For nearly 100 years, people have been flocking to Yorkshire for a taste of Bettys. Bettys was founded by Frederick Belmont, a Swiss baker and confectioner who came to England in search of opportunities to develop his craft skills. He opened his first Café Tea Rooms in Harrogate in 1919 and named it 'Bettys'. The reason why remains a mystery to this day.
Lots of things have changed since then. They now have six Café Tea Rooms in Yorkshire and the Bettys name has become famous the world over. They have also added a mail order service which delivers deliciousness to homes from Tunbridge Wells to Tokyo, and they share their knowledge and passion for food through Bettys Cookery School.
But in other ways, they are unchanged. Still family-owned, they believe in doing business in a way that is fair to people and kind to the planet. And at their Craft Bakery in Harrogate they still practice the artisan skills that Frederick Belmont brought to Yorkshire from Switzerland nearly 100 years ago.
Its now Great British Bake Off Season here in the UK, and in honor of that each week Betty's will be sharing a delicious recipe, plus a video and their baking tips to go with each recipe. The kind of thing you won't find in any cookery book!
This week they sent me some delicious Fondant Fancies to enjoy eating while we enjoy watching the GBBO! I can't wait to get stuck in. They look delicious!
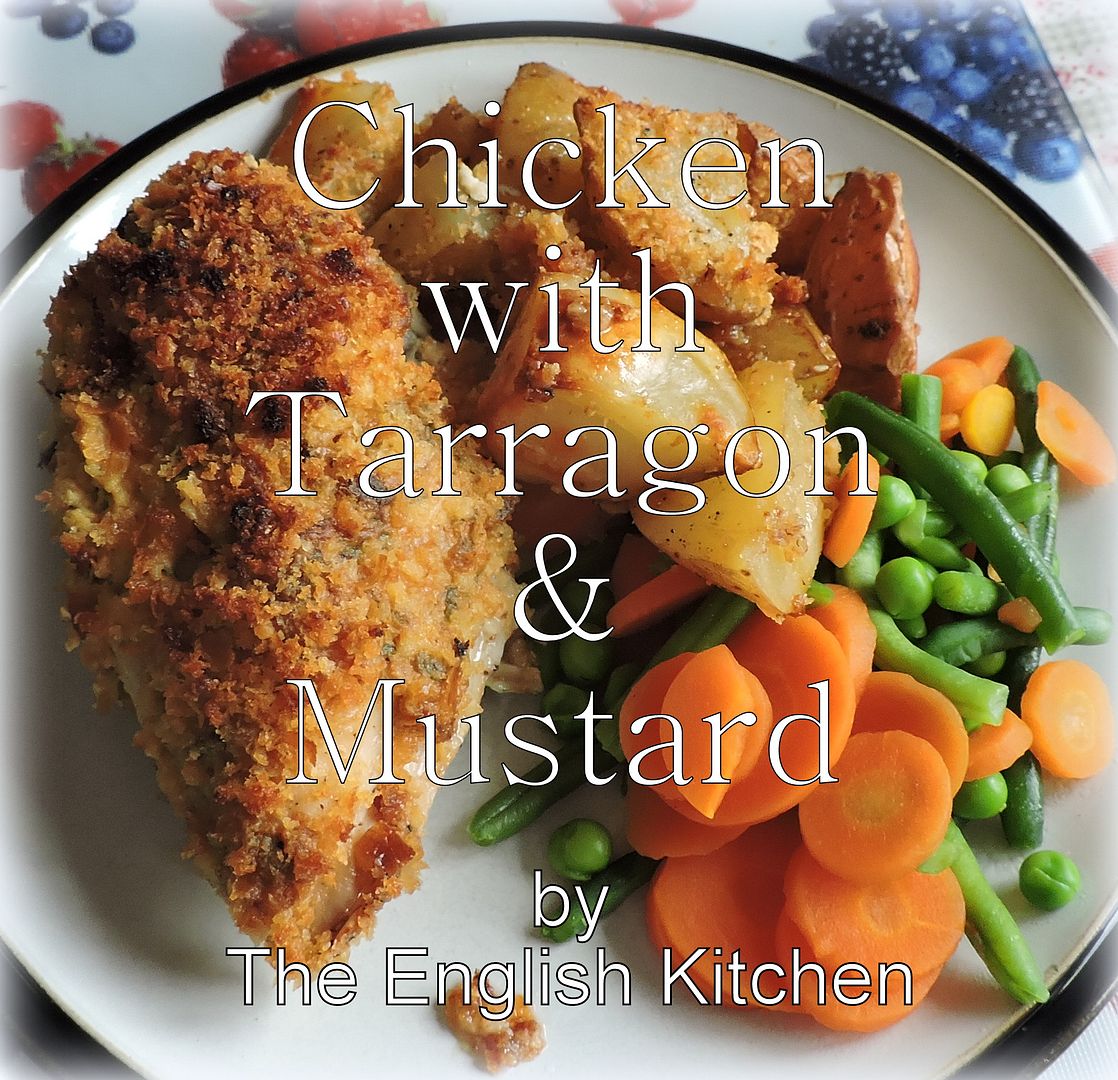
This is a delicious chicken recipe that I made for our tea the other night. I had some partially boned chicken breasts that I wanted to use. I adapted the recipe from one that I found in a Diana Henry cookery book entitled A Bird in the Hand, chicken recipes for every day and every mood. It's a great book. I have a number of Diane's cookerybooks and I have to say I really like her recipes. They are very good.
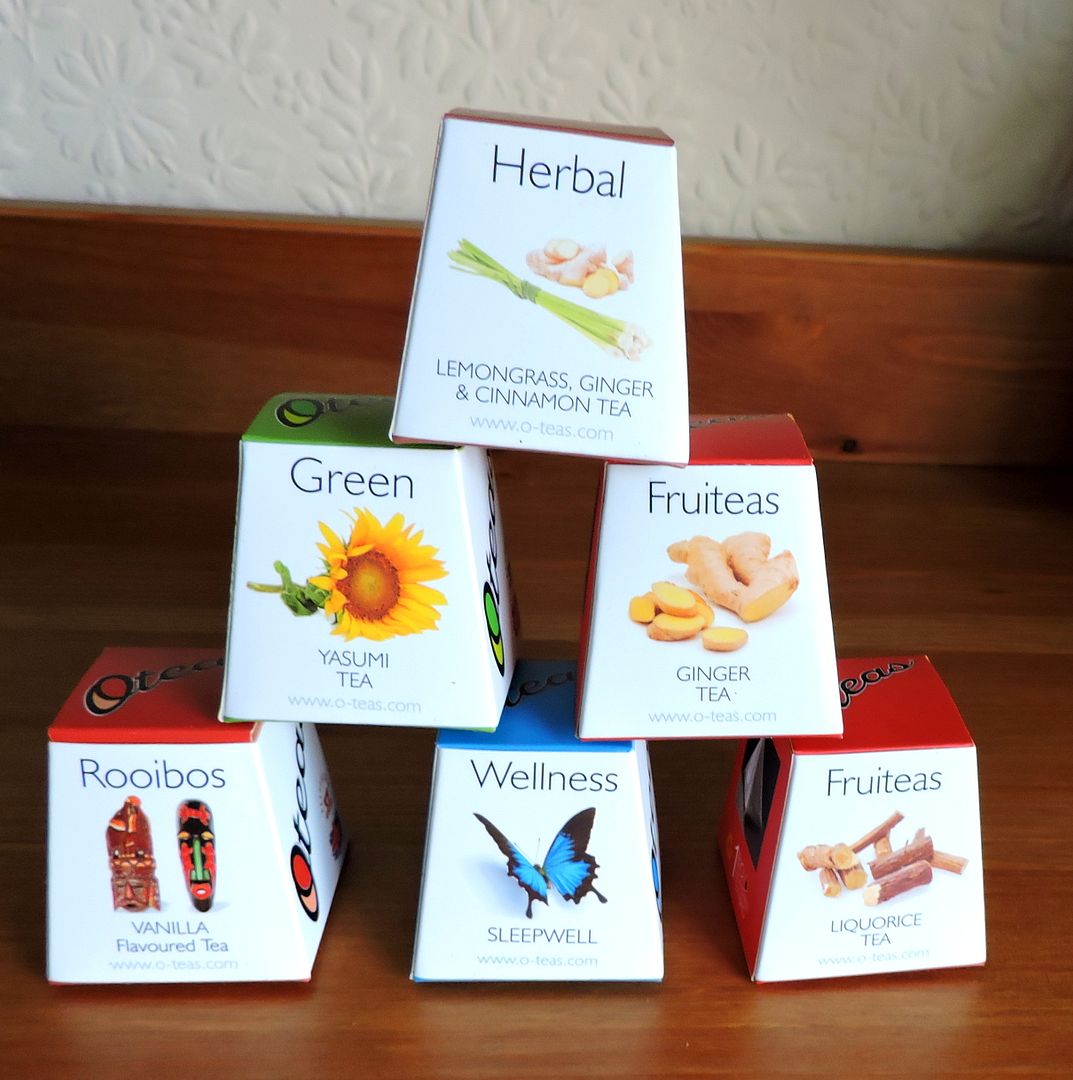
I was recently sent a sampling of Oteas to try out, some of their herbal blends and fruity teas. I don't drink regular tea, so its always nice to try something herbal that I can drink.
Oteas was born out of a desire to promote and support an active, healthy and balanced lifestyle. Their teas are expertly blended with the highest quality ingredients. They are sourced from around the world, from countries including India, Sri Lanka, China and Japan.
The tea is in pyramid shaped bio-degradable bags to maximise their infusion and to provide a superior taste. They come in 7 different ranges, each with a variety of different blends. You can choose from Black, Detox, Fruit, Green, Herbal, Organic or Rooibos and indulge in mouth-watering blends such as Date & Lime, Moroccan Mint and Lemongrass, Ginger & Cinnamon.
The blends are available in pouches or tins, each containing 15 bio-degradable tea bags, with prices ranging from £3.39 to £4.49 per pack. The most eye catching and quirky member of the Oteas family is their individually boxed tea bags, which is what I received. They are available in collections of 3, 12 or 24, with prices starting at just £1.29. These delightful miniature boxes make the perfect gift for any tea-lover. They would make great stocking stuffers coming Christmas time.
For those who are keen to embark on a health kick, they also offer a Detox range, called ‘Oteatox’ which is currently stocked in Lloyds Pharmacy.
Oteas also offers around 400 different teas in a loose-leaf only format, which is rising in popularity.
I quite enjoyed the selection I was sent. I think my favourite was the Liquorice one. I love Liquorice anyways and this had a lovely flavour without it being over-powering! I also loved the cute little pyramid boxes. Great for gift-giving.
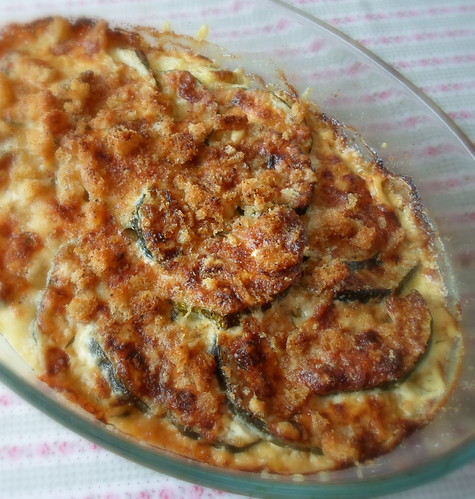
I was given a mammoth Courgette the other day. I didn't mind at all . . . we kinda like courgettes, and as long as they aren't overly large, there's still a lot of value in them. Once they get too big, they get a bit too spongy for me. I prefer small to medium sized ones, but the larger ones are quite good to use to make tasty courgette loaves. In North America you will probably know this vegetable as the indomitable Zucchini!
I love this time of year when we blessed enough to be enjoying an abundance of fresh local produce! I grew my own tomatoes this year and I have to say I did a really great job of it! (Not to brag or anything!) I took advantage of some of them, as well as some which I bought to make up the difference, to make a delicious homemade crock-pot marinara sauce.
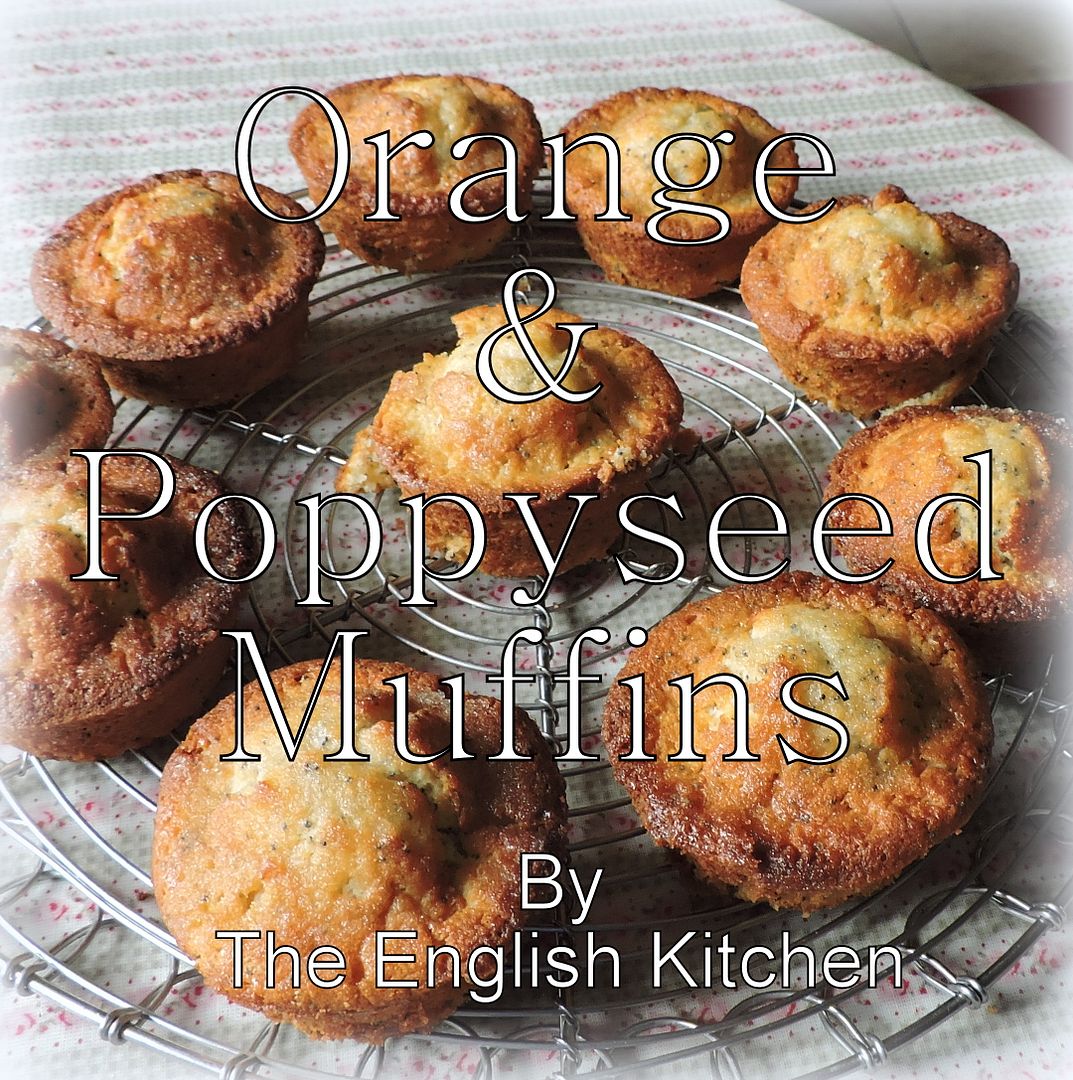
I am not sure what it is about poppyseeds, but I love anything with poppyseeds in them. When I lived out West we used to be able to buy the best poppyseed sweet buns at the grocery store bakery in Medicine Hat. They were to die for! I have been craving them ever since! I will have to find myself a recipe one day and make my own. These muffins are not quite buns, but they are quite delicious in a different sort of way!
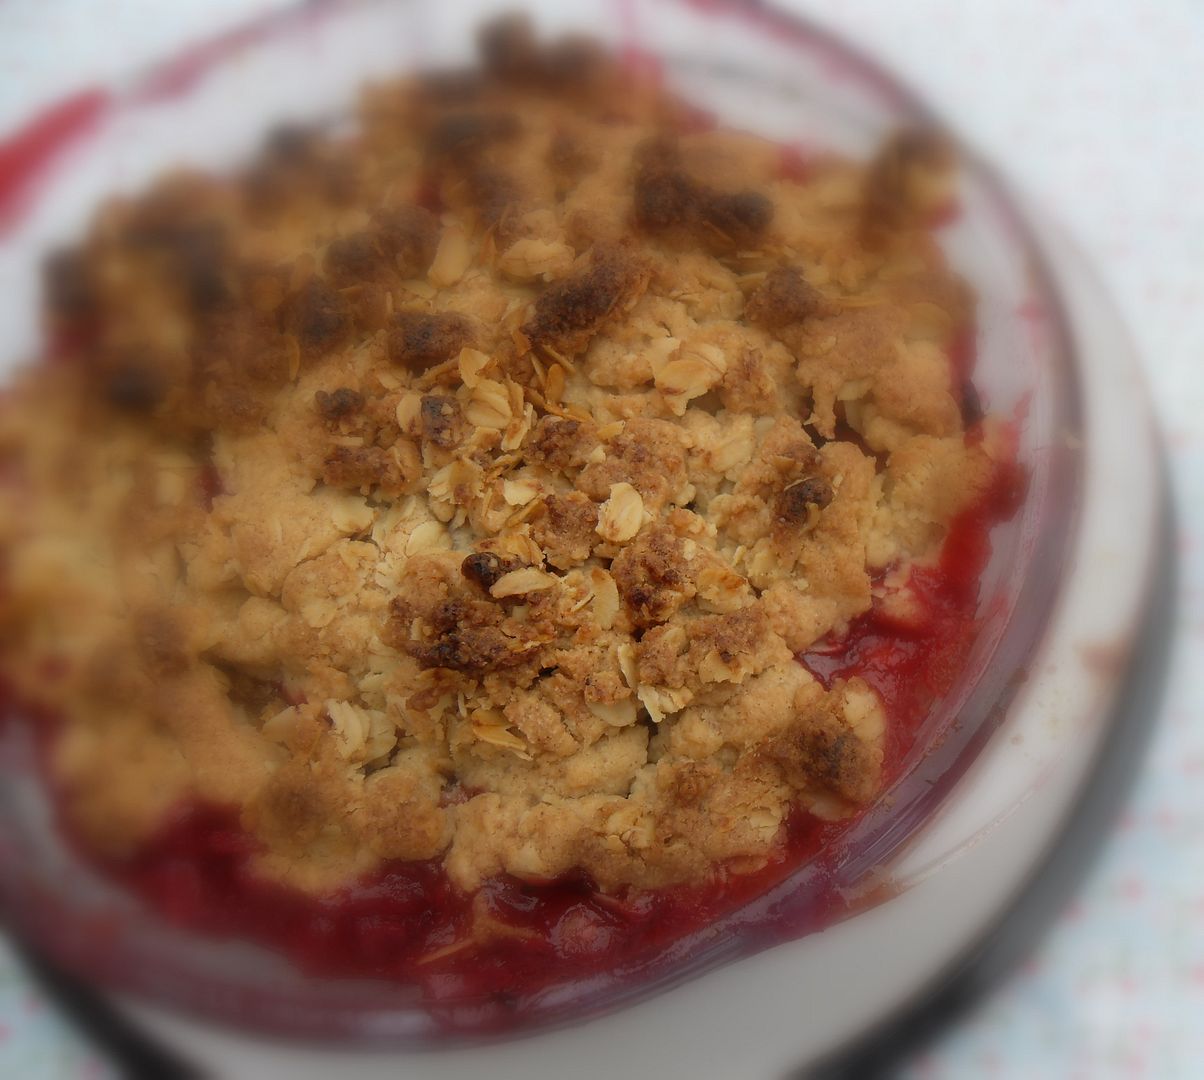
There is no dessert that Todd loves more than a good crumble. Apple. Blueberry. Strawberry rhubarb . . . if it has crumble in the name, Todd loves it. Well, maybe not as much as the memory of his mother's apple pies, but almost!
mmm . . . mmm . . . mmm . . . This was my ABSOLUTELY favourite kind of day . . . no, the sun did not shine, nor was it really, really hot. It was kind of muggy actually and humid, so weatherwise not great. It was my favourite day in another kind of way, in a tasty baking kind of way . . .
When my veggie box came this week, there were two lovely big and fat red peppers inside, amongst other things of course! I have always loved the flavours of peppers . . . raw and with dips, sliced and sauteed and in omelets (I like to use more than one colour in these), sliced and sauteed with beef strips to make pepper steak . . . the possiblities are endless. I never run out of ideas on how to use them!
For nearly 100 years, people have been flocking to Yorkshire for a taste of Bettys. Bettys was founded by Frederick Belmont, a Swiss baker and confectioner who came to England in search of opportunities to develop his craft skills. He opened his first Café Tea Rooms in Harrogate in 1919 and named it 'Bettys'. The reason why remains a mystery to this day.
Lots of things have changed since then. They now have six Café Tea Rooms in Yorkshire and the Bettys name has become famous the world over. They have also added a mail order service which delivers deliciousness to homes from Tunbridge Wells to Tokyo, and they share their knowledge and passion for food through Bettys Cookery School.
But in other ways, they are unchanged. Still family-owned, they believe in doing business in a way that is fair to people and kind to the planet. And at their Craft Bakery in Harrogate they still practice the artisan skills that Frederick Belmont brought to Yorkshire from Switzerland nearly 100 years ago.
Its now Great British Bake Off Season here in the UK, and in honor of that each week Betty's will be sharing a delicious recipe, plus a video and their baking tips to go with each recipe. The kind of thing you won't find in any cookery book!
This week they are sharing their recipe for Classic Bread Rolls with us. After watching the video, I think even I will be able to bake us some lovely rolls!
selection of poppyseeds, sesame seeds, sunflower seeds
METHOD:
1.
Place the flour and salt together in a bowl. Rub the butter into the
flour using your fingertips until it is fully mixed through.
2.
Add the yeast to the milk and water and mix with a fork. Allow to
stand until the yeast has dissolved before adding this to the dry
ingredients.
3. Gradually add the liquid to the dry
ingredients, together with the dissolved yeast. Work the mixture
together until it forms a ball of dough, and tip ou tonto a work
surface.
4. Knead gently for about 10 minutes until the dough becomes soft and smooth.
5. Allow the ball of dough to rest under a slightly damp cklean tea-towel for 5 minutes.
6.
Roll the dough into a sausage shape first and, using the scraper,
divide th edough into 8 evenly sized pieces. Roll each into a round
shape. Allow the dough to relax again for five minutes under a damp
tea-towel or clingfilm before making each ball into a shape.
7. When the dough has been shaped, carefully place onto a baking tray.
8. Brush the dough with a little egg/milk mixture and sprinkle with seeds of your choice.
9. Place the tray in the prover or leave in a warm place covered with clingilm for about 20 minutes, or until doubled in size.
10.Bake the bread in a preheated oven at 200*C/400*F/ gas mark 6 (fan assisted) oven for 10 to 15 minutes, (depending on shape.)
11.The bread is baked when golden brown in colour and when tapped underneath they should sound hollow. Place on a cooling wire.
NOTES IN THE MARGINS ~o~Beautiful Bread~o~
KNEADING
When kneading, always work the dough in the same direction. This will deveop the network of gluten strands.
To avoid sticking to your dough, use the one second contact rule - don't touch your dough for more than a second as you knead it
Imprint your dough with your thumb - if it springs back, its ready.
BALLLING OFF
This stage is really important - what you're trying to do is trap energy in the dough.
When Lisa holds up the underside of the balled off dough, you can see the swirls of the core - yet the top is smooth.
The movement you're looking for is down and over. Notice in our film how Lisa pushes slightly down and she rotates the dough in her palm, travelling in the same direction.
HOMEMADE PROVER
If you don't hav ea dedicated prover, few of us do, its easy to create one.
Simply take a bowl, turn it upside down in your sink, add hot water and your tray of dough, and cove rwith some cling fim.
Do you get tangled up in clingfilm? Than fold it back on itself to double line it - it prevents it from misbehaving!
FINISHING THE RACE
Allow the dough a final 10% to finish the race. In other words, remove the dough from the prover a little before it has completely risen.
This is because the yeast needs a last bit of energy to take into the oven for a perfect rice.
COOLING
When cooling your bread, make sure there's an airflor under the tray.
This prevents soggy bottoms!
Do check out the Betty's Baking Secrets Page, for a whole lot more baking secrets during the GBBO and beyond. Also don't forget to check back next week to see what's baking next! (With any luck I might even get it baked myself to show you my results! There is no rest for the wicked!!)
This lovely salad comes from a cookery book which I just love and can't recommend enough. Genius Recipes, by Kristen Miglore.
Its a compilation of recipes that promise to rethink the way you cook. There hasn't been a dud in the bunch. I have loved every one I have tried, and this one here today is no exception!
I don't know if your grocery shops are like my grocery shops. Most of the fruit they sell at an affordable price is fruit you must ripen at home.
So hard and green for the most part. They do sell already ripened fruit, but at a real premium price.
And yes . . . the most annoying thing of all is that it doesn't always ripen at home . . . going mealy and yucky and inedible instead of ripening properly.
I get so angry when that happens because it is like pouring money down the drain, and so, I confess . . . if I want to eat a ripe peach or nectarine or plum . . . I will buy the ready to eat and already ripened ones. To me it has always been worth the price.
But what to do with those green fruits . . . or peaches. Well, not a problem any longer! This lovely salad takes perfect care of that issue! Oh my, how perfectly delicious it is!
And the best part is it can use the hardest most unforgiving (as the book states) peaches in the pile, in fact the harder the better as they will stand up perfectly to the peeling, pitting and slicing process, staying intact for the whole procedure.
I have added my tips for peeling and cutting. If you don't give this delicious salad a try, you are really going to be missing out on something really special!
This
is delicious and makes a great use of the hard peaches you get at the
shops. Don't try to make it with fully ripe peaches. They will be too
soft and not be able to stand up to the dressin well. This is
gorgeous. Talk about making a silk purse from a sow's ear! Adapted
from Genius Recipes and accredited to Crook's Corner.
1 kg un-ripened peaches (about 2.2 pounds)
50g of sugar (1/4 cup)
1/2 tsp fine sea salt
2 TBS good quality extra virgin olive oil (I like the Greek, it has a great peppery flavour)
2 TBS fresh mint leaves, cut crosswise chiffonade
1/2 tsp freshly ground black pepper
Blanch
the peaches for 2 minutes in a bowl of boiling water. This makes them
much easier to peel. The peels should just slip off. Make a slice all
the way around the middle of the peach and twist, it
should pull apart very easily. Remove and discard the pits.
Cut into
wedges and drop into a bowl. Add the sugar and salt, giving it all a
good swish to combine. Set aside to macerate for 10 to 15 minutes. At
the end of that time, add the olive oil, mint and pepper. Toss together
to coat and serve. This salad should be eaten on the day.
Just a note on technique, to cut leafy herbs such as mint or basil in what is called "Chiffonade," stack the leaves together, one on top of the other, larger ones on the bottom, roll up tightly like a cigar and then slice thinly crosswise with a very sharp knife.
You should never really chop soft delicate leafy herbs such as basil and mint because it ends up bruising them rather too much.
We enjoyed this with grilled steaks and baked potatoes. Scrummo!
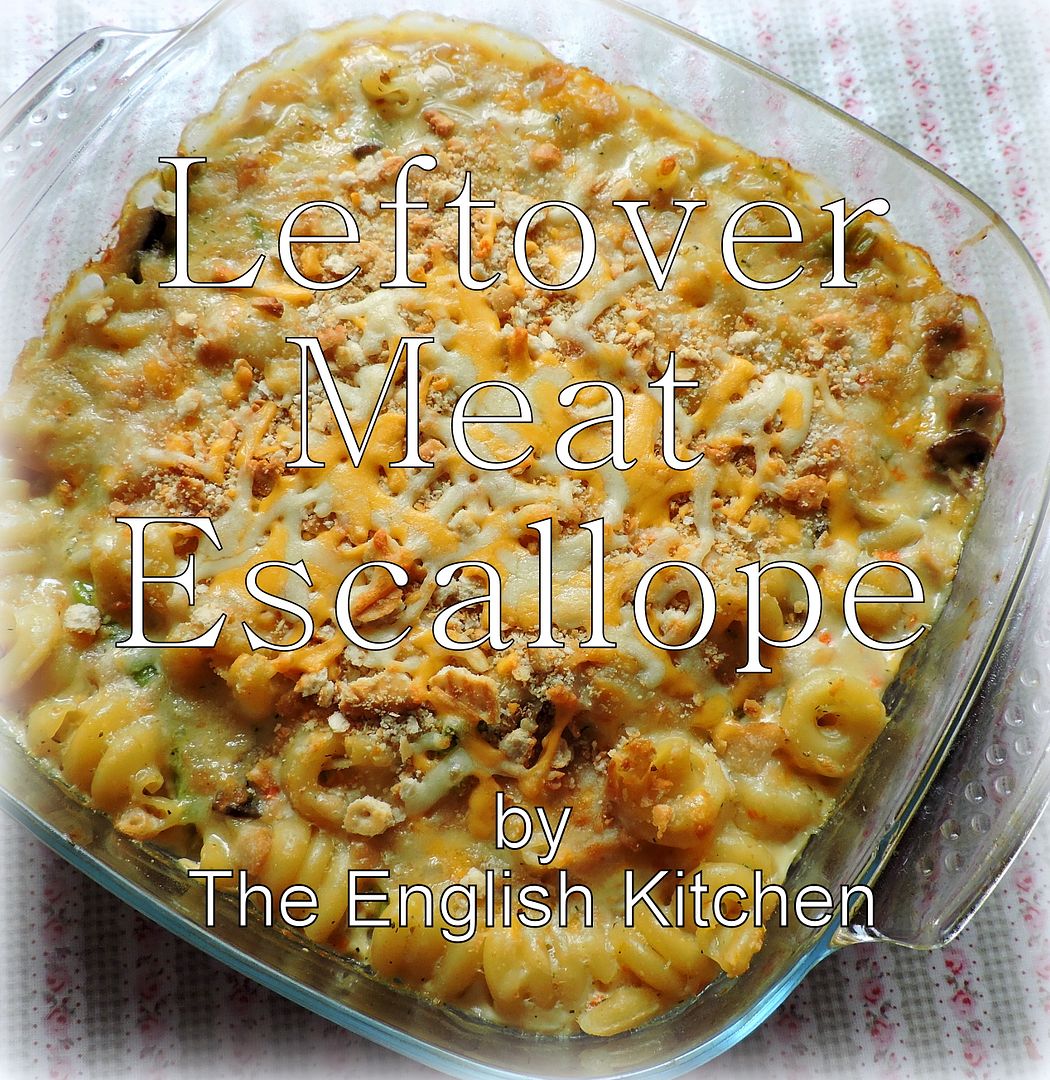
So you saw that lovely roast pork I posted yesterday. I do love a roast dinner, don't you? I love the leftovers even more! They are a beautiful ingredient to use to create another delicious meal from. My mother was great at making pot pies from leftover roasts. I like to do that also, but if I can create a delicious casserole, so much the better! Delicious casserles like this Leftover Meat Escallope casserole! You don't need to use pork in this, lamb, beef or chicken work equally as well.
This is a lovely roast that I cooked a month or so ago and am just getting to show you now. I figured now that temperatures are cooling down a bit the timing would be better.
I didn't want you to give up on this delicious recipe because it was too hot outside! This is a real winner!
Red meat isn't something we eat a lot of in this house, and so when we do I make sure its really good, like this delicious Roast Pork with Sage and potatoes.
This was amazingly delicious to say the least.
The pork in this dish gets rubbed with a mix of sage and garlic before roasting that really gives it a nice flavor.
That same herb and garlic mix is used to toss together with potatoes that are roasted along with the pork.
Oh boy are they some delicious . . . nothing I love better than potatoes which have been roasted to perfection.
These potatoes get all sticky and golden, roasted in succulent meat juices with herbs and garlic. Sooo so so good!
SOOOO, sooooo good. Thinking back on just how good makes me want to lick the screen.
I sure do love my potatoes! I'm a potato nut for sure! These ended up being exceptional. The meat ends up succulent and tender and so wonderfully flavoured . . .
The fat on the edge . . . beautiful golden and crisp . . . and if you use a bone in rib loin roast, you get the finger licking tasty spare-rib parts, also beautifully flavoured.
Altogether with a few vegs on the side this was the perfect roast.
WHAT YOU NEED TO MAKE ROAST PORK WITH SAGE AND POTATOES
Simple ingredients. There is nothing too complicated about this. Start with the best pork and potatoes you can buy and the rest takes care of itself.
2 pounds of potatoes, peeled and cut into 1 inch pieces
3 TBS olive oil
one 3 to 4 lb. bone in pork loin roast (or a 2 to 3 lb. boneless one)
I like to use organic locally produced garlic when possible. I am not a huge fan of Chinese garlic because of the things they treat it with in order to export it with. You can tell Chinese garlic from the rest as, with the Chinese one, all of the roots will have been trimmed away. Local garlic usually still has these intact.
Use a nice waxy potato. The type of potato that you might use in a potato salad. One that holds it's shape. You don't want a potato that is good for mashing as it will disintegrate in the longer cook time.
Fresh herbs are nice if you have them, but dried work well also.
HOW TO MAKE ROAST PORK WITH SAGE AND POTATOES
Its simple really.
Preheat the oven to 220*C/425*F/ gas mark 7. Have ready a roaster (with a lid) large enough to hold everything.
Mix together the garlic, sage, salt and black pepper. Put the potatoes into the roaster along with 1 tsp of the herb/garlic mixture and 2 TBS olive oil. Toss all together to coat the potatoes. Cover and put in the oven while you prepare the pork.
Take a sharp knife and cut slits down into the pork, large enough to get your finger into them. Reserving about 1 tsp of the garlic/herb mixture, push the remainder down into the slits.
Spread the reserved tsp of garlic herb mixture over the outside of the roast. Remove the roaster from the oven and nestle the pork roast down into the potatoes. Drizzle with the remaining TBS of oil. Cover and return to the oven.
Roast for 1/2 hour. Remove from the oven and reduce the oven temperature to 170*C/325*F/ gas mark 3. Stir the potatoes up from the bottom. A few may be stuck, but unstick them if you can. Baste the pork with some of the pan juices. Cover and return to the oven.
Roast for another 1 1/2 hours, basting and stirring the potatoes every fifteen minutes or so. The roast is done when the internal temperature is 62*C - 65*C/145*F-150*F. Uncover during the last half hour of roasting.
Remove the meat to a warm platter and tent lightly to rest. Stir the potatoes once more and turn the oven up to 220*C/425*F/ gas mark 7 to brown them off for about 10 minutes.
Carve the meat and serve with the potatoes, and you favorite side dishes. Don't forget the applesauce!
You can very easily make your own applesauce while the pork is roasting. You only need a few apples. I like to use a mix of sweet and tart apples. Peel and core them and cut them into chunks.
Put them into a saucepan with a pinch of salt and sugar to taste. You can add a bit of water, but you don't really need much. You should just barely see the water through the apples. Bring to the boil and then simmer over low heat until the apples are lovely and soft. Mash well, until smooth with a few chunks.
Taste and adjust the seasoning and sweetness as desired. Since this will be served with pork you can add a knob of butter and a teaspoon of horseradish if you wish. Delicious!
This is a really nice dinner. The pork is lovely and tender and beautifully flavored. The potatoes get all sticky and glazed. Together they are perfection.
All you need on the side is a few vegetables. On this day I chose a carrot and parsnip mash and some runner bean. This was the perfect meal!
I don't eat pork very often but when I do I like to make sure I do the best with it that I can. Some other pork recipes here in The English Kitchen are:
CLASSIC PORK LOIN ROAST WITH GRAVY - A simple roasted pork loin, well flavored and cooked to succulent perfection. There is nothing worse than dry pork. This is nice and moist. A beautiful gravy accompanies it, ready to serve with your favorite sides.
STUFFED PORK ROAST WITH BROWNED POTATOES - This lovely roast is stuffed with prunes, rubbed with a flavor filled rub and roasted to perfection, along with some lovely paprika roasted potatoes. The juices make for a very delicious gravy to spoon over top of the sliced meat and roasted potatoes.
Yield: 6
Author: Marie Rayner
Roast Pork with Sage and Potatoes
Prep time: 15 MinCook time: 2 H & 15 MTotal time: 2 H & 30 M
This is simple to make and makes a great Sunday roast. Pork and sage have a beautiful affinity for each other. You want a firm waxy potato for this, not one which will turn to mush in the long cooktime.
2 pounds of potatoes, peeled and cut into 1 inch pieces
3 TBS olive oil
one 3 to 4 lb bone in pork loin roast (or a 2 to 3 lb boneless one)
Instructions
Preheat the oven to 220*C/425*F/ gas mark 7. Have ready a roaster (with a lid) large enough to hold everything.
Mix together the garlic, sage, salt and black pepper. Put the potatoes into the roaster along with 1 tsp of the herb/garlic mixture and 2 TBS olive oil. Toss all together to coat the potatoes. Cover and put in the oven while you prepare the pork.
Take a sharp knife and cut slits down into the pork, large enough to get your finger into them. Reserving about 1 tsp of the garlic/herb mixture, push the remainder down into the slits.
Spread the reserved tsp of garlic herb mixture over the outside of the roast. Remove the roaster from the oven and nestle the pork roast down into the potatoes. Drizzle with the remaining TBS of oil. Cover and return to the oven.
Roast for 1/2 hour. Remove from the oven and reduce the oven temperature to 170*C/325*F/ gas mark 3. Stir the potatoes up from the bottom. A few may be stuck, but unstick them if you can. Baste the pork with some of the pan juices. Cover and return to the oven.
Roast for another 1 1/2 hours, basting and stirring the potatoes every fifteen minutes or so. The roast is done when the internal temperature is 62*C - 65*C/145*F-150*F. Uncover during the last half hour of roasting.
Remove the meat to a warm platter and tent lightly to rest. Stir the potatoes once more and turn the oven up to 220*C/425*F/ gas mark 7 to brown them off for about 10 minutes.
Carve the meat and serve with the potatoes, and you favourite side dishes. Don't forget the applesauce!
Did you make this recipe?
Tag @marierayner5530 on instagram and hashtag it #TheEnglishKitchen
Tune in tomorrow to see what I did with the leftovers! Bon Appetit!
This content (written and photography) is the sole property of The English Kitchen. Any reposting or misuse is not permitted. If you are reading this elsewhere, please know that it is stolen content and you may report it to me at: mariealicejoan at aol dot com
Do you love shortbread biscuits as much as I love shortbread biscuits? Who doesn't! I think that shortbread biscuits have to be just about everyone's favourite cookie! I make whipped ones every Christmas which are as simple as beating them together and dropping them on a baking sheet. I make rolled and cut outs in a variety of flavours.
All are gorgeous. When I saw this recipe for Peanut Butter ones, I knew I just had to bake them. Peanut Butter and shortbreads . . . two of my favourite things together in one!
I adapted the recipe from one of my favourite baking books, One Bowl Baking by Yvonne Ruperti. If you don't have it, you should. It's a fabulous baking book. Everything I have ever baked from it has been a winner!
These are lovely shortbreads. The smell of peanut butter which fills the air when they are baking is enough to get your tastebuds tingling in overtime!
With the cross-hatching they look very similar to other peanut butter cookies, but that is where every similarity ends.
These are short and crumbly . . . and not too sweet. Everything a perfect shortbread biscuit should be.
Filled with lots of lovely chopped peanuts, I would go so far as to call them moreish. They are not chewy, or crisp . . . just short and deliciously buttery peanut buttery crumbly.
They positively beg to be enjoyed with a nice hot drink. These are grownup peanut butter biscuits, that bring out the child in you.
Short and crumbly, milk dunking cookies. You are going to love these!
85g butter, softened (6 TBS)
130g soft light brown sugar (2/3 cup packed)
50g granulated sugar (1/4 cup)
1/2 tsp salt
340g creamy peanut butter (1 1/3 cups)
1 large free range egg
1 large free range egg yolk
1 tsp vanilla extract
215g plain flour (1 1/2 cups)
1/2 tsp bicarbonate of soda (baking soda)
70g chopped peanuts (1/2 cup)
Preheat the oven to 180*C/350*F/ gas mark 4. Line two large baking sheets with baking paper.
Cream
together the butter and both sugars until light and fluffy. Beat in
the salt and peanut butter, followed by the egg, egg yolk and vanilla.
Stir in the soda and flour to combine. Stir in the peanuts.
Divide
the dough into 24 equal pieces, and roll into balls. Place evenly
spaced on the baking sheets. Using a fork, cross hatch into each
cookie, pressing them down to about 1 inch thick.
Bake for 12 to 14 minutes, rotating the pans halfway through the cooking time, until golden brown and set.
Let
cool on the pans for about 5 minutes before scooping out onto a wire
rack to finish cooling. Store in an airtight container.
If you are fond of shortbreads and like peanut butter, you will quite simply adore these lovely biscuits. In fact . . . I might go so far as to say you will feel like you have died and gone to heaven. Bon Appetite!