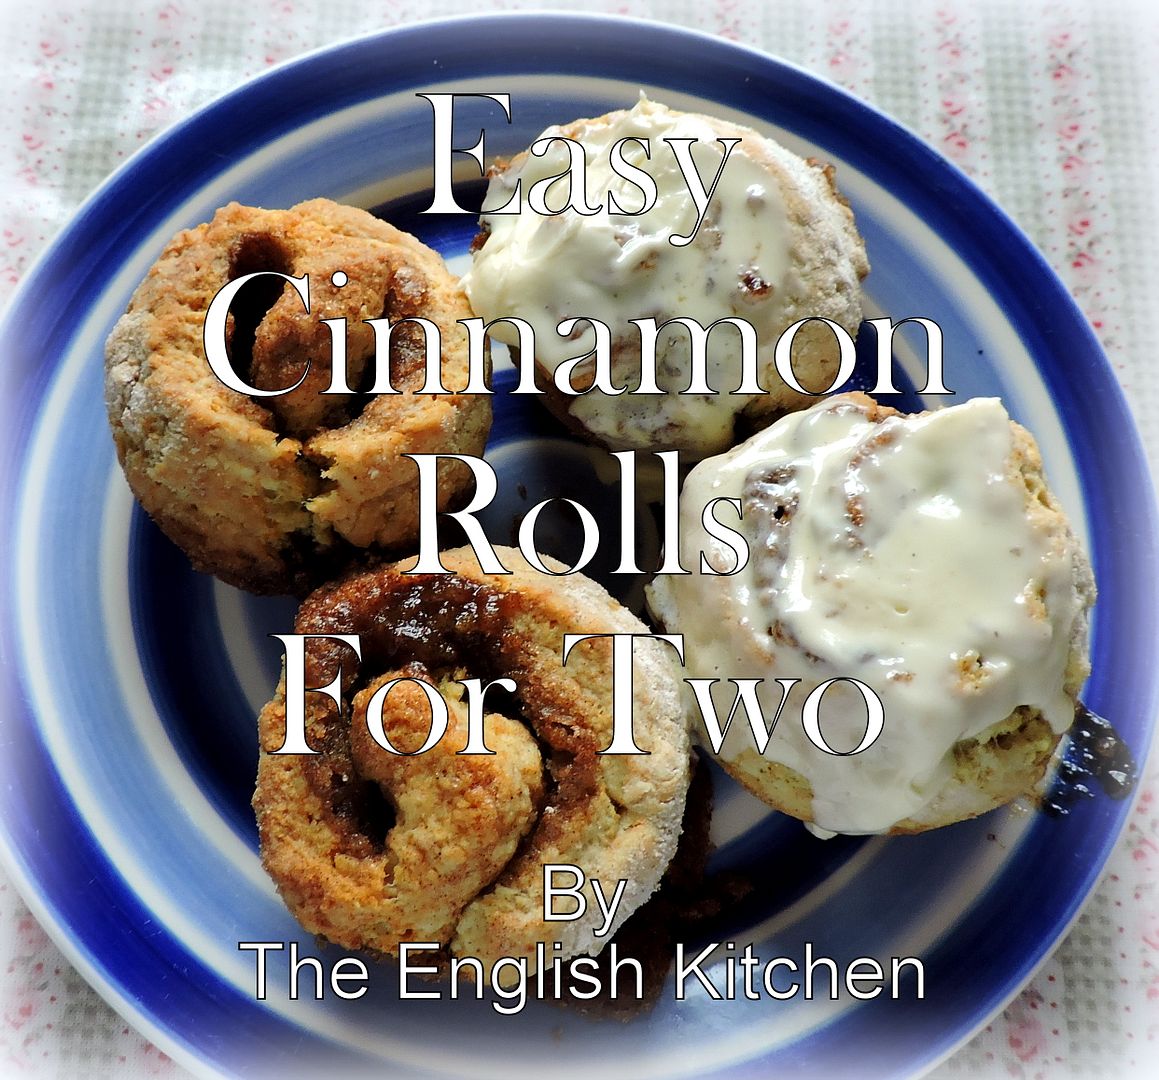
I have been blogging in one way or another since about 2003. I started over on My Space. It was just a way of keeping an online journal at that time and I had hoped that it would be a way that my children could keep up with the goings on in my life after I moved over here to the UK.
I moved from MySpace over to AOL Journals because it was a bit user friendlier and then I ended up moving over here to blogger and started my Year From Oak Cottage Blog. I hadn't been blogging for very long when I noticed that people loved it when I posted a recipe I had cooked. So I started adding recipes to my page.
Then I decided I wanted to separate the two and have a personal blog and a cookery blog and that is when The English Kitchen was born. I recently stopped paying for my domain at Oak Cottage since I haven't written there in several years and its been shut down, but I have wanted to move all of my recipes over here.
I cringe when I look at those early photographs. They were really bad. I had a lousy camera and knew nothing about taking food pictures. But they were all really sound and delicious recipes. I hope you will forgive me if every so often I do a post which features some of these old recipes.
Its a real mishmash today of this that and everything in between, but I think you will find a few treasures here, at least I hope you will!

*Spicy Pork Chops With Peaches*
Serves 4
Printable Recipe
Oh
my but these are some tasty. I just love peaches and pork is a meat that
goes so very well with fruit. Tender, juicy and spicy these chops
please on many levels. I simply served them with rice and a vegetable
and it was a meal fit for a king!
2 TBS brown sugar
2 TBS, plus 1/3 cup orange juice
2 TBS soy sauce
3/4 tsp ground cardamom
1/2 tsp mild curry powder
1/8 tsp freshly ground black pepper
4 boneless pork chops
2 tsp extra virgin olive oil
3 cups peeled and thickly sliced peaches
Combine
the brown sugar, 2 TBS of orange juice, soy sauce, cardamom, curry
powder and pepper in a small bowl. Stir to dissolve the sugar.
Trim
all the fat off of your pork chops. Place them into a heavy plastic bag
or between two sheets of cling film and bash them with a rolling pin
(gently) until they are about 1/3 of an inch thick and uniform in size.
(this also helps to tenderize them) Place them into a shallow glass dish
and pour the spice mixture over top. Allow to marinate for at least 15
minutes, or cover and place in the fridge to marinate for up to 2 hours.
Heat
the oil in a large non-stick frying pan over medium high heat. Shake
off any excess marinade (reserving marinade) and cook the chops in the
heated pan, browning well on both sides. This should take about 2
minutes per side. While the chops are browning, add the peaches to the marinade, turning them to coat them all over.
Add
the remaining 1/3 cup of orange juice to the pan and bring to a simmer,
stirring. Reduce the heat to medium low and simmer the chops, turning
occasionally,until the chops are cooked through, some 4 to 5 minutes.
Remove the chops from the pan to a plate and cover loosely with foil.
Keep warm.
Add the peaches and the reserved marinade to the pan.
Increase the pan heat and bring to a simmer. Cook, stirring often, until
the liquid is reduced to a light sauce. Stir any juices from the
resting pork chops. To serve, spoon the sauce and peaches over the
chops.

*Scalloped Turkey (or Chicken)*
serves 4 - 6
Printable Recipe
Delicious
dressing on the bottom and topped with tender slices of leftover
turkey. The whole thing is smothered in a tasty sauce and baked in the
oven. I simply cooked some vegetables and baby new potatoes to go along
and it truly was a meal fit for a king!
3 to 4 cups cooked turkey or chicken
4 ounces butter
1/2 cup flour
salt and black pepper to taste
2 1/4 cups chicken stock
1 cup milk
1 4-ounce tin of sliced mushrooms, drained well
(Or you can slice up some fresh mushrooms like I do, and brown them
off in a bit of butter)
For the dressing:
2 cups toasted bread cubes
2 small onions, peeled and chopped
1/2 cup coarsely chopped celery
1/2 tsp salt
black pepper to taste
1/2 tsp dried sage, crumbled
2 ounces butter
Pre-heat the oven to 180*C/350*F. Lightly butter a 2 quart casserole dish and set it aside.
Melt
the 4 ounces of butter in a saucepan. Blend in the flour and cook,
stirring for one minute. Slowly stir in the broth and the milk. Cook,
stirring constantly until bubbly and thickened. Season to taste with
some salt and pepper. Set aside.
Lightly toss the bread cubes,
onion, celery, 1/2 tsp salt, crumbled sage and the 1/4 cup of melted
butter together in a bowl. Add a grinding of black pepper to taste.
Arrange in the prepared casserole dish.
Place the sliced turkey
overtop of the dressing in the casserole dish. Top with the sliced
mushrooms and then pour the sauce over top, covering it completely.
Place in the heated oven and cook for about 1 hour, until nicely bubbling and well heated through. Serve hot.

*Sunshine Chicken*
Serves 4
Printable Recipe
Moist chicken, covered in a deliciously golden sweet and sour sauce,
this wonderful dish surely lives up to it's name. I love anything sweet
and sour. This went beautifully with some steamed rice and some string
beans.
1 (3 ounce) packet of lemon flavoured gelatin powder
3 TBS butter, melted
3 TBS prepared mustard (not the hot English mustard)
1 tsp salt
2 fat cloves of garlic, peeled and crushed
1/4 tsp ground black pepper
4 large boneless, skinless chicken breast halves
2 TBS thinly sliced almonds
Pre-heat the oven to 180*C/350*F.
Combine
the gelatin, butter, mustard, garlic, salt and pepper in a small bowl,
whisking well together. Place the chicken breasts in an ungreased 11
inch by 7 inch by 2 inch baking dish. Brush well with this mixture and
then pour any remaining mixture around the chicken in the dish.
Cover
and bake for 20 to 25 minutes, basting once halfway during the cooking.
Remove the cover, baste again and sprinkle with the almonds. Bake,
uncovered, for 15 minutes longer or until the chicken juices run clear.
Remove from the oven and serve.

*Little Pink Chicken*
Serves 6 - 8
Printable Recipe
This
recipe is attributed to Linda Robinson from the Belgrano Ward in the
South America South Area mission of the LDS church. Like me, she loves
to cook for the missionaries and always likes to give them a taste of
home if she can. This was one of the Elder's who was working in their
area's favourite thing from home that his mother always made, so she
e-mailed his mom and got the recipe and here it is. She says the elders
always love it and after having made and tasted it myself, I can
totally see why!! It's fabulous! Thank you Sister Robinson!
2 large chicken breasts
1/2 tsp garlic salt
cornstarch
1 egg, beaten with 1 TBS water
oil for frying
for the Sauce:
1 cup white sugar
1/3 cup white vinegar
1/3 cup tomato ketchup
1/4 cup chicken broth
1 tsp salt
2 TBS soy sauce
Cut
the chicken into bite sized pieces and sprinle it with the garlic salt.
Let sit for one hour. At the end of that time, coat each piece in
some cornstarch. (I put some cornstarch into a bowl and just stirred it
all together. I used about 1/4 cup)
Heat some oil, about 1/4
inch deep in a heavy skillet over medium high heat. Dip the cornflour
coated chicken bits into the beaten egg and then carefully cook them in
the hot oil until lightly browned. Scoop out into a shallow casserole
dish. Repeat until all the chicken pieces are browned.
Pre-heat the oven to 180*C/350*F.
Place
the sauce ingredients into a large microwavable beaker. Whisk
together. Cook on high for approximately five minutes, stirring it
halfway through the cooking time. Pour over the chicken in the
casserole dish.
Bake for 30 to 45 minutes until the sauce is nicely thickened. (Do not cover)
I served this with some egg fried rice and stir fried vegetables on the side. It was wonderful!

*Pecan Crusted Chicken Tenders and Salad with Tangy Maple Dressing*
Serves 4-6
Printable Recipe
This
is one of my favourite salads to eat in the warmer weather. I love the
crunch of the chicken and the crisp salad greens and it's sweet and
tangy dressing.
Chicken Tenders:
vegetable oil for frying
1 1/2 - 2 pounds chicken tenders
salt and freshly ground black pepper
1 cup flour
2 eggs, beaten together with a bit of milk or water
1 cup dry bread crumbs or cracker meal
1 cup of pecans, finely chopped or ground
1/2 tsp nutmeg, freshly ground
the zest of one orange
Dressing:
1/4 cup maple syrup
1/4 cup of barbeque sauce
1/4 cup balsamic vinegar
the juice of one orange
1/4 cup extra virgin olive oil
sea salt and freshly ground black pepper to taste
Salad:
3 hearts of romaine lettuce, chopped
a handful of cherry tomatoes, sliced in half
6 spring onions, sliced diagonally
Place
the flour in one shallow dish. Place the eggs in another shallow dish,
next to the flour. Place the bread crumbs, nutmeg, orange zest and
pecans in third shallow dish, mixing them together well.
Season
the chicken tenders with salt and pepper and then roll them in the
flour. Dip them into the beaten egg and then finally coat them in the
crumb mixture.
Heat some cooking oil in a large skillet over
medium high heat. Fry the tenders in the hot oil in small batches for 3
to 3 1/2 minutes on each side. Drain well on paper towels.
Whisk together all the dressing ingredients until amalgamated. Season to taste with salt and pepper.
Combine
the chopped lettuce and the spring onions in a large salad bowl. Toss
with 3/4 cup of the dressing. Divide the mixture amongst 4 to 6 chilled
serving plates.
Top each with several of the chicken tenders. Drizzle the remaining dressing over top. Serve.

*Hearty Ham Broth*
Serves 4
Printable Recipe
What a delicious soup this is,
just full of wonderful flavours and textures. It's easy, low in fat,
high in folic acid and easily counts as two of your daily five a day!
1 TBS olive oil
2 onions, peeled and finely chopped
1 carrot, peeled and finely chopped
2 large potatoes, peeled and cut into small cubes
2 ounces cooked ham, shredded
2 pints hot vegetable stock
2 ounces small pasta shapes or broken spaghetti
1/2 of a cabbage, shredded (I used Savoy)
salt and black pepper
Heat
the oil in a large pan. Add the onion, carrot and potato. Gently
sweat for about five minutes without colouring. Add the pieces of ham
and the vegetable stock. Bring to the boil. Reduce the heat and then
allow it to simmer for about 10 minutes, or until the potato begins to
soften.
Add the pasta and cook for a further 10 minutes, until
the pasta is cooked and the potatoes begin to break down and thicken the
soup. Stir in the cabbage and cook for several minutes longer, just
until the cabbage is cooked. Taste and add some salt (if needed) and a
healthy grind of black pepper. Serve up in heated bowls with some
buttered crusty bread on the side.

*Cauliflower Cheese Soup*
Makes 5 cups
Printable Recipe
1 medium head of cauliflower, trimmed and broken into florets
2 cups chicken stock
1/4 cup butter
1 small onion, peeled and chopped
1/4 cup all purpose flour
1/2 tsp salt
1/8 tsp black pepper
2 cups milk
1 cup grated strong cheddar cheese
For the buttered bread crumbs:
1 cup fresh soft white bread crumbs
2 TBS butter
1/4 tsp celery salt
1/8 tsp black pepper
Place
the cauliflower into a pot with the chicken stock. Bring the boil, then
cover and simmer until the cauliflower is tender. Do not drain. Allow
to cool for a bit, then run it through a blender to puree. Set aside.
Melt
the butter in a medium sized saucepan. Add the onion and saute until
the onion is softened and fragrant. Do not brown. Stir in the flour,
salt and pepper. Cook for a minute then slowly whisk in the milk. Heat
and whisk until it boils and thickens. Add the cauliflower mixture and
the cheese, stirring until the cheese melts. Give it a blitz with a
stick blender if you want it to be completely smooth.
To make the
toasted bread crumbs, melt the butter in a small skillet and then when
it begins to foam toss in the breadcrumbs. Add the seasonings. Cook and
stir until the bread crumbs begin to brown and crisp up.
Serve the soup in heated bowls with a spoonful of the bread crumbs on top of each.

*Ham and Eggs In A Bun*
Serves 4
Printable Recipe
This
is such a wonderful way to serve your ham and eggs. There’s very little
mess and it’s so charming. The kids, both big and small, will love this
one!
4 whole wheat rolls
Softened butter
4 large free range eggs
4 slices of ham, slivered
2 spring onions, chopped, both green and white parts
4 slices of Swiss emmenthal cheese
1 tsp sweet paprika
Salt and freshly ground black pepper to taste
Chopped fresh flat leaf parsley
Pre-heat your oven to 180*C/350*F.
Take
your buns and cut into them with a sharp knife, hollowing them out and
leaving a sturdy outside shell. You don’t want it to be flimsy. You want
it to be sturdy enough to hold the filling without collapsing. (you can
use the crumbs to feed the birds or to make some bread crumbs to keep
in the freezer for future uses) Butter all the insides of the bread
shells and then place them on a baking tray and toast them lightly in
the heated oven. Remove them from the oven and proceed as follows.
Divide
the ham up and put half of it into the bottoms of each bread shell.
Divide the onions up and put half of them into the bottoms of each bread
shell as well. Break an egg into each hole and season each with some
salt and cracked black pepper. Top each with a mixture of the remaining
ham and onion. Finally place a slice of cheese over the top of each one
and dust with paprika. Cover lightly with a sheet of foil, shiny side in
and place the baking sheet back in the oven. Bake for about 10 to 15
minutes, depending on how well you want your egg done. Remove the foil
and place under the grill for a few seconds until the cheese turns
golden brown and bubbly. Remove from the oven and let sit for a few
minutes. Scatter with some chopped parsley just before serving. Enjoy!

*Chili Dog Enchiladas*
Serves 5
Printable Recipe
I don't know a child alive who doesn't love these . . . or a husband! Quick, easy and delicious.
10 corn tortillas (the smaller sized ones, about 6 inches in diameter)
10 hot dogs (If you can get the all beef ones, use them.)
1 tin (15 to 16 ouncees) of chili (I buy Stag)
2 cups of tomato salsa (I prefer the mild)
1 cup of coarsely grated cheddar cheese (4 ounces)
Preheat the oven to 180*C/350*F/ gas mark 4. Butter a 13 by 8 by 2 inch dish. Set aside.
Soften
the tortillas according to the package instructions. Place one hot dog
and 3 TBS of the chili on each tortilla. Roll up tortillas and place,
seam sides up, in the baking dish. Spoon the salsa evenly over top,
pressing the edges of the tortillas together. The salsa will help to
keep the tortillas from opening during baking.
Cover with foil
and bake for 20 minutes. Remove the foil and discard. Sprinkle the
cheddar cheese over top. Bake for a further 5 minutes, to melt the
cheese.

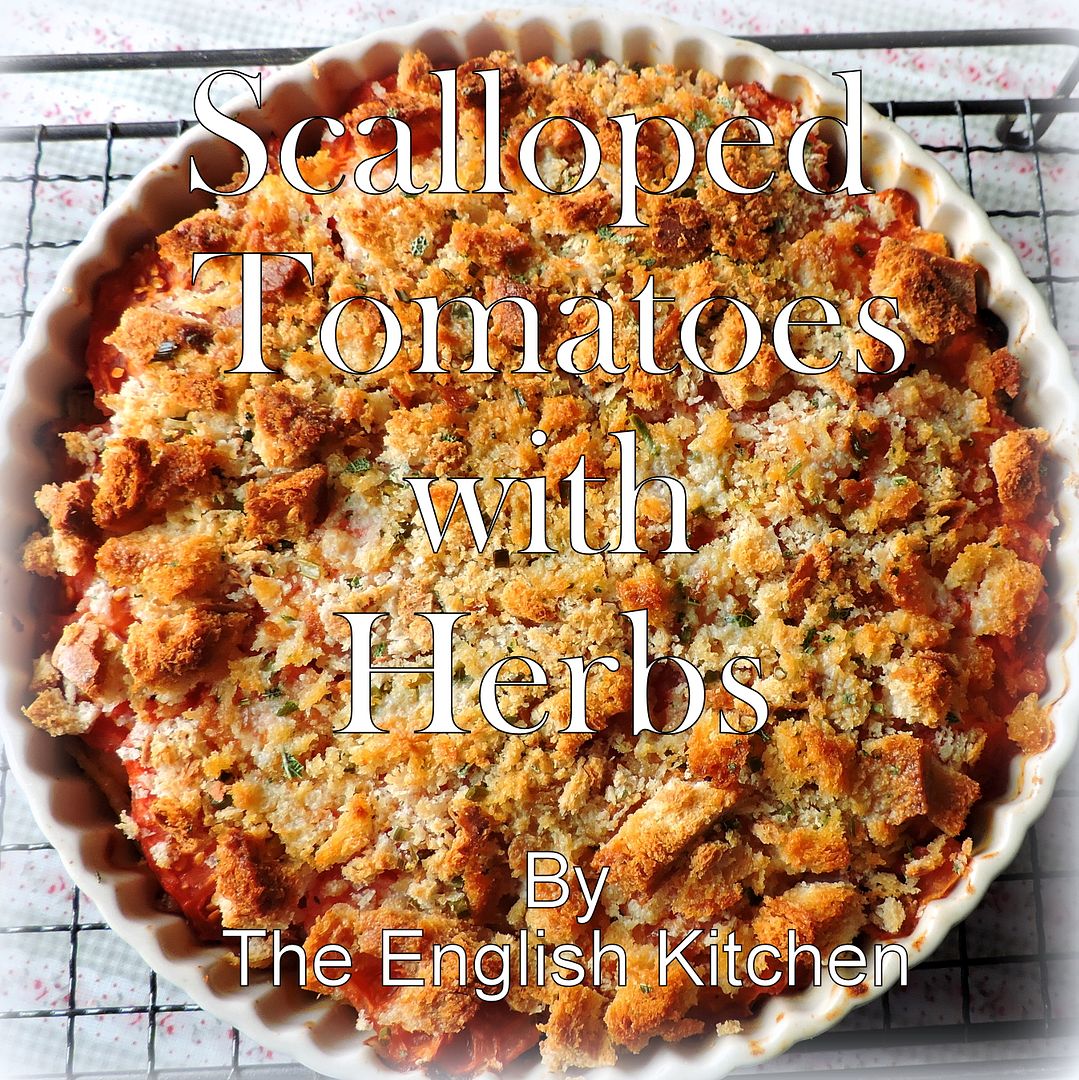
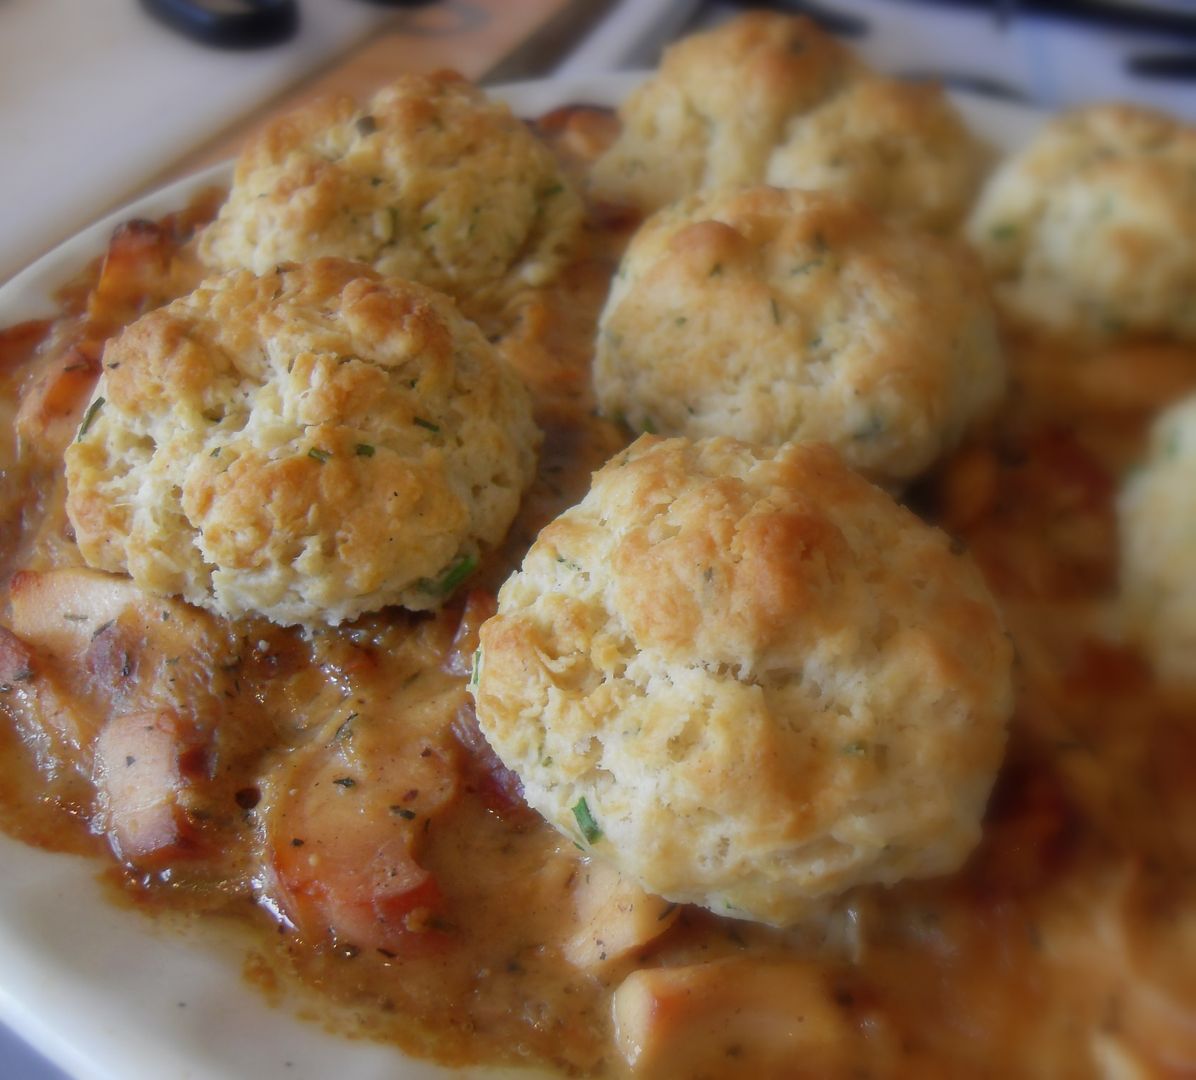
*Tomato Dumplings*
Serves 4 - 6
Printable Recipe
Light
and fluffy, and wonderfully savoury, these dumplings float on a
delicious sea of a robust and tasty tomato sauce. What’s not to like
about these lovely taste tempting babies?
½ cup peeled and finely chopped onion
¼ cup finely chopped green pepper
¼ cup finely chopped celery
¼ cup butter
1 bay leaf, broken in half
28 ounces of tinned chopped tomatoes, in their juices, undrained
1 TBS soft light brown sugar, packed
½ tsp dried basil
½ tsp salt
¼ tsp freshly ground black pepper
For the Dumplings:
1 cup plain flour
1 ½ tsp baking powder
½ tsp of Italian garlic seasoning
1 TBS cold butter
1 TBS snipped fresh parsley
2/3 cup of milk
Melt
the butter in a large skillet (with a lid) over medium high heat.
Whenit begins to sizzle add the onion, pepper and celery. Cook,
stirring, until they are tender. Add the bay leaf, tomatoes, brown
sugar, basil, salt and pepper. Cover, reduce the heat, and simmer for 5
to 10 minutes.
Make the dumplings as follows.
Whisk the
flour, baking powder and garlic seasoning together in a bowl. Rub in the
butter with your fingertips until the mixture resembles bread crumbs.
Stir in the parsley and then finally stir in the milk, mixing it only
until mixed together and all the dry ingredients are uniformly moist.
Remove
the lid from the simmering tomato mixture and drop the dumpling batter
onto the top of the simmer liquid by tablespoonfuls. Cover tightly with a
lid and simmer for another 10 to 15 minutes without peeking, until a
toothpick inserted into one of the dumplings comes out clean and they
look set and somewhat dry on top. Serve immediately, spooned out onto
warm plates.

*Mashed Carrots and Parsnips*
Serves 4
Printable Recipe
These two vegetables go really well together. I could eat a big bowl of just this and nothing else.
4 large carrots (about 1 pound) peeled and coarsely chopped
6 large parsnips (about 1 pound) peeled and coarsely chopped
3 whole cloves
2 tsp white sugar
1/2 tsp salt
2 TBS butter
2 TBS brown sugar
Place
the vegetables into water to cover in a saucepan, along with the
cloves, white sugar, and salt. Bring to the boil and then cover and
simmer for 25 to 30 minutes, or until very tender. Drain well, removing
the cloves. Return to the hot pan. Place over the residual heat on the
burner and give them a good shake to dry off any remaining water. Add
the butter and brown sugar and mash together with a potato masher. I
like to leave some chunks in mine, but you can mash them as smoothly as
you prefer. Serve hot.

*Nutty Wheat Bread*
Makes 2 loaves
Printable Recipe
A delicious light textured bread with the nuttiness of wheat germ and toasted walnuts added.
3 1/2 to 4 cups plain flour
1 tsp salt
2 pkg of rapid rise dry yeast (4 1/2 tsp)
1 1/2 cups milk
1/2 cup water
1/3 cup runny honey
1/4 cup butter
1 1/2 cups whole wheat flour
2/4 cup chopped toasted walnuts
1/4 cup wheat germ
Butter two 8 by 4 inch loaf pans. Set aside.
Measure
2 cups of the plain flour into a large bowl, combine with the salt and
yeast, mixing together well. Combine the milk, water, honey and butter
in a saucepan. Warm to melt the butter and melt the honey. (120
-130*F) Add the warm liquid to the flour mixture. Blend at low speed
with an electric hand whisk until moistened, then at .medium speed for
two minutes. Add the whole wheat flour, another 1 cup of plain flour,
the walnuts and wheat germ by hand.
Tip out onto a floured
surface and knead in the remaining 1/2 to 1 cup of flour until the dough
is smooth and elastic, about 5 minutes. Place dough into a greased
bowl, turning to grease the top, cover loosely with plastic wrap or a
tea towel and leave to rise in a warm place for about an hour, until
light and doubled in size.
Punch down the dough several times to
remove all air bubbles. Divide the dough in half. Roll each half out
on a lightly floured surface to a 10 by 8 inch rectangle. Starting with
the shorter side, roll up tightly, pinch edges and ends firmly to
seal. Place seam side down into the greased pans. Cover and let rise i
a warm place until the dough fills the pans and the tops are about 1
inch above the edge of the pans, 35 to 40 minutes.
Preheat the
oven to 180*C/350*F/ gas mark 4. Bake the bread for 30 to 40 minutes
or until the loaves sound slightly hollow when tapped on the bottoms.
Remove from the pans and allow to cool on a wire rack.

*Cheese and Pepper Bread*
Makes one loaf
Printable Recipe
2 cups flour
1 cup shredded sharp cheddar cheese
1 TBS sugar
1/2 tsp baking powder
1/2 tsp baking soda
1/2 tsp salt
1/2 tsp fresh coarsely ground black pepper
1 cup buttermilk *
1/3 cup melted butter
2 large eggs
Pre-heat
the oven to 180*C/350*F. Grease the bottom only of a 9 by 5 or an 8 by 4
inch loaf pan. Whisk the flour, cheese, sugar, baking powder, baking
soda, salt and pepper together in a medium sized bowl.
In another
small bowl, whisk together the buttermilk, melted butter and the eggs.
Add all at once to the dry ingredients. Mix together just until the dry
ingredients are moistened. Pour into the greased pan.
Bake for 35
to 45 minutes, or until a toothpick inserted into the centre comes out
clean and the top springs back when lightly touched. Remove from the pan
to cool on a wire rack.
Serve warm with butter for spreading.
*Note - if you don't have any buttermilk you can use 1 TBS of vinegar or lemon juice plus milk added to make 1 cup.

*Ham and Pineapple Melts*
Serves 2
Printable Recipe
Toasted
English muffins topped with salty baked ham, sweet pineapple and a
yummy cheese topping. These are really, really good. I normally have
all the ingredients at hand.
2 wholemeal English muffins, split and lightly toasted
4 thick slices of cooked ham
2 tsp honey mustard (I used honeycup, it's quite spicy and
went really well with the saltiness of the ham and the
sweetness of the pineapple)
4 pineapple rings, well drained and dried off with some paper towels
2 ounces grated mature cheddar cheese
a spash of Worcestershire sauce
Pre-heat
your grill (broiler) to medium. Place the toasted muffin halves onto a
grill pan. spread each half with some of the mustard. Top with a
slice of ham, a pineapple ring and some cheese. Grill for 3 to 4
minutes until bubbling and golden. Remove from the grill and spash on
some Worcesterhire sauce. Serve immediately.
These go very well
with a side salad, but for a more substantial meal such as supper why
not make some homemade oven chips to go along on the side!
 *Heaven and Earth Casserole*
Serves 4
Printable Recipe
Sweet
potatoes make a change from regular potatoes. It may sound like an
unusual combination to put together sweet potatoes, onions and apples,
but trust me when I say they go together beautifully!!! The original
recipe was called Sausage and Sweet Potato Casserole, but I changed it
to Heaven and Earth, because to me it epitomizes all the best of both . .
. the apples from the tops of heavily laden apple trees, and the sweet
potatoes and onions from the earth, and everything in between . . .
1 pound of pork chipolata sausages (I used Cumberland)
3 cups peeled and thinly sliced raw sweet potatoes
½ cup peeled and sliced onion
1 tsp salt
¼ tsp freshly ground black pepper
2 peeled and thinly sliced apples
1 TBS packed brown sugar
¼ cup chicken stock
1 cup grated cheddar cheese
Preheat
the oven to 200*C/400*F/gas mark 6. Lightly grease a casserole dish and
set it aside. Start browning the sausages in a heavy skillet over
medium low heat.
Begin layering the vegetables in the prepared
casserole dish. Start with some sweet potatoes and the apples. Sprinkle
with a bit of salt and pepper. Then layer on some onion. Repeat the
layers until all are used up, ending with a final layer of sweet
potatoes. Pour the ¼ cup of stock over all, sprinkle the brown sugar
evenly over top, and then put on the lid. Bake in the heated oven for 30
minutes.
Remove from the oven. Top with the sausages and scatter
the cheese evenly over top. Bake for another 15 minutes or until the
cheese is melted and beginning to turn golden brown.
Remove from the oven and let sit for a few minutes before serving. Delicious!
 *Upside Down Pizza*
Serves 6
Printable Recipe
If you like pizza you will love this novel casserole, which has the pizza toppings on the bottom!
1 pound of extra lean ground beef
2 TBS oil, divided
1 small onion, peeled and finely chopped
1 small green pepper, peeled, deveined and finely chopped (optional)
1 clove of garlic, peeled and chopped
1 (14 to 15 ounce) jar of pizza sauce (Can use Spag bol sauce if you wish. I like the Napolina Tomato and Basil sauce)
2 large free range eggs
1 cup milk
1 cup of plain flour
1/2 tsp salt
2 cups (8 ounces) of grated strong cheddar cheese
2 medium spring onions, chopped
Preheat the oven to 220*C/425*F/ gas mark 7.
Heat a large nonstick skillet over medium heat. Add 1 TBS of the oil
and heat til it shimmers. Crumble in the ground beef, onions, peppers
and garlic. Cook, stirring for about 10 minutes, until the beef is
browned completely and the vegetables are softened. Stir in the sauce.
Heat to a boil, then reduce heat to low and keep warm.
Whisk together the eggs, milk, remaining TBS oil, flour and salt together until foamy.
Spread beef mixture into a 13 by 9 by 2 inch baking dish. Sprinkle with
the cheese. Pour the batter over top of the cheese. Sprinkle with the
onion.
Bake for 25 to 30 minutes until puffy and golden brown. Serve immediately. Delicious!
 *Chicken, Cheese and Rocket Salad*
Serves 4
Printable Recipe
I
just love the variety of flavours in this salad. You get the
punchiness of the rocket, the creamy tanginess of Stilton cheese, the
sweet crunch of ripe pears and then of course the lovely nutty flavour
of the toasted walnuts. There's plenty of goodness to enjoy here.
5 ounces of a rocket salad leaf mix
2 sticks celery, trimmed and sliced
1/2 English cucumber sliced (peeled or not as you wish)
2 spring onions, trimmed and slices thinly
2 TBS chopped fresh flat leaf parsley
1 ounce of toasted walnut pieces
12 ounces boneless roast chicken, sliced
4 1/2 ounces Stilton cheese, crumbled
2 ripe red pears, cut into cubes
(You can use halved red grapes instead if you wish)
sea salt and freshly ground black pepper
DRESSING:
2 TBS olive oil
1 TBS sherry vinegar
1 tsp dijon mustard
1 TBS chopped mixed fresh herbs
(Parsley, oregano, basil, thyme)
Wash
your salad leaves and pat them dry with kitchen paper. Place them into
a large salad bowl. Add the celery, cucumber, spring onions, parsley
and toasted walnuts. Mix together well.
Arrange the chicken
slices over all and then scatter with the cheese and chopped pears.
Season to taste with some sea salt and freshly ground black pepper.
Place
all the dressing ingredients into a jar with a screw top lid. Shake
until well combined and then drizzle over top of the salad and serve.
 *Cheater's Apple and Cherry Crumble*
Serves 8
Printable Recipe
This makes a large dessert, just perfect for taking to a pot luck! It's delicious and easy to make.
1 tin (21 ounce) apple pie filling (use a fruity one)
1 tin (21 ounce) cherry pie filling (again use a fruity one)
1 tsp apple pie spice )If your apple pie filling is a spicy oen, omit this ingredient)
12 flat style granola bars (ones like Nature's Valley that come two in a pack)
1/2 cup flour
1/2 cup butter, melted
1/4 cup sliced almonds
Preheat the oven to 180*C/350*F/ gas mark 4. Spritz a 2 quart baking dish with cooking spray set aside.
Stir together the pie fillings in a bowl, along with the apple pie spice, if using. Spread this mixture in the baking dish.
Place
the granola bars into a zip lock baggie and give them a good bash with
the side of a rolling pin to crush them into small pieces. Dump this
into a bowl. Stir in the flour and butter, mixing all together until
crumbly. Stir in the almonds. Sprinkle this mixture over top of the
filling mixture, spreading it out evenly.
Bake for 25 to 30
minutes, until the edges are bubbly and the centre is thorougly heated.
Allow to cool slightly before serving. Serve warm or cold with a scoop
of vanilla bean ice cream if desired! (Or Todd's favourite, warm
custard)
 *Sweet Yellow Cake*
Makes one 9 inch square cake
Printable Recipe
Five
minutes in the bowl, 30 minutes in the oven and served warm. It's
crowning glory is the warm chocolate glaze that you spoon over top of it
as soon as it comes out of the oven. This is scrumptiously moreish,
need I say more?
6 TBS butter, softened
1 cup white sugar
2 large eggs
1 cup plain flour
1/2 tsp baking powder
1/4 tsp baking soda
pinch salt
1/2 cup sour milk
(place a tsp of lemon juice in a measuring cup and fill with milk to the half cup level)
1 tsp vanilla extract
For the Glaze:
6 ounces good quality chocolate broken into pieces
(I use a mixture of Green and Black's milk chocolate and Lindt dark)
1/4 cup white sugar
1/3 cup milk
2 TBS butter

Pre-heat the oven to 180*C/350*F. Lightly grease a 9 inch square cake pan. Set aside.
Cream
the butter and sugar together in a bowl, until light and fluffy. Beat
in the eggs, one at a time, mixing well together. Place the flour,
baking powder, baking soda and salt in another bowl and whisk well
together. Stir the milk and vanilla together.
Add the flour
mixture to the creamed mixture in thirds alternating with one third of
the milk mixture, mixing until all the ingredients are combined and no
flour is visible.
Pour the batter into the prepared pan and place
in the oven to bake. Bake for 25 to 30 minutes until cake tests done
and either a toothpick inserted in the centre comes out clean or the top
springs back when lightly touched with a fingertip.
Make the
glaze while the cake is baking. Place the chocolate, milk and sugar into
a small saucepan and cook over medium low heat, cooking and stirring
until the chocolate has melted and the sauce thickens slightly. Remove
from the heat and stir in the butter. Stir until the butter has
completely melted and amalgamated into the sauce. Keep warm until the
cake comes out of the oven.
When the cake is done and out of the
oven, poke holes all over the top with a skewer or the tines of a fork.
While the cake is still hot and in the pan, pour 1/2 cup of the glaze
over the top and let it soak into the cake for 5 to 10 minutes. Cut the
cake into squares and serve while still warm, with some more of the
chocolate sauce spooned over top. Scrumdiddlyumptious!
 *Molasses Spice Cake, with Ginger Syrup*
Serves 8 to 9
Printable Recipe
There
is nothing more comforting than the homey smell of a cake full of
cinnamon and cloves baking in the oven. When you combine that served up
warm with bits of preserved ginger and the syrup drizzled over top with a
big dollop of whipped cream, well, you’ve just died and gone to heaven!
CAKE:
¾ cup milk
2 TBS calvados
1 ½ tsp cider vinegar
2 cups plain flour
1 ½ tsp baking soda
¼ tsp salt
1 tsp ground cinnamon
1/8 tsp ground cloves
½ cup butter, at room temperature
1/3 cup sugar
2 eggs
¾ cup light molasses (over here in the UK use ½ cup of golden syrup and ¼ cup of dark treacle mixed)
TO FINISH:
4 knobs of preserved ginger, chopped
Syrup from the jar for drizzling
Softly whipped cream
Pre-heat
the oven to 180*C/350*F. Butter a non-stick 9-inch square or round
baking pan really well and dust the insides with flour. Set aside.
Combine
the milk, calvados and vinegar in a small bowl. Sift the flour, baking
soda, salt, cinnamon and cloves into another bowl. Using an electric
mixer, cream the butter and sugar together in a large bowl until light
and fluffy. Beat in the eggs, one at a time, until completely
incorporated. Add the molasses and mix in well. Add the dry ingredients
alternately with the wet, mixing well after each addition. Pour the
batter into the prepared pan and then bake it in the pre-heated oven for
approximately 25 to 30 minutes, or until it tests done when a toothpick
is inserted in the middle and comes out clean. Remove from the oven to a
wire rack to cool until just warm, or at room temperature.
Cut
into 3 inch squares or wedges to serve. Sprinkle each serving with some
of the chopped ginger and drizzle some of the syrup from the jar over.
Top with a big dollop of whipped cream. Delicious!
 *Apple Crumble Pie*
Makes one 9 inch pie
Printable Recipe
Picture
apples, tender and sweet, tucked in beneath a crumbly and short sweet
and spicy blanket, and all nestled into a crisp crusty bed . . . what
could be any better?
1 un-baked 9 inch pastry shell
Filling:
2/3 cup sugar
1 tsp cinnamon
1/4 tsp freshly grated nutmeg
2 tsp flour
6 cups tart apples, peeled, cored and sliced
(I used Granny Smith's)
Topping:
1 cup flour
1/2 cup soft light brown sugar, packed
1/2 cup cold butter
1/2 tsp cinnamon
1/2 cup chopped toasted walnuts (optional)
Pre-heat the oven to 200*C/400*F. Line a 9 inch pie tin with pastry, your own or shop bought. Flute the edge and set aside.
Mix
the sugar, cinnamon, nutmeg and flour for the filling in a large bowl.
Add the apples and toss well together. Pour this into the pie shell.
TO
make the topping, place the sugar, flour, cinnamon and butter together
in a bowl. Blend together with a pastry blender until the mixture is
crumbly. Stir in the chopped nuts if using. Sprinkle this evenly over
top of the apples in the pie shell.
Place onto a foil lined
baking sheet and slide this into the oven. Bake for 45 to 50 minutes
until the apples are soft and bubbling and the topping is golden
brown.**
Remove from the oven and allow to cool to room temperature before eating.
Note** If you find the crust is browning too quickly, cover with foil.
 *Luscious Lemon Snacking Cake*
Serves 8
Printable Recipe
This
is one of those tasty and moist cakes that you make, bake and serve all
from one pan. No fuss, no mess and plenty of taste! If you like lemon,
this cake's for you.
For the Cake:
1 1/4 cups flour
1 cup sugar
1 1/2 tsp baking powder
1/2 tsp salt
1 egg
2 tsp freshly grated lemon zest
1/2 tsp lemon extract
1/4 cup melted butter
3/4 cup milk
For the Glaze:
3/4 cup icing sugar
1 TBS melted butter
2 to 3 tsp fresh lemon juice
Pre-heat the oven to 180*C/350*F. Lightly grease an 8 inch square baking pan.
Sift
the flour, sugar, baking powder and salt into the pan. Level it off and
then make two deep indentations in it. Beat the egg and lemon zest
together in a small bowl. Pour this mixture into one indentation. Pour
the melted butter into the other indentation. Pour the milk over all
and then mix well with a fork. (There will be some lumps that remain,
just do your best and make sure you get into the corners)
Bake
for 30 to 35 minutes, or until a toothpick inserted in the centre of
the cake comes out clean or until it springs back when lightly touched
in the middle. Remove from the oven and allow to cool completely in the
pan.
For the the glaze combine the icing sugar, melted butter
and enough lemon juice in a small bowl, using only as much lemon juice
as is desired to make a glazing consistency. Spread over the cooled
cake.
 *Fresh Berries With White Chocolate Sauce*
Serves 4
Printable Recipe
I know there are umpteen versions of this floating around. This one is mine. I think that it's important to use the best
white eating chocolate you can buy. Simple yes, but the flavour is amazing. I would certainly serve this to company.
6 ounces good quality white chocolate, broken into small pieces
(I used Green and Black's organic. You can see the flecks of Vanilla in it. Just wonderful)
2/3 cup double cream
4 cups fresh mixed berries (raspberries, blueberries, raspberries and halved strawberries)
Put
the cream and chocolate bits into a microwaveable measuring cup. Place
into the microwave for about 35 to 40 seconds on high. Remove from the
microwave and let sit for a minute
before whisking it together into a
smooth sauce with a small whisk. (Your chocolate should be completely
melted) Alternately you can heat the two together in a heatproof bowl
set over a pan of simmering water. Stir until the chocolate has just
melted, then remove from the heat. Pour the sauce into a jug.
Place
all the berries into a bowl and give them a mix. Divide them into 4
shallow serving bowls. Pour the white chocolate sauce over them at the
table. Delicious!