Thursday 31 August 2017

Beetroot Chutney

Beetroot Chutney


I think one of my favourite vegetables has to be beetroot!  I just adore it.  Steamed, roasted . . . pickled, fried, you name it. Its right there up on the top of my "Love" list!  


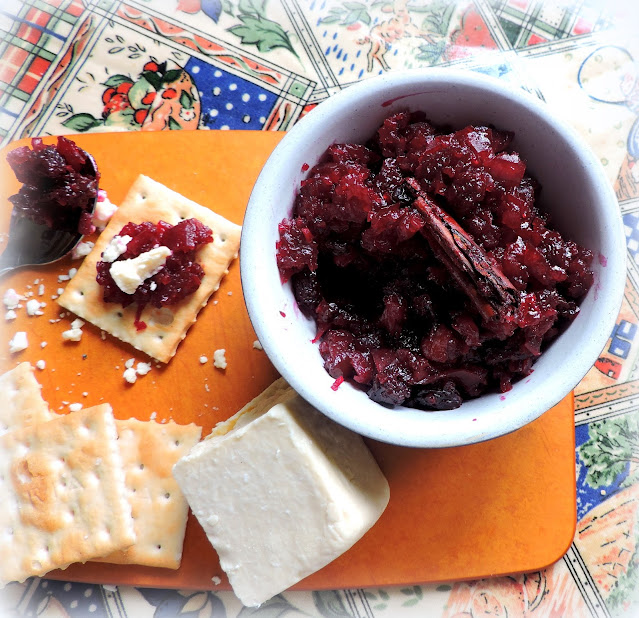
Last week we were blessed with some fresh beetroot from a friend's garden and I was in beetroot heaven.  I used some of it to make a small batch of this Beetroot Chutney!


Beetroot Chutney


When I moved over here to the UK in 2000 I went back to school and learned how to be a Chef at a local college.  One of the first things we were taught to do was make chutney. 


It is something I have never forgotten and which I have used a lot over these past 17 years.


Beetroot Chutney


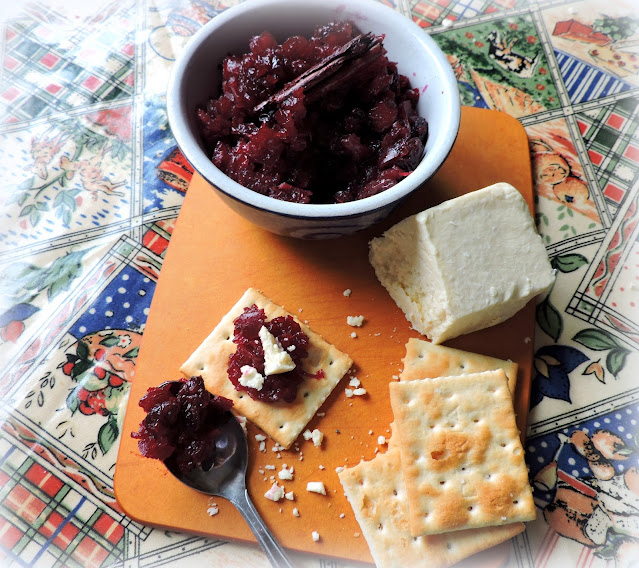
We adore chutney in this house. Its so easy to make and goes very well with oodles of things . . .  like cheese and crackers for instance . . .  or cold meats.


Beetroot Chutney


The principles of making a chutney are pretty simple.  You want a bit of sweet/sugar, a bit of acid/vinegar,  a bit of heat/chilies, some spice/cinnamon, cumin, etc. and fruit/raisins, etc. . . . and the main ingredient.

Whatever it is you are wanting to use, like today's Beetroot, but also you can do it with mango, plums, tomatoes, whatever . . .  the world is your oyster when it comes to making chutney!


Beetroot Chutney


Recipes for Eastern ‘chatneys’ begin to appear in cookbooks such as Eliza Acton’s Modern Cookery for Private Families in the 19th century. 


Some were fresh, almost a relish, and others were preserved and similar to this beetroot chutney I am showing you today. The older recipes were not as sweet as the ready made chutney's we have become used to in modern times.


Beetroot Chutney


I kind of winged this when I was making it, hearkening back to what I was taught in my chef's course and this is what I came up with.  We were both really pleased with the results. 


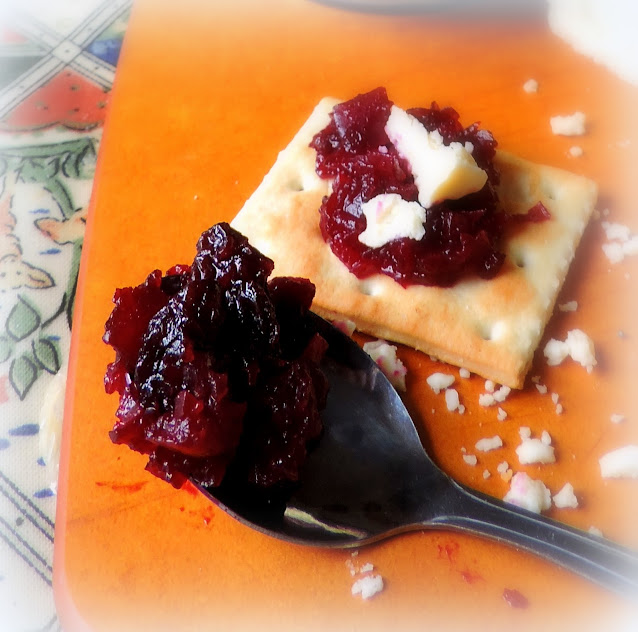
 What you see here is the bit that didn't fit into the jars. It is delicious. I could eat it simply with a spoon.


Beetroot Chutney


*Beetroot Chutney*
Makes 2 to 3 small jars
 
This is delicious.  You can vary the strength of the heat by upping or reducing the amount of crushed chilies. 

500g beetroot (about 1 1/4 pounds)
500g red onions (about 1 1/4 pounds)
1 clove of garlic, bruised
splash of olive oil
50g demerara sugar (1/4 cup, turbinado)
1 TBS honey
1 TBS freshly grated gingeroot
5 whole cloves
5 whole peppercorns
1 broken cinnamon stick
150ml cider vinegar (2/3 cup)
1/2 tsp salt
pinch hot chili flakes
a handful of mixed dried fruit (sultanas, currants, candied peel)


Beetroot Chutney


Peel and chop your beetroot and onion.  Heat a splash of olive oil in a large saucepan.  Add the beetroot and the onions.  Cook over low heat and sweat for about 15 minutes, taking care not to let it brown or burn, you just want it to have begun softening.  


Add the remaining ingredients.  Bring to the boil, then reduce to a very slow simmer.  Cook, stirring occasionally, over very low heat for about 45 minutes until thick and chutneyish. 


If you think it is going too dry before it is done you can add a splash of vinegar to keep it looking glossy and moist.  When it is done, spoon into 3 hot sterilized jars and seal immediately while still hot.  Store in a cool dark place.


Beetroot Chutney


 I have decided that beetroot is not the most photogenic crayon in the box, but what the hey.  Taste counts for a lot and this chutney is most delicious!  Bon Appetit!


Sunday 27 August 2017

Chocolate Drizzled Ginger Butter Cookies

 
Border Biscuits here in the UK make a gorgeous Chocolate covered Gingernut biscuit.  I just adore them, they are hot and spicy with lots of ginger flavour and coated in either dark or milk chocolate.  They are so crisp they snap when you bite into them and the chocolate melts on your fingers as you are eating them.  A bit of a mess to eat, but oh so tasty.

 
These are not them, but they are every bit as good.  This is like a shortbread biscuit almost  . . .  buttery and short  . . . crisp . . .


Studded with candied ginger and flavoured with ginger extract . . .  just a few drops. If you can't get the ginger extract, then add about 1/4 tsp of ground ginger-root powder in it's place . . .

 
Dark chocolate drizzled over top are their crowning glory and makes them very scrummy indeed.  Dark chocolate and ginger are a marriage made in heaven.  Combine them in a delicious biscuit and you have some very incredibly edible indeed!  Mmmm . . .  soooo good!


*Chocolate Drizzled Ginger Butter Cookies*
makes a couple dozen
 
Butter, crisp and rendolent of lovely sweet and spiced ginger flavours, accented by a dark chocolate drizzle. 

225g of butter, softened (1 cup)
110g of caster sugar (1/2 cup + 1 TBS))
few drops of ginger extract
275g of plain flour (scant 2 cups, sifted)
4 TBS finely chopped candied ginger
50g of melted dark chocolate ( 2 ounces) 

Preheat the oven  to 170*C/325*F/ gas mark 3.  Line a large baking sheet with baking paper. 

Cream together the butter, extract and sugar until light and fluffy.  Beat in the flour and stir in the ginger bits.  Roll into walnut sized balls.  Place a few inches apart on the prepared baking sheet.
Press down with a fork.  Bake for 13 to 15 minutes until light golden brown and just firm on top.   Leave on baking sheet to cool for five minutes before transferring to a wire rack to finish cooling. 

Drizzle the tops decoratively with melted chocolate.   Allow to set prior to storing in an airtight container.


When I eat these I am reminded of the dark chocolate coated bits of candied ginger we treat ourselves to at Christmas time.  You won't be able to eat just one of these, I guarantee! Bon appetit and happy dunking!


Saturday 26 August 2017

Late Summer Mixed Berry Crumble

 
This is the perfect dessert for this time of year.   Late summer.   We are just getting to the end of the strawberries and the Blueberries and raspberries are at their best.   Let's get ready to crumble!!

 
I actually used frozen blueberries and strawberries for this.  Our blueberry bushes are not really producing this year for some reason.  We are getting only a berry or two at a time.  We need to change something obviously.  Any advice? Our strawberries are long since done, but I had frozen berries.  So what I did was I just gently mixed them with the raspberries and put them into the oven for about 10 minutes before I added the remaining ingredients. You could also add blackberries.


It worked beautifully.   They were perfectly thawed and ready for me to sprinkle over the white chocolate and the buttery crumble mixture.  The white chocolate perfectly sweetens the fruit so you need no other sugar in the filling.   It's a delightful mix of sweet and tart . . . 

 
The topping has just the right amount of buttery and crispness . . .  part of it sinks down into the fruit thickening the juices.  It's just delightful.   Especially when served up with dollops of clotted cream.   All that rich cream melting down into the fruit and buttery crumble.   Oh so moreishly scrumptious.  We quite, quite love this.


*Late Summer  Mixed Berry Crumble*
Serves 4 to 6, depending on appetites 
 
A delicious way to use up the last of the summer berries.  I use strawberries, blueberries and raspberries.  Any sweetness comes from the delicious addition of some white chocolate.  The buttery crumbs are it's crowning glory! 

300g of strawberries, washed and hulled (about 2 cups, cut in half if large)
200g fresh blueberries (2 cups)
200g fresh raspberries (2 cups)
100g of good white chocolate, broken into bits (about 1/2 cup)
For the topping:
240g plain flour (1 2/3 cup)
140g of chilled butter, cut into bits (10 TBS)
80g sugar (scant half cup) 


 Preheat the oven to 200*C/400*F/ gas mark 6.

Butter a six cup deep casserole dish.  Gently mix the berries and pour them into the dish.  Scatter the white chocolate bits over top.

 
Measure the flour and sugar into a bowl.  Drop in the butter.  Rub it into the dry mixture with your finger tips until the mixture resembles dry bread crumbs.  Sprinkle this evenly over top of the fruit. 

Bake for 35 to 40 minutes, until the crumble topping is golden brown and the fruit is bubbling up.   Serve warm with or without lashings of cream! 


We actually had ours with clotted cream.  In for a penny, in for a pound and all that!  Bon Appetit!

Friday 25 August 2017

Spaghetti & Meatballs


 I have often found that it's the simple things in life which bring us the most pleasure . . . things like marmite on hot buttered toast, bread and jam, or macaroni and cheese . . . when I worked down South for the family I cooked for, every meal had to be a production.  There was no such thing as simple or ordinary.   Even a grilled cheese had to be something extraordinarily out of the ordinary  . . .  seriously.  But then again, they were paying me to cook for them, so I expect they wanted some bang for their buck, and I didn't really mind.  I enjoyed it very much.

 
And as you can imagine, however . . .  with every day meals being so outrageous  . . . things got really complicated when there was a dinner party to plan and cook for, or even a simple ladies luncheon.   Every meal, every occasion, every time . . . had to impress.  I used to enjoy getting home and just letting my hair down and going simple . . .

 
 I admit  that I enjoy a bit of fancy once in a while . . . to celebrate something special, or on holidays, but most days I do so much more enjoy simplicity.   I don't like things to be complicated or terribly involved.


It doesn't matter to me what I have for supper.  I don't need to have Filet Mignon every night, just so long as what I am having tastes good, and I have enjoyed the journey to get there.

 
Meals such as this simple recipe I am showing you here today for Spaghetti and Meatballs are my favourite types of dishes. With this you get the ultimate in satisfaction and flavor without having to jump through multiple hoops or using a multitude of ingredients.


 Economical.  Tasty.  Simple.  Satisfying.  Well flavored meatballs in a well flavored and simple sauce.  What more could you ask for?  The Toddster had his with mashed potatoes.  To each their own . . .


*Spaghetti and Meatballs*
Serves 4
 
Simple, delicious and comforting.  There is nothing fancy here.  Just good and tasty food. 

for the meatballs:
1 thick slice of soft white bread, crust removed, torn into chunks
4 TBS milk
200g minced lean pork (1/2 pound)
200g minced lean beef (1/2 pound)
2 TBS chopped fresh parsley
1/2 tsp ground cinnamon
1/2 tsp ground cumin
1/2 small onion, peeled and grated
about 4 TBS olive oil for frying 


For the sauce:
2 TBS olive oil
2 cloves of garlic, peeled and smashed a bit
400g tin of chopped diced Italian tomatoes in tomato juice (14 ounces)
about 4 to 6 fresh basil leaves, torn
2 TBS olive oil
1/2 cup red wine
1 TBS soft light brown sugar
pinch cloves
salt and black pepper to taste 

To serve:
350g spaghetti (about 12 ounces)
2 TBS butter
grated Parmesan cheese to serve


First make the meatballs.   Soak the bread in the milk, squashing it with your fingers until it completely breaks up.  Put your meat into a bowl along with the parsley, cinnamon, cumin, squashed bread, grated onion and 1/2 tsp salt.  Mix thoroughly with your hands.  (This is very cathartic I find.)  Shape into about 24 small balls, about the size of cherry tomatoes.   Heat the oil in a large non-stick frying pan.  Add the meatballs and brown.  Give them a shake every few minutes so that they roll around and brown evenly all over. 
While the meatballs are cooking make the sauce.  Heat the olive oil in a saucepan.   Add the garlic.  Cook until you can smell it and then dump in the tomatoes and basil.  Season with some salt and pepper and cook for about 10 minutes.   Add the brown sugar, cloves, some black pepper and the red wine.   Give it a good stir and then add the meatballs.   Simmer, uncovered, for an additional 20 to 25 minutes, until the meatballs are tender and the sauce has thickened nicely.  Taste and adjust seasoning as required.

Serve spooned out over hot buttered spaghetti with a fresh grating of Parmesan cheese on top.   Garlic bread is nice with this too.


Any leftovers are splendid fryed up in some butter the next day.  Just saying!  Its how I roll!  Bueno Appetito!

Thursday 24 August 2017

Cheesy Scalloped Potatoes

 
I love scalloped potatoes, but I adore Cheesy Scalloped Potatoes!  This is a fabulous recipe and, unlike most Scalloped Potato recipes, you can have this delicious dish on the table in less than half an hour and it is perfectly sized for just two people, which makes it great for the smaller family!

 
Most of the work is done on top of the stove, which means that your kitchen stays blessedly cool!

 
Delicious layers of tender potatoes, melded with grated cheddar cheese and cream . . .  a bit of stock, some onion and seasoning . . .  topped with a layer of Parmesan cheese that gilds to a golden brown in the oven.

 
You brown the onions first in a skillet (make sure its oven proof) and then add some garlic and thyme.  Some stock and cream are added along with the sliced potatoes and then the mixture simmers, covered for about 12 to 15 minutes . . .


After that you stir in the cheese.  Today I used some leftover cheddar I had which was flavoured with beer, leeks and mustard . . .  sooooo good . . .


The Parmesan gets sprinkled on top and then a quick roast in a hot oven for 10 minutes and bingo!  Your potatoes are done!  Tender, rich and delicious, crisp around the edges and golden brown!
 
 
What more could a person ask for!  We had them with BBQ pork chops and some corn.  Yummy!

 
*Cheesy Scalloped Potatoes*
Serves 2 generously

A simple and easy way to make delicious cheesy scalloped potatoes for two people and have them on the table in less than half an hour. Simple.  Make sure you have all of your ingredients ready before beginning and it will go in a flash. 

60g grated medium cheddar cheese (1/2 cup)
(I used a leek, mustard and beer one
the last time with delicious results)
1 1/2 tsp cornflour, divided (cornstarch)
90g grated Parmesan cheese (1/2 cup)
1 tsp vegetable oil
1 medium onion, peeled and finely chopped
1/4 tsp dried thyme leaves (can use 1 tsp fresh minced)
1 garlic clove, peeled and minced
80ml chicken stock (1/3 cup)
80ml heavy cream (1/3 cup)
3/4 pound potatoes, peeled and sliced into 1/4 inch thick rounds
1/2 tsp salt
1/2 tsp freshly ground black pepper

 
Preheat the oven to 220*C/425*F/ gas mark 7.  You will need an 8 inch oven-proof skillet with an oven-proof handle.


Toss the grated cheddar with 1 tsp of the cornflour in a small bowl.  Toss the grated parmesan with the remaining 1/2 tsp cornflour in another bowl.  Set both aside.

 
Heat the oil in your skillet over medium heat until it begins to shimmer.  Add the onion and cook, until softens and turns light golden in colour.  Add the garlic and thyme and cook until fragrant, about 1 minute or so.  Add the stock and cream,a long with the salt and pepper.  Add the potatoes and turn to coat.  Bring to the boil, then reduce to a low simmer.  Cover and simmer over very low heat for 10 to 12 minutes, until the potatoes are nearly tender. 

Remove from the heat.  Stir in the cheddar cheese, mixing it in as well as you can and turning the potatoes in it.  Press the potatoes into an even layer. Sprinkle the Parmesan cheese evenly over top.  Bake in the preheated oven for 12 minutes or so until golden brown and the potatoes are completely tender.  Let stand for about 5 minutes or so to cool, prior to serving. 


I really hope you will give these a go and if you that you enjoy them as much as we do!  Bon Appetit!

Wednesday 23 August 2017

Street Style BeefTacos


I have never lived anywhere that they serve Street Tacos but I have long imagined what they might be like, and this tasty dish today is the result of my imagination going crazy over the years.  If I am not even close to what they are really like, don't burst my bubble, because I am really happy with these!!


The meat filling is not made from ground beef, but from beef steaks, thinly sliced and then chopped with a sharp knife into small chunks . . . and then marinated in the juice of a lime along some choice seasonings . . .  Tex Mex flavours, cumin, mild chili powder, garlic and onion powders . . .


This gets browned in a skillet with some chopped onion and a green chili, and then it is simmered long and slow over low heat until the meat is tender and falling apart . . .


I made my own Guacamole type of Avocado sauce to serve with them . . . oh boy but it was some good.  I could eat it with a spoon.


The Avocado I used for my Avocado cream was the Strong Roots Frozen Ripened Avocado halves! So convenient and easy to use. These Peruvian Avocado Halves (RRP £5.29) are perfectly ripened, pitted and freshly frozen.  With with a bag or two of these in the freezer it means smoothies and guacamole can be made at anytime along with anything else that requires avocado.  These are available at Whole Foods.  I think they're just beautiful!


The smooth coolness of that delicious Avocado Cream went so well with the slight heat of the Taco meat.  I don't like my food to bite me back and this had just a tiny bite that wasn't overly obnoxious to me.  You could add more chili if you want more heat of course!


I also made my own flour tortillas from scratch.  I love homemade tortillas.  I have been making them for years and years.  They are a hundred times tastier than the ready made ones and are really easy to make.  Mine never quite turn out round, but hey ho!  They always stretch out of shape when I lift them into the hot pan.  It's the flavour that matters most though, so no worries!  They are soft and delicious, with just the right number of brown blisters . . .  very, VERY good!

I set everything out "Taco Bar" style  . . .  with a variety of toppings . . .  chopped spring onions, sour cream, the avocado cream, chopped tomatoes, chopped ripe olives, shredded lettuce . . . and some grated jack cheese!


You could use Pepper Jack if you really want to kick up the heat.  Or add a bottle of hot sauce for those who really like things spicy, or pickled jalapenos . . . that's not me.  I am a lover of spicy but tame food.  ☺  Altogether these were, very, very nice!


*Street Style Beef Tacos*
Makes 8 nice big tacos
Printable Recipe 
 

Deliciously spiced meat filling in homemade tortillas with a beautifully favoured avocado topping.


For the meat filling:
2 pounds extra thin steak
the juice of one lime
2 onions, peeled and chopped
1 green chili, deseeded, trimmed and finely chopped
1  TBS mild chili powder or to taste
1 tsp ground cumin
1/2 tsp garlic powder
1/2 tsp onion powder
salt and black pepper to taste
non-stick cooking spray
 

for the Avocado topping:
2 frozen avocado halves, thawed
185g Green yogurt (3/4 cup)
3 TBS fresh lime juice
1 TBS white wine vinegar
1 tsp chipotle in adobo sauce or to taste
fine sea salt to taste
a handful of coriander leaves, chopped (cilantro)


For the tortillas:
280g plain flour
1/2 tsp salt
180ml water (3/4 cup)
3 TBS olive oil


You will also need your preferred taco topping:
shredded lettuce, grated cheese, sliced spring onions, lime wedges,
sliced black olives, chopped fresh tomatoes, sour cream etc.


To make the beef filling.  Trim your thinly cut beef steaks of any fat or sinew along the edges, and in the middle if required.  Roll them up tightly and cut crosswise into thin strips with a really sharp knife.  Cut the strips into bits with the sharp knife.  You want 1/4 inch or so small bits.  Alternately coarsely chop in a food processor. You want it chopped into bits but not ground. 

Put the steak into a bowl and add the lime juice and all seasonings.  Let stand for about 15 minutes. Spray a large skillet with the cooking spray and heat.  Add the meat, onions and green chili.Cook over medium heat, stirring frequently until the meat is browned. Add about 1/4 cup of water and simmer over very low heat while you make the topping and tortillas, stirring every now and then.  Don't let it boil dry. By the end of that time the meat will be very tender.  Taste and adjust seasoning as required. 

Stir the flour and salt together in a bowl for the tortillas.  Mix together the water and olive oil.  Stir in with a fork. You will have a very sticky dough.   Tip out onto a well floured surface and knead for a minute or so.  Cover and let rest while you make the Avocado topping. 

Mash the avocados well.  Stir in the yogurt, lime juice, vinegar, chipotle chili, sea salt and coriander leaf.  Cover and set aside. 

Knead your tortila dough a couple more times and then divide into 8 even pieces, rolling each into a ball with your hands.   Roll each out on a generously floured surface, to a 7 inch circle, using a well floured rolling pin.  If you stack them together place a piece of cling film or paper in between. 

Heat a large nonstick skillet and coat with cooking spray.  Cook the tortillas one at a time.  Cook on one side until golden brown blisters appear, flip over and repeat on the other side.  This will take about 1 minute per side over medium heat. Keep warm while you cook the remaining ones.  

To serve, spread warm tortillas with the avocado sauce, top with a portion of meat, and your favourite toppings.  Fold over and enjoy!


It won't be long before I made these again.  I might even make them for the Missionaries next time they come for supper, doubling everything up of course!  They are sure to have hearty appetites if I set these down in front of them!  I count these as one of my favourite things so far that I have cooked this year!  Provecho!!!  (That's Mexican for Bon Appetit!)

Note - Although I was sent the Strong Earth Avocado Halves free for testing purpose and review, I was not required to write a positive review.  Any and all opinions are my own.