Wednesday 28 February 2018

Scalloped Chicken Supreme


I cooked a roast chicken at the weekend.  We love roast chicken in this house.  You can't beat it. With a roast chicken you always get at least three meals from it.  


One on the day, one with the leftovers and another with the bones when you make a delicious soup.  With Roast Chicken, its always a winner/winner chicken dinner!


I have tried all sorts of recipes for roast chicken, all good  . . . but this one here is my absolute favourite. way of doing it.  

You always end up with a tender, well flavoured, moist chicken, with crisp skin.  Its so delicious!


After we have had our chicken dinner, I always like to strip the meat off the bones. I may be odd, but I don't like the flavour of chicken that has been chilled on the bone. 


I prefer it off the bone once it has been cooked and cooled. So just strip it off and chill it in the refrigerator, ready to use for casseroles or sandwiches, fried rice, etc.


Don't ever get rid of the bones!  That's a big no/no. 

I usually leave a few scraps of meat on the bones, and then you can either use them right away to make a tasty chicken stock, or freeze them in an airtight container to make a stock or soup on another day when you have  more time.  

A roast chicken just makes for great economy!


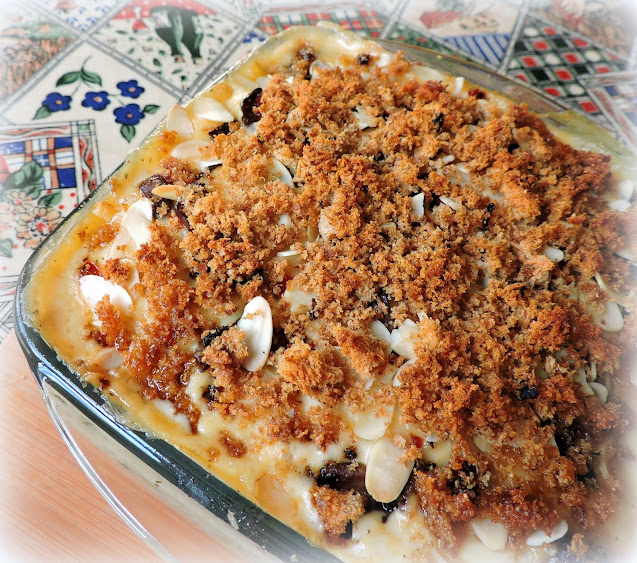
So, today I used the leftover meat to make us a delicious Scalloped Chicken, and not just a Scalloped Chicken, but a Scalloped Chicken Supreme!  

How can you not love it!  This recipe was adapted from one I found in Betty Crocker's Picture Cookbook, so its a really old recipe.  It is in the Supper Dishes Chapter.


I have updated it for my own use by using low fat evaporated milk, which cuts down on fat and calories.  

I also used my tip I shared the other day about blitzing the flour and chicken stock in a blender, along with the seasonings, pouring into a saucepan and then adding the cream, before thickening.

This cuts even further down on the fat and calories, but I have given you the full fat version recipe here. If you want any help in cutting back on it, just let me know.


I also used cooked brown rice, which adds favour and makes it lower GI. Every little helps. 


With its delicious sauce, tender chicken and layers of sauteed mushrooms and toasted almonds, this went down a real treat.  

Oh yes, I also used whole wheat bread crumbs on top, which I spritzed with low fat cooking spray instead of butter.


*Scalloped Chicken Supreme*
Serves 8

 
How can you not love something with a delicious name like this?  Its impossible! 

For the gravy/sauce:
6 TBS butter
6 TBS plain flour
1 tsp salt
1/8 tsp black pepper
480ml chicken stock (2 cups)
240ml single cream (1 cup)
1/4 tsp celery salt
1/4 tsp poultry seasoning


You will also need:
325g of cooked rice (2 cups)
240ml chicken Stock (1 cup)
375g of cooked chicken, torn up or cut into cubes (3 cups)
85g flaked toasted almonds (1/2 cuup)
75g of sliced mushrooms, sauteed (1 cup)
2 TBS finely chopped red pepper
a handful of buttered bread crumbs


Pour the second amount of chicken stock over the cooked rice, and stir.  Set aside until you need it.
First make the gravy. Melt the butter in a saucepan.  Whisk in the flour and cook for several minutes.  Whisk in all og the seasonings/herbs.  Slowly whisk in the stock and then the cream.  Cook, whisking constantly, until the mixture bubbles and thickens.  Set aside and keep warm.

Preheat the oven to 180*C/350*F/ gas mark 4.  Butter an 12 by 7 inch deep baking dish.  Begin layering in as follows: Half the rice, half the chicken, half the sauce, half the mushrooms, half the peppers and half the toasted almonds. Repeat.  Top with the buttered bread crumbs.

Bake in the preheated oven for 40 to 45 minutes.  Serve hot with your favourite vegetables on the side.

Scalloped Chicken Supreme


Here is the Printable Recipe!  I hope you will want to make this and that you enjoy it!

Yield: 8
Author: Marie Rayner
Scalloped Chicken Supreme

Scalloped Chicken Supreme

Prep time: 20 MinCook time: 45 MinTotal time: 1 H & 5 M
How can you not love something with a delicious name like this? Its impossible!

Ingredients

For the gravy/sauce:
  • 6 TBS butter
  • 6 TBS plain flour
  • 1 tsp salt
  • 1/8 tsp black pepper
  • 480ml chicken stock (2 cups)
  • 240ml single cream (1 cup)
  • 1/4 tsp celery salt
  • 1/4 tsp poultry seasoning
You will also need:
  • 325g of cooked rice (2 cups)
  • 240ml chicken Stock (1 cup)
  • 375g of cooked chicken, torn up or cut into cubes (3 cups)
  • 85g flaked toasted almonds (1/2 cuup)
  • 75g of sliced mushrooms, sauteed (1 cup)
  • 2 TBS finely chopped red pepper
  • a handful of buttered bread crumbs

Instructions

  1. Pour the second amount of chicken stock (1 cup/240ml) over the cooked rice, and stir. Set aside until you need it.
  2. First make the gravy. Melt the butter in a saucepan. Whisk in the flour and cook for several minutes. Whisk in all of the seasonings/herbs. Slowly whisk in the stock (2 cups/480ml) and then the cream. Cook, whisking constantly, until the mixture bubbles and thickens. Set aside and keep warm.
  3. Preheat the oven to 180*C/350*F/ gas mark 4. Butter an 12 by 7 inch deep baking dish. Begin layering in as follows: Half the rice, half the chicken, half the sauce, half the mushrooms, half the peppers and half the toasted almonds. Repeat. Top with the buttered bread crumbs.
  4. Bake in the preheated oven for 40 to 45 minutes. Serve hot with your favorite vegetables on the side.
Did you make this recipe?
Tag @marierayner5530 on instagram and hashtag it #marierayner5530


I was able to very successfully cut the recipe in half as there are  only the two of us, and we now have leftovers of this tasty casserole to eat tomorrow.  So, really from this chicken I will have gotten 4 meals, and I still have some roast chicken in the refrigerator to do a fried rice or some such.  You really can't go wrong with a roast chicken, you really can't!  Bon Appetit! 


This content (written and photography) is the sole property of The English Kitchen. Any reposting or misuse is not permitted. If you are reading this elsewhere, please know that it is stolen content and you may report it to me at: mariealicejoan at aol dot com Thanks so much for visiting. Do come again!  


Tuesday 27 February 2018

Curried Cauliflower Soup


I allowed myself to be tempted into buying a huge bag of cauliflower florets the last time I was at Costco. (I also bought a huge bag of broccoli!)  There are worse things I could have been tempted by, let me tell you! That place is a veritable Aladdin's cave of scruminess. Don't get me started on the cakes, pies and muffins.  I have never bought them, but boy oh boy are they ever tempting! Its only because there are only two of us and I have limited freezer space that keeps me from caving in and buying those! (Especially the muffins!)  So anyways, I reckon buying big bags of vegetables is not all that bad of a temptation to succumb to in comparison! 

Monday 26 February 2018

Sweet Potato, Broccoli & Cheese Bake


I have always loved potatoes. They have long been my favourite vegetable.  As a type 2 Diabetic however, these days they are more than often off my menu. I have had to rethink a lot of my old favourites and try to create new favourites. Oddly enough new potatoes are not as bad for you as old potatoes, and sweet potatoes are actually the wisest choice of all the potatoes. High in fibre and vitamins, they are also considered to be low GI, which means they won't spike your blood sugars as much as regular potatoes.  Great news for me, because I also love sweet potatoes!


And by that I don't mean the sugar and marshmallow laced variety that you will see on some tables, I like them just plain, with a bit of salt and pepper, nothing else needed . . .  well sometimes a bit of garlic and some parmesan cheese, but I am more of a savoury sweet potato lover rather than a "sweet" sweet potato lover, if that makes sense.


A casserole I used to love was made using lightly fried potatoes and onions . . .  and cheese, all mixed in and baked until ooey gooey fabulous.  Maybe with a bit of bacon scattered over top. You can well imagine how very tasty it was.  But not so good for you.  This is my rethink on that dish.


I switched out the regular potatoes for sweet potatoes, and I didn't fry them. Nope. I cut them into chunks and par boiled them.  I didn't fry onions either. I finely chopped some red onion and mixed it into the sweet potatoes, along with a bit of salt and pepper.


I nixed the bacon and replaced it with another "B" word, broccoli, which we also happen to love in this house.  Cut into florets and lightly blanched, it works perfectly in this.


I use a lower fat cheddar cheese. Get a whole block and crumble it yourself. It melts better and you get nice gooey nuggets which are really pleasing to the tongue.


Half the sweet potato, onion mix is layered in a baking dish  and topped with half of the crumbled cheese . . . repeat and then bake until hot and bubbling.


This is really REALLY good.  In fact I like it better than the old version.  Colourful, delicious,and filled with lots of fibre,  it is helping on my road towards better and healthier eating. I don't feel deprived and I am eating a delicious rainbow of taste. Nom Nom!


*Sweet Potato, Broccoli and Cheese Bake*
Serves 4

There's no doubt about it, this is delicious! 

2 pounds sweet potatoes, peeled and cut into 1 inch cubes
2 large broccoli crown, broken into florets
2 TBS finely minced red onion
fine sea salt and coarse black pepper to taste
125g strong cheddar cheese, crumbled (1/4 pound)


Preheat the oven to 200*C/400*F gas mark 6.  Lightly spray a shallow gratin dish large enough to hold both vegetables with some light cooking oil spray, or lightly butter.  Set aside.

Bring a large saucepan of lightly salted water to the boil.  Add the cubed sweet potato. Bring back to the boil and then cook for about 10 minutes, until semi tender, adding the broccoli florets in the last five minutes.  Drain well and then refresh under cold water.  Toss together in a bowl with the minced onion and some salt and black pepper to taste.  Layer half of the vegetables in the baking dish.  Scatter half of the cheese crumbles on top.  Layer on the remaining vegetables and scatter with the remaining cheese. Bake for 15 minutes until golden and bubbling.  Serve hot.


This was so delicious I can't quite remember what I served with it??  Whatever it was, it obviously paled in comparison to this delicious bake. The leftovers the next day served with some salad were also mightly tasty.  I hope you will give it a go!  Bon Appetit! 


Sunday 25 February 2018

Monkey Face Cookies


This happens to be one of our favourite cookies and I can't believe I have never showed it to you before today!  I went to bake them this morning, and was looking for the recipe in my online recipe file, only to  discover that it wasn't there, which meant I had never baked them for the blog.  
 
I had to rifle through my big blue binder for the recipe, which was so not a problem, because I love rifling through my big blue binder!


This is a very old recipe which has a story attached to it.  I love old recipes, and I especially love old recipes with stories attached! Don't you???  
 
Apparently the original recipe was found pasted on a piece of paper pasted into the drawer of an old table, hand written in fading ink, in an old fashioned script . . . "For Ella."  
 
I don't know how true the story is, or who Ella was, but the story certainly has its charm, and I never fail to think about Ella and her charms whenever I bake them.  She must have been very special indeed to have someone want to bake these cookies for her!!


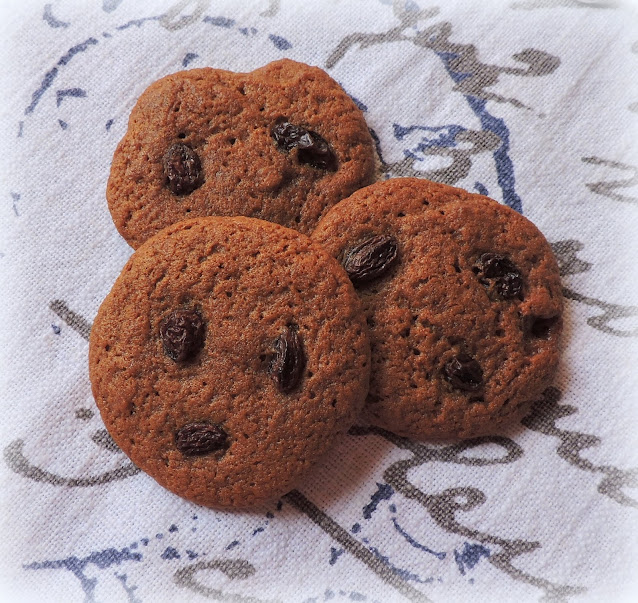
Why are they called Monkey Face Cookies?  Because of the raisins which you apply to the tops of them prior to baking.  
 
Two eyes and a mouth, which settle themselves into cute little droll expressions during baking, each one seeming to say something different!


Some looking surprised  . . . others sad . . .  some angry, and still others very nonchalant . . . or even mischevious . . . .  kind of like monkeys!


Children love them.  Partly because of the name, and partly becaus they are delicious!  Its fun to pick the raisins off and eat them separately . . . its fun to eat them all together.  Its just fun to eat them!


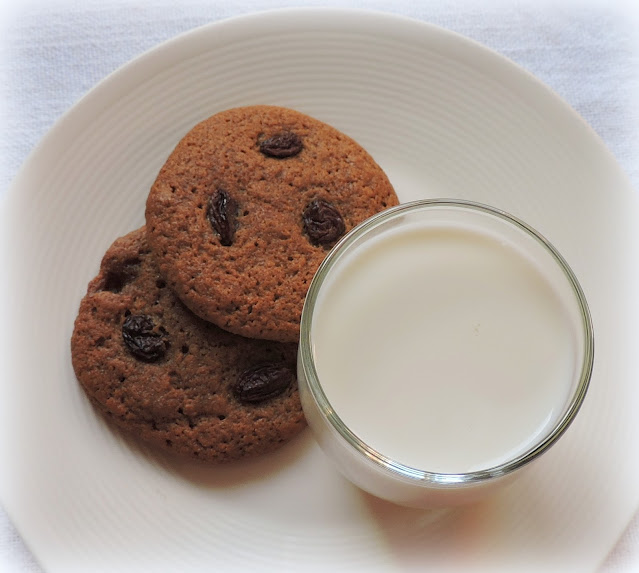
They go down really well with an ice cold glass of milk, be you a child or a grown up!  Molasses cookies always taste wonderful with cold milk.  That is my considered opinion at any rate!


See that one with the little sticky brown sugar nugget in it?  I call dibs on that one!  Its mine! Yum!  Slightly chewy, and lightly spiced, these Monkey Face Cookies are good old fashioned pleasers.  There's no denying it!


*Monkey Face Cookies*
Makes about 4 dozen 

Children love these. The name comes from the funny expressions that the raisins make on the cookies after they are baked. This is a very old recipe. 

110g of white vegetable shortening (1/2 cup, Crisco or in the UK Trex)
200g soft light brown sugar (1 cup, packed)
120ml molasses (1/2 cup)
120ml sour milk (1/2 cup)
1 tsp vinegar
350g plain flour (2 1/2 cups)
1 tsp bicarbonate of soda (baking soda)
1/2 tsp salt
1/2 tsp ground cinnamon
1/2 tsp ground ginger
raisins for decorating (a large handful)


Preheat the oven to 190*C/375*F/ gas mark 5.  Line two large baking sheets with baking paper. Set aside.

Cream together the shortening, brown sugar and molasses until light and creamy. Beat in the milk and vinegar. Sift together the flour, soda, salt, cinnamon and ginger.Stir this into the creamed mixture, mixing it in thoroughly. Drop by heaped teaspoons onto the prepared baking sheets, leaving 2 1/2 inches in between each to allow for spreading. Place 3 raisins on each for eyes and mouth.

Bake for 10 to 12 minutes, until set. Let sit on the baking sheets for several minutes before removing to a wire rack to cool. Store in an airtight container.


Oh this one does look rather sad doesn't he?  I think I will gobble him up and put him out of his misery.  Bon Appetit!

Note - there are no eggs in this recipe, don't worry I have not left them out. The recipe is exactly as written. 


This content (written and photography) is the sole property of The English Kitchen. Any reposting or misuse is not permitted. If you are reading this elsewhere, please know that it is stolen content and you may report it to me at: mariealicejoan at aol dot com Thanks so much for visiting. Do come again! 

Follow my blog with Bloglovin


Saturday 24 February 2018

Malvern Apple Pudding


I decided to spoil Todd yesterday and made him a Malvern Apple Pudding. This is an old, old recipe which I got from a small booklet entitled Favourite Shakespeare Country Recipes.  It differs from most of the recipes for Malvern Pudding out there in that it is a steamed pudding. Most of the recipes I discovered when researching it were actually baked and included stewed apples and a kind of custard.  I even found a few that didn't have apples in them at all but berries.


Malvern is a spa town in Worcestershire, in an area which is known for its great beauty at the foot of the Malvern hills. At its centre, Great Malvern, is an historic conservation area, which was very popular during Victorian times due to the natural mineral springs in the vicinity.  I am not sure entirely as to the history of this dish and which is even the proper way of preparing it, the baked or the steamed.  Todd loves a steamed pudding however and I knew he would really enjoy this one as it is stogged full of lovely bits of apple and currants, or sultanas.  Whichever you happen to have in the cupboard will work.  I dare say dried cranberries would also work well.  I used sultanas today.


I think these steamed puddings take Todd back to his school boy days and his school dinners.  I know they get a bad rap, but he never minded school dinners.  With meat, two veg and a pudding, he quite enjoyed them, especially the puddings, and the stodgier the better!


This actually isn't that stodgy. Its a bit like a steamed apple cake, moist and filled to the brim with lovely bits of apple and studded with sweet sticky sultana raisins.  It is also flavoured with apple brandy. (Calvados)  You can use ordinary brandy if you want.  I happen to always have a bottle of Calvados in the larder, so that is what I used.


The serving suggestion was to serve it warm with either pouring cream, custard or brandy cream.  Of course my custard loving husband chose custard.  He loves his custard. You can find my recipe for that here.


Its not that difficult to make and is not at all overly sweet, so it goes very well with this pudding. Myself, I would probably like vanilla ice cream. But that is the North American in me coming out!  And I guess ice cream is really frozen custard after all, so its not that different, and the hot pudding melts it so you get a bit of hot and cold, altogether very scrummy to my way of thinking!


I did taste a tiny corner of this and I have to say it is really delicious.  It smelled heavenly when I tipped it out of the bowl, with all of the apples.  There is a slight lemon tang as well, from the use of lemon zest and a tiny bit of juice. Simple and uncomplicated, I just know your family will love it as well.  Also, there is no need to buy a special pudding basin to steam it in. Today I used my medium sized tempered glass mixing bowl and it worked just fine!


*Malvern Apple Pudding*
Serves 4 - 6

This is a simple steamed apple pudding, flavoured with lemon, currants and apple brandy. You can use normal brandy if you can't get the apple. 

125g butter (1/2 cup)
115g sugar (2/3 cup)
2 medium free range eggs, beaten
140g flour (1 cup) sifted together with a pinch of salt
4 eating apples, peeled, cored and finely chopped
the grated zest of one lemon
1 tsp lemon juice
30g dried currants or sultanas (3 TBS)
2 to 3 TBS apple brandy
To serve:
Brandy cream, custard or pouring cream


Cream the butter and sugar together until light and fluffy.  Beat in the eggs a bit at a time. Stir in the flour to mix thoroughly.  Stir in the apples, lemon zest, lemon juice, currants and brandy, mixing well together. (Make sure you cut your apples in a fine dice so that they will cook through!)

Butter a 2 1/2 pint pudding basin really well. (5 cup)  Place a small square of baking paper in the bottom to allow for ease of unmolding when done.  Spoon the apple mixture into the basin, smoothing over the top.  Lay a sheet of baking paper over a sheet of aluminium foil. Pleat in the centre and spray the paper with oil spray  Place on top of the pudding basin and secure around the edges, sealing well, with some kitchen twine.  Place onto a trivet in a large saucepan (with a lid) and fill the pan to halfway up the side of the puddig basin with boiling water. Cover and steam for 1 1/2 hours, topping up with boiling water as necessary. When done a skewer inserted into the pudding should come out clean.   Unmold onto a warm serving plate.  Serve warm, cut into wedges with pouring cream, brandy sauce or custard.

Note - for a trivet I use a large metal canning jar ring, which works very well


It won't be long before Spring will be here and we won't be wanting these winter desserts, so I thought I would get in one more before we move onto other things.  If you are looking for a tasty, yet simple dessert to feed your family this weekend, look no further. This one is all that and  more!  Bon Appetit!


Friday 23 February 2018

Lemon Sauced Salmon Cakes


These salmon cakes are one of our absolute favourite suppers.  They are very quick and simple to make and don't use anything out of the ordinary. In fact I am betting you have everything in your larder and refrigerator to make these for your tea tonight!


These crisp tender little salmon cakes are made using tinned salmon. You could also use leftover poached salmon as well if you wanted to.  But the tinned salmon is very convenient.  I always keep several tins of the boneless skinless salmon in the cupboard to use for things like these cakes.


I use minced red onion in mine, (for a bit of colour), but you can just as easily use plain brown onions or even spring onions, which also add a bit of colour.  Other than that, you need nothing more than a bit of cornmeal, some flour, eggs and cream. I use no-fat evaporated milk instead of the myself. It helps to save on fat and calories, which works very well, but if you aren't bothered those things, go ahead and use the cream!


I have cut down on some of the fat for frying them as well.  The only way to get that crisp exterior is to fry them, baking doesn't cut it.  But with only a tsp each of butter and olive oil, its not too bad altogether.


The lemon sauce is luxurious.  No two ways about it.  With butter, flour, lemon juice, water and a bit of seasoning and some sugar, it is exellent spooned over the cakes.  The sauce is so flavourful that a little bit goes a very long way.


These salmon cakes are crisp and flavourful . . .  the sauce rich and luxurious . . .  the two together are quite heavenly.


They go very well with steamed new potatoes and a green vegetable.  If you didn't want to make the lemon sauce, you could also make  creamed peas to spoon over the cakes.  I can promise you thugh, however you choose to make them, you are sure to enjoy!  Who says delicious needs to be complicated!


*Salmon Cakes with a Lemon Butter Sauce*
Serves 4 

These are delicious and very easy to make.   


For the salmon cakes:
2 large free range eggs
60ml of heavy cream (1/4 cup)
45g of cornmeal (1/4 cup)
4 TBS minced red onions
2 TBS plain flour
1/4 tsp baking powder
pinch black pepper
1/2 tsp salt
1 large can of salmon, drained, skinned and boned or two smaller ones
(I buy the boneless, skinless salmon.  It comes in a 125g (6-oz) tin.  I use two of those)
1 tsp each butter and olive oil for cooking
For the Sauce:
the juice of one large lemon
120ml of cold water (1 cup)
65g butter (1/4 cup)
1 1/2 TBS plain flour
1 TBS sugar
fine sea salt and freshly ground black pepper to taste


First make the Sauce.  Whisk together the lemon juice and water.  Melt the butter in a saucepan.  Whisk in the flour and sugar.  Cook, stirring for about a minute.  Slowly whisk in the water/lemon mixture.  Cook and stir over medium heat until the mixture boiled and thickens.   Season with some salt and pepper to taste.  Taste and adjust sweetness if necessary.  Keep warm.

To make the Salmon Cakes, beat the eggs.  Beat in the cream, cornmeal, minced onions, flour, baking powder, salt and pepper.  Flake the salmon into the mixture.  heat the butter and oil in a large non-stick skillet, over medium heat.  Once heated, shape heaped dessertspoons of the salmon mixture into a ball and then flatten out.  Place into the hot fat. Cook for about five minutes per side, until golden brown.

Serve the warm salmon cakes with the lemon sauce for spooning over top.  Delicious!


Its also very easy to cut the quantities for the salmon cakes in half to serve fewer people. I do it all the time, as there are only two of us.  I have never cut the sauce recipe in half, but I dare say it wouldn't be that difficult to do so.  In any case you are sure to enjoy!  Fish for Friday, Bon Appetit!