Saturday 31 March 2018

Farmhouse Cheddar Soup


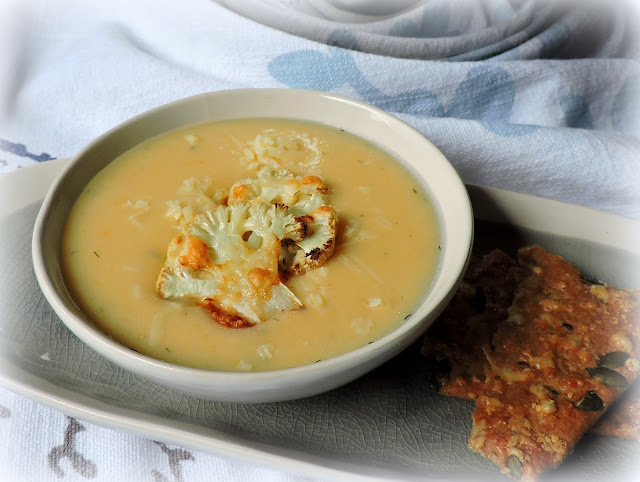
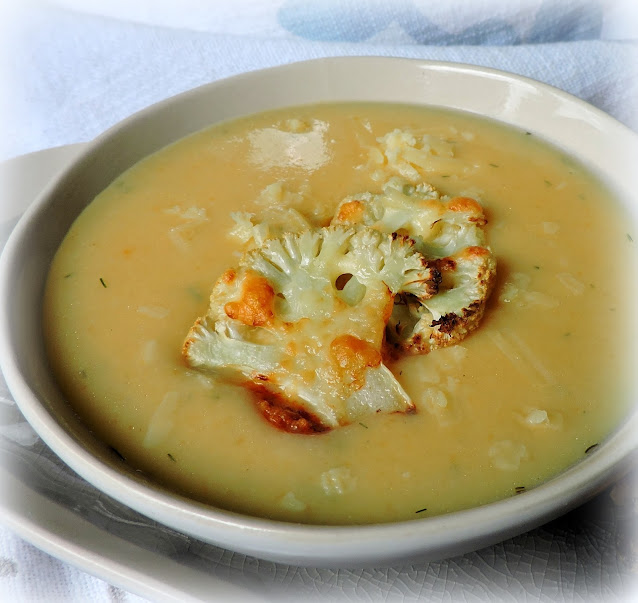
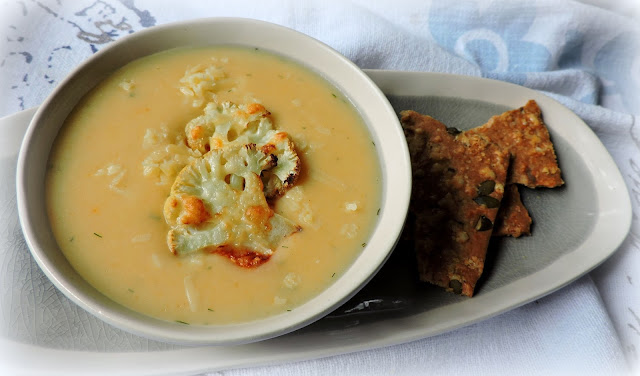
Farmhouse Cheddar Soup. This delicious vegetable soup is one that I have had resting in my big blue binder for many, many moons now. 
 
 
The writing on the page is fading and the paper is all splattered and stained . . .  a testimony to the deliciousness of it,  as it tells the viewer that this is a much beloved and often made recipe!


It really uses nothing out of the ordinary.  In fact it uses things that more often than not I have in my kitchen, larder and refrigerator.


Cauliflower, potatoes, carrots, onions  . . .  garlic.  Some good vegetable or chicken stock  . . .


And of course a good strong farmhouse cheddar.  Oh, we do love a good cheddar in this house and this soup highlights the very best of its flavour.  


It is creamy and rich and quite moreish.


Even my husband goes back for a second helping, which is really not like him.  


He is usually a one serving kind of a guy, but when this is on the menu, he always goes back again.


Today I cooked some cauliflower croutons for on the top.  Simply cut a few florets of cauliflower into thinnish slices, about 1/4 inch thick, and place them onto a baking tray you have lined with some paper.


Spritz them with a bit of low fat cooking spray. One squirt each works well. And then sprinkle them with a bit of the reserved cheddar.  


Heat your oven to as high as it will go and pop them in until they are tinged with golden crunchy bits.  Soooo tasty. (It takes about 10 minutes max.)


They look really nice floating on top of hot bowls of this delicious soup.  Dressing it up really nice.  


Also if you are low carbing it, make some extra's for snacks.  So yummy!  (Even the dog loves them.)


Farmhouse Cheddar Soup


*Farmhouse Cheddar Soup*
Serves 8


This soup is delicious. You can reserve a few florets of the cauliflower as well, and saute them in a bit of butter until browned for a garnish as well.  It does look very pretty, but so do toasted bread croutons, especially if you cut them out with a specially shaped cutter!  


2 pints  vegetable or chicken stock (4 cups)
2 large potatoes, peeled and chopped
1 head of cauliflower, trimmed and broken into florets
1 large onion, peeled and chopped
3 cloves of garlic, peeled and minced
249g  shredded strong cheddar cheese, divided (2 cups)
1 1/2 tsp salt
1/4 tsp dried dill tops
1/4 tsp dried English Mustard powder
1/8 tsp ground white pepper
180ml whole milk (3/4 cup)


Combine the stock, potatoes, cauliflower, onions, carrots and garlic in a large pot.  Bring to the boil, then reduce the heat.  Cover and simmer for about 15 minutes, or until all the vegetables are tender. 


Remove from the heat and allow to cool for 15 minutes.  If you have a stick blender, use it to puree the soup until it is smooth.  If you don't, you will have to use either your food processor or a standing blender to do it in small batches.  Proceed with care though as you can get a nasty burn if you are not careful.  The heat of the soup creates an expansion of air and it can blow the lid right off your blender!  If I am using this method I always put a towel over the top of the blender and hold it down tightly! 


Return the pureed soup to the pan and whisk in the milk, 180g (1 1/2 cups) of the cheddar cheese, dill, dry mustard and white pepper.  Taste and adjust seasoning as necessary.  Cook, stirring until all the cheese is melted and the soup is smooth and hot.  


Serve in heated bowls with the rest of the cheese sprinkled on top.  


Farmhouse Cheddar Soup.  Just the name of this soup  brings up a lovely picture in the mind, of an old farmhouse table with a checkered red and white table cloth and the family all gathered around it at the end of the day with steaming bowls of this delicious soup in front of them and plenty of crusty bread.  Maybe that it a bit too Walton's-like, but hey, it made me smile.  If you are looking for a wholesome, delicious soup to give the family (and lets face it there are not too many soups days left before the warmer weather hits) look no further.  This is the "one!"  Bon Appetit! 


This content (written and photography) is the sole property of The English Kitchen. Any reposting or misuse is not permitted. If you are reading this elsewhere, please know that it is stolen content and you may report it to me at: mariealicejoan at aol dot com Thanks so much for visiting. Do come again! 

Follow my blog with Bloglovin


Friday 30 March 2018

Glazed Easter Bread


I loved Easter when I was a child.  We didn't get a lot of candy really, a chocolate bunny, some coloured candy eggs, with a white nougat filling, maybe a few chocolate eggs, and coloured Real Easter Eggs. 

The eggs were always raw, and my mother would poke a hole into them with a darning needle and blow them out so we could have scrambled eggs for breakfast.  

Then she would string the empty egg shells onto yarn and we would wear them like a necklace all day, trying to see how long we could go without them breaking up.  


It was a time also of reflections on the meaning of Easter and the Saviour's sacrifice.  There would be special activies at Sunday School and church and of course we would celebrate on the Sunday with a lovely ham dinner baked by my mom.  A

nother of my favourite memories is of the beautiful Easter Breads that my Aunt Thelma would bake and send up to us.  They were always iced and decorated with candied fruit. We loved them.

 
Aunt Thelma & Mom, circa 1936  

Aunt Thelma was my mother's oldest sister.  She didn't have a lot, but she was so very generous to share what she had with us. She brought up five children all on her own, and she did it on her hands and knees cleaning other people's houses.  

Her own home was spotless and she was a fabulous cook.  She made the best Potato Rolls.  I wish I had her recipe, and I wish I had the recipe for those lovely Easter Breads she used to make us as well. 

Alas she has been gone for a while now and nobody has the recipes.  I think of her often and with love, but most especially at Easter when I think of her loving generosity to us.


This recipe today is from one I put together in memory of my dear Aunt. I can't promise that it is as good as hers was, but it is pretty good and not all that hard to make.  

I think hers was a bit lighter in texture, but that could just be the rose coloured glasses of my memory doing that.


Its an easy sweet dough, containing eggs, and makes one braided loaf.  Make sure you warm the milk to blood temperature before you add the yeast and sugar. 

It is also a sticky dough, but if you use a well floured board when you are kneading it, this isn't a problem.


Its very easy to shape.  

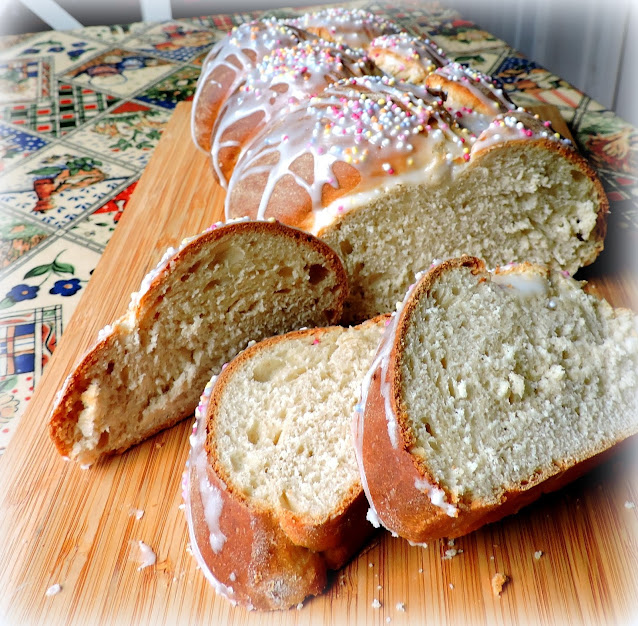
Just cut your risen dough into three, shape each into a longish log (maybe 12 inches in length) and then braid them together. 

Fold the ends under to finish them off nicely, and then you pop it onto a baking sheet to raise a bit more.


I flavoured the dough with some ground cardamom . . .  I think cardamom goes wonderfully in sweet breads such as this.


You finish the baked and cooled loaf off with a simple icing sugar and milk drizzle and then sprinkle it with some candy sprinkles for colour.  

I didn't have any cherries today, or I would have used them instead.


This really is a beautiful loaf.  

I am not a great bread baker and the fact that it turned out well for me is a testimony to the greatness of the recipe!  Yahoo!


It has a beautiful even crumb, without any big holes.  And the glaze is just the right touch without being too sweet. 

I am not normally overly fond of sprinkles, but must needs do whatever you have to to make it look all pretty for Easter.


*Glazed Easter Bread*
makes 1 loaf 

Created in the memory of my Aunt Thelma who used to bake us beautiful Easter Breads every year. 

For the bread:
350g white bread flour
45g caster sugar (1/4 cup)
160ml warm milk (2/3 cup)
2 tsp active dry yeast
2 TBS softened butter
2 large free range eggs
1 tsp ground cardamom
1 tsp salt
For the icing:
260g icing sugar (2 cups)
2 TBS milk
sprinkles


Mix the milk and yeast in a bowl.  Let stand for five minutes.  Stir in the sugar, butter, flour, ground cardamom, and salt.  Blend well together with an electric whisk.  Beat in the eggs, one at a time. The dough will be fairly sticky.  

Tip out onto a well floured bread board, and knead for about five minutes until you have a smooth non-sticky dough, shape into ball, drop into a lightly oiled bowl, turning to grease the ball. Cover with a clean tea towel and leave to rise for an hour in a warm place. 


Tip out onto a lightly floured surface and divide in three.  Shape each piece into a long thin rope.  Braid the ropes together into a plait. Tuck ends under and place onto a parchment paper lined baking sheet.  Lightly cover with a clean tea towel and allow to rise for about half an hour.


Preheat the oven to 180*C/350*F gas mark 4.  Bake the bread in the preheated oven for 20 to 25 minutes until golden brown and the loaf sounds hollow when tapped on the bottom.  Place onto a wire rack to cool completely.


Whisk together the icing sugar and milk to give you a smooth drizzle.  Spoon over the loaf of bread and sprinkle with sprinkles.  Let set before cutting into slices to serve.


My husband enjoyed some sliced and buttered and spread with plum jam.  He does love his bread and jam.  This bread would make a welcome addition to your Easter morning breakfast.  Bon Appetit! 


This content (written and photography) is the sole property of The English Kitchen. Any reposting or misuse is not permitted. If you are reading this elsewhere, please know that it is stolen content and you may report it to me at mariealicejoan at aol dot com. 


Follow my blog with Bloglovin

Thursday 29 March 2018

Easy Caesar Chops


I'm almost ashamed to show you this recipe today as it is such an easy one that you will probably be smacking yourself on the forehead and saying, "Why didn't I think of that!" 

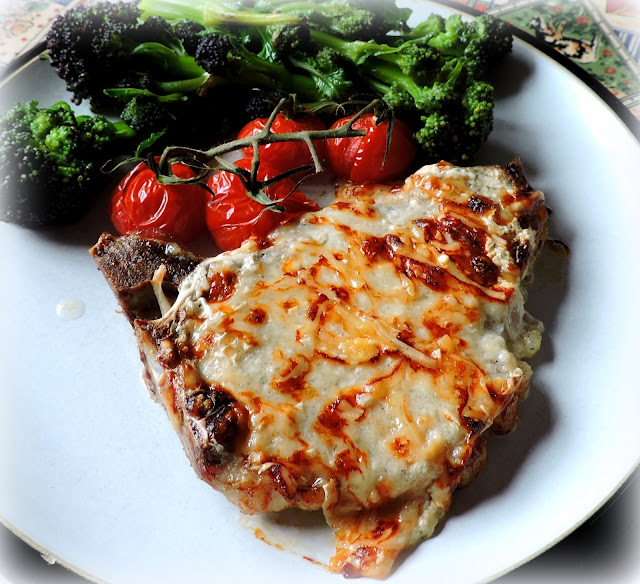
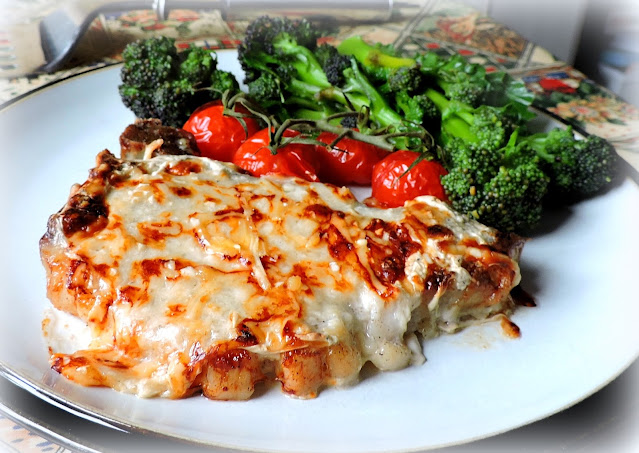
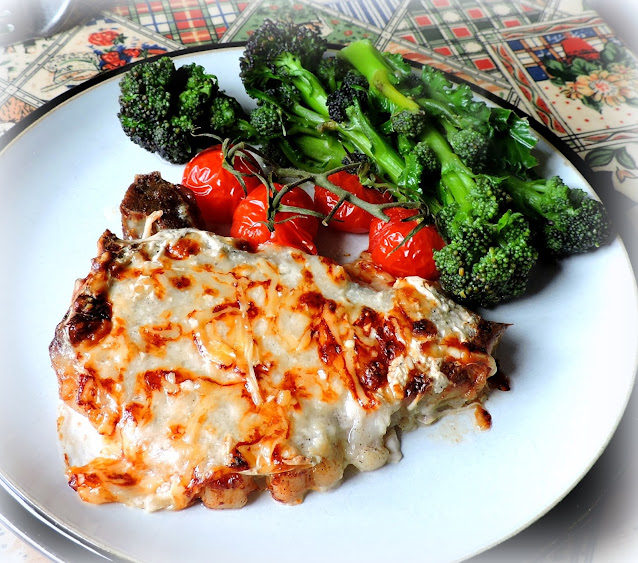
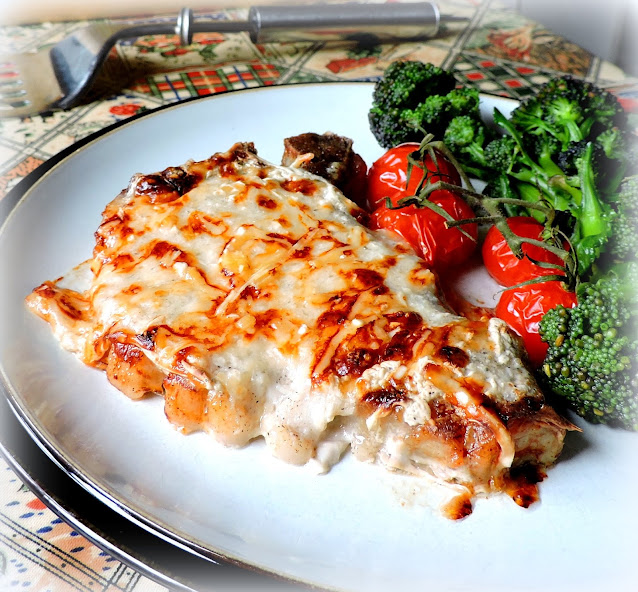
Easy Caesar Chops. 

Three ingredients and about half an hours baking time, and presto!  You have delicious pork chops that your family are really going to fall in love with.


Today I used bone in chops.  You could use boneless chops, but I actually prefer the ones with the bones attached. Almost like the T-bone equivalent of a pork chop. 

Mine are about 1/2 inch thick.  I love that tender meat that is next to the rib bone. Its my favourite part, so filled with flavour.


I always slash the fatty edge of my chops at intervals, which helps to prevent them from curling up when you cook them.  

They stay nice and flat as you can see above.   I hate it when chops curl all up. They don't look nice and I think they are tougher.

Just a handy tip I know you will thank me for at some point.


Its as simple as laying the chops out in a single layer on a baking tray. I lightly season them with sea salt and black pepper.  

I line the tray with foil first, which I spritz with a low fat cooking spray. This helps prevent sticking.


I spread each chop with some creamy Caesar salad dressing. You could use more, but I find a tablespoon is just about the right amount.  

You don't want it to be gloopy or overly thick. Too much would totally overpower the dish.


After that you sprinkle on some grated Parmesan cheese.  Just sprinkle it evenly over top of each chop. 

I like to use a coarsely grated Parmesan Cheese for this. I find that if it is too finely grated it kind of melts into the dressing and you don't get as nice a finish.


Then you just pop them into the oven and bake. 

I like to add some clusters of cherry tomatoes on the vine to the pan for an added extra, but you can leave them out if you wish. 

 I like them and think they add an extra layer of flavour, not to mention some colour.


In any case I am sure that this is bound to become a favourite in your household as it is a favourite in ours.  

A favourite because it is basically no fuss, no muss, and because they are quite simply delicious!  Tender, juicy and full of flavour!


*Easy Caesar Chops*
Serves 4
 

 Delicious and tender, everyone loves these! 


4 pork loin chops, preferably with the bone in
salt and black pepper.
4 TBS creamy Caesar Salad dressing
8 TBS freshly shredded Parmesan Cheese
4 clusters of cherry tomatoes on the vine (optional)


 Preheat the oven to 190*C/375*F/Gas mark 5.  Line a baking tray with foil and then spritz lightly with low fat cooking spray. Slash the fatty edge of the chops at 1/2 inch intervals to help prevent them from curling up.  Place them onto the prepared baking tray. Season lightly as required. Top each with 1 TBS of the salad dressing and spread it out to cover the chop with the back of a spoon.  Sprinkle 2 TBS of the cheese evenly over top of each chop.  Place clusters of cherry tomatoes around the chops on the baking tray.


Bake in the heated oven for 35 to 40 minutes, until the pork is done and nicely browned.  The juices should run clear.  Place on heated plates along with your desired accompaniments and serve!


These really are quite delicious.  I have another recipe that I use which you need to dust the chops with flour etc. first, but this cuts out that step entirely and to be honest, these are every bit as tasty!  

Like I said, no fuss, no muss. I am all for that!  Bon Appetit!  


Easy Caesar Chops

This content (written and photography) is the sole property of The English Kitchen. Any reposting or misuse is not permitted. If you are reading this elsewhere, please know that it is stolen content and you may report it to me at mariealicejoan at aol dot com. 

Follow my blog with Bloglovin

Wednesday 28 March 2018

Swiss Roll


Funny how things are named different things in different places.  In Canada, we would call this a jelly roll . . . over here it becomes a Swiss Roll . . . and I have no real idea of where the name came from, but if you click here, you can find out all sorts of things about them.  
 
I found it quite fascinating, and what was really interesting was that there seems to be a similar creation in a lot of cultures . . . a rose by any other name and all that!!  
 
At the end of the day it doesn't really matter what it's called . . . it only really matters that it tastes good and goes down well with a hot cuppa! 


Swiss Roll is the perfect cake to bake.  It goes together very quickly and you can have one done and finished and be eating it well within half an hour,seriously!!  
 
But . . . that's not the best news.  The really good news is that . . . IT'S COMPLETELY FAT FREE!


I know . . . what a bonus!!  I am all for fat free . . . of course that doesn't mean it's calorie free . . . and you still do have to bear in mind that extra calories are extra calories and they still add up.
 
It is nice to know, howver, that if you are going to indulge in a treat, it can at least be that little bit less bad for you than say . . .  a chocolate brownie or some other decadent indulgence!! 


Yep!  Not an ounce of fat to be seen.  Well . . .of course that is all depending on what you fill it with.  
 
Obviously cream and curds and caramel are going to be more fattening . . . but using preserves . . . well, there's no fat in there, and if you get the low sugar jam, or the sugar free jam, how bad can that be, really???


It's really quite a versatile cake actually.  You can fill it with all sorts . . . whipped cream and fresh fruit, any flavour of jam which strikes your fancy.

Then there is lemon curd . . . caramel . . . chocolate . . . it's really all up to you and what you feel like eating!!


Todd,  being the old fashioned fella that he is . . .  likes  it plainly filled with just raspberry jam.  Happily I quite concur!  I am a real jam lover myself I have to say! 
 
It REALLY is quite scrummy.  Nom Nom!!  Enjoy!!  (I do think a dollop of whipped cream is also very nice on this . . . just sayin'!!)


*Swiss Roll*
Makes one 13 inch long roll, serving 6 to 8 people
 

A fatless sponge, rolled up with a jam filling.  You can of course get more creative and fill it with all sorts, such as whipped cream and fresh fruit, Lemon curd, etc.  Quick and easy to do and makes a fabulously quick teatime treat! 


4 large free range eggs
95g (1/2 cup) caster sugar
100g self raising flour (a scant 3/4 cup)

caster sugar to sprinkle

To fill:
4 heaped tablespoons of strawberry or raspberry jam
(I go for the larger amount rather than the smaller)  


Preheat the oven to 220*C/425*F/Gas mark 7.  LIghtly butter a 13 by 9 inch swiss roll tin and then line with baking parchment.
 

Place the eggs and sugar in a large bowl. Whisk with an electric mixer on high until the mixture is light and frothy and the whisk leaves a ribbon train when lifted out of the bowl.  Sift the flour into the mixture, carefully folding it in at the same time.  Do not over mix or your cake will not be as light as it could be.  Turn into the prepared tin and gently shake it to level it out, making sure that it spreads into the corners. 


Bake in the preheated oven for about 10 minutes, or until the sponge is golden brown and has begun to shrink from the edges of the tin.  


While the cake is cooking lay a piece of parchment paper on the counter top larger than the tin the cake is cooking in.  Sprinkle evenly with several tablespoons of caster sugar. 


Invert the baked cake onto the sugar covered parchment paper.  Quickly loosen the paper on the bottom of the cake and carefully peel it off.  Trim one short edge of the sponge with a sharp knife, about 1 inch in from the edge, making sure you do not cut it all the way through. 


Allow to cool for several minutes and then spread the jam evenly over the cake.  If the cake is too hot it will absorb too much of the jam.  Roll the cake up firmly, starting at the scored edge.  Allow to cool before slicing with a serrated knife.  Delicious! 


T really is one of my family's very favourite of all cakes.  I have always wanted to try it with a sugar substitute, but haven't really gotten around to it yet. 
 
Maybe filled with a low sugar jam.  That would  make it fat free and very low in sugar.  I will let you know when I do!   

This content (written and photography) is the sole property of The English Kitchen. Any reposting or misuse is not permitted. If you are reading this elsewhere, please know that it is stolen content and you may report it to me at: mariealicejoan at aol dot com Thanks so much for visiting. Do come again! 

 Follow my blog with Bloglovin


Tuesday 27 March 2018

Baking with Cadbury's Creme Eggs & Georgia's Cakes


Who doesn't love a Cadbury's Creme Egg or two at this time of year!  Does the Easter Bunny ever bring enough?  I think not.  Cadbury has teamed  up with Georgia Green of Georgia's Cakes to develop three beautiful recipes for your Easter Bakes using their fabulous Cream Eggs! 


*Cream Egg Layer Cake*
Serves 20 

Ingredients:
5 Cadbury Creme Egg halves to decorate
250g butter (1 cup)
250g caster sugar (1 1/2 cups)
225g self raising flour (1 1/2 cups plus 2 TBS)
25g cocoa powder (3 1/2 TBS) sifted
1 tsp vanilla paste 

For the buttercream:
150g softened butter (2/3 cup)
60ml milk (1/4 cup)
425g icing sugar (3 1/4 cup)
75g cocoa powder, sifted (2/3 cup) 

For the chocolate drips:
50g double cream (3 1/2 TBS)
40g dark chocolate (1 1/2 ounces) 

You will also need:
meringue kisses 


Method:
For the cake, melt the butter and whisk together with the caster sugar.  Add the eggs and mix through, then add the flour and mix until incorporated. 

Line 2 six inch round cake tins with baking paper.  Divide the batter equally amongst them, and then bake at 180*C/350*F/ gas mark 4 for 30 to 40 minutes until they spring back when lightly touches and a toothpick inserted in the centre comes out clean.  Leave to cool on cooling racks. 

To make the butter cream, beat together the icing sugar, cocoa powder, butter and milk until the mixture is light and fluffy. 

Level each cake off on the top and carefully cut in half through the  middle so that you have 4 equal layers.  Save one of the bottoms to be used as the top layer. 

Place a layer on a cake plate and spread with a layer of butter cream. Place a second layer on top, and spread with butter cream. Repeat with a third layer.  When you get to the fourth layer, make sure the top layer is face down so that you have the flattest side on top,  Spread butter cream over the whole cake.  Scrap off any excess buttercream and leave in the fridge/freezer until it is set firm. 


Heat the cream and pour over the chocolate, mixing until it is melted and thoroughly combined.  Pour this melted chocolate mixture over the cake, pushing it towards the edges with a palatte knife and allowing it to drip down the sides. 

Using the leftover buttercream, assemble the top of the cake, placing 5 Cadbury Creme Egg halves on top along side meringue kisses.


*Cadbury Creme Egg Cheesecake*
Makes 1 8-inch cheesecake  

 
Ingredients :
10 Cadbury Creme Eggs
6 mini Cadbury Creme Eggs
150g digestive biscuits (1 2/3 cups graham cracker crumbs)
75g melted butter (1/3 cup)
750g full fat cream cheese (26 1/2 ounces)
150g icing sugar, sifted (1 cup, plus 2 1/2 TBS)
1 vanilla pod
300ml double cream (10 1/2 fluid ounces)
White chocolate melted
Dark chocolate melted
Caramel sauce 

You will also need:
8 inch cake ring or spring form tin
Acetate 

Line the inside of the tin or ring with acetate.  This will make it easier to remove the cheesecake after it has set. 

Crush the digestive biscuits into fine crumbs and stir in the melted butter.  Press into the bottom of the prepared ring/tin, pressing to compact well.  Place in the refrigerator to chill. 

Chop five of the creme eggs into small chunks and set aside. 

In a bowl beat together the cream cheese, caviar from the vanilla pod and sifted icing sugar. 

In a separate bowl, whisk the double cream just until it begins to form soft peaks.  Gently fold the cream into the cream cheese mixture to combine. Mix in the reserved chopped cream eggs. 

Take the tin out of the refrigerator. Cut the remaining creme eggs in half, length ways and arrange them facing out around the sides of the tin. (Use the goo to help them stick.)  Pour the cheesecake mixture in and smooth the top with a spatula or palette knife. 

Chill in the refrigerator for at least 1 hour. 

Once set, take out from the refrigerator and remove the tin with care. Remove the acetate.  Drizzle over some white chocolate, dark chocolate and caramel sauce in a criss cross pattern.  Cut the mini creme eggs in half lengthways and arrange around the outside of the cheesecake.  


*Cracking Creme Egg Macarons*
Makes 20 - 25  

Ingredients:
5 large Cadbury Creme Eggs
125g icing sugar (1 cup)
65g ground almonds (3/4 cup)
60g egg whites (2 large egg whites)
12 g caster sugar (3 tsp)
10g cocoa powder (1 1/2 TBS)
100g double cream (3 1/2 fluid ounces)
100g dark chocolate, chopped (3 1/2 ounces) 

Method : Sieve together the almonds, cocoa powder and icing sugar into  bowl.  Whisk the egg whites, gradually adding the sugar in stages, until stiff peaks have formed. Fold the egg whites into the dru mixture in 3 stages.   

Fill a piping bag with a round nozzle attached. 

Line a baking tray with baking paper and pip £2 coin sized circles, leaving about a 2cm (1 inch) gap in between each one.  Leave for about 20 minutes to skin. Dust with a small amount of cocoa powder, just to achieve a slight pattern on the surface. 

Heat oven to 135*C/275F/gas mark 3.   Bake the macarons for 10 to 12 minutes. 

Make the filling by heating the cream and pouring it over the chocolate.  Stir to melt the chocolate and combine well together.  Leave the ganach to cool and thicken, stirring every now and then. 

Once the macaron shells have cooked, remove them from the oven and leave to cool completely before removing them from the tray.  

 
Heat a knife in hot water and slice the Cadbury Creme Eggs widthways into 5 to 6 circular pieces. 

Once the ganache has thickened and is of a spreadable consistency, fill a piping bag with it.  Pair up the macarons. Place a slice of the cadbury creme egg on the bottom sides of each of half of the shells, and pipe a ring of  ganach around each slice. Sandwich together with the remaining macarons. Voila! Cracking Creme Egg Macarons.   


For a handy printable of all three recipes please click here.   Make sure you pick up some extra eggs  just for munching on!   They are available in several different sizes.  It wouldn't be Easter without them! Happy Easter!