Wednesday 30 May 2018

Chive & Shallot Vinaigrette


I don't think I ever had a ready made bottled salad dressing the whole time I was growing up. My mom always made her own salad dressing from scratch.  

 It was always the same, and never varied, but we didn't mind because we loved it.  We always had a salad on Sundays with our supper and she would begin it early in the afternoon.  

She would thinly slice some onion, or cut it into small bits and put it into a bowl.


On top of that she would pour a quantity of white vinegar, adding some salt and pepper.  She would let that sit for a while . . .  the onions almost pickling in the vinegar.  

Finally she would add just plain old salad oil, nothing special, and maybe a pinch of sugar.  

The lettuce and other salad vegetables would be tossed into it and and then it would all be tossed together and that would be our salad!  We loved it.


A salad is only as good as its dressing.  That is a fact.  I can't believe how many times restaurants get it all wrong . . .  salad that is.  

Old lettuce, sorry tasting dressings (if any at all) or just plain salad cream. 

Don't get me wrong.  Salad cream has its place, but if I am paying a whack for a salad I want a decent dressing with it, and decent salad ingredients!  (You all know this is a pet peeve of mine!)


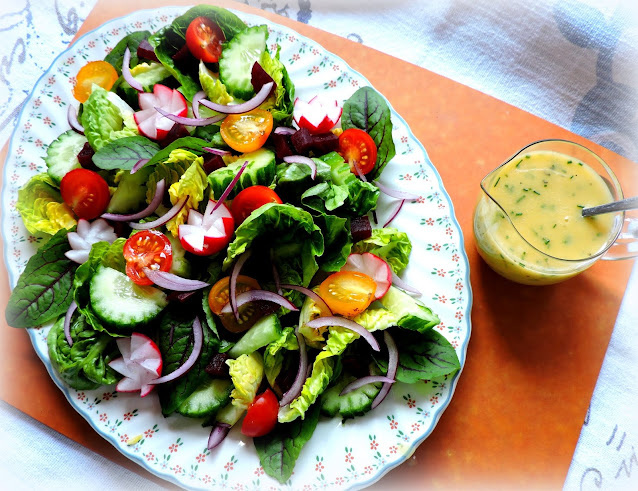
We had a lovely salad with our dinner today which I made just using what I had to hand. I was eager to use some of the tender young Sorrel leaves from our garden. 

I have never grown Sorrel before.  They are the leaves you see in this salad with the red veins.  It is supposed to have a sour flavour, but I couldn't taste it.  Nevermind  . . .


Other than that I added baby Gem lettuce leaves, which are kind of like a baby romaine, but with a somewhat bitter flavour.  

I also added thinly sliced red onions, cucumber, some cherry tomatoes, cubed beetroot and some radishes that I got rather fancy with . . .  cutting them into little crowns.


I thought it all looked rather pretty together.  A pretty salad deserves a tasty dressing, and this Chive & Shallot Vinaigrette is certainly that! 


Its a very simple dressing with simple ingredients  . . . I love making tasty things with simple ingredients.  

Lemon juice. Shallots. Salt. Pepper. Dijon mustard. (Unheard of in my mother's time, but a very common kitchen ingredient these days.) 

Salt and black pepper, and some chives, freshly picked and minced from our garden.


I like to add a touch of sugar just to cut the edge off the tartness of this, but you don't have to if you don't want to.  My husband doesn't like really sharp flavours.  This is a fabulous dressing! 


*Chive & Shallot Vinaigrette Dressing*
Serves 4
 

This tangy delicious vinaigrette goes well on mixed leaf salads, grilled chicken, fish, etc. I use my immersion blender for this. It makes it thick and creamy.


2 TBS finely minced fresh chives
1 TBS minced shallot
1 1/2 TBS fresh lemon juice
1/2 tsp Dijon mustard
fine sea salt and freshly ground black pepper
pinch sugar (optional)
4 TBS extra virgin olive oil


Put the shallot, lemon juice and mustard in the beaker container of an immersion blender.  Blitz to puree the shallots.  Add the seasoning and blitz again.  Trickle in the olive oil, running the blender the whole time, and moving it a bit up and down, until you have a thick and creamy dressing. (Alternately you can do this in a regular blender)  Whisk in the minced chives. Taste and adjust seasoning as desired.


I always spend the last few months of Winter/Spring looking forward to the late Spring/early Summer salad days. Its one of my favourite times of the year, and mostly it is because of Salad. 

 I quite simply adore salad.  And yes, a good salad dressing makes all the difference in the world, and this a good'un!  Bon Appetit!


Chive & Shallot Vinaigrette
 
This content (written and photography) is the sole property of The English Kitchen. Any reposting or misuse is not permitted. If you are reading this elsewhere, please know that it is stolen content and you may report it to me at mariealicejoan at aol dot com. 


Follow my blog with Bloglovin

Tuesday 29 May 2018

Stewed Steak & Macaroni


This recipe I am showing you here today is a very, very old one.  It comes from a handwritten scrap of paper in my big blue binder, copied out in my own hand, I suspect from one of my mother's old cookery books from the early days of her marriage. It is the type of thing our Grandmother's would have cooked.


It is a testimony to the thrift of our forebears, and their ability to make simple things taste extraordinarily good, most times not even using recipes, but adding a bit of this and a bit of that, tailoring each lovingly to the tastes of her own family.


I confess, I have done the same, with the original recipe having nothing but salt and pepper and ketchup as seasonings.   I suspect it strongly relied on the individuality and ability of a home cook to play with according to what was in-house.


I have added onion and garlic powders, some dried thyme and a splash of Worcestershire sauce.  Oh, and a bay leaf.  Did you know that breaking a bay leaf in half helps to release more of its flavours?  Its true.  When you think about it, it only makes sense.


I also added some finely grated peeled carrot and swede (rutabaga) because we like those things with beef, but you can leave them out if you don't have or want to add them.


The long slow cooking over low heat, really tenderises the meat . . .  until it is pretty much falling apart and fork tender.


The macaroni actually gets added at the end and cooks in the juices in the pot, just until it is al dente. You may need to keep topping it up with some boiling water until the macaroni is cooked, but do be judicious as you don't want it to be soupy. 


As you can see, mine is not soupy in the least.  In fact I would call it darned near perfect, and I say that in all humility.


This is absolutely delicious.  Cheap, cheerful and delicious.


All you need on the side is a salad perhaps and some buttered crusty bread if desired . . . 


I used a small piece of silver side, that had been cut into a small roast for someone, that I discovered in the grocery store for only £2.38, which made for a really thrifty find.


It was a really lean piece of meat as well, with only one small sliver of fat that needed trimming off and discarding.  Altogether this made a really delicious and hearty meal for us for about £4, with enough leftovers for us to enjoy tomorrow.  A very tasty economy!


*Stewed Steak & Macaroni*
Serves 4 - 6


This simple and yet delicious recipe is a testimony to the ability of our forebears to create something quite delicious out of simple and ordinary ingredients.
 

1 1/2 lb stewing steak (round steak)
(Trimmed of fat)
2 TBS plain flour
2 TBS butter
salt and black pepper to taste
1/2 tsp garlic powder
1/2 tsp onion powder
1/2 tsp dried thyme
1/2 tsp sweet paprika
1 bay leaf, broken in half
2 inch piece of peeled carrot and the equivalent in swede (rutabaga), finely grated (optional)
splash of Worcestershire sauce
115g pound dry macaroni (1 cup)
1 TBS tomato ketchup


Cut the steak into small pieces.  Roll the pieces in the flour.  Heat the butter in a medium saucepan which has a lid,  over moderate heat, until it begins to foam.  Add the steak, a few pieces at a time and brown on all sides.  Season to taste with salt and pepper.  Add the garlic powder, onion powder, thyme and paprika.  Cover generously with hot water, the grated vegetables, and add a splash of Worcestershire Sauce. Break the bay leaf in half and add.  Bring to the boil, then reduce to a slow simmer, cover tightly and simmer over low heat for 1 1/2 hours until the meat is very tender.  You may need to add some boiling water from time to time to make sure that the bottom doesn't catch. b


At the end of that time, remove the bay leaf and discard. Add the dry macaroni and enough boiling water to make sure that the macaroni will cook properly, you want about a inch of water over the top.  Cook, stirring occasionally, and adding water as necessary, until the macaroni is tender.  Stir in the tomato ketchup and adjust seasoning as required.  Serve hot spooned into bowls.

Note - some cheese grated over top is good.


I know a lot of us are tempted to discard or ignore these old recipes, thinking that there is little or no value in them.  I mean, they are quite old fashioned aren't they and there is no kale or quinoa in sight, but really, when you think about it, our ancestors were, in main, quite healthy and all they had was simple food to eat.  Simple, thrifty ingredients done well.  This fits in very well with the ethos of my style of cooking.  Bon Appetite! 


Monday 28 May 2018

Creamy Baked Chicken


This is a delicious chicken dish which Todd really loves.  He is a real meat/chicken and potatoes man, and if there is a delicious gravy/sauce involved, he is one very happy bunny!  This is a simple dish which I have also seen called Amish Chicken, or Baked Chicken which makes its own gravy. I just call it Creamy Baked Chicken.  A rose by any other name and all that.  Its an old, old recipe, a simple recipe and a very delicious one!


You can use whatever kind of chicken you want in this just so long as it is bone in and the skin is still on.  I like to use thighs and legs, or leg quarters.  The long cooking time is too long for breast meat in my opinion.  It only dries it out, gravy or not.  Legs and thighs are best.


The chicken itself gets shaken in a bag of well seasoned flour and place into a baking dish in a single layer.  There is no browning, or fussing and faffing about.  Just shake, coat and put into place.


The flour is seasoned with salt, garlic, pepper and paprika . . .  I like to add some dried thyme and parsley myself for a bit of an herb flavour and some colour.  Its nice, but you can leave it out if you wish.  Personally I really like the addition.


You just place the coated chicken into a baking dish and then you whisk together an equal amount of thick cream and water and pour it around the chicken in the dish, and that is it!!  Easy peasy.  Just bang it into a moderate oven, uncovered and let it bake.


It has a fairly long baking time, which is why I don't really like to use breasts myself.  In that long slow baking that cream/ water mixture reduces down to a thick creamy gravy,  well flavoured by the juices from the chicken and some of that flour coating  . . .


The skin gets all crispy and brown and you have that delicious gravy, which is perfect spooned over both the chicken and my favourite, baked or mashed potatoes.  Todd loves it with potatoes also.  Rice would work as well.  Some cooked vegetables on the side and dinner is served! 


*Creamy Baked Chicken*
Serves 6 - 8 
This is a simple recipe which results in chicken that has its own flavourful creamy gravy. I like to serve it with baked potatoes and a vegetable, but mashed potatoes would also be good, as would rice. 
 

6 to 8 bone in chicken pieces, with the skin
(I like to use a mix of thighs and legs)
140g plain flour (1 cup)
2 tsp garlic powder
2 tsp  salt
1 tsp black pepper
2 tsp paprika
1/2 tsp dried thyme
1/2 tsp dried parsley
360ml heavy cream (1 1/2 cups)
350ml water (1 1/2 cups) 


Preheat the oven to 180*C/350*F/gas mark 4. Have ready a baking dish large enough to hold all of the chicken pieces in a single layer. 


Place the flour, garlic powder, salt, black pepper, thyme, and parsley into a bag.  Shake together.  Wet the chicken pieces and shake them in the flour in the bag one at a time, and then place them into the baking dish in a single layer.

Whisk together the cream and the water.  Pour around the chicken in the dish.  Bake for 1 1/2 hours, uncovered, until the skin is golden brown and the sauce has thickened somewhat.  Serve the chicken with the gravy spooned over top.


Just look at how tender and moist that chicken is and how flavourful that gravy looks.  It will soon be too hot in the kitchen for meals like this.  I reckon this will be one of the last ones we treat ourselves to until the autumn spins around.  Today we are enjoying a bit of  a thunderstorm, so it is just perfect!  Bon Appetit! 


Sunday 27 May 2018

Cinnamon Cake

Cinnamon Cake


Mmmm . . . is there any smell on earth better than the smell of cinnamon anything baking in the oven???  I think not!!!  

It has to be the most comforting, homey, hug-me smell that there is, next to Vanilla.  That smells pretty good too.  

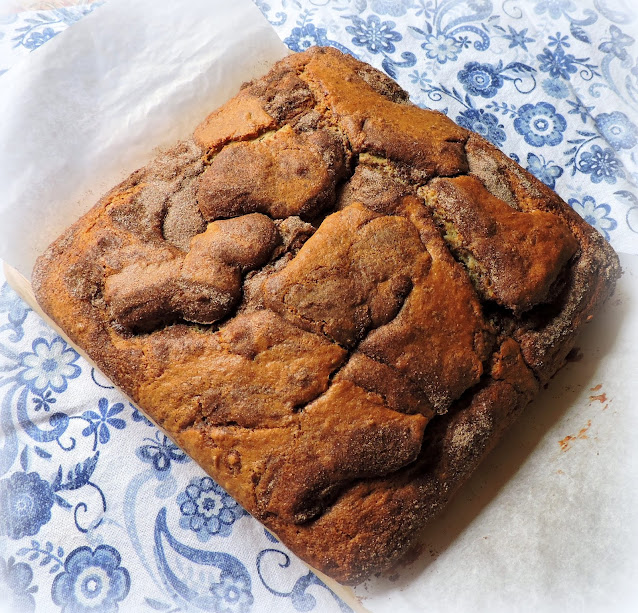
You are going to love this wonderful breakfast cake I am showing you this morning.  It is absolutely perfect in every way!


It has a moist and nutty batter  . . . moist from the use of sour cream.  

Sour cream is a great moistener when it comes to cakes  . . .  and this cake has plenty of that. 


Finely chopped toasted pecans.  This cake has plenty of those too . . .  

Finely chopped and stirred through that beautiful batter, so that every forkful brings you some of that moreish nuttiness . . .


And then there is the cinnamon sugar  . . .  a whole 4 tsp of cinnamon in that cinnamon sugar mix . . .  swirled through that lovely nutty batter . . .


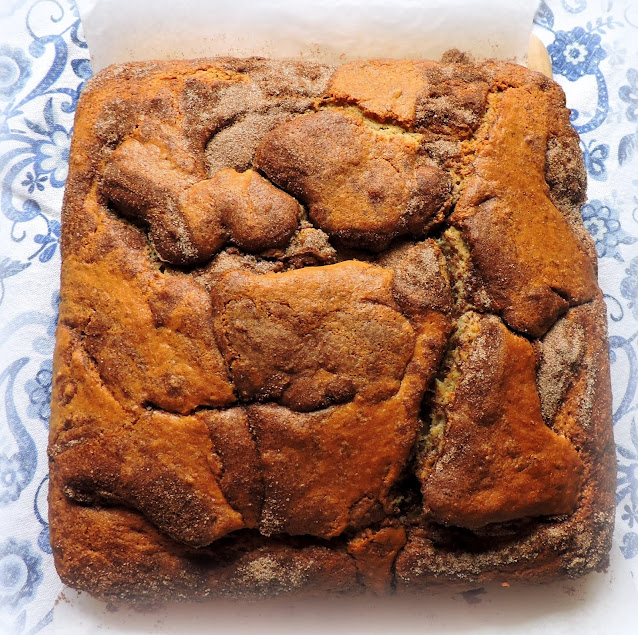
It makes lovely cinnamony . . . sugary  . . .  moreishly tasty rivers and canyons of cinnamon tastiness throughout the cake!


Perfect for a weekend brunch  . . .  I guarantee the smell of it baking alone will get everyone hopping out of bed and clambering to the table, bellying up for a taste! 


"By the Rivers of Cinnamon  . . . la la la . . .!  

Wait no, I guess it was Babylon, never mind.  Drat  . . .  now I'll be singing that song all day in my head.  Urrrrggg! I hate it when that happens.


I all seriousness however, this is one very delicious cake.  And it is simple.  As simple as stirring together a batter, and spreading it into a pan . . .


As simple as mixing together a quantity of granulated sugar and another quantity of ground cinnamon and sprinkling that over top of the batter in the pan . . .


As simple as taking a round bladed knife and swirling that layer of cinnamon sugar through that sour cream batter  . . .


and then simply waiting  . . .  for half an hour or so while it bakes  . . . and you sit there smelling that lovely smell  . . .


And then you take it out, wait a few minutes until it cools down a bit . . . and dig in.  Mmmm . . .  so lovely served warm with something to drink.  Tea. Coffee.  Milk.  Hot Chocolate, or  . . .  in my case . . .  diet coke. (I know naughty me.)  Yum!!


*Cinnamon Cake*
Makes one 8 or 9-inch cake


This light and moist cake smells heavenly when it is baking and makes a great addition to a weekend brunch!
 

210g plain flour (1 1/2 cups)
1 tsp bicarbonate of soda (baking soda)
1/4 tsp baking power
1/4 tsp salt
120g butter softened (1/2 cup)
135g sugar, divided (3/4 cup)
2 large free range eggs
1 tsp vanilla
120g sour cream (1 cup)
60g finely chopped pecans (1/2 cup)
4 tsp ground cinnamon


Preheat the oven to 180*C/350*F/ gas mark 4.  Butter and flour an 8 or 9 inch square baking tin. Set aside. 


Whisk together the flour, soda, baking powder and salt. 


Cream together 90g/1/2 cup of the sugar with the butter. Beat in the eggs, one at a time. Beat in the vanilla.  Stir in the dry ingredients, just to blend, in two lots, alternating with the sour cream.  Stir in the pecans. Spoon into the prepared cake tin.  Combine the remaining sugar and the cinnamon. Spoon evenly over top of the cake batter. Swirl in with a round bladed knife to marble it. 


Bake for 30 to 35 minutes until a toothpick inserted in the centre comes out clean and the cake springs back when lightly touched. Cool in the pan for 15 minutes and serve warm, cut into squares.


Cinnamon Cake


Todd enjoyed his with some squirty whipped cream on top.  I cannot afford that indulgence myself.  In fact I cannot afford even eating the cake, but I do treat myself to a tiny smidgen.  I hope you will too!  Bon Appetit and happy weekend!

This content (written and photography) is the sole property of The English Kitchen. Any reposting or misuse is not permitted. If you are reading this elsewhere, please know that it is stolen content and you may report it to me at mariealicejoan at aol dot com. 


Follow my blog with Bloglovin