Tuesday 31 July 2018

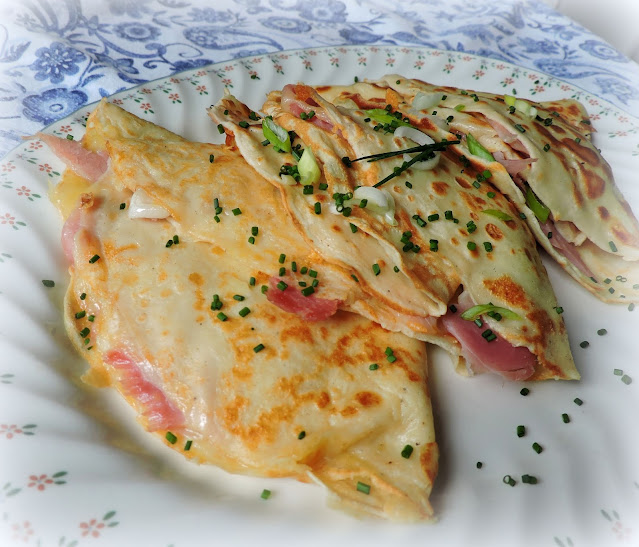
Ham, Gruyere & Spring Onion Crepes


Ham, Gruyere & Spring Onion Crepes. If you have ever had the opportunity to go to a French market over on the Continent, you will most likely have seen Crepe Vendors.  

Baking crepes in the open air and filling them with whatever your heart desires.  Folded into quarters, and wrapped in paper, they are very easy to eat while you walk around browsing through the market.


You can get them filled with fruit fillings, nutella, cream and even with savoury fillings. My favourites are always the ones filled with ham and cheese.  

Kind of like a Croque Monsieur, but in a crepe, not bread.


They also make for a quick, easy and light supper during the summer months when you are looking for something to make that isn't going to keep you standing over a hot stove for ages and ages. 

I'm all for that.  I can be lazy from time to time when it comes to cooking.  No, I'm not kidding. Its true.


These are delicious.  I like to use Gruyere cheese, which is a lovely melty Swiss type of cheese, but you could use cheddar, or Colby, or even Jack cheese if you wanted to.  

You could even use a combination of cheeses. I like cheeses with a lot of flavour and so I choose Gruyere because it has a sweet and nutty taste, and goes really well with ham.


I like to pair it with a good ham . . .  thinly sliced honey ham is good, or a thinly sliced dry cured oak smoked.  

You are going to tear it into pieces, so just pick a nice ham, and one that you enjoy. The nicer the flavour of the ham you use, the less you will need of it. Fact.


People can find making crepes a little bit intimidating, but they really aren't hard to make at all.  

I put the batter through a sieve to make for a smooth batter.  Just use a good non-stick frying pan, lightly oiled and well heated.


You don't want them frying so much as you want the to bake in the skillet.  Just pour a very thin layer and tilt the hot pan a bit to spread the batter out into evenly.  

Let it cook until golden brown and then using a flexible spatula, flip them over to brown the other side. Easy peasy.


Once you have browned one side and flipped them over you can start filling them.  They cook in literally about a minute if you pan is heated properly. 

Not too hot, not too cold.  Sprinkle the cheese on half of the crepe . . .


Let it cook for about 30 seconds to melt the cheese, then scatter over some torn ham and some chopped spring onion.  

Fold in half again so that you have a triangle and put into a warm oven to keep warm while you cook the rest.  Again, such a simple thing. 

Like an omelet, but with a flour batter instead of an omelet batter.


These go together really quickly and are so delicious!  You don't need to limit yourself to what I have used. Use your imagination and whatever is in the refrigerator to fill them with whatever appeals.  

You could go completely vegetarian and fill them with sauteed vegetables and cheese, or maybe you have some leftover curried chicken or lamb.  That would also be nice. A salad on the side makes for a complete meal!


*Ham, Gruyere & Spring Onion Crepes*
serves 4


Delicious savoury pancake wrapped around torn sliced ham, Gruyere (Swiss) cheese and chopped spring onions, to make a delicious quick supper.  Serve a salad on the side. 


150g plain flour (1 cup + 1 1/2 TBS) sifted
3 large free range eggs, beaten
450ml whole milk (1 3/4 cup)
generous pinch salt
freshly ground black pepper
240g grated Gruyere Cheese (can use cheddar if you wish) (2 cups)
4 slices baked ham, torn
4 spring onions, trimmed, washed and thinly sliced
oil for frying 


Sift the flour into a bowl along with the salt and pepper.  Make a well in the centre.  Add the egg and milk and whisk all together until smooth.  If necessary put through a sieve to take out any lumps.

Have ready a large non-stick skillet.  Lightly grease with oil and heat. Pour 1/8th of the batter into the hot skillet, tilting to cover the bottom with the batter evenly. Cook until golden brown. Carefully flip over, and brown on the other side. Sprinkle a portion of cheese on half the crepe, top with some chopped onion and torn ham.  Fold half the crepe over to cover, and then fold in half again until you have a triangle.  Keep warm in a low oven while you cook the remaining crepes. You should have at least 8, maybe a couple more.

Serve warm with some salad, if desired. 


My husband is not a man who enjoys eating with his hands.  He even eats his burgers with a knife and a fork. To each their own! 


I highly recommend this fabulous Induction Stone Skillet that is available from MyKitchn. Made out of premium stone with aluminum alloy frame, these pans ensure optimal spread of heat to maximize flavor retention. It's non-metal material is chemically stable and doesn't release metal particles into the food.  

I love MyKitchn.  It is a unique kitchen store which lets you cook delicious, healthy meals in half the time. With a variety of recipes on their website and innovative products, they make it easy to save time, money and motivate you to love your kitchen. Check them out and be healthy :)
 http://mykitchen.love

 Bon Appetit!


Ham, Gruyere & Spring Onion Crepes 

This content (written and photography) is the sole property of The English Kitchen. Any reposting or misuse is not permitted. If you are reading this elsewhere, please know that it is stolen content and you may report it to me at mariealicejoan at aol dot com. 

Follow my blog with Bloglovin


Monday 30 July 2018

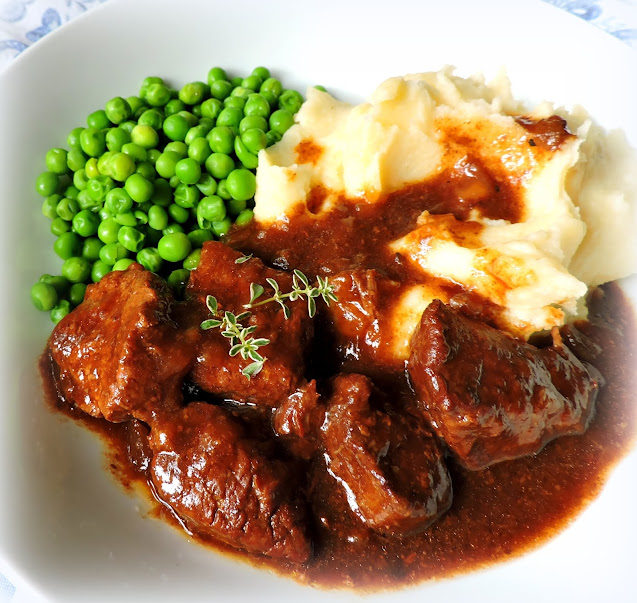
Braised Brisket with Stout & Onions


Usually on Sunday if  I am on the ball, I will put something into the slow cooker for our dinner before I leave for church in the morning. 


Normally it will be red meat of some kind. To be honest I am not fond of chicken in the slow cooker. I find it almost gets over-cooked and I don't like the texture of it.  

Beef on the other hand, or pork, lends itself quite well to being cooked in a slow cooker, especially the cheaper cuts.


I especially love Beef Brisket done in the slow cooker, either whole as a pot roast, or as I have done today, cut into chunks and as a stew.  


Brisket is one of my favourite cuts of beef and is beautiful when prepared this way. 


And is is such a simple thing as well.  Cubes of brisket (I like to cut mine into 1-inch cubes) is tossed with well-seasoned flour and then browned in a bit of oil, on top of the stove in a skillet.  


Really brown it well on all sides. It is the colour from this initial browning that will help to colour your stew. 


The juices from the meat also caramelise a bit which adds flavour. Don't crowd the pan when you are browning.  Do it in batches if need be.  


Crowding it means your meat won't brown properly.  Handy tip here. 


Onions and garlic are added as well as some stout (Guinness) and beef stock.  


Stout makes for a lovely and richly flavoured gravy.  Pour it all into the slow cooker, and then let the slow cooker (crock pot) do the rest.


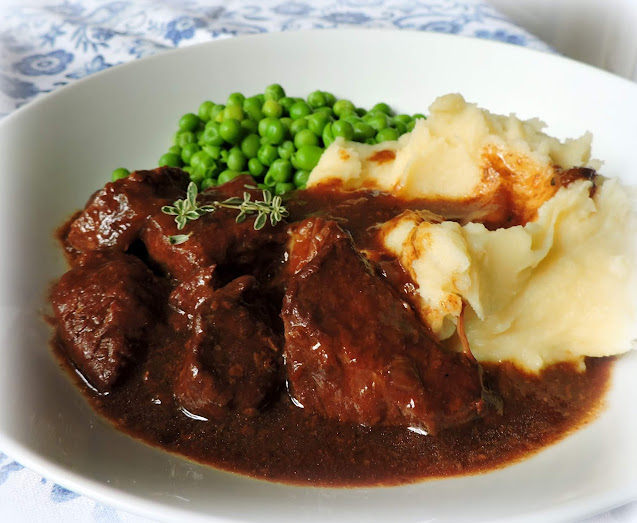
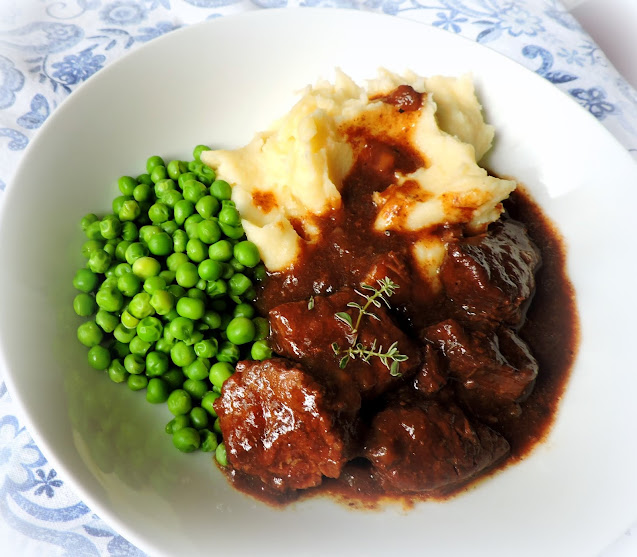
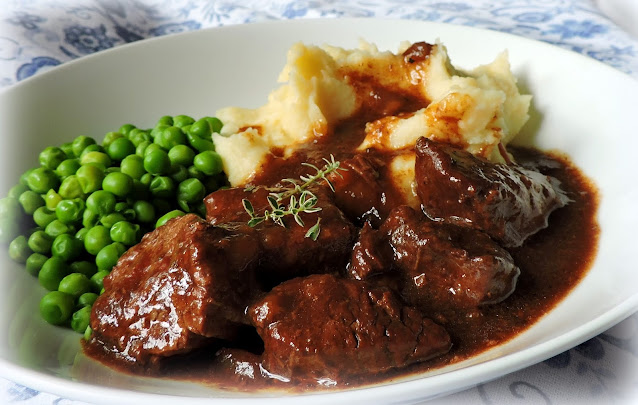
Six hours on low does the trick. You will have fork tender chunks of beef, in a really rich beautifully flavoured gravy  . . .  


And plenty of it . . .  and so beautiful spooned out over a lovely pile of creamy mash.  I cheat sometimes and use the frozen mash. Especially after church.  


It is so simple to use and just as good as fresh mash. I add a bit of butter and cream to mine, which makes it even tastier.


Today I cooked English Petit Pois to serve with it, which really went down a real treat.  I love Petit Pois.  I always buy them. I like them a lot more than the regular ones!  So sweet and tender! 


The smell of this when it hits your nose as you walk back into your house immediately starts your taste buds to tingling and your mouth to watering.  


You will hardly be able to wait until you have the rest of the meal ready before digging in, but you must  . . .


Trust me when I tell you. It is well worth the wait.  Well, well worth it  . . .


This is just so, so, so good.  I know it might seem like winter food to some, and yes, it is, but sometimes in the summer you get a cool day (like today) and you just crave something like this.  


Today was the day. It went down a real treat!


*Braised Brisket with Stout & Onions*
Serves 4
 

A delicious stew that cooks long and slow in a slow cooker. You can also do it in the oven if you wish or on top of the stove. I like to pop it into the slow cooker on Sunday mornings and then I have a delicious dinner waiting for us when we get home from church. I serve with mashed potatoes and a vegetable. 


2 large onions, peeled and chopped
a few springs of thyme
1 bay leaf, broken in half
1 clove garlic, peeled and crushed
oil for browning
2 pounds beef brisket cut into chunks
6 TBS flour well seasoned with salt and black pepper
240ml Guinness/stout (1 cup)
240ml Beef stock (1 cup) 


Heat the oil (about 1 TBS) in a skillet with a heavy bottom.  Toss the beef with the seasoned flour. Shake off any excess and then brown the beef on all sides in the hot oil. You want it to have a good colour so do it in batches if need be.  


Add the onions and cook until they begin to soften. Add the garlic and cook just until fragrant.  Add the beef stock and bring to the boil, stirring up any browned bits.  


Pour the whole mixture into a medium sized slow cooker. Add the sprigs of thyme and the bay leaf.  Stir in the stout.  Cover and cook on low heat for about 6 hours, until the meat is tender and the gravy well flavoured. 


If need be you can thicken the gravy with a bit of flour shaken together with some cold water until smooth (about 1 TBS flour, and 120ml/1/2 cup water) pour this into the beef, give it a stir and cook on high for about 15 minutes until thickened.

Serve hot, spooned out onto a fluffy pile of mash with a vegetable on the side.


Braised Brisket with Stout & Onions


There has been a lot of talk about the undesirable look of "Brown" food in food photography. I don't know about you, but I see nothing undesirable about the looks of this at all. 


In fact it makes me hungry just seeing it.  Perhaps that's because I know how delicious it really is!  Bon Appetit!


Sunday 29 July 2018

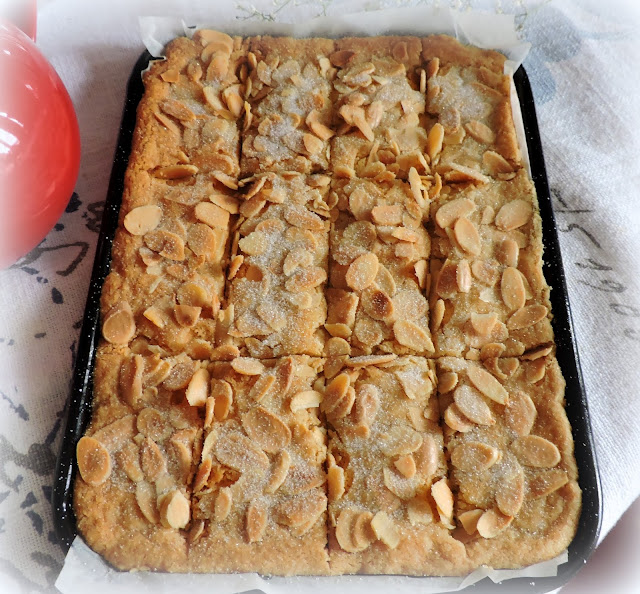
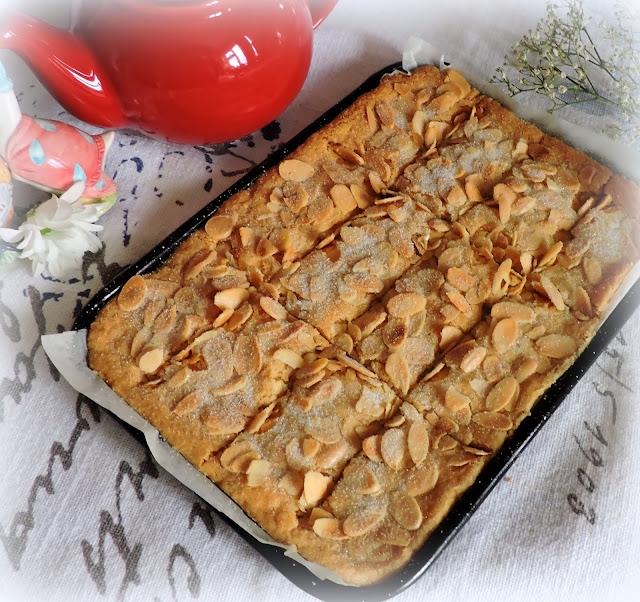
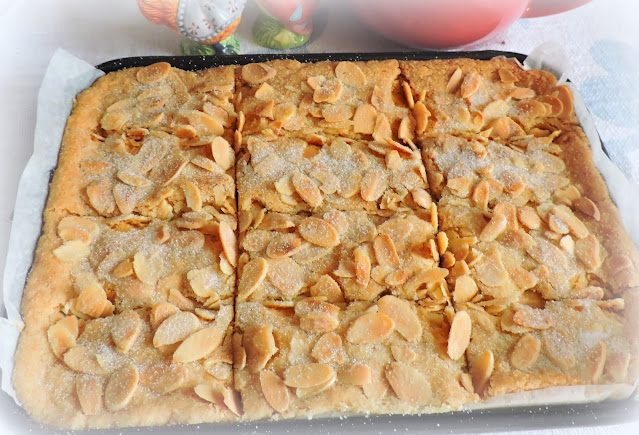
Bishop's Fingers

Bishop's Fingers


Whenever I come across a recipe with a name such as this I am instantly intrigued and here in the UK there is no shortage of recipes with unusual names.  

Think of things like Spotted Dick, or Hollygog Pudding.  See what I mean??? With names like that,  you immediately want to know more!


Bishop's Fingers


Such was the case when I ran across this biscuit recipe that I found in a baking book I have entitled Mary Berry's Baking Bible, over 250 classic recipes. 

Yes, Mary Berry of the GBBO fame. I saw this recipe and I thought to myself  . . . wow, I wonder what is the story behind those.


Bishop's Fingers


I was determined to establish a history but alas, I was unable to find out. 


 I can only think that the recipe must date back to a time in English history when the church was held in very high esteem.

And these were the sort of biscuits (cookie) that might be baked and trotted out on special occasions, especially occasions when the church Bishop might be in attendance! 


Bishop's Fingers


It certainly makes sense as one would want to bring out the very best on just such an occasion and these are certainly the very best! They are also cut into fingers! DUH!


Bishop's Fingers


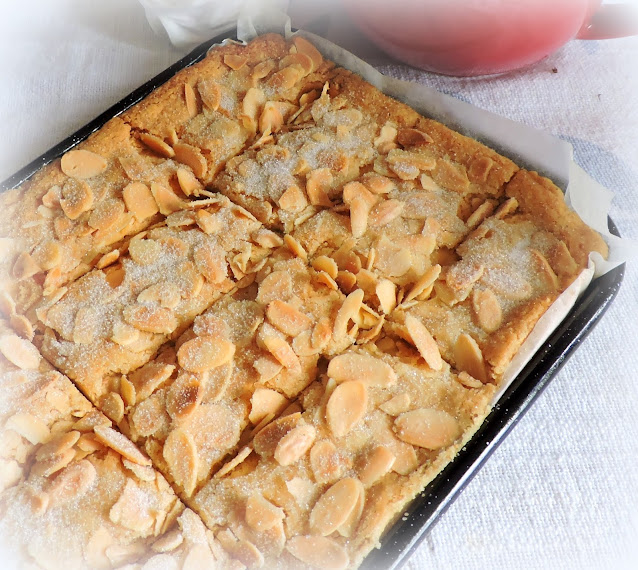
Crumbly, buttery and sweet, exactly what one would expect from a shortbread type of biscuit.  These are perfect, and even tastier than what I always thought was my best classic shortbread biscuits.  


In fact I would go so far as to say they are as good as my Peppermint Petticoat Tails, and that is saying a lot! 


Bishop's Fingers


I am a connoisseur of short bread biscuits.  I have always loved them.  In fact short breads are not safe in any room that I am in because I will pester them and pick at them, until they are gone.  


I don't think I am alone in that!  I think most people have a fondness for a good shortbread biscuit.


Bishop's Fingers


Sweet and buttery, short almost like pastry, but moreish like a cookie.  Mmmm . . .  I hope you will try these and soon.  


Don't just save them for a special occasion or visitor.  Surely YOU are worth a treat like this once in a while yourself!


Bishop's Fingers


*Bishop's Fingers*
Makes 12 fingers


A delicious shortbread cookie topped with flaked almonds.  Delicious with a hot cuppa. 


100g plain flour (3/4 cup minus 2 tsp.)
25g ground almonds (scant 1/3 cup)
25g semolina (2 TBS + 3/4 tsp)
100g butter (7 TBS)
50g Castor sugar (1/4 cup)
few drops almond extract
25g flaked almonds (1/3 cup)
caster or granulated sugar for dusting  


Bishop's Fingers


Preheat the oven to 160*C/325*F/ gas mark 3.  Lightly butter a shallow 7 inch square baking tin.


Whisk together the flour, almonds and semolina.  Drop in the butter, sugar and almond extract.  Rub together with your fingers until the mixture just begins to come together. Knead lightly until smooth and then press into the prepared pan, smoothing the top over with the back of a metal spoon.  Sprinkle the flaked almonds over top.


Bake for 30 to 35 minutes in the preheated oven until a very pale golden brown.  Mark into 12 fingers with a knife and sprinkle with the remaining sugar.  Leave to cool in the tin.  when completely cold cut into fingers and lift out carefully.  Store in an airtight tin.


Note - if at the end of the baking time the underside is not a pale golden brown, return to the oven for a further 5 to 10 minutes.


Bishop's Fingers


Whether you bake these for yourself, or you bake them for the Bishop, or  another special occasion you are sure to love these lovely biscuits.  

I mean Mary Berry . . .  you just know up front that the recipe is a winner!  Pour the tea now and pinkies at the ready
.  Bon appetit!


 Note - I didn't have any semolina in the cupboard today, but I did have Cream of Wheat which is pretty much the same thing, and it worked beautifully!


Saturday 28 July 2018

Raspberry Almond Breakfast Cake


I am sure that this recipe I am sharing today is nothing new to you. I have been baking it for years and I am pretty sure you have too.  Its a raspberry cream cheese coffee cake that makes a beautiful breakfast cake.


Its just so good that I felt that I needed to share it with you, just in case there are some of you that have not heard of it or baked it.   I adore breakfast cakes!  I mean, Cake for breakfast???  What's not to like about that!


And this is a most amazing breakfast cake. Some might call it a coffee cake, but over here in the UK a coffee cake is a cake flavoured with coffee.


I didn't want any confusion, so although  those of you who are visiting from North America might see this as a coffee cake, here in the UK, it would be a breakfast cake.  A cake that you would enjoy for breakfast or brunch with a hot drink or cuppa as those are often called. 


Are you confused yet? I hope not!


This is truly a lovely cake with a cake type of bottom, flavoured with almond and vanilla and enriched with sour cream. Sour Cream  not only makes for an incredibly moist cake, but also rich with both white and brown sugars.  


In short, this raspberry cream cheese coffee cake is dense, beautiful and delicious! 


Prior to baking you pour a cheesecake filling over the cake batter.  


Cheesecake . . .  if you are like me you love cheese cake. I cannot get enough of cheese cake.


Over the cheesecake layer goes a raspberry layer composed of fresh raspberries, sugar and raspberry preserves blitzed together until smooth.  This is a bit different than some I have seen out there, which use only the jam.  


I like the difference that the use of actual fruit makes.  Its jammy, but fresh and not too sweet, almost sweet/tart.


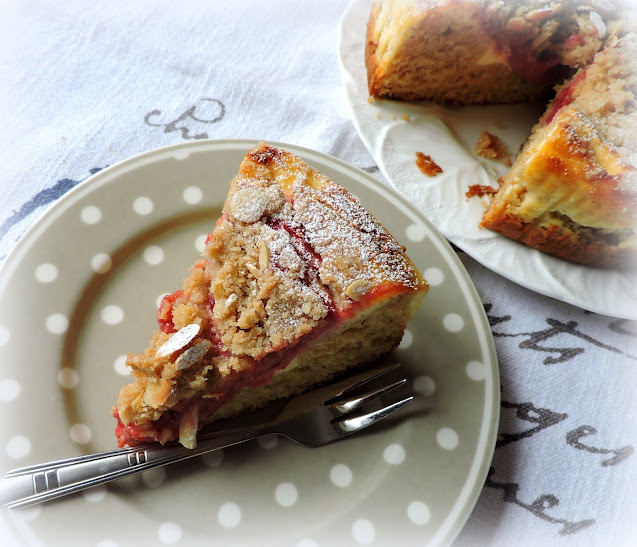
Over the raspberry layer you sprinkle a streusel layer. This is topped with some flaked almonds. 


Once the cake is baked it turns into a buttery crisp nutty topping that is just so scrumptiously delicious!


The cake bakes beautifully into four distinct delicious layers. 


Somehow they meld together, whilst remaining separate and holding down their own identities masterfully! 


The flavour combinations in your mouth are amazing. First you have the buttery dense cake followed by a creamy rich cheesecake.


Finishing with sweet/tart raspberries and a buttery crisp, flaky crumbly almost shortbread almond layer.  WOWSA!


I had not made this in a very long time. It had always been a favourite of my family. When I had baked it the other day I remembered why.  


Its dangerous!  


That's why. You just can't leave it alone.  You will find yourself thinking about it as you lay in bed at night tempting you to pop downstairs to cut yourself a tiny sliver . . . because you can't stop thinking about it!


Yield: 9-10
Author: Marie Rayner
Raspberry Almond Breakfast Cake

Raspberry Almond Breakfast Cake

Prep time: 15 MinCook time: 50 MinTotal time: 1 H & 5 M
A sweet breakfast cake with a lovely almond flavoured batter, topped with a cream cheese filling, raspberry puree, sweet streusel and flaked almonds. Break out the coffee pot!

Ingredients

For the cake layer:
  • 280g plain flour (2 cups)
  • 45g caster sugar (1/4 cup)
  • 50g soft light brown sugar (1/2 cup, packed)
  • 2 tsp baking powder
  • 1/4 tsp salt
  • 1/4 tsp bicarbonate of soda
  • 1 tsp vanilla extract
  • 1/2 tsp almond extract
  • 75g butter, melted (1/3 cup)
  • 1 large free range egg
  • 156ml milk (2/3 cup)
  • 60g sour cream (1/2 cup)
For the cream cheese layer:
  • 45g caster sugar (1/4 cup)
  • 225g cream cheese (8 ounces)
  • 1 tsp vanilla
  • 1 large free range egg
For the raspberry layer:
  • 225g fresh raspberries (1 3/4 cups)
  • 2 TBS sugar
  • 2 TBS raspberry preserves
For the streusel:
  • 140g plain flour (1 cup)
  • 135g sugar (3/4 cup)
  • 6 TBS cold butter
  • 60g flaked almonds (1/3 cup)

Instructions

  1. Preheat the oven to 190*C/375*F/ gas mark 6. Butter a 9-inch square deep baking tin, or a deep 10-inch round cake tin, or completely line with baking paper. (I used a round deep pan with a loose bottom. You could also use the equivalent size in a spring form pan.)
  2. Make the raspberry layer by pulsing the berries, sugar and preserves in a small processor until smooth. Set aside.
  3. Make the cream cheese layer by beating the cream cheese, sugar, vanilla and egg together until smooth and creamy. Set aside.
  4. Make the streusel by combining the sugar together with the flour and rubbing in the butter until the mixture resembles coarse crumbs. Reserve the almonds for sprinkling on top just prior to baking.
  5. Whisk the flour, both sugars, baking powder, salt and bicarbonate of soda together in a bowl. Whisk together the egg, milk extracts and melted butter. Make a well in the centre of the dry ingredients and add the wet. Combine all together just to mix. Fold in the sour cream until just combined. Spread into the baking tin. Spread the cream cheese mixture over top of the cake batter. Pour the raspberry filling over that. Sprinkle the streusel evenly over the raspberry filling and sprinkle the flaked almonds on top.
  6. Bake in the preheated oven for 45 to 50 minutes, or until a toothpick inserted in the centre comes out clean. Cool completely before serving.
Did you make this recipe?
Tag @marierayner5530 on instagram and hashtag it #marierayner5530


Trust me when I say that this is worth heating up the kitchen a little bit fore!  Its amazing, or what is it they say now?  Amaze-balls!   I am sure a dollop of whipped cream or clotted cream would go very nicely on top.  Just sayin'  Bon Appetit!  


This content (written and photography) is the sole property of The English Kitchen. Any reposting or misuse is not permitted. If you are reading this elsewhere, please know that it is stolen content and you may report it to me at: mariealicejoan at aol dot com Thanks so much for visiting. Do come again! 

Follow my blog with Bloglovin