Thursday 28 February 2019

All Dressed Hummus


I am a huge fan of hummus.  I often make it to enjoy with crisp crackers or raw vegetables.  It has been my snack of choice for many years. 


  It is one of the few ways I can tolerate chick peas due to my diverticulitis.  I used to love to make a vegetarian chili which used tinned chick peas when my children were growing up.  It was really delicious. Sadly those days  of enjoying those types of things in abundance are over for me! 


So far I have been able to enjoy hummus however.  Probably because the chick peas are pureed, which makes them easier to digest.


I love all kinds of hummus. Perfect Hummus is the recipe I normally use.  But my Roasted Beetroot Hummus is also very good, and a very pretty pink colour.


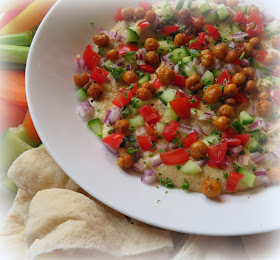
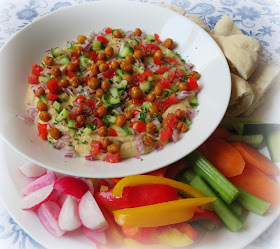
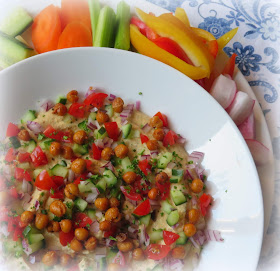
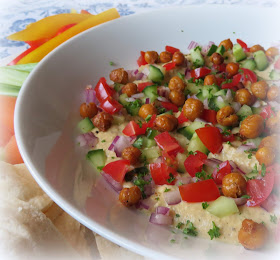
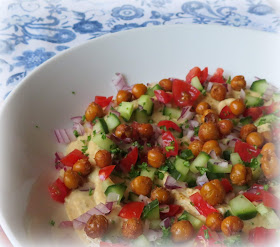
This All Dressed Hummus is also a real favourite around here.  I call it all dressed because it is topped with lots of lovely bits to dress it up. 


Its like the Cinderella of Hummus all dressed up and ready to go to the ball, glass slippers and all  . . .


I like to top it with a variety of finely chopped vegetables. 


Chopping things up really finely isn't really a chore if you have a good set of knives to work with.
For all of my chopping needs  I like to use these lovely knives  from the MyKtchn Premium Black Ceramic Kitchen Knife Set. 
 
 
Made of Zirconia ceramic, this six piece set of knives feature longer durability than regular steel while leaving your food free of chemical and metal taste. They are sleek, easy to handle and perfect for your slicing and dicing needs. I love them.  They make short work of slicing or dicing things into bits.


Along with the variety of diced veg I used, I topped this Hummus with some Crispy Chickpeas.  If you have never eaten them or made your own, you really need to try.  The oven basically does all the work and they are wonderfully crunchy and crisp, quite addictive as a snack or a garnish.


Yield: Makes about 1 1/2 cups

Crispy Chickpeas

These are crisp and delicious.  They are fabulous eaten out of hand as a snack, or used as a garnish.

ingredients:

  • 1 (400g) tin of chick peas, drained and patted dry (14 oz)
  • olive oil to drizzle
  • ground cumin, paprika, garlic powder, onion powder, salt and coarse black pepper
  • (according to your taste, I find about 1/4 tsp of each is ample)

instructions:

  1. Preheat the oven to 200*C/400*F/ gas mark 6.  Line a baking tray with foil.  Scatter the chick peas over top and then drizzle with a bit of extra virgin olive oil. Only about 1 TBS for the whole tin if that.)  Sprinkle with the spices/seasonings and toss to coat well with the oil and seasonings.  Spread out evenly leaving space between.  Pop into the pre-heated oven and roast for about 25 minutes until crispy.  Cool completely and then store in an airtight jar.
Created using The Recipes Generator


Almost like popcorn, except they contain a lot more fibre and protein.  I flavour mine with ground cumin, garlic, paprika, onion powder, salt and pepper, but you can use whatever flavours you desire.  As a snack you can also make a sweet variety as I did here with my Gingerbread Roasted Chickpeas. They also make a tasty snack. Again I have to control my consumption of these things because of my tummy. 😓 Getting older is not for sissies for sure. 


Today I topped my hummus with chopped tomatoes, red onions, cucumber, coriander leaf, a drizzle of EVO, and some crispy chick peas.


We I enjoyed it with some crisp raw vegetable sticks and fresh warm pita bread. (Todd is not a fan of raw vegetables.)  They have started stocking a sour dough pita bread at our local grocers that is fabulous!


Altogether this made a really delicious and healthy lunch for me, which I really enjoyed. 


Yield: Variable

All Dressed Hummus

An incredibly tasty and pretty appetiser.  Serve chilled with plenty of warm pita breads and crisp vegetables for dipping.

ingredients:

  • 1 (400g) tin of chickpeas, drained (reserve the liquid) (14 oz tin)
  • 2 TBS Tahini paste
  • 3 TBS extra virgin Olive Oil
  • 1 clove of garlic, peeled
  • 2 tsp lemon juice
  • 1/2 tsp sweet paprika
  • 1/4 tsp ground cumin
  • 4 TBS water
  • 1 TBS packed fresh coriander leaf (cilantro)
  • 1 tsp fine sea salt
  • 1/2 tsp coarse ground black pepper, or to taste
Toppings:
  • extra virgin olive oil to drizzle (optional)
  • 4 TBS chopped cherry tomatoes
  • 4 TBS chopped red onion
  • 4 TBS chopped unpeeled cucumber
  • crispy chickpeas (optional)
  • toasted mixed seeds (optional)
  • chopped fresh coriander (cilantro)
  • crumbled feta cheese (optional)

instructions:

  1. Combine all of the hummus ingredients in a food processor and blitz until smooth and to your desired consistency, adding reserved chickpea liquid as desired to give you what you want.  Spread the hummus in a large flat bowl. Cover and chill while you create the toppings.
  2. When you are ready to serve, sprinkle your desired toppings over top of the chilled hummus and serve immediately with plenty of crisp vegetables and warmed pita bread cut into pieces.
Created using The Recipes Generator


This makes a fabulous group appetizer for when you are entertaining, or for picnics (you can top it just before you serve it) and of course its great in the lunch box.  I would pack the hummus and the toppings and the dippers separately in that case.  What a treat!


Wednesday 27 February 2019

Balsamic Chicken & Mushrooms


I need to be better at labeling what I put in the freezer.  


When I go to Costco, I buy big packs of chicken breasts and thighs, and then I divide them up and freeze them in smaller packs when I get them home, thinking that I am going to remember what is what, but guess what!  I don't.


Sometimes I thaw out what I think is chicken breasts only to discover once it is thawed that they are thighs and vice versa.  


Not a problem really . . .  unless I had something in mind to cook that called for the other.  Not to self - buy a permanent marker.


So I had planned on making a curry with chicken breasts, but it ended up being thighs, and so I did something else entirely.


Balsamic Chicken & Mushrooms  . . .  a skillet entree that is quick and easy and so very tasty! 


The Balsamic Vinegar adds a very subtle piquancy . . . its not in your face.  Make sure you use a good quality one. 


Not the best, because that would be a waste, and a really good Balsamic needs to be enjoyed at the very simplest level.


But you will still want a good one as a cheap nasty one would be too acidic.  Go for something in the moderate cost range. 


White or button mushrooms work best. Other kinds (portabella, baby portabella) give off too much dark colour to the sauce, which I don't think is very visually appealing.


Also, don't burn your garlic.  Burnt garlic is bitter.  There is no coming back from that.   None.


This is really simple and really delicious. I like to serve it with some steamed Basmati and a vegetable.  On this particular day it was corn, but I actually prefer it with peas or beans. 


 There is a small amount of cream in it, just to make the sauce very creamy, but when you split it 4 ways, its really not a lot and it is worth it.


Yield: 4

Balsamic Chicken & Mushrooms

A simple entree made with boneless, skinless chicken thighs cooked in a creamy balsamic and mushroom gravy.  This is fabulously tasty

ingredients:

  • 1 TBS light olive oil
  • 1 TBS butter
  • 1 small onion, peeled and thinly slices
  • 2 fat cloves garlic, peeled and minced
  • 1/2 pound white mushrooms, cleaned and sliced
  • 1 1/2 pound boneless, skinless chicken thighs, cut into 2 inch pieces
  • 2 TBS flour
  • 3/4 tsp salt
  • 1/2 tsp coarse black pepper, divided
  • 120ml chicken stock (1/2 cup)
  • 2 TBS Balsamic vinegar
  • 60ml double cream (1/4 cup, heavy cream)
  • a few spring thyme and some chopped leaves to garnish

instructions:

  1. Heat the oil and butter together in a large skillet over medium heat. Add the onions and cook, stirring occasionally until they start to brown a bit. Add the garlic and cook for a further minute.
  2. While the onions are cooking, toss the chicken pieces together with the flour, 1/2 tsp salt and 1/4  tsp black pepper.
  3. Push the onions to the side of the skillet and add the chicken pieces, a few at a time, browning on both sides and adding more as they brown.  Transfer all to a bowl.
  4. Add the mushrooms to the pan. Cook and stir until they are lightly browned.  Add the remaining salt and black pepper.  Add the chicken stock and balsamic vinegar, stirring to release any brown bits from the bottom of the pan.  Return the chicken and onions/garlic mixture to the pan along with the thyme sprigs.
  5. Cover and simmer for about 10 minutes, until the chicken is cooked through.  Stir in the cream and heat through. Taste and adjust seasoning as required.  Sprinkle with a few thyme leaves and serve immediately.
Created using The Recipes Generator


You could use dried thyme if you wanted to, about 1/2 tsp.  I have fresh thyme in my kitchen garden and so I always used fresh.  This is fabulously tasty. 


In fact, I would serve this to company and it makes a great Dinner party dish, although for a dinner party I  wouldn't serve corn.  I'd be a bit more elegant, and I might serve baby potatoes instead of rice.  You are sure to enjoy it any way any how!  Bon Appetit! 


Tuesday 26 February 2019

Tuna Salad Wrap


I've had a pretty busy day today.  I went to the grocery store this morning and picked up a bunch of things to make my granola and a few other bits.  It amazing how much a few bits can add up to these days, especially if you are trying to eat healthier. 


It shouldn't be that way really.  They should make junk food more expensive and healthy food cheaper, but that makes sense, and most things the shops do hardly ever make sense.  I think my main beef about fresh fruit and vegetables is that it only lasts a couple of days once you get it home, depending on where you buy it. 


I find if you shop in the more expensive shops it tends to be of a better quality and fresher, but my days of shopping in expensive shops are long gone now I am not working full-time.  So I tend to have to pick up less and go more frequently, rather than do a weekly shop, only getting in what we can eat within a couple of days so that nothing gets wasted.


Today I gave Todd leftovers from yesterday for his dinner.  He had chicken and a baked potato and some tender-stem broccoli.  He was quite happy with that. (I'll be showing you the recipe for that chicken tomorrow.  It's a real winner/winner!) 


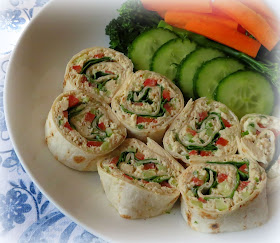
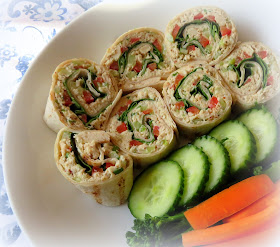
I had a lovely Tuna Salad Wrap with plenty of raw veg and some of that tender stem broccoli. I did take mine out well before it was finished cooking.  I only just blanched it. Todd likes his well done. 😖  We are all different.  I'm just lucky I can get him to eat broccoli at all. My father never would. 


We were both happy with our dinners.  The Tuna Salad is a recipe I pinched and adapted from a Weight Watchers site.  Theirs was pretty plain.  I added a few things for colour and crunch. 


Things like spring onions and red pepper strips.  They had their red pepper chopped.  I didn't want it chopped. 


I also added a layer of fresh baby spinach leaves . . .  both for colour and for nutrition . . .  and for the crunch. 


I spread my filling out really thinly and then laid the pepper strips and spinach on top of it before rolling the wrap up really tightly. 


I then refrigerated it for about an hour so that I could cut it into neat little slices.  That would be the perfect way to serve it in a lunch box to take to work.  So pretty, and easy to eat. 


Yield: 1

Tuna Salad Wrap

This makes a large wrap, suitable  for lunch, especially when sliced into rounds and served with a variety of raw veg for munching on.  Healthy and delicious!

ingredients:

  • 1 (150g) tin of white tuna, in water, drained well (3 ounce tin)
  • 1 large whole grain wrap bread
  • 2 TBS fat free mayonnaise
  • 1 tsp grainy  Dijon mustard
  • 1 TBS fat free plain yogurt
  • 2 TBS finely chopped celery
  • 2 TBS finely chopped spring onion 
  • 1/2 small red pepper cut into strips
  • a handful of baby spinach leaves, de-stemmed
  • 1/2 tsp sea salt with lemon
  • 1/4 tsp coarse black pepper

instructions:

  1. Drain the tuna well and flake into a small bowl.  Add the chopped celery and spring onion, mixing well together.  Stir together the mayonnaise, Dijon mustard, yogurt, lemon salt and black pepper.  Mix this into the tuna mixture, combining all and mashing it well together.
  2. Lay out your wrap on a flat surface.  Spread the tuna over the wrap to cover, leaving about 1/2 inch free all the way around.  Lay out the pepper strips  lengthwise on top of the tuna in rows, leaving about an inch in between the rows.  Cover with the spinach, in a single layer. Roll up as tightly as you can from one edge.  Wrap well in cling film and chill for about an hour. 
  3. Cut into 1 inch slices to serve.
Created using The Recipes Generator


In all truth I could not eat the whole thing and so I wrapped the remainder up and put it in the fridge for tomorrow.   I don't know what's happening to my appetite lately.  I get filled up a lot faster, and I just don't seem to be able to eat as much as I used to, which isn't exactly a bad thing when you think about it!  Bon Appetit! 


Monday 25 February 2019

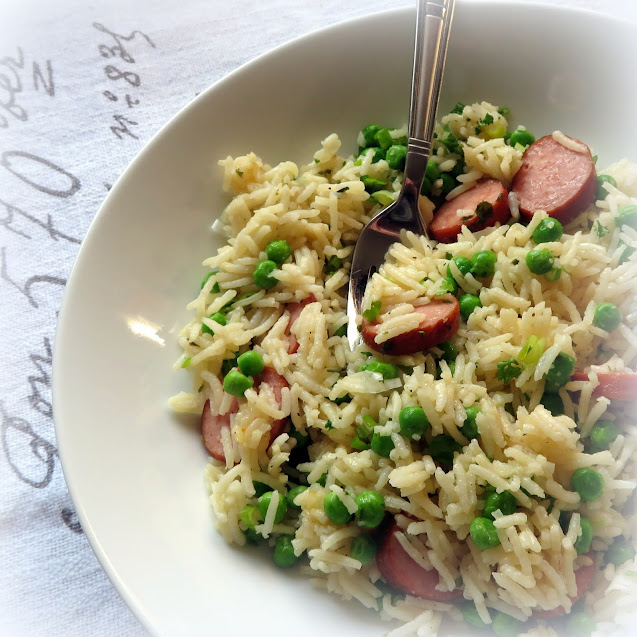
Skillet Sausage, Peas & Rice


I love to cook, and I love to eat.  I worked as a Personal Chef for a number of years for a very wealthy American Family here in the UK, where every meal had to be a production.  


I didn't mind.  It gave me the opportunity to stretch, and it was what I was being paid to do.  It was the dream job in many ways for the consummate foodie.


To be honest however, it is not how I like to eat and cook in my personal life.  


With the exception of Special Occasions, I want to cook  . . . and I enjoy . . . simplicity.  Less is more in my kitchen. 


I prefer simple ingredients, put together quickly, easily and in a delicious way. You can call me lazy if you want to, but it truly is what works best for me. 


 I don't want to spend hours and hours in the kitchen cooking . . .  or cleaning up! 


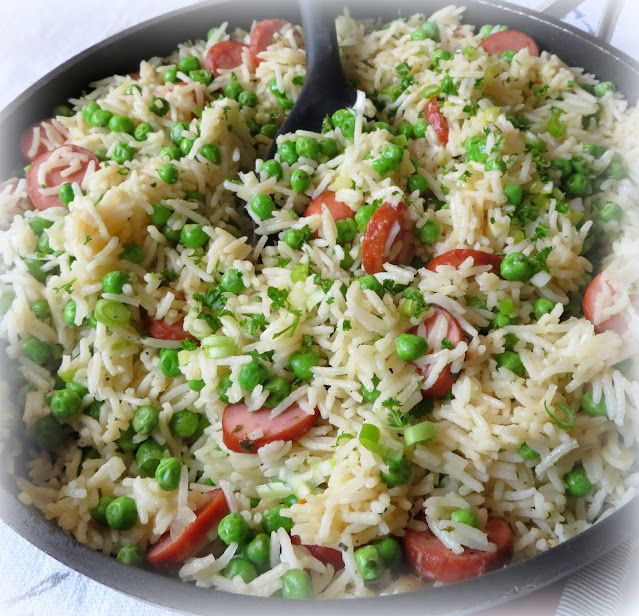
For most of my every day cooking meals like this Skillet Sausage, Peas & Rice work well for me.  


Its the type of thing I like to cook and to eat. 


Simple, honest and, yes  . . .  delicious.  Quick too!  Meals like this get me in and out of the kitchen in a short period of time.


Polish Sausage (smoked sausage) is one of the main ingredients.  


I adore the smokiness and spiciness of a good polish sausage and yes . . .  the hit of garlic.  It is just so good! 


In this simple dish polish sausage rounds are lightly browned in a bit of olive oil and then combined with some fresh garlic for even more of a garlic hit!  


Don't worry it's not too much, not too much at all. (Be careful not to let your garlic brown or burn. It will turn bitter.)


After that you simply add some basmati rice, chicken stock and a bit of seasoning.  


Brought to the boil and then simmered, within about 20  minutes, your dish is almost done. 


All you need to do now is to stir in some frozen baby peas, chopped spring onions and chopped parsley. 


The heat from the dish, helps to thaw the peas and slightly cooks them without causing them to lose that beautiful green colour . . .


It also takes any harshness out of the spring onions, leaving you just with a lovely light onion flavour that is not obnoxious in the least. 


Parsley adds even more lovely green colour and contrast.  Oh but this is some delicious.  We love it! You can also successfully cut the recipe in half if you wish. 


Yield: 5 - 6

Skillet Sausage, Peas & Rice

prep time: 15 minscook time: 20 minstotal time: 35 mins
Meals like this all in one pan skillet sausage, peas and rice make for a really delicious, quick and easy mid-week supper.  All you need on the side is perhaps a salad and for the heartier eaters, some crusty bread!

ingredients:

  • 2 tsp light olive oil
  • 3 cloves garlic, peeled and minced
  • 1 pound polish (smoked) sausage (kielbasa) sliced into 1/4 inch thick coins
  • 710ml chicken stock (3 cups)
  • 315g basmati rice (1 1/2 cups)
  • 1/2 tsp garlic granules (not salt)
  • 1/4 tsp freshly ground black pepper
  • salt as needed
  • 225g frozen petit pois (1 1/2 cups)
  • 4 spring onions, trimmed, washed and finely chopped
  • a handful of fresh flat leaf parsley, chopped (about 1/4 cup)

instructions:

  1. Heat the oil in a large skillet (with a lid).  Add the sausage and cook, stirring occasionally, until it browns on the edges.  Add the garlic. Cook and stir for a minute or so longer, until fragrant. (Don't let the garlic brown or it turns bitter.)  Add the chicken stock, rice, garlic granules and pepper.  Stir and bring to the boil, then reduce to a slow simmer, cover and cook over low heat for about 20 minutes, until all of the liquid has been absorbed.  Taste and adjust seasoning with salt as needed.  Stir in the frozen peas, spring onions and parsley.  Cover and let stand for about 5 minutes then serve.  (Don't worry, the peas thaw out beautifully and semi-cook during this time.)
Created using The Recipes Generator


All you really need on the side is a nice tossed salad and for the really big eaters some crusty bread.  It always goes down a real treat.  Delicious and it gets you in and out of the kitchen in about half an hour or so tops!  Win/win!