Sunday 31 March 2019

Sour Cream Coffee Cake


The recipe I am sharing with you today is a very old recipe that I have had for many, many years.  It is not a coffee cake in the sense that there is any coffee at all in the cake, but in the sense that it is meant to be enjoyed with a hot drink . . .  usually coffee, or tea . . .  hence the term coffee cake.


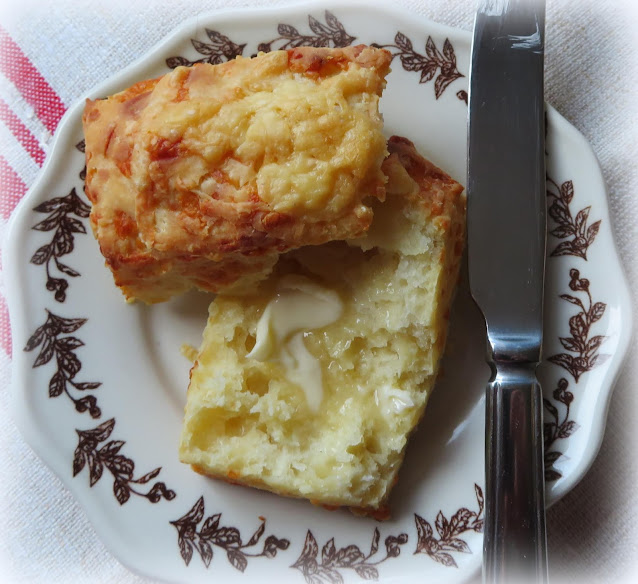
It is a beautiful cake  . . .  with a lovely well flavoured moist batter . . .  with a ribbon of cinnamon nut streusel running through the middle  . . .  as well as baked into and gracing the surface. 


It is a recipe that I have been making since the early 1980's.  I can't tell you where I got the original recipe as it comes from my Big Blue Binder and is handwritten in my own hand all those years ago.  Home Internet wasn't even heard of back then, so the idea that I would ever be sharing these recipes with anyone other than my closest friends never occurred to me, so I never ever noted the source, unless it was from a friend. 


I strongly suspect it came from a magazine clipping or the newspaper.  I did not own many cookbooks back then.  I had a Purity cookbook, a Fanny Farmer Cookbook, my BHG cooking encyclopedia and a cookbook I got free for subscribing to Chatelaine magazine. I still have all of those and this recipe isn't in them . . . . just in my Big Blue Binder.


When I went to make it today, I realised that this is the first time I have baked it since moving over here to the UK!  I don't know why I haven't! 


Its unbelievable as it is a really great cake. It has to have been at the very least 20 years since I have baked it, but it is a cake that I baked frequently when my children were growing up for the family and also for friends if I was entertaining a coffee party, or a family brunch for the extended family.


It makes a nine inch square cake, which cuts beautifully into exactly 16 squares. 


The batter is a simple one made with sour cream, butter, eggs, etc. You could also use plain yogurt instead of sour cream if you wanted to.  Today I did not have quite enough sour cream so I used part yogurt.


And both were full fat.  I couldn't tell the difference.


The streusel is a very simple one  . . .  brown sugar, cinnamon, chopped nuts.  The original recipe did not call for chocolate chips but for one reason or another I added them once, and it was so tasty that I have always added them ever since.


Half the batter gets spread into the pan and then topped with half the streusel . . .  then the other half batter gets spread on top and the remaining streusel over all.  The second half of the batter can be a bit difficult to spread over top so what I do is to dollop it all over the middle layer of streusel in smaller bits . . .  and then carefully tease the bits with the back of a spoon until they meet each other and cover it.  This is the best and easiest way to keep the layers distinct.


Oh but it smells like a little bit of heaven when it is cooking.   Cinnamony and warm and toasty  . . .  just like every happy memory I have of home sweet home.

Yield: 16

Sour Cream Coffee Cake

prep time: 10 minscook time: 50 minstotal time: 60 mins
An incredibly moist and flavourful cake, with a streusel filling and topping, meant to be enjoyed with a nice hot cuppa! From my Big Blue Binder.

ingredients:

  • 120g butter (1/2 cup)
  • 190g caster sugar (1 cup)
  • 2 large free range eggs, beaten lightly
  • 1 tsp vanilla extract
  • 120g sour cream (1 cup)
  • 1 tsp bicarbonate of soda
  • 245 g plain flour (1 3/4 cups)
  • 2 tsp baking powder
For the Topping:
  • 200g soft light brown sugar (1 cup)
  • 60g finely chopped toasted nuts (walnuts or pecans)
  • 1 TBS ground cinnamon
  • 90g semi sweet chocolate chips (1/2 cup) optional

instructions:

  1. Preheat the oven to 180*C/350*F/ gas mark 4.  Line a 9 inch square baking tin with some baking paper. Set aside.
  2. To make the streusel combine all of the ingredients in a small bowl, mixing together well.  Set aside. (The chocolate chips are an optional ingredient.)
  3. Cream the butter and sugar together until light.  Beat in the eggs one at a time.  Beat in the vanilla.  Combine the sour cream and the soda.  Sift the flour and baking powder together.  Add the sour cream mixture to the creamed mixture alternately with the dry ingredients, making three dry and two wet additions, beginning and ending with dry.   Spread half of the batter in the prepared pan.  Sprinkle half of the streusel over top.  Cover with the remaining batter. Sprinkle the remaining streusel over all.
  4. Bake in the preheated oven for 45 to 50 minutes until a toothpick inserted in the centre comes out clean and the top springs back when lightly touched.
  5. Serve warm or cold, cut into squares.
Created using The Recipes Generator


 Todd polished off two pieces of it before I could say Jack Robin!  Yes, it is that good of a cake.  I hope you will give it a go!  I guarantee you will fall in love.  I don't think it will be another 20 years before I bake it again.  At least I hope that it won't!  


Saturday 30 March 2019

Orange & Almond Muffins


I usually like to bake something at the weekend for us to enjoy with a leisurely drink, either at breakfast or at some point during our busy day.  


These delicious muffins fit the bill perfectly.


Tender and moist Orange muffins filled with the crunch of flaked almonds.

They are topped with more flaked almonds and then sweetly glazed with some orange marmalade after baking.   I adore marmalade.


I adapted the original recipe from a book by the Australian Women's Weekly entitled "Madeleines, Muffins & More."


Its a great baking book, about the size of a magazine, and is filled with loads of recipes for small and delicious bakes and cakes, both sweet and savoury.


The original recipe makes 12 delicious muffins.  I have adapted it to make only six. because we are a small household, and I reckon some of you are as well. 


This is the small batch version I guess.


Its a fabulously moist muffin with a beautiful texture . . . not a cake per se, but a muffin.

A very, very good and tasty muffin.


The orange flavour comes from the use of orange zest in the batter and then a quantity of orange marmalade.


 The marmalade is used both in the batter and then again in the bitter sweet glaze that is spooned over the finished muffins while they are still warm. Yummmm . . . .


There is a bit of crunch in the muffin as you stir some flaked almonds in the batter.  


These also add flavour . . . I love muffins with nuts in them.


More are sprinkled on top of the batter prior to baking  . . .  they get all toasty.  I love toasted nuts, don't you?  


I believe that toasting enhances the flavours of all nuts. It somehow makes them nuttier! 


I used my favourite Bonne Maman Bitter Orange Marmalade for these.   You can use any good marmalade you have to hand.


Marmalade is something we always have in the house.  We enjoy it on our toast of a morning, and I even like it stirred into my oatmeal from time to time. 


It adds a certain "Je ne sais quois!"


Just look at that lovely texture.  These were incredibly tasty and went down really well with a nice hot cuppa herbal tea.


I really hope you will want to bake some for yourself. I think you are really going to enjoy them!  At least I hope you will!


Yield: 6

Orange & Almond Muffins

prep time: 10 minscook time: 25 minstotal time: 35 mins
This small batch muffin recipe yields six beautifully flavoured muffins, with a moist and tender crumb. It boasts  a crunchy toasted almond topping and a tangy orange marmalade glaze!  You can easily double the ingredients to make 12.

ingredients:

  • 150g self raising flour (2 cup plus 1/2 TBS)
  • 65g butter, cut into bits (4 1/2 TBS)
  • 40g flaked almonds (1/2 cup)
  • 75g caster sugar (6 TBS)
  • 1/2 TBS finely grated orange zest
  • 85g orange marmalade (1/4 cup)
  • 1 large free range egg, lightly beaten
  • 60ml milk (1/4 cup)
  • couple additional TBS of flaked almonds to top
For the orange marmalade glaze:
  • 2 1/2 TBS orange marmalade
  • 1 TBS water

instructions:

  1. Preheat the oven to 200*C/400*F/gas mark 6.  Butter a six cup muffin cup really well, or line with muffin papers.
  2. measure the flour into a bowl.  Drop in the butter and rub it in with your fingertips until the mixture resembles fine bread crumbs.  Stir in the caster sugar, orange zest and almonds.  Whisk together the marmalade, egg and milk. Add all at once to the dry ingredients.  Mix just to combine.  Divide between the prepared muffin cups.  Sprinkle some additional flaked almonds on top of each.
  3. Bake in the preheated oven for 25 to 30 minutes until well risen and golden.
  4. While the muffins are baking whisk together the marmalade and water for the glaze.  Spoon over the hot muffins when they come out of the oven.  Let the muffins sit in the tin for about 10 minutes before scooping out onto a wire rack to cool.
  5. Store any leftovers in an airtight container.
Created using The Recipes Generator


There was a bit of marmalade left on the spoon when I took it out of the jar.  What else was I to do but spread it on my muffin???  Scrumdiddlyumptious! 

 
All of the content you see here on this page, both photography and written, are the sole property of The English Kitchen, Marie Rayner. Any reposting or misuse is not permitted. If you are reading this elsewhere, please know that it is stolen content and you may report it to me at mariealicejoan at aol dot com

Thank you for visiting! Do come again!
 

Friday 29 March 2019

Three Ingredient Cheese Scones


What if I told you, you could make a delicious, light, flaky savoury scone using only three ingredients?  Its true! You can and these lovely scones are just that!  

I almost couldn't believe it when I read the recipe.  Three ingredients?  How could that be?  What would they turn out like?   I just had to try them out first hand. Three Ingredient Cheese Scones.


I was very pleasantly surprised.  I did not expect such positive results.  These were light, flaky and savoury.  Chock full of cheese.
 
Light, flaky and savoury scones that really do use only three ingredients.  Not only that, but they go together in a flash! What more could a person ask for!


These literally go together in about five minutes.  Seriously!  I kid you not!
 
You can put these together in about 5 minutes, pop them into the oven, bake and be enjoying them in less than half an hour. I was literally amazed at the speed and ease of preparation!


All you need is self-raising flour (self-rising), grated cheddar cheese and plain yogurt.  That's it! Three simple ingredients.

Three ingredients I always, always have in my refrigerator. Refrigerator basics and of course the flour. I always keep a variety of flours on hand.  Plain, self-raising, whole wheat, whole wheat self-raising, and a variety of bread flours. 


Did you know that you can keep your flour in the freezer?  In fact when it comes to whole grain or specialty flours that you may only use occasionally, it is the best way to keep them without them gong to waste.  
 
Simply pop the flour into a sealed container and then put it into the freezer. It will keep for ages and ages.  Just measure it out for any recipe you need it for and bring it to room temperature prior to using. Its that simple.


You can easily make your own self raising flour.  Simply add 1 1/2 tsp of baking powder and 1/4 tsp salt  for every 140g/1 cup of plain flour.  Easy peasy!  

Putting these scones together is a real doddle. You measure the cheese and the flour together into a bowl and then stir with a fork to combine. Once you have done that, you then stir in the yogurt to make a soft dough.  Pat the  out to a rectangle . . .  cut . . .  then bake.


I love that you simply cut the dough into rectangles rather than stamping them out with a round cutter. No waste and no rerolling of scraps.
 
That means that they all turn out perfect.  Re-rolled/patted scones can sometimes come out a bit wonky and they won't rise quite as much.  They will also be not quite as tender.


These rise really nice and tall  . . .  and are so flaky. Use a sharp knife to cut them into the rectangles.
 
I like to use a nice strong cheddar for plenty of flavour when I am baking. The stronger the cheese the more flavour.   You also  have the option of sprinkling more cheese  on top  prior to baking for a lovely finish. I say why not!  More cheese please!!


These are lovely just served  plain and on their own.  They are excellent split and spread with softened butter.
 
And why not.  A bit of butter elevates the taste of anything in my opinion. Well, all things savoury at any rate!


Look at that lovely texture of these.  Isn't it beautiful?  I think they are just perfect! 


These are wonderful served for breakfast with butter, and yes, even jam.  Cheese and jam go really well together.  

They are wonderful served with salads also for a nice light lunch.


They are also pretty wonderful served with soups or, or stews for dinner.  
 
These are quitet lovely no matter what or when you serve them.  I can almost guarantee that they are sure to always be well received!

Yield: 10

Three Ingredient Cheese Scones

prep time: cook time: total time:
Light, flaky cheese scones that go together in a flash.  You are sure to love these, and yes they only need three ingredients!

ingredients:

  • 300g self raising flour (2 cups plus 3 TBS)
  • 150g grated strong cheddar cheese (1 1/4 cups)
  • 250g  plain yogurt ( 1 cup)
Optional:
  • 5 TBS grated strong cheddar to sprinkle on top

instructions:

  1. Preheat the oven to 200*C/400*F/ gas mark 6.  Line a baking tray with some baking paper set aside.
  2. Measure the cheese and flour into a bowl.  Stir together with a fork to combine completely.  Add the yogurt and quickly mix together to form a soft dough.  Tip out onto a lightly floured surface and knead a couple of times until smooth.  Pat out into a rectangle 6 by 10 inches in size, and about 1 inch thick.  Cut into 10 rectangles.  Place the rectangles spaced apart on the baking sheet.  Sprinkle with the optional additional cheese if using.
  3. Bake for 18 to 20 minutes until well risen and golden brown.  Scoop onto a wire rack to cool slightly before serving with plenty of cold butter for spreading.  Delicious!
Created using The Recipes Generator


I found the original recipe written on a scrap of paper.  I suspect I had copied it out from a magazine at the Dentists or Doctor once upon a time.  I adapted it to use both Metric and American measurements.  You're welcome

This content (written and photography) is the sole property of The English Kitchen. Any reposting or misuse is not permitted. If you are reading this elsewhere, please know that it is stolen content and you may report it to me at: mariealicejoan at aol dot com Thanks so much for visiting. Do come again! 


Thursday 28 March 2019

Strawberry Almond Cream Cheese Danish


When I was living in Canada prior to moving over here I worked at a Canadian Institution called Tim Hortons.  I quite liked my job.  I have always loved working with people and with food. 


During Strawberry season they used to carry a line of Strawberry Cream Cheese Danish that I totally loved.  There is something really wonderful that happens when you combine strawberry filling and puff pastry.


Add a cream cheese filling and you are in taste heaven.  End of story!


I was sitting here looking out at the sunshine today and thinking about my time at Timmies this morning and decided to re-create the flavours of their Strawberry Danish for Todd to enjoy. 


I think I did a pretty good job  . . .  ahem . . .  maybe these are even better.  *blush*


And they only require a few ingredients.  One package of all butter puff pastry.  I use the all butter one because I don't like to use or eat things like palm oil if I can help it, and well, all butter puff pastry just tastes better! 


You simply unroll the pastry and cut it into 8 even rectangles.  Then you lightly score a half inch border all around the edge of the rectangles using a sharp knife.


You will also need 1 free range egg yolk, which is divided.  1/2 of it gets used in the filling and 1/2 gets beaten with a bit of water and brushed around the borders you just created.  You then press flaked almonds into the borders, just lightly so that they will adhere. 


The other half egg yolk gets beaten into some cream cheese, sugar and flavourings.  I use pure flavourings. Almond and Vanilla. 


This gets spooned into the centre of the pastries. It will be a bit runny, but that's okay.  Just don't overfill them and there won't be a problem. You may not need it all, but there shouldn't be a lot leftover. 


After that you want to take the best strawberry jam you can buy. ( I confess, I adore Bonne Maman.)  Just plunk about two teaspoons down the centre of the pastries. Don't be tempted to over-fill.  Hot jam expands.


And that's it.  Bang those babies into the oven and let the magic happen  . . .


Let that pastry puff up and develop all of it's flaky golden layers  . . .


Let those lovely flaked almonds get all golden brown and toasty . . .


Let that rich cream cheese custard bake through . . . . mmmm . . . .


And let that sweet strawberry jam bubble away and get all sticky gooey berry-ish . . .


A flicker of almond icing is the finishing touch . . .  it gilds these lilies to perfection!


Yield: Makes 8

Strawberry Almond Cream Cheese Danish

prep time: cook time: total time:
These wonderfully flaky pastries will have your family reaching for seconds. Quick, easy and delicious! If you have all the elements ready and waiting they go together in a flash.

ingredients:

  • 1 sheet of all butter puff pastry
  • 180g package of cream cheese (4 ounces)
  • 45g sugar (1/4 cup)
  • 1 free range egg yolk, divided
  • 1/4 tsp each pure almond and vanilla extracts
  • strawberry jam
  • flaked almonds
For the glaze:
  • 65g sifted icing sugar (1/2 cup)
  • 1 TBS milk
  • 1/4 tsp almond extract

instructions:

  1. Preheat the oven to 200*C/400*F/ gas mark 6.  Line a baking tray with baking parchment.
  2. Whisk together 1/2 of the egg yolk (reserve the remainder), the sugar, cream cheese, vanilla and almond extract until smooth.  Set aside.
  3. Unroll your puff pastry. Cut it into 8 equal sized rectangles.  Using the tip of a sharp knife, score lightly about 1/2 inch in around the border of each rectangle, taking care not to cut all the way through.  Transfer to the baking sheet.
  4. Whisk together the remaining egg yolk and an equal amount of water.  Brush the 1/2 inch border around each rectangle with the egg wash and sprinkle with the flaked almonds, pressing them on lightly.
  5. Spoon a portion (about 2 heaped TBS each) of the cream cheese mixture into the centre of each rectangle, spreading it out a bit.  Spoon 2 tsp of strawberry jam into the centre of each on top of the cream cheese.
  6. Bake in the preheated oven for 17 to 20 minutes until puffed and golden brown at the edges.  Remove from the oven.  Scoop off onto wire rack to cool completely.
  7. Whisk together the icing sugar, milk, and almond extract until smooth.  Flick over top of the pastries.  Allow to set before serving.
Created using The Recipes Generator


What more can I say but nummity nummity nummity num num num! Hmmm . . . why oh why do I do this to myself?  So very hard to resist!