Wednesday 31 July 2019

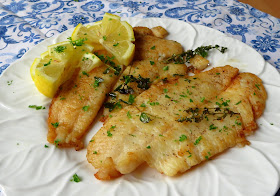
Sole Fillets with Lemon & Thyme


I think Sole has to be one of my absolutely favourites of all the fishes in the sea.  There are two types of Sole which we enjoy here in the UK, Dover Sole and Lemon Sole.  Both are highly-prized, delicately flavoured fishes.  Lemon Sole is slightly less expensive than Dover Sole, but in my opinion is just as delicious and that is what we enjoyed today. 


My sole came from The Fish Society.  The Lemon Sole comes two fillets in a package, and in a variety of sizes from small to large.  Mine were medium sized.  They had the skin on, which I didn't necessarily want.  The skin of Sole can be quite rubbery, so I quickly removed it and disposed of it. Its very easy to do if you have a sharp knife.  Just make a small cut through the flesh at the narrow end of the fish, and then, angling your knife slightly, grab hold of the skin and wiggle it through beneath the blade of your knife, pulling it gently away from the fish. I am not sure if I explained that correctly, but I found a video on YouTube that explains it perfectly.  Its a lot easier to do than it is to explain!


This is really a beautiful piece of fish, and I have to say, I am always really impressed with The Fish Society and its service.  Every piece of fish I have ever gotten from them has been lovely and of the highest quality.  


It arrives frozen and well packed, ready for you to thaw as and when you need it. With overnight delivery available I just unpack it and throw it right into the freezer when it arrives. Easy Peasy.


A fish as delicate and delicious as sole is deserves the simplest treatment when you are cooking it. You want to keep everything as simple as possible. You don't want strong flavours over-powering the flavour of the fish . . .  and with fish this nice, the more simplistic your method of cooking the better.


One thing I love about fish is how very quickly it cooks. This  cooks in about six minutes from start to finish to make sure any side dishes are ready and waiting to be served. You won't want to start cooking it until everyone is almost sat down at the table!


I seasoned my skinned fillets with kosher salt and black pepper on both sides and dusted them lightly with flour, shaking off the excess . . .


I added a knob of butter and some canola oil to a large skillet and heated it just until the butter began to foam, over moderate heat.


I threw a few sprigs of fresh thyme into the pan to flavour the butter and then applied the fish fillets, presentation side first. (Presentation side is the side of the fish you will want showing when you plate it up for service.)


You want to fry it just until it is golden brown on that side, which should take about 3 minutes, and then carefully flip it over to brown the other side. 


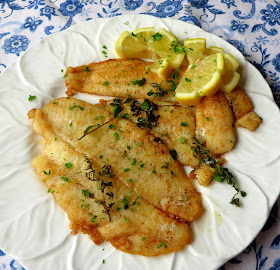
That won't take very long either. Two to three minutes maximum.  Remove it from the heat and scoop it onto a serving platter, placing some of the crisp thyme sprigs with it to adorn it and sprinkling it with some chopped fresh parsley.  That's it!


You could squeeze fresh lemon on it while it is still in the pan, but I prefer to pass lemon wedges at the table for diners to squeeze onto their individual servings.  This helps to maintain the crisp exterior of having fried it in butter . . .  why bother if you are just going to soggy it up before you serve it?


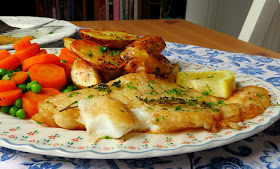
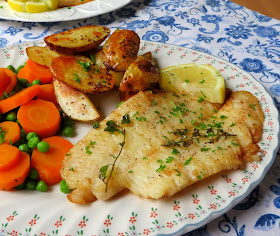
In any case these were beautiful fillets of sole . . .  perfectly cooked and golden brown.  Todd enjoyed his with some roasted baby new potatoes and peas/carrots.  He was in fish heaven.

Sole Fillets with Lemon & Thyme

Yield: 4
Author:
Sole is a wonderful fish, which stands out with the simplest preparation. This way its delicate flavour and texture is highlighted to the highest level. In order to keep the coating on the fish crisp for serving, I pass lemon wedges at the table rather than squeeze it over the cooked fish in the pan.

ingredients:

  • 4  (6-oz) boneless, skinless sole fillets
  • 1/2 tsp fine sea salt
  • freshly ground black pepper
  • 70g plain flour (1/2 cup)
  • 2 TBS butter
  • 1 TBS flavourless oil
  • several sprigs of fresh thyme
  • chopped fresh parsley to sprinkle
  • fresh lemon wedges to serve

instructions:

How to cook Sole Fillets with Lemon & Thyme

  1. Season your fish fillets on both sides with salt and black pepper.  Dust with flour, patting it in and shaking off any excess.
  2. Heat the butter and oil in a large skillet, over medium high heat,  until the butter begins to foam.  Add the thyme sprigs.  Place the fish fillets in the pan, presentation side down. Cook for about 3 minutes until golden brown. Carefully turn them over using a fish slice/spatula and brown on the second side, a further 2 to 3 minutes.  Remove from the pan to a heated serving plate.
  3. Sprinkle with chopped parsley and serve with wedges of lemon for squeezing over top.
Created using The Recipes Generator


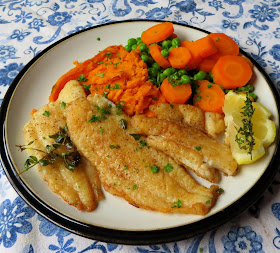
I enjoyed mine also with some peas and carrots, and a bit of mashed sweet potato.  I do love sweet potatoes.  Oh my but this was some of the best sole I have ever eaten.  I found myself wondering why why don't we eat it more often than we do. It is just excellent excellent fish. Quality speaks for itself.  The Fish Society has all kinds of fish, fish that you normally won't find in the shops. Its like having your own private fish monger on line and on tap!  They have everything from Abalone to Zander and they deliver right to your door in a timely manner.  Shell fish.  Sea food.  All Sashimi grade.  I have never been disappointed, as Todd says, best fish ever.  You can't go wrong. 


Tuesday 30 July 2019

10 Delicious Main Dish Salads to Help You Keep Your Cool


 One thing I really love about the warmer months is the way our appetites seem to turn to the eating of salads and grilled food.  We crave light and fresh, and are only to happy to indulge ourselves in this type of food for as long as we can.  And small wonder this, as we are fortunate enough in this country to have some of the nicest local fresh ingredients available to us in the world.  Salad as a main course?  In the dog days of summer you just can't go wrong in serving up a delicious salad for supper!  Why not enjoy it outside on the patio. The cold wet weather will be upon us before we know it. Let us make hay while the sun shines! Here are my favourite Ten Main Dish Salad Picks for when the temperatures are rising and you just can't face cooking in a hot kitchen!

Salade Composé 

Why not make like the French and turn your home or patio into a French Bistro one night with a fabulous Salade Composé. These are my favourite kinds of salads because they are so easy to put together with a little bit of this and a little bit of that.  Hard boiled egg, crisp streaky bacon, sweet garden cherry tomatoes, fresh salad leaves (also from the garden if you are lucky), toasted garlic croutons and a tangy Sherry Dijon Vinaigrette Dressing complete the delicious picture!  


I love the tangy dressing on this Grilled Thai Steak Salad, with it's slight sweet and sour flavour, hot and spicy from the chilies and the sweet surprise of fresh pineapple. It has a distinct, but not unplatable bite and a wonderful tang from the use of lime.This is another main dish salad winner. You can either grill the steak to your preference on the BBQ (my favourite) or on top of the stove in a grill pan. Of course if you have an electric grill you can also use that!


Grilled Chicken Caesar Salad 

My all time favourite salad has to be the Grilled Chicken Caesar Salad.  Back home if we were eating out in the summer months I would always choose this over my normal fish and chips. Grilled chicken, seasoned with my own Montreal Chicken Seasoning, along with crisp Cos (romaine) lettuce leaves, Streaky bacon, Crisp garlic croutons, plenty of Parmesan Reggiano Cheese and a brilliantly flavourful Caesar dressing complete the picture for a nice light supper everyone will love! 

Steak, Mushroom, and Blue Cheese Salad


This fabulous Steak, Mushroom and Blue Cheese Salad is another supper time favourite of ours in the Summer months. I call this the holy trinity of steakdom! Steak, mushrooms and tangy blue cheese . . . the three combined in a simple salad which tastes anything but simple. It has a deliciously tangy and rich vinaigrette dressing . . . using sherry vinegar and honey.  You get the green rich and meaty crunch of fresh baby spinach leaves . . . the lovely flavour of the steak, the tang of capers and blue cheese . . . rich mushrooms and a lovely vinaigrette, which when combined together create a fabulous salad that I would be proud to even serve to company.  


I adore Taco Salad, and especially this Low Fat Chicken Taco Salad!  The real star of this is  the dressing. It's cool and creamy and very low in fat, which is an extra bonus! I used no fat mayo and sour cream for mine and it turned out just wonderfully delicious with just a bit of heat. You can control that by using more or less of the Chipolte chili paste. (This gives it a nice smokey flavour too.) Of course if you would rather use ground beef instead of chicken you certainly could. I used battered chicken strips in this and homemade baked tortilla crisps. You won't miss any of the taste of the full fat version. This is perfect just as it is.


 Layered Cobb Salad 

This Layered Cobb Salad is not only delicious but very pretty to look at as well.  It has all of the elements of the infamous Cobb Salad, stacked in a tasty tower . . . crisp iceberg lettuce, rich and indulgent creamy ripe avocado . . .  ripe sweet tomatoes, sharp spring onions  . . .  crisp and salty bacon and  rich and tangy blue cheese.  All with a deliciously creamy dressing!  Makes for a lovely  luncheon dish on its own or an amazing side dish when you are entertaining. Grilled steaks or chicken would go very well along side. 

Turkey, Sour Cherry & Almond Pasta Salad  

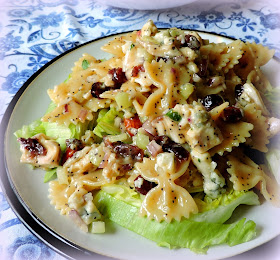
Turkey, Sour Cherry & Almond Pasta Salad is what I call a really supper-time winner. The salad itself boasts the inclusion of cubed cooked turkey breast.  You could also use chicken if you don't have any turkey.  Dried sour cherries provide a bit of sweet tartness with the addition of sharp red onions, crunchy celery, salted almonds . . .  and creamy tangy Gorgonzola cheese.  Bow Tie Pasta and a tangy poppy seed vinaigrette complete the picture. 

Grilled Chicken and Wheatberry Salad


Grilled Chicken & Wheatberry Salad. A colourful plate of salad greens is topped with a delicious wheatberry salad, chock full of crunch and sweetness. Crunchy toasted walnuts and chopped celery . . . sweet dried cranberries . . . sharp tasting spring onions, and a tangy lemon and olive oil dressing. This is topped again with a breast of chicken that has been rubbed with a delicious mixture of spices and grilled until perfectly cooked, and still juicy and tender. Nobody can complain about this!


If you have a delicious dressing to hand, you can build a fabulously tasty supper salad out of just what you have in the refrigerator, picky bits left over from other meals.  This Tarragon, Chervil & Chive Dressing is quite simply wonderful. Creamy and delicious and filled with beautiful flavours.  Here I have served it with some baby gem lettuce leaves, boiled egg, sliced cooked chicken, tenderstem broccoli,cooked baby carrots, boiled new potatoes and English Peas. Fabulously Tasty!  What's in your refrigerator that you can simply throw together to make a fabulously tasty salad collation? 

Crispy Chicken Salad with a Blueberry Vinaigrette

Crispy Chicken Salad with a Blueberry VinaigretteThis is a delicious salad with crisp fresh salad greens . . .  I used baby rocket (arugula), baby gems and baby spinach . . .  crisp French radishes, fresh cucumbers from the garden,  crispy salad onions, toasted pecans, and crumbled feta cheese . . .  and yes, fresh sweet blueberries that are coming into season now!  You top all of that with some sliced crispy chicken.   I have created a delicious blueberry dressing to drizzle over top of it all. Seriously yum yum!  

So there you have it!  My tasty top ten picks.  There is sure to be a bit of something here for everyone on your list!  Get ready to chill out and dig in!


Monday 29 July 2019

Back to the 60's Hot Chicken Salad

 Hot Chicken Salad  

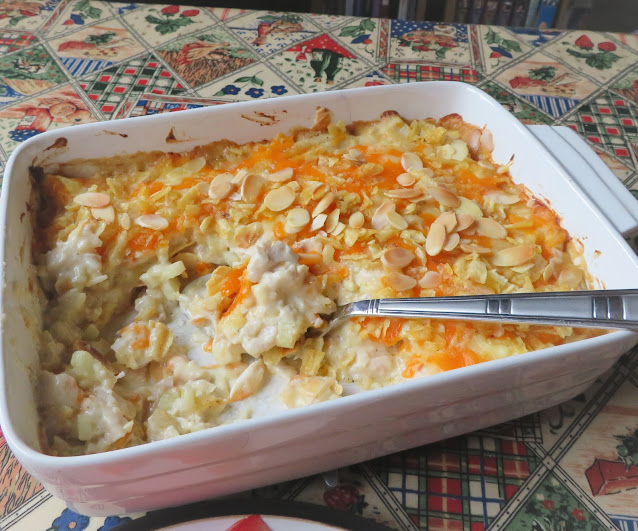
Hot Chicken Salad.  This recipe is one of my long time favourites. I reckon I've been enjoying it since the 1960's, hence the title. 

Its a plain unadulterated recipe.  Its not hot chicken salad with pasta, nor is it a hot chicken salad with rice recipe.  Its just plain and simple. The kind of recipe your mom might have made.

I've been playing today with another system of photo editing.  Mostly because my computer was doing updates that were taking forever, and so I had to download my photos onto another system and figure out how to crop/edit the there. 

I guess it did an okay job.  It was a very steep learning curve for me!


This is a very nostalgic casserole recipe.  Like I said, it is most likely something which your mother probably cooked at one time or another when you were growing up (if you are around my age anyways!).

It was a very popular luncheon dish for Ladies Who Lunch back in the 1960's and 70's.  Simple and yet very delicious!


Its a classic combination of cooked diced chicken, celery, mayo, with a few delicious twists along the way.

For a simple and easy lunch or supper, it really doesn't get much better than this!


You begin with a  rich and creamy chicken base  . . .   rich with mayonnaise and sour cream.

Mayonnaise and sour cream work very well together, especially in casseroles like this one.


Crunch is supplied with the addition of plenty of chopped celery. I love celery.  I always de-string mine. It was a habit I picked up when I worked at the Manor.  

Its an easy thing to do and I actually like celery better that way. Sometimes strings can be really chewy and they can get caught in your teeth.


Ladies who lunch don't like things caught in their teeth.  Its a huge no no. 

Simply take your knife and catch the ends of the strings (one at a time) at one cut edge and pull them down the length of the stalk of celery, which lifts them out, and just discard.


There is cheese in the salad base and again in the topping.  

I used a mix of coloured and uncoloured strong cheddar. 


The cheese adds another depth of flavour and richness . . .  and its lovely melted on top.

I always try to grate my own cheese when I can.  Grating your own cheese is not only economical, but I think it usually works better than already grated cheeses you might buy.


Melted on top, it helps to grab hold of the crushed potato chips and flaked almonds, keeping them in place.

Were potato chips or cracker crumbs a popular feature on the casseroles of your childhood?  I have to say the addition of flakes almonds really adds even more deliciousness.


Admittedly this is not low in calories  . . .  but when Ladies are lunching, they don't really want to watch their calories, although they may say differently.  

They want their lunch to be a treat and a feast.  After all, its not something which happens every day. 


You could use low fat sour cream, mayo and cheese if you wanted to, but I can't vouch for the results. 

I'm an in for a penny, in for a pound kind of a girl, and always have been, which is probably why I look the way I do! ha ha!


Actually this makes the perfect low-carb casserole dish, so long as you omit the potato chips on top.  Simply use more almonds if you wish.


If you want more crunch in the dish itself, you could add chopped or sliced water-chestnuts . . .


A hint of sweet can be added (if you are not low-carbing it) by adding some chopped dried cranberries, which also add a touch of colour!


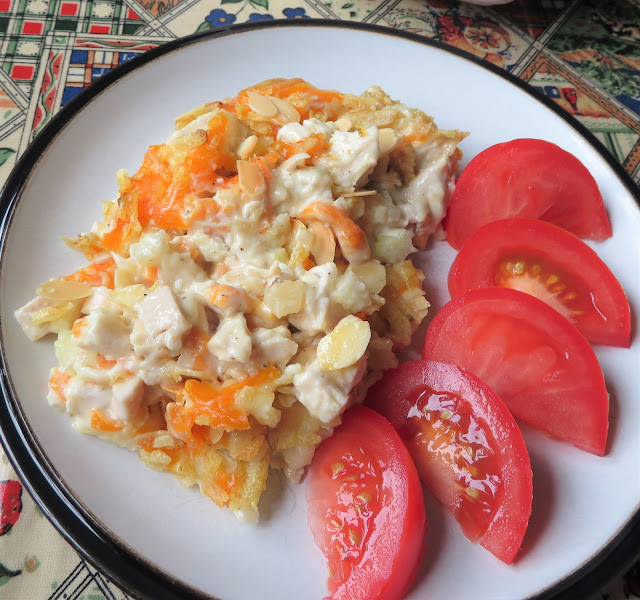
Its pretty delicious either way.  I served it today with some sliced garden tomatoes, but a green salad would also be nice.

Hot Chicken Salad


Yield: 4 - 6
Author:
This quick and easy casserole is  delicious and the sort of thing we might have seen our mother serving when she hosted a  ladies luncheon. It was fabulous then and it is pretty fabulous now!

ingredients:

  • 6 single boneless chicken breasts, poached and cubed
  • 2 stalks celery, trimmed, washed and chopped
  •  1 small onion, peeled and minced
  • 2 cloves of garlic, peeled and minced
  • 120g grated strong cheddar cheese (1 cup), divided
  • 110g full fat mayonnaise ( 1/2 cup)
  • 30g dairy sour cream (1/4 cup)
  • 60ml chicken broth (1/4 cup)
  • salt and black pepper to taste
  • 1 small single serving packet of plain salted potato chips
  • 45g flaked almonds (1/4 cup)

instructions:

How to cook Hot Chicken Salad

  1. Preheat the oven to 200*C/400*F/ gas mark 6.  Have ready a 11 inch by 7 inch shallow baking dish. No need to butter it.
  2. Mix together the cubed chicken, chopped celery, chopped onion, minced garlic, 2/3 of the grated cheese, the mayonnaise and the sour cream.  Combine well together and spread into the baking dish.  Drizzle the chicken broth over top.  Sprinkle the remaining cheese over all.  Sprinkle with the potato chips and the flaked almonds.  Bake in the preheated oven for  20 to 25 minutes, until golden brown and bubbling.
  3. Let sit for five minutes or so before serving. A salad goes very well alongside.

NOTES:

You can very easily dress this up by adding chopped dried cranberries, or drained chopped pineapple to this. Chopped water chestnuts are also nice. You can also add a TBS of lemon juice and some lemon zest. You can also use the equivalent in leftover roasted chicken or a rotisserie chicken, about 3 cups of diced meat.
Created using The Recipes Generator


If your family has particularly hearty appetites and you are serving them this, you could also serve it with a side of steamed rice of baked potatoes.  My husband enjoyed a baked potato with his. 

This is very easily done in the microwave these days. Just prick with a fork, wrap with some paper toweling and microwave on high for 5 to 6 minutes, depending on the size of your potato.  The potato should yield to a slight pressure when it is done.  Easy peasy!  


Hot Chicken Salad

This content (written and photography) is the sole property of The English Kitchen. Any reposting or misuse is not permitted. If you are reading this elsewhere, please know that it is stolen content and you may report it to me at: mariealicejoan@aol.com 


Sunday 28 July 2019

Almost Instant Mayonnaise


One thing that I like to make from scratch is mayonnaise.  That's why I was dismayed when my immersion blender disappeared!  


Once you have made your own mayo from scratch you  will want to make it all the time rather than buy it.  


The recipe makes a decent amount, not too much, and I have never had a problem using it all up within a week.  I would not keep it for any longer than that.


It does use a raw egg, but if you are bothered about that you can use pasteurized egg or a coddled egg.  Personally I am not bothered.  


I find our eggs are very safe today.  However, if you are worried about that, or you have an elderly person or a very young person in the home do try my method of coddling the egg first, and then just add it and proceed as per the recipe below.


To coddle an egg:
  • Bring a small pot of water to boiling. 
  • Set up an ice bath (lots of ice and cold water in a bowl). 
  • When water begins to boil, submerge whole egg into the pot for exactly 1-minute. 
  • Remove and immediately place in an ice bath for 1 to 2 minutes. 
  • Remove and use in place of raw egg.


I just use the juice of the lemon, but you can also add the zest for a really nice lemony touch, or even a clove of raw or roasted garlic for a garlic mayo.


You just put everything into the blender cup of your immersion blender. It is important that the liquid comes over the top of the blades of the blender, or it won't work properly.  


I put the egg, lemon juice or vinegar, and mustard in first and then pour the oil in over top of those.  Let it sit for a few seconds.  Put the blender head in, reaching right to the bottom and turn it on.


Leave it for a few seconds and you will see it start to emulsify and creep up the sides of the container, then you can slowly life the blender up, tilting it now and then until you reach the top and the whole mixture has emulsified.  


It won't take very long at all. 60 seconds if that.   You can then stir in any seasonings you want to use.  I sometimes use a mix of lemon juice and cider vinegar.  I don't always add sugar.  


Real mayonnaise does not have sugar in it, but depending on what I am using it for, sometimes I do add a bit.


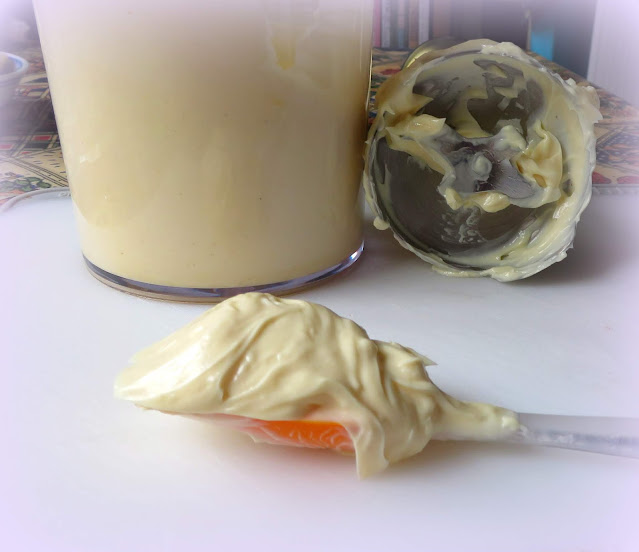
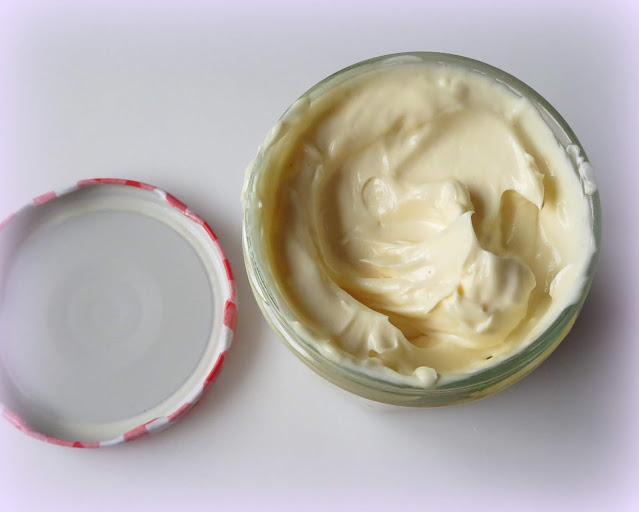
It always comes out perfectly thick, rich and beautiful, as you can see. Its also very easy to flavour it.  If you have some basil oil, or chili oil, you can substitute a bit of the regular oil with that. I would not use any more than a TBS of the flavoured oil.  


I also don't use any oil other than a basic vegetable oil. I would never make it with extra virgin olive oil.  You want a flavourless light oil.  Only add other oils in a small quantity to add some flavour and nothing  more.


This is beautiful and such a simple thing to make. Once you try it you will never go back to store bought if you can possibly help it.  Trust me on this! 


Salad Cream


I also like to make my own Salad CreamIt does require a bit more work than mayonnaise as it is cooked, but there is nothing like a homemade salad cream to use in a potato salad or a coleslaw.

Two Minute Mayonnaise


Yield: makes about 220g/ 1 cup
Author:
If you have a stick blender/immersion blender homemade mayonnaise is only a few minutes away.  You can also do it in a food processor or regular blender but it takes a tiny bit more effort.

ingredients:

  • 1 whole free range egg, or two egg yolks
  • 1 TBS fresh lemon juice
  • 1 tsp mustard powder (can also use Dijon mustard)
  • 240ml flavourless vegetable oil (1 cup)
  • 1/4 to 1/2 tsp fine sea salt
  • 1 tsp sugar (optional)
  • white pepper to taste

instructions:

How to cook Two Minute Mayonnaise

  1. Place the mustard, egg, sugar (if using) and lemon juice in the bottom of the blender container of your immersion blender.  Top with the oil.  Let sit for about 30 seconds.  Then put the wand/head of the immersion blender into the container, right to the bottom, and turn it on, lifting it slowly and tilting the head as the mayonnaise forms. Don't lift it up and down or pump it.  Season to taste with salt and pepper. I like white pepper as it doesn't colour the mayonnaise.  You can use cider vinegar instead of lemon juice.
  2. If you are using a regular blender or food processor.  Add everything to the bowl of the blender/processor and turn it on, drizzling the oil in slowly through the feeder tube until it thickens and emulsifies.
  3. Keep in a covered container in the refrigerator.
Created using The Recipes Generator


I used this to make cucumber sandwiches to take to Grace's Birthday Party.  I just spread medium thick slices of bread on both sides with the mayonnaise. You can see how nicely it spreads. 


Thick and not gloppy.  I like to cut my cucumber for it very thinly with a mandolin cutter, and than layer it as you can see. 


Its not as slippery when done that way. (You can also pat them dry with paper towels.) I seasoned them today just salt however as Ariana had requested just salt.  I personally like a bit of pepper as well. 


Cucumber Sandwiches


For a tea party I would cut off the crusts.  But for a child's birthday party, I just left the crusts on.  I also garnished them with some radish roses. 


Almost Instant Mayonnaise


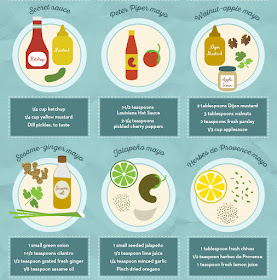
I was going to tell you how to add different flavourings to your mayonnaise to dress up your sandwiches, salad plates, etc.  But I found a lovely Info graphic that does a wonderful job of  just that!


I broke it down into sections so that you could view it better and larger.  I hope you don't mind.


Some of them sound quite, quite delicious and I may give them a go!  After-all tis the season for such things!  I can see me serving the Sesame Ginger one with some lovely poached salmon


The Buffalo Cheese Mayo would be fabulous with chicken, and I think the Chipotle would be just wonderful on burgers, as would the Spicy Horseradish-Parmesan version! 


No matter how you choose to enjoy your mayonnaise, I think you will agree that once you have made your own and see how easy it is to do so, its something you will want to do often! 


This is the Immersion Blender that I have now.  It is a Cookhouse Model.  As with all of their products I am very impressed with it.  Its midway priced and performs impeccably.  Its easy to clean as well.  (I just immerse it in a cup of hot soapy water and blitz away!)  


They did not send me a free one to use, or ask me to tell you about them.  I received it as an early Birthday Gift from a friend.  I quite simply wanted to share it with you because I am really happy with it and I think you would be too.  

Have a great day! 


Almost Instant Mayonnaise 


This content (written and photography) is the sole property of The English Kitchen. Any reposting or misuse is not permitted. If you are reading this elsewhere, please know that it is stolen content and you may report it to me at: mariealicejoan@aol.com 

Thank you for visiting! Do come again!