Sunday 31 October 2021

Easy 7-up Biscuits

7-up Biscuits


These Easy 7-Up Biscuits are a recipe which I have wanted to try for a very long time. I think maybe even years.  I just never got around to it until now.


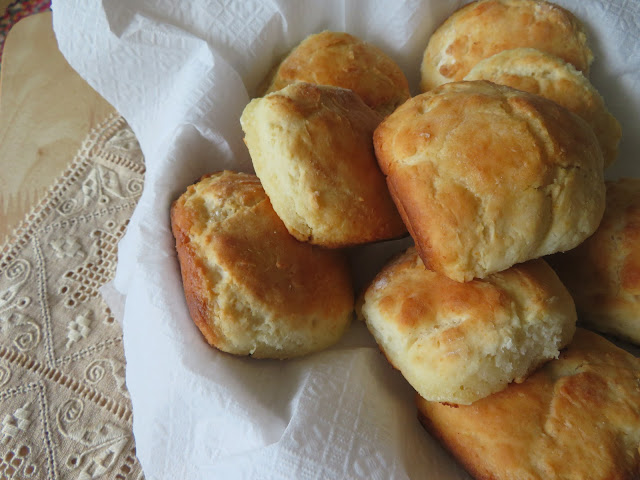
Boy, have I ever been missing out! These are the BEST biscuits!  So easy to make and quick to make as well. Light and fluffy!


7-up Biscuits 


They use only four ingredients, a baking mix, some sour cream, 7-up soda pop and butter.  That's it.  Easy peasy.


You can use a store bought baking mix such as Bisquick, or make your own biscuit mix. I do that and keep it in the freezer, ready to use as and when.


7-up Biscuits 


With there only being me in the house now, that only makes sense. I simply would not get a traditional box of baking mix used up in time before it expired.


I make a batch of my homemade baking mix, pop it into a tightly sealed container and then I can use as much or as little as I wish to whenever I need it.  It also really easy to make. 


7-Up Biscuits 


You can access my homemade mix recipe here. Just scroll down the page and you will find a printable recipe. 


It comes in handy for all sorts.  Other than making your own, you can use Bisquick or any other commercially produced baking mix.  


Easy 7-up Biscuits 


And really, don't worry about using it all up. I have plenty of recipes on here that are delicious and that you can use it in:


Easy 7-up Biscuits


Just to name a few. Never fear, you will always find a way to use it up!


Easy 7-up Biscuits 


You really don't want to miss out on making and baking these delicious biscuits.  Seriously they are one of the most delicious biscuits I have ever made, and are so convenient and quick to make as well.


I have heard them also called Popeye's biscuits, after the biscuits that are found at that popular fast food eatery in the US.  It is said they closely resemble those. 


I cannot say for sure as I have never been to a Popeye's. I can only assure you that they are very delicious!


Easy 7-up Biscuits 


WHAT DO YOU NEED TO MAKE EASY 7-UP BISCUITS


Only 4 ingredients if you count the butter that is melted in the baking tin. Easy peasy.

  • Baking mix (such as Bisquick)
  • 7-up soft drink (not the diet version)
  • Dairy sour cream (not low fat)
  • Butter
That's it! 


You will also need a bowl, a pastry blender, measuring cups, a biscuit cutter and an 8  or 9-inch square baking tin.  You will also need some plain flour to dust the surface you pat out and cut your biscuits on.


Easy 7-up Biscuits


HOW TO MAKE EASY 7-UP BISCUITS


These biscuits are super easy to make. You begin by putting some melted butter into a square baking tin. You can either melt the butter first, or pop the butter into the tin and pop the tin into the preheating oven.


Just don't forget its in the oven or your butter will burn. It doesn't take long at that high a temperature. So you really only need to have it in there for a few minutes. 


7-Up Biscuits 


To make the biscuits themselves you will need to mix together the baking mix, sour cream, and 7up.  Measure the baking mix into a bowl.  Drop in the sour cream.


You need to cut the sour cream into the baking mix. I used a pastry blender. When it is mixed properly you will have a mixture that closely resembles coarse bread crumbs.


Finally you stir in the 7-up.  This is what makes your dough all nice and puffy. I use a fork to mix it in. 


Easy 7-up Biscuits 


The dough will be quite soft and sticky. Don't worry that is the way it is supposed to look.


Sprinkle some extra baking mix or plain flour onto the counter or cutting board and tip the dough onto the top of it.  Flour your hands and pat the dough out into a square that is roughly 1/2 inch thick.


Easy 7-up Biscuits  


Cut out the biscuits using a 3-inch sharp cutter, pulling together the scraps and re-cutting the dough as needed.  It find it helps to flour the edges of the cutter in between the cuts.  Its a simple thing. 


 Place the biscuits into the buttered pan and bake as per the recipe.  Have a small knob of butter ready to brush over the top of the baked biscuits when they come out of the oven.


Easy 7-up Biscuits 


This isn't totally necessary, but its awfully nice. There no need to melt it or anything, the heat from the biscuits will do that.


Just pop the butter onto a fork and brush it over the hot biscuits, where it sill melt and glaze them nicely.


Easy 7-up Biscuits


And that's all there is to it!  Easy peasy and quick as a wink. No fuss, no muss.


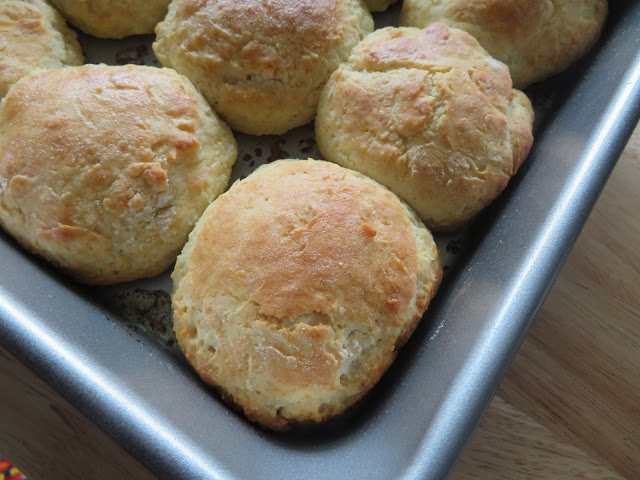
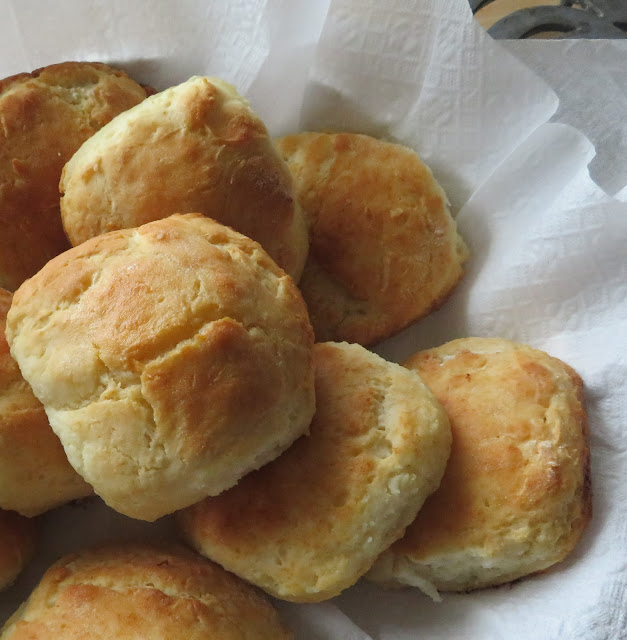
Look at the beautiful texture of those biscuits.  They come out all crisp and buttery edged from the butter in the bottom of the pan.  Oh so tasty!


Easy 7-up Biscuits


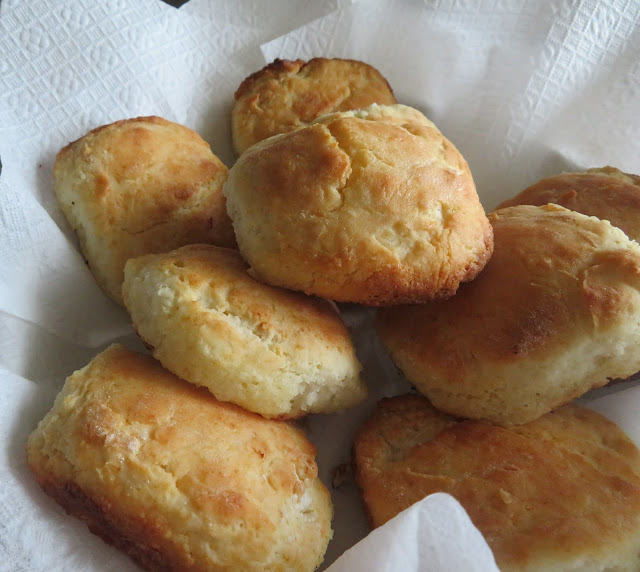
They don't rise up real high, or at least mine didn't, but they do rise a bit and are nice and light.


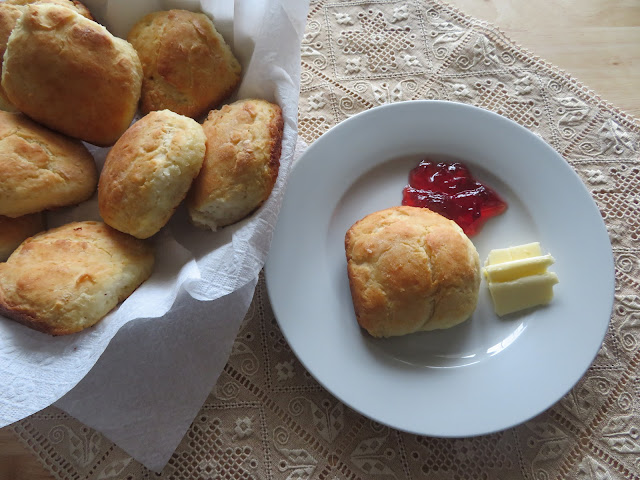
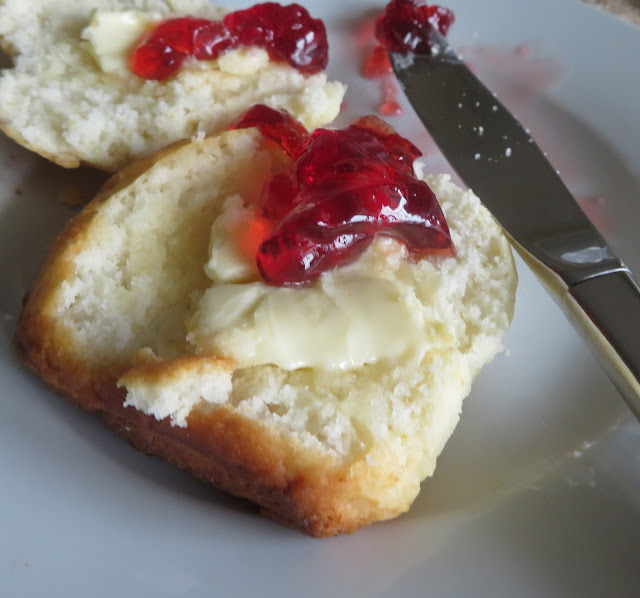
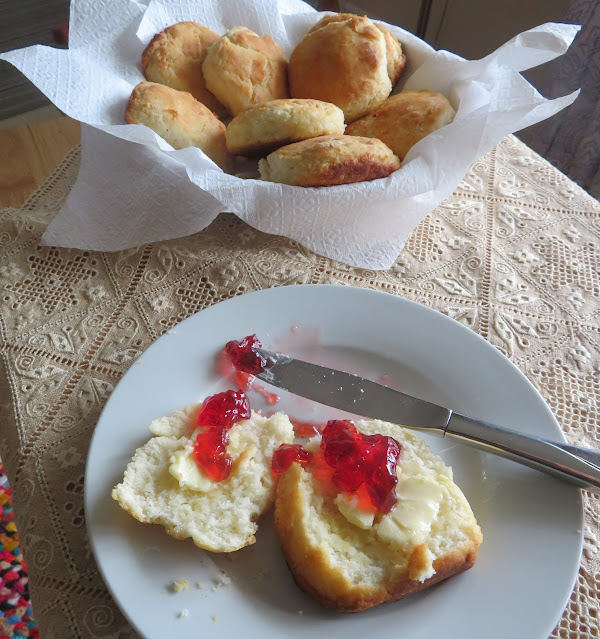
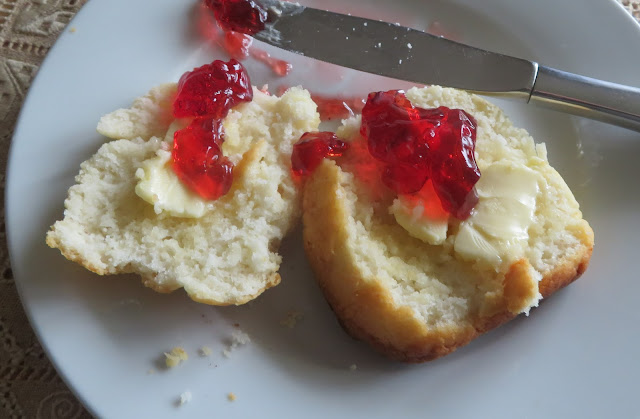
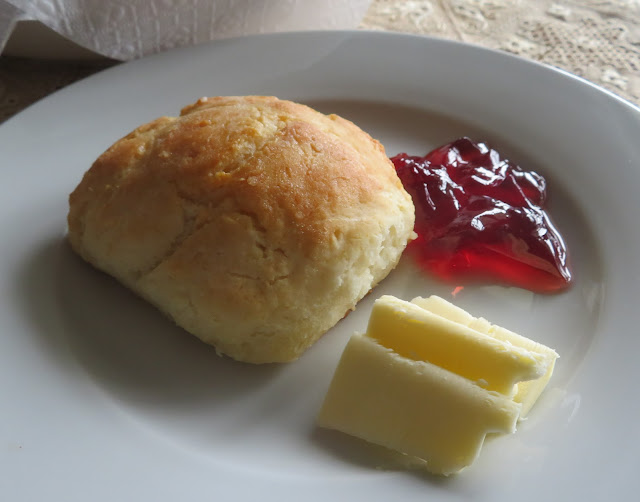
I loved the crisp edges and that buttery exterior.  I also loved the flaky, light interior. These are just perfect.  I enjoyed one fresh out of the oven with some butter and strawberry jelly.  Oh so good.


Easy 7-up Biscuits


Delicious on their own with butter and jam, these also go very well with soups or stews, cold cuts, bacon, cheese, eggs . . . 


In short these go well with just about anything!  I hope that you will give these a go the next time you are looking for a quick and easy bread recipe.

I guarantee you will not be disappointed!  These are perfect in every way!

7-Up Biscuits

7-Up Biscuits

Yield: 9 Biscuits
Author: Marie Rayner
Prep time: 10 MinCook time: 12 MinTotal time: 22 Min
This recipe makes 9 beautiful light and flaky biscuits and uses only 4 simple ingredients if you count the butter in the pan.

Ingredients

  • 2 cups (240g)  baking mix such as Bisquick
  • 1/2 cup (95g) sour cream
  • 1/2 cup (120ml) 7-up soda (not the diet one)
  • 1/4 cup (60g) butter, melted, plus additional butter to rub on top of the warm biscuits (optional)

Instructions

  1. Preheat the oven to 450*F/230(C/ gas mark 6. Put the butter into an 8 or 9-inch square baking dish. Set aside.
  2. Measure the baking mix into a bowl.  Cut in the sour cream until the mixture resembles coarse crumbs.  Stir in the 7-up. It will be a very damp mixture.
  3. Sprinkle a cutting board or your counter-top with some flour.  Tip the dough out onto this and pat it out into a 1/2 inch thick square using floured fingers.  Using a floured sharp 3-inch round cutter, cut the dough into 9 rounds, re-patting the scraps as needed.
  4. Pop the rounds into the butter coated baking tin.
  5. Bake in the pre-heated oven for 12 to fifteen minutes, at which time they should be golden brown.
  6. Rub the tops with some cold butter if desired.  Delicious!
Did you make this recipe?
Tag @marierayner5530 on instagram and hashtag it #marierayner5530
7-up Biscuits


This content (written and photography) is the sole property of The English Kitchen. Any reposting or misuse is not permitted. If you are reading this elsewhere, please know that it is stolen content and you may report it to me at: mariealicejoan at aol dot com 

Saturday 30 October 2021

Maple Walnut Vinegar Pie


Maple Walnut Vinegar Pie 


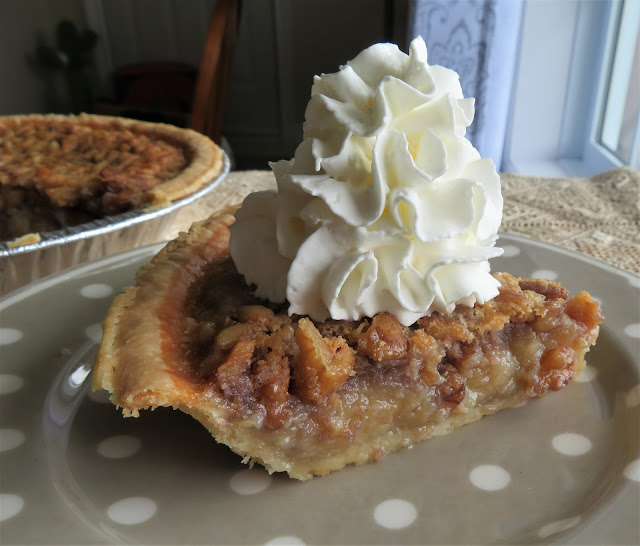
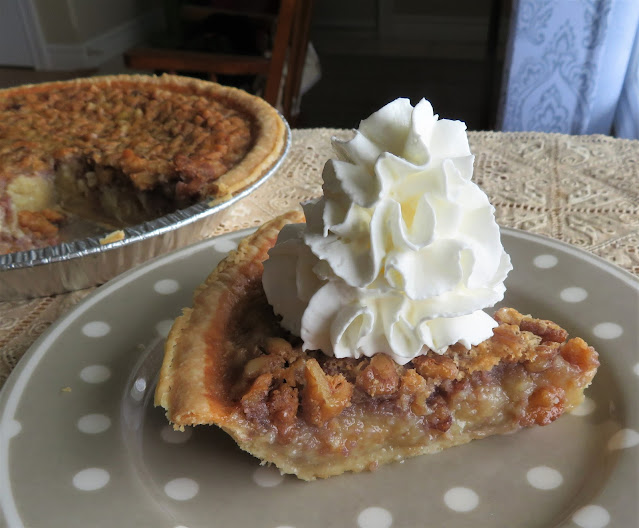
Maple Walnut Vinegar Pie.  I was having my daughter and her husband over for dinner the other night and I wanted to make it a really nice meal.  

My son in law does have rather simple tastes. So we just had meatloaf, mac & cheese, salad and then I baked this fabulous pie for dessert!

I had to be really careful when it came to what I cooked because I wanted to make sure that Tim would eat it. He is quite fussy when it comes to food.
 

Maple Walnut Vinegar Pie 


I baked my traditional meatloaf.  He had two helpings.  I call that a win!  He also had two helpings of my mac and cheese.   I also considered that to be a win.

He passed on the salad, but ate the canned niblets corn I served. You can't win them all. He also passed on this pie and had some ice cream and a donut in its place.

Maple Walnut Vinegar Pie 


That's okay.  As my daughter so rightly said, "More for me!"  I concurred.  Its a shame he wouldn't try it because he was losing out on a really delicious pie! 

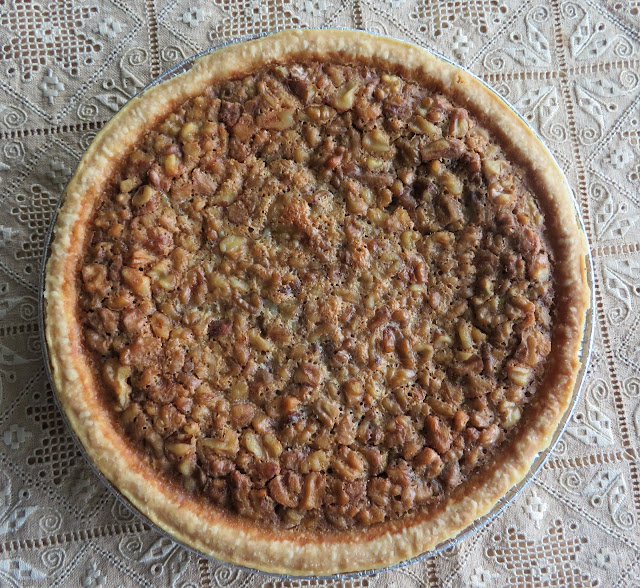
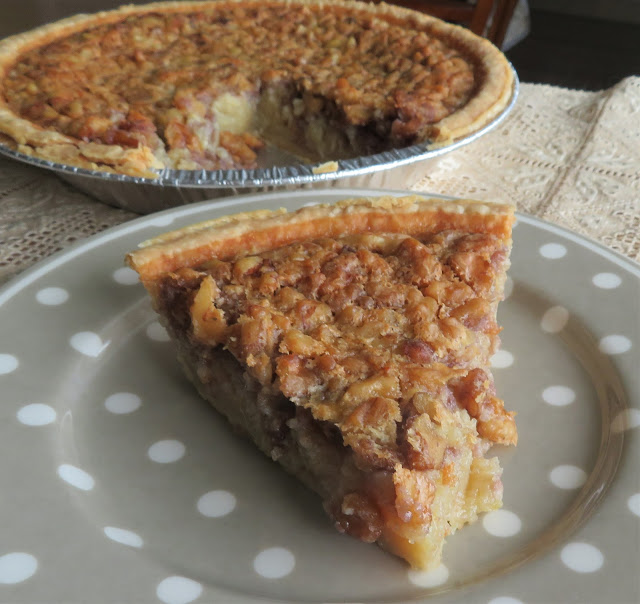
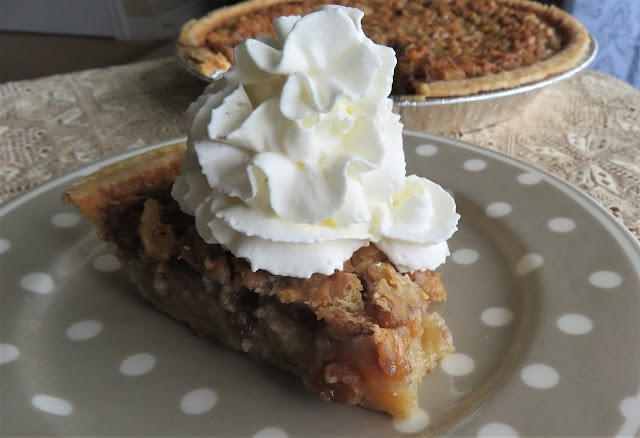
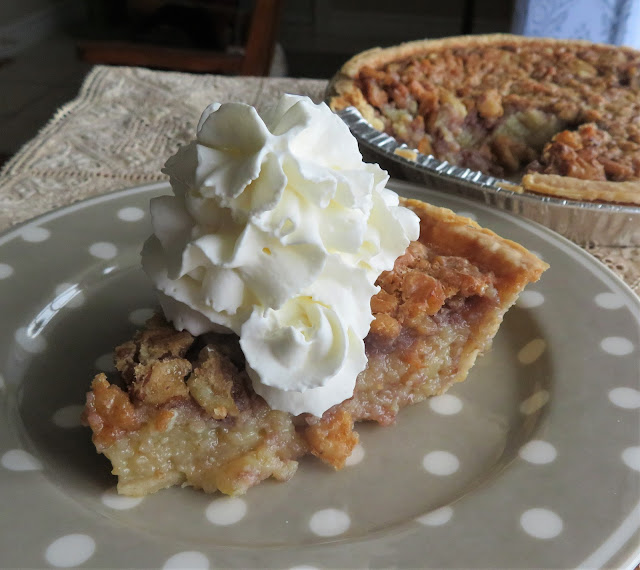
Maple Walnut Vinegar Pie is a Canadian twist on the American Pecan Pie.  Maple and walnuts are naturally a brilliant flavor combination, and one that my family just loves!

But just what is a vinegar pie and why vinegar?


Maple Walnut Vinegar Pie 


Please don't be put off by the mention of vinegar in this pie.  Vinegar, or for that matter, lemon juice, is often used in piece to take the edge off of a super sweet filling.

You barely even notice the vinegar flavor. I strongly suspect it was added back when lemons were not often available and considered to be a bit of a luxury.  

Maple Walnut Vinegar Pie 


Quite an inventive solution to what was probably a very real problem. In fact you will historically  find pie recipes  that use nothing but vinegar. 


Vinegar Pie 


This is a prime example of one such a pie.  I can well imagine that it was very delicious.  I am going to seek out a recipe in one of my old cookbooks and bake one some day just to see.

I have a very old Quaker cookbook as well as an old French Canadian Cookbook.  Watch this space!


Maple Walnut Vinegar Pie 


In any case this pie does use apple cider vinegar, but don't be put off by it. It is barely discernable and helps what would normally be a super sweet pie, from going over the top.

In short, this is one very delicious pie! 


Maple Walnut Vinegar Pie 


WHAT YOU NEED TO MAKE MAPLE WALNUT VINEGAR PIE

I am guessing with perhaps the exception of the walnuts, you probably have everything in your house to make this delicious pie right now, and, if you are like me, you will probably have the walnuts too! 

  • one unbaked single pie crust (I use my butter lard pastry recipe. Just freeze one crust for another time.)
  • Large free range eggs
  • Granulated sugar
  • Orange juice 
  • Apple cider vinegar
  • Maple syrup
  • Butter
  • salt
  • Chopped Walnuts
I didn't have any orange juice on this day, true confession. I used some apple juice in it's place, thinking that it would work well, and it did.

Maple Walnut Vinegar Pie 


HOW TO MAKE MAPLE WALNUT VINEGAR PIE

This is a very simple pie to make and there is no reason you cannot have success with it if you follow my instructions and tips!

You will need an unbaked single crust pie shell. I always like to prebake my single crusts for a few minutes if I am going to be using a really wet filling such as this one.  

Its very easily done. Just pop it onto a baking sheet and then into a moderate oven for about 8 to 10 minutes, no longer.  This just helps to prevent a soggy bottom, and you know none of us wants a pie with a soggy bottom!

Maple Walnut Vinegar Pie 


Once you have done that you can scatter the toasted chopped walnuts across the bottom of the pie shell. There are plenty of them. (If you are only now just toasting them, make sure you cool them off a bit.)

You will need to gently warm the maple syrup with the butter to melt the butter. Do this first and then it will be cooled down sufficiently when it comes time to add it to the remaining ingredients.

Whisk the eggs, egg yolk, sugar, orange juice and vinegar together in a  large bowl. You want everything to be well blended.  Then slowly whisk in the maple syrup/butter mixture.  Again, until everything is well blended.

You are then ready to pour this mixture carefully over the walnuts in the pie crust.  Try not to dislodge the walnuts too much, but if you do, then you can gently rake them into place with a fork.

Maple Walnut Vinegar Pie 


TOP TIP!  When you are dealing with a pie with a soupy filling such as this one, do the final assembly very near to the oven. It also helps to have the pastry base/pie plate on a baking sheet which makes it much easier to get it into the oven.

This helps to prevent a lot of sloshing about!  If you are near the oven when you go to pour the filling in the dish, and you have it on a baking sheet, you can prevent yourself from making a huge mess in the kitchen. 

Once you have the filling in the pie, it is as simple as popping the pie into the oven and baking it. I turn it around halfway through the bake time (180*).

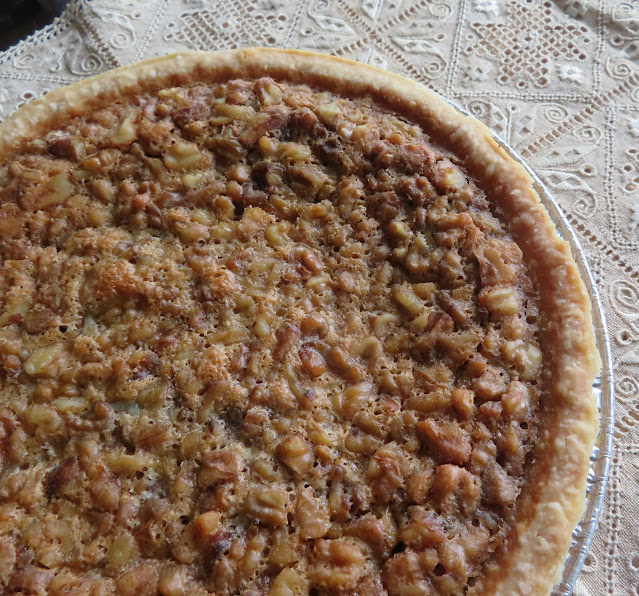
It is finished when the crust edges and filling are both golden brown along.  The filling will also be slightly puffy and it will barely jiggle if you give the pie a gentle nudge to check.


Maple Walnut Vinegar Pie


Take it out of the oven and place the pie on a wire rack to cool completely before eating. The filling will sink a tiny bit and not be so puffed once it is cold.  

You can either chill this and serve it cold from the refrigerator, or you can serve it at room temperature.

We enjoyed this at room temperature with some refrigerated whipped cream squirted on top. It went down a real treat. This is a really special pie, with a beautiful maple walnut flavor. 

It would be the perfect addition to any special or holiday meal!  You really don't want to miss out on this one!

Maple Walnut Vinegar Pie

Maple Walnut Vinegar Pie

Yield: 8 - 10
Author: Marie Rayner
Prep time: 15 MinCook time: 45 MinTotal time: 1 Hour
This delicious pie is the Canadian cousin to Pecan Pie. Equally as delicious!

Ingredients

You will need:
  • One single crust unbaked pie shell (I like to use my Butter/Lard pastry, scroll down to near the bottom of linked page for the recipe.)
For the filling:
  • 3 large free range eggs, plus one egg yolk (freeze the white for another use)
  • 3/4 cup (150g) granulated sugar
  • 1/4 cup (60ml) orange juice
  • 2 TBS apple cider vinegar
  • 3/4 cup (180ml) pure maple syrup
  • 4 TBS butter, cut into smaller bits
  • pinch salt
  • 1 1/4 cups (150g) chopped toasted walnuts

Instructions

  1. Preheat the oven to 350*F/180*C/ gas mark 4.  Line a 9-inch pie dish with your pastry. Flute or crimp the edges, prick and partially bake for 10 minutes. (Have it on  baking sheet, and leave it on the baking sheet.)
  2. Scatter the toasted walnut pieces in the bottom of your pie crust.
  3. Gently warm the maple syrup with the butter, just until the butter melts. Set aside.
  4. Whisk the eggs, egg yolk, sugar, orange juice, salt and vinegar together in a bowl until well blended.  Whisk in the maple syrup/butter mixture, again until well blended.  
  5. Carefully pour this mixture over the walnuts in the pie crust, taking care not to dislodge the nuts as much as possible.
  6. Bake the pie on the baking sheet, in the middle of your oven, for 40 to 45 minutes, until golden brown and slightly puffy.  Rotate the pie halfway through the bake time. (180*)
  7. The pie is done when the filling is set.  Give the pie a gentle nudge to check. There should ebe no discernable wobble. Transfer to a wire rack and allow to cool completely.  
  8. Serve slightly chilled or at room temperature, cut into wedges. with some whipped cream or vanilla ice cream on top.
Did you make this recipe?
Tag @marierayner5530 on instagram and hashtag it #marierayner5530


This content (written and photography) is the sole property of The English Kitchen. Any reposting or misuse is not permitted. If you are reading this elsewhere, please know that it is stolen content and you may report it to me at: mariealicejoan at aol dot com 

Friday 29 October 2021

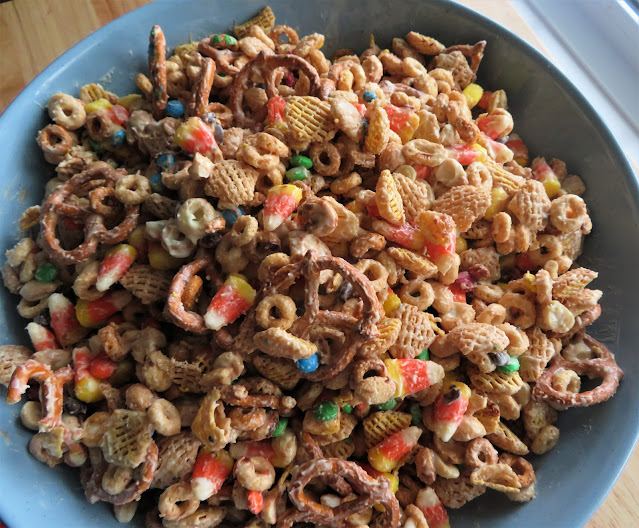
White Chocolate Monster Munch

White Chocolate Monster Munch 
A  month or so ago I was at Walmart with my sister and I got really excited because they had Candy Corn!  Candy Corn was not something which I had readily available to me when I was over in the UK.
  
It just did not exist there at all.  Candy Corn and Halloween are synonymous! One just goes with the other. That and Candy Pumpkins, which I have not seen here yet, but I do know they have it in America.
White Chocolate Monster Munch 
Anyways, I got really excited about it and I picked up a container of it with great plans in mind to do something tasty for Halloween on here.  

Well you know how those kinds of plans go!!   Before I knew it, we were a week before Halloween and I had done nothing with it. Zip! Nada! Zilch! 

White Chocolate Monster Munch 
My daughter and son in law are going away to visit some friends for the weekend for Halloween. I thought I would make them something to take with them.  A hostess gift of sorts.

It is not often they get to go away and so this is a really special occasion for them.  I spied this snack mix on Six Sisters Stuff.  White Chocolate Monster Munch.

White Chocolate Monster Munch 
Of all the Monster Munch recipes out there it appealed to me the most, plus I had pretty much everything I needed to make it.  Having what you need to make something is the most important thing when it comes to choosing what to make! 

I had to switch out a few things, but I will explain what I did and give you some examples of what you can use in the UK that would be quite similar.

White Chocolate Monster Munch 
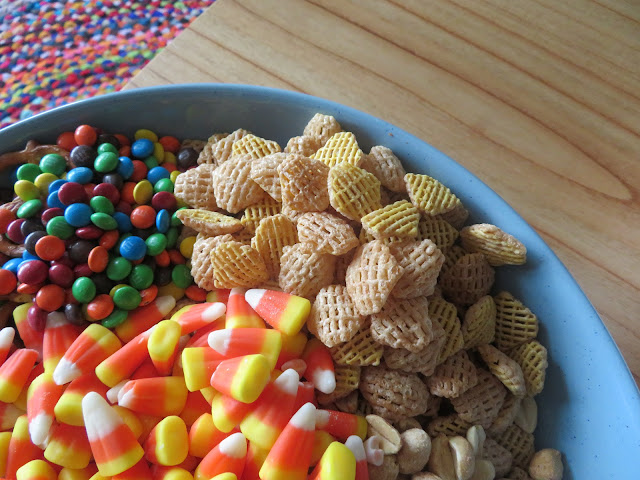
   WHAT YOU NEED TO MAKE WHITE CHOCOLATE MONSTER MUNCH

There is nothing too complicated here.  Simple things. It looks like quite a list, but trust me, it is a simple list, and there is nothing too out of the ordinary. 

This is the North American list of ingredients:

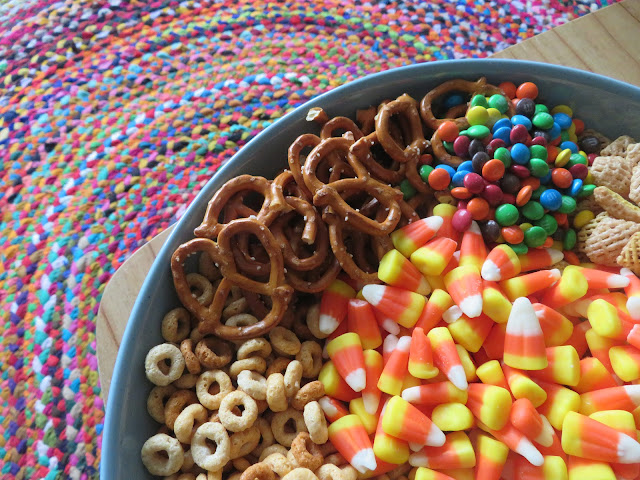
  • Candy corn
  • M & M's
  • Chex type of cereal (Cripex works well in Canada)
  • Cheerios (She suggested honey nut, but I used multi-grain)
  • Salted roasted peanuts
  • Pretzels (I used small twists)
  • White chocolate
  • Canola oil


White Chocolate Monster Munch 

Here is the UK or European list of ingredients with things swapped out for what you can access over there. 

  • Dolly Mixture candies (Nothing is actually cooked so they are the right size, colors, and will work perfectly, The Children will love them!)
  • M & M's chocolate candies
  • Shreddies cereal or mini wheats
  • Cheerios (She suggested honey nut, but I used multi-grain)
  • Salted roasted peanuts
  • Pretzels (I used small twists)
  • White chocolate buttons
  • Canola oil

Dolly Mixtures

Dolly Mixtures are a type of candy mix that is found in the UK. It is composed of small nougat types of candy, very similar to Candy corn, as well as little sugared jellies.

Candy Corn is a nougat type of candy which is small and shaped like corn kernels.  

As you can see from the above photograph they are roughly the same size, and the colors totally work here. You don't have to use the jellies. You can easily remove them, but I think they add extra interest!

White Chocolate Monster Munch

Chex is a type of corn/rice cereal that is shaped like little puffy pillows.  Other than Bugles, there is no cereal in the UK exactly like it.

But I do think either Shreddies or mini wheats would work well and actually would get some fiber into the children, and be somewhat healthy!  Just don't use the sugar coated ones.

There's plenty enough sugar in this mix!

White Chocolate Monster Munch 

HOW TO MAKE WHITE CHOCOLATE MONSTER MUNCH

This is so simple to make.  You merely mix all of the dry ingredients together in a bowl to combine. The white chocolate chips are melted together with the canola oil in the microwave.

In my microwave this took about a minute and a half.  I checked it every 30 seconds and gave it a good stir.  That way it melted smooth and did not over cook. 

Over-cooked white chocolate will seize and there is no coming back from that. So do be careful.

White Chocolate Monster Munch 
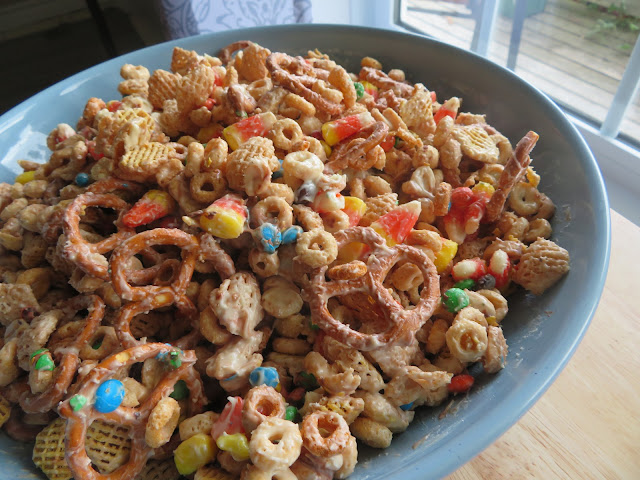
Once everything is mixed and melted, you just pour the white chocolate over top of the cereal/candy mix and toss everything together until it is evenly coated.

The best way, as with most things, to do this is with your hands.  That way you can really get in there.  Your hands are probably one of the best kitchen tools going!

White Chocolate Monster Munch 
I use my hands for all sorts.  I have never minded getting my hands dirty.   I know some people can't stand it.

Once you get everything mixed well together and evenly, just spread it all out onto a couple of baking sheets. I like to line them with some parchment paper first.

White Chocolate Monster Munch 
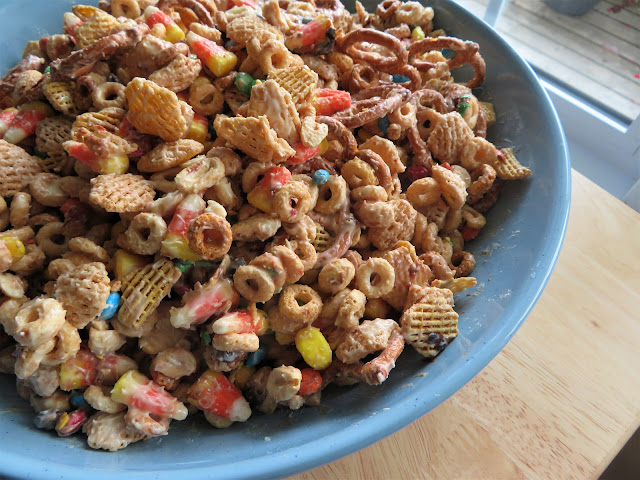
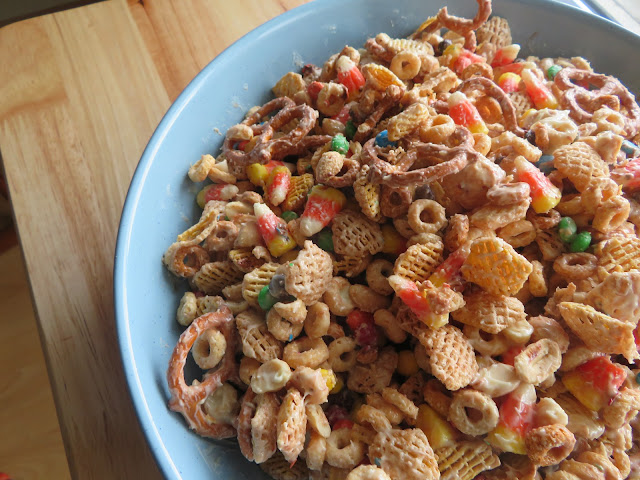
And that's it. Your White Chocolate Monster Munch is done.  You just need to leave it to set for about an hour or so. 

Once it has set you can break it up into clumps and its ready to put into snack sized bags for school Halloween Party handouts (I would not use Peanuts if I was sending it to school),  snacks for the kiddos or into a large bag to give as a hostess gift.

White Chocolate Monster Munch 

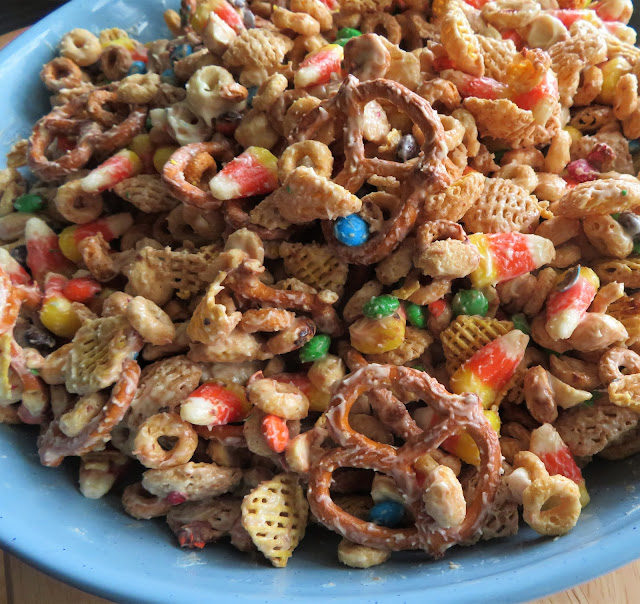
This really is a snack for children, although I will admit it is incredibly tasty.  As an adult, I quite enjoyed the cereal and the pretzel bits.

Even the chocolate M & M bits.  The Candy Corn was really sweet, but there is enough savory going on with the cereal and pretzels to cut that and make it not as cloying. 

White Chocolate Monster Munch

Were I a child however, I would just gobble this up.  Its bright. Its colorful.

Its a bit savory, a bit salty and a bit sweet.

In short, quite delicious.  Oh, and then there is the crunchy element, which I quite love about any kind of snack. Combine that with chocolate and I am all in.

If you want to make a quick, easy and delicious snack for your children or grandchildren this Halloween, this really is one to consider!  I think (personally) you could even get away with half the white chocolate mixture.

It wouldn't clump together as much, but there would be less sugar as well. And when it comes to snack foods, quite often less actually is more!

White Chocolate Monster Munch

White Chocolate Monster Munch

Author: Marie Rayner
Prep time: 15 MinCook time: 3 Mininactive time: 1 HourTotal time: 1 H & 18 M

Ingredients

  • 1 cup (5 ounces) pretzels
  • 2 ½ cups (75g)Cheerios
  • 2 ½ cups (75g) basket type of cereal (Chex, Crispex, Shreddies)
  • 1 cup (145g)  salted roasted peanuts
  • 1 cups (200g) M & M's chocolate candies
  • 1 cup (200g)Candy Corn candy 
  • 2 cups (320g) white chocolate chips 
  • 1 ½ TBS vegetable oil

Instructions

  1. Measure all of your dry ingredients into a large bowl and toss together to mix.
  2. Measure the white chocolate chips into a microwave safe bowl.  Stir in the canola oil.
  3. Microwave on high at 30 second intervals, stirring after each time, until melted and smooth. (Mine took approximately 1 1/2 minutes.)
  4. Pour the melted chocolate mixture over top of the dry ingredients, tossing everything together to coat the dry ingredients evenly with the chocolate.  The best way to do this is to use your hands.  
  5. Spread out on a couple of lined baking sheets and allow to set before breaking into chunks.
  6. Store in an airtight container.
Did you make this recipe?
Tag @marierayner5530 on instagram and hashtag it #marierayner5530
White Chocolate Monster Munch
My Little Monster coming over to investigate!

This content (written and photography) is the sole property of The English Kitchen. Any reposting or misuse is not permitted. If you are reading this elsewhere, please know that it is stolen content and you may report it to me at: mariealicejoan at aol dot com