If you had to pick one thing that was synonymous with Saturday night suppers when I was growing up it would have to be the Baked Bean Supper.
I am not sure if this is a Canadian maritime thing or not, but Saturday night in our home usually meant baked beans.
Sometimes my mother would serve them with ham and scalloped potatoes as I have shown them here today, and sometimes it would be wieners.
Ham, wieners. It didn't and doesn't matter. Something smoky to serve with baked beans is a must!
Sometimes we would have oatmeal brown bread and sometimes we would have steamed brown bread . . . sometimes it would just be white bread and butter, but there was always bread of some sort.
Cornbread is also very nice. We love cornbread.
All the better to sop up all of those delicious juices from my mother's baked beans. They were so good you didn't want even a morsel to go to waste.
If it had been polite to lick our plates we would have been licking our plates.
Mom always started her beans on Friday night. She always used dried pea beans, or dried haricot beans as they are called over here in the UK. She would pick them all over and rinse them really well.
Sometimes you might find the odd stone in a bag and it was surprising that they could sometimes be a bit dirty. Then they would be put into her large saucepan and covered with cold water to soak overnight.
Next morning, bright and early she would bring them to the boil and then simmer them just until the skins began to split when you put a couple on a fork and blew on them.
You knew then they were ready for the bean crock. Oh, and a pinch of baking soda went into the water as well. Any foam that rose to the top would be skimmed off and discarded.
Mom had an old stoneware bean crock. She would put the simmered beans into the pot with only enough water that you could see it through the beans.
Molasses and some brown sugar would be stirred into them along with a bit of apple cider vinegar, a spoonful of tomato ketchup, dry mustard powder, some salt and some pepper.
A whole peeled brown onion would be pushed down into the centre of them and then a slab of salt pork would be set on top.
The lid would be placed onto the crock and they would be put into a slow oven where the smell of them baking would serve to tantalise us all the day through!
Oh boy but they were some good. Mom always kept a container of the leftovers frozen in the freezer, even after we had all gotten married and left home.
Baked beans are something which freezes very well. They are one of those things which tastes even better a day or two later!
You could almost guarantee that when we came home for a visit some would be thawed out and our first supper would be mom's home baked beans and brown bread.
We didn't really want anything fancy. Just that simple meal.
It makes me a bit sad that I will never again have the pleasure of sitting down to my mom's homemade baked beans and brown bread . . .
I know I can make them myself, but somehow what I make never ever comes up to what the memory of hers tastes like.
Yield: Makes one loaf
Author: Marie Rayner

Quick Brown Bread
A moist and delicious whole wheat quick bread, sweetened with molasses that goes perfectly well with baked beans!
ingredients:
- 240ml buttermilk (1 cup)
- 280g whole wheat flour (2 cups)
- 1 tsp salt
- 1 1/2 tsp baking powder
- 1/2 tsp baking soda
- 1 large free range egg, lightly beaten
- 120ml molasses (1/2 cup)
- 60ml sunflower oil (1/4 cup)
instructions:
How to cook Quick Brown Bread
- Preheat the oven to 180*C/350*F/ gas mark 4. Butter a 9 X 5 inch loaf tin really well and line the base with baking paper. Set aside.
- Whisk the flour, salt, baking powder and soda together in a bowl. Whisk together the molasses, buttermilk, egg and oil. Add all at once to the dry mixture and stir all together just to combine. Pour into the prepared loaf tin.
- Bake in the preheated oven for about 30 to 35 minutes, until risen and a toothpick inserted in the centre comes out clean. Let cool in the pan for about 5 minutes before tipping out onto a wire rack to cool completely.
- Serve cut into slices and buttered.
Did you make this recipe?
Tag @marierayner5530 on instagram and hashtag it #EnglishKitchen
Created using The Recipes Generator
This is the perfect recipe to end November on. Comfort season is in full session now! Bring it on!!
This content (written and photography) is the sole pr
operty of The English Kitchen. Any reposting or misuse is not permitted. If you are reading this elsewhere, please know that it is stolen content and you may report it to me at: mariealicejoan at aol dot com
Thanks so much for visiting. Do come again!!
You are sure to love this recipe I am sharing with you today. Not only is it very unusual, but it is also quick, easy and delicious!
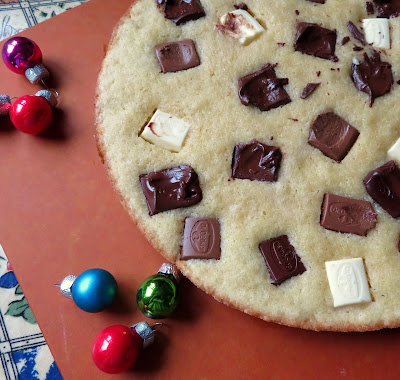
A skillet sized chocolate chunk cookie that bakes on top of the stove, right in the skillet!
I told myself that this year I wasn't going to buy myself any more cookery books, but then the other day when I had gone to Gordale to buy my Christmas cards, lo and behold, this little book jumped right into my basket! How could I resist however. Cookies in a Pan by Sabrina Fauda-Role. It was just far too tempting and the price was right, only £3.99. A real bargain.
Everything for the cookie gets mixed together right in the pan. Melted butter, egg, flour, sugar and baking powder . . . I added some vanilla paste because I am quite unable to leave things well alone, and a chocolate chunk cookie with vanilla is to me perfection.
You spread the batter out in the pan, press some chocolate chunks into it and let it bake on the stove top in the skillet over very low heat for about fifteen minutes and then you cover it tightly and bake it for about 5 minutes longer.
Voila! Presto changeo! You end up with a beautiful skillet sized cookie!
Its like magic. Its more than magic!
What a fabulous gift one of these would be for a neighbour, friend or family for Christmas, presented right in the pan it was baked in!
Who wouldn't be totally thrilled to get a gift like that! Not me that's who! I would love it!
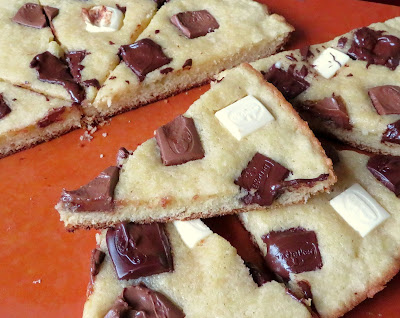
The recipe said it made six servings, but in all honesty they would be HUGE! I cut it into eight wedges and they were still nice and big.
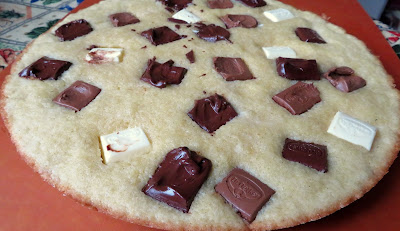
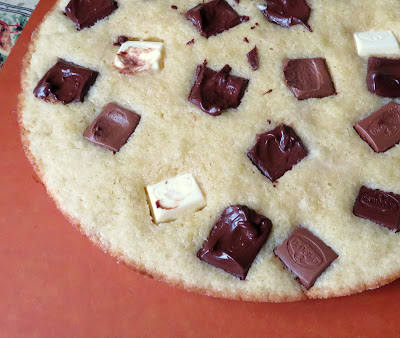
Look at that beautiful texture, very much like a regular cookie!
And that mix of chocolate chunks . . . Perfection!
Todd and I each enjoyed one while they were still semi warm . . .
The chocolate slightly gooey, so, so, so good . . .
I dare say these would make for an excellent dessert served warm in wedges with a scoop of vanilla ice cream on top and perhaps some indulgent chocolate or toffee sauce spooned over top!

Chunky Chocolate Cookie In a Pan
Yield: 8
Author: Marie Rayner
An interesting way to bake a cookie, in a skillet on top of the stove. Deliciously different!
ingredients:
- 150g plain flour (1 cup + 1 1/2 TBS)
- 1 tsp baking powder
- 90g sugar (scant 1/2 cup)
- 100g salted butter (7 TBS)
- 1 tsp vanilla paste
- 1 large free range egg, beaten
To top:
- 120g squares of chocolate (a mix of white, dark and milk) (4 ounces)
instructions:
How to cook Chunky Chocolate Cookie In a Pan
- Measure the flour, sugar, and baking powder into a bowl and whisk well together. Set aside.
- Melt the butter in a 10 inch non-stick skillet over very low heat. Remove from the heat. Whisk a bit of the butter into the beaten egg to temper it and then whisk the egg back into the butter in the skillet. Whisk in the vanilla paste and then the dry ingredients until you have a mixture with a smooth texture. Spread out into the bottom of the skillet evenly. Scatter the chocolate bits over top, pressing in lightly.
- Place over low heat again and cook for 15 minutes. Cover tightly with a lid and cook for a further 5 minutes. Remove the lid and wipe off any condensation which has formed. Replace on the pan and remove the pan to a wire rack away from the heat to cool for 15 minutes before cutting into wedges to serve.
Did you make this recipe?
Tag @marierayner5530 on instagram and hashtag it #EnglishKitchen
Created using The Recipes Generator
I was really surprised and quite pleased with how these turned out! I am game now to try some of the other recipes in the book and maybe even invent a few combinations of my own!
I had some lovely salmon fillets in the freezer that we had gotten from Seafresh. Their fish is so amazing. I have never had any fish from them that I didn't like. Its frozen fresh at the source and so it is the freshest fish that you can find. Their salmon fillets are absolutely gorgeous. Boneless and skinless and individually frozen so that you can take out as many or as few as you want to cook.
Sourced from the clear cold waters of Scotland and the Farroe Islands, they are centre cuts, cut from the thicker mid-section of the salmon, rather than the tail. Fish cuts from closer to the tail are a lot "fishier" if you know what I mean. Stronger in flavour. I much prefer the higher quality centre cuts.
I fancied a rib sticking soup today and so I did some research online. I thought perhaps a chowder with maybe some spinach, but I didn't have any fresh spinach in the house, although I did have frozen . . . but in something like a chowder I feel fresh spinach is best.
I came across what looked like a very promising recipe on Spruce Eats for a Creamy Salmon Chowder. I did find a few others, but of all the ones I looked at, this one looked the best from my view-point and inspired me.
I adapted their recipe to my own tastes and knowledge, plus I sized it down to serve two people perfectly and generously.
I wanted a recipe that wouldn't over-power the delicate flavours of the salmon and which would allow the salmon itself to shine.
A lot of chowder recipes use bacon, and I am not against bacon, but I didn't want bacon in my salmon chowder, at least not today anyways.
A mirepoix of vegetables are softened in some butter. Mirepoix is a mix of aromatics used to give sauces, stocks and soups flavour. Usually it will consist of carrot, celery and onion, slow cooked in butter or oil without browning.
The goal is to sweeten the ingredients rather than caramelise them so that they will flavour your soup, sauce or stock beautifully.
After that you whisk in some flour and add a bit of chicken stock. Not an awful lot really, just enough that you can add your potato to the pan and it will basically almost cover it so that it can cook.
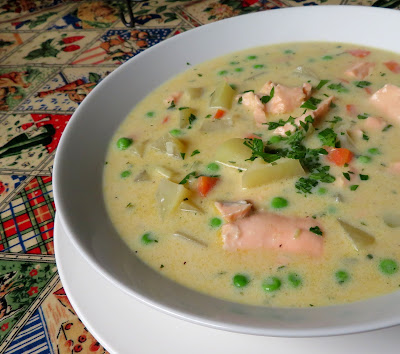
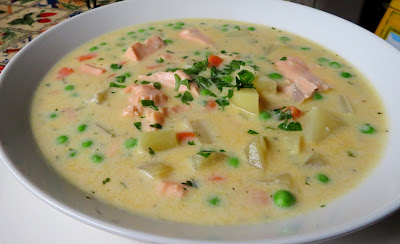
Once the potatoes were almost fork tender I added my salmon fillets and they poached quickly in the heat of the stock and the pan. It doesn't take long. Once they were poached I was able to break them into largish flakes . . .
It was then just a process of adding some whole milk, thawed frozen peas, and seasoning . . . I added some Tabasco sauce because I thought it would go well with both the fish and the cheddar cheese that is stirred in at the end. This was quite simply fabulous.
Yield: 2
Author: Marie Rayner

Fresh Salmon Chowder
This is creamy and delicious. Adapted to feed only two from a recipe I found on another site.
ingredients:
- 1 1/2 TBS butter
- 1 stick celery, finely chopped
- 1 small carrot, peeled and chopped
- 2 TBS minced onion
- 1 TBS plain flour (all purpose)
- 180ml chicken stock (3/4 cup)
- 1 medium potato, peeled and diced
- 2 boneless, skinless salmon fillet portions
- 75g frozen peas thawed (1/2 cup)
- 240ml whole milk or half and half (1 cup)
- 120g strong cheddar cheese
- sea salt and freshly ground black pepper to taste
- a few splashes of Tabasco sauce
- chopped fresh flat leaf parsley to garnish
instructions:
How to cook Fresh Salmon Chowder
- Melt the butter in a saucepan. Add the chopped vegetables and cook over low heat, stirring periodically, until the onion is translucent and the celery is tender. Whisk in the flour and then whisk in the chicken stock. Add the cubed potatoes. Cook over very low heat, covered, until the vegetables are crispy tender. Add the salmon fillets. Cover and cook for 3 to 4 minutes until the salmon is tender. Break up into chunks. Add the peas and milk. Heat through just until the peas are tender. Add the cheese and stir to melt the cheese. Season with salt, pepper and hot sauce. Sprinkle with parsley and serve immediately. I like crackers with mine. Todd enjoys bread.
Did you make this recipe?
Tag @marierayner5530 on instagram and hashtag it #EnglishKitchen
Created using The Recipes Generator
As with any fish dish, quality speaks for itself. When you are starting with really good fish, you really don't or shouldnt' have to do very much to it to get the best from it. The Salmon fillets from Seafresh are beautiful. I think they are the best I have ever eaten and that says a lot! If you are looking for quality fish at a great price with a fabulous delivery service I can't recommend Seafresh highly enough! Their product, delivery service, packaging and customer service are exemplary in my opinion and so is this recipe!!
A few things about Seafresh:
- Same Day dispatch on orders received before 1 PM.
- All packages are carefully hand packed.
- Free delivery on orders above £50, £8 on orders below that amount.
- Responsibly and sustainably sourced.
- Air Blast Frozen at source within 4 hours of being caught.
- Wide variety to choose from.
Follow them on Facebook, Twitter and Instagram.
Note - Although I was gifted with product free of charge for the purposes of review, I was not required to write a positive review in exchange, nor would my integrity allow me to recommend anything if I did not truly like it. Any and all my opinions are my own entirely.
One thing that my family always wanted me to do after we cooked a holiday beast (turkey) was to make enchiladas with the leftovers. I have to say that it was one of their favourite leftover meals.
My original recipe I clipped out of a Sunset magazine back in the 1980's and I have to say it was pretty basic and simple.
Cooking Tex Mex over here has always been a bit of a challenge. When my friend Eliza came over from Arizona one time, she brought all kinds of tex mex stuff with her.
We made Tamales, Cheese Enchiladas, Mexican Chocolate Tart, and Tacos. She had green enchilada sauce for the cheese enchiladas, something which I never thought I would see over here in the UK, until now!
TADA! I discovered this on Ocado last week. (Ocado is an online supermarket). I bought myself a few jars and some of the green chili salsa as well! I am set to go!
Of course I had to make some enchiladas with our leftover turkey from last week!
I started by creating a delicious turkey filling. You could use leftover chicken or pork if you wanted to. I shredded it and then added a few ingredients to it.
I sauteed some onion and chopped green jalapeno chilies in a bit of butter and then I added the shredded turkey and some of this Mexican seasoning. Its quite good. I like it a lot. I also added a few other things.
Garlic powder (but you could use real garlic), paprika, mild chili powder, salt, pepper and some ground cumin.
Did you know that heating ground cumin in a hot skillet for a few seconds really enhances its flavour? It's true, and it does!
I wanted to add a bit of creaminess and so I added some cream cheese as well and let it all melt and meld together . That was my filling done. I don't mind saying it was quite delicious.
All I had to do was fill the tortillas then. I like wheat flour tortillas. Sometimes I make my own, but more often than not I will buy them for something like this tasty casserole.
Six inch tortillas are perfect for this. I poured some of the green enchilada sauce into the baking dish and then I started filling the tortillas and laying them on top of the sauce.
I divided the mixture between 8 tortillas, laying a strip down the centre of each and then sprinkled a heaped TBS of grated Jack cheese on top before rolling them up tightly and laying them next to each other on top of that tasty green enchilada sauce.
Once I had them all filled, rolled and tucked into bed, I covered them with a thick blanket of the rest of the green enchilada sauce.
And then the rest of the grated Jack cheese . . .
They were then ready to bake and get all scrumptious! I was practically rubbing my hands together in glee and anticipation. YES I DO SO LOVE LOVE ENCHILADAS!
We enjoyed them hot out of the oven garnished with some sour cream and sliced spring onions, and we were both in Enchilada heaven!
Best part I had 6 leftover enchiladas that I wrapped up tightly and froze for future enjoyment!
Yield: 8
Author: Marie Rayner

Green Chili Turkey Enchiladas
Rich, creamy, spicy and delicious. A great way to use up some of your leftover holiday turkey! Fabulously tasty!
ingredients:
For the Filling:
- 250g cooked turkey meat, shredded (2 cups)
- 1 tsp Mexican seasoning blend
- 1 TBS garlic powder
- salt and black pepper to taste
- 1/2 tsp paprika
- 1/2 tsp chili powder
- 1/2 tsp ground cumin
- 2 TBS butter
- 1 large onion, peeled and minced
- 2 jalapeno peppers, trimmed, deseeded and minced
- 230g cream cheese, cut into bits (8 ounces)
You will also need:
- 8 (6-inch) soft flour tortillas
- 2 (380g) jar of green enchilada sauce (4cups)
- 230g grated Jack cheese (8 ounces) divided
instructions:
How to cook Green Chili Turkey Enchiladas
- Preheat the oven to 180*C/350*F/ gas mark 4. Butter a rectangular baking dish large enough to hold all of your enchiladas. Set aside.
- Heat the butter in a skillet. Add the onion and jalapeno peppers. Cook and stir over medium heat until the onion has turned translucent. Add the shredded turkey, garlic powder, Mexican seasoning blend, paprika, chili powder, ground cumin and salt and black pepper to taste. Heat through, stirring occasionally. Add the cream cheese and stir to melt. Remove from the heat.
- Pour about 1/2 of one jar of enchilada sauce in the bottom of the baking dish.Working with one tortilla at a time, spoon 1/8th of the turkey mixture down the centre of the tortilla. Sprinkle with 1 TBS of the cheese. Roll up tightly and place into the baking dish, seam side down. Repeat until all have been filled. Pour the remaining enchilada sauce over top evenly. (You may not need it all.) Sprinkle with the remainder of the Jack cheese.
- Bake in the preheated oven until the filling is hot and bubbling and the cheese has melted, some 30 to 35 minutes. Serve hot.
Did you make this recipe?
Tag @marierayner5530 on instagram and hashtag it #EnglishKitchen
Created using The Recipes Generator
Turkey Enchiladas are just so tasty. I remember one year I had made some and had them in the freezer. My son Anthony had his friend Carly stay overnight and they were sleeping in the basement. They raided the freezer and ate the enchiladas . . . Frozen! If you can believe it!
And as would happen to a very unlucky person my husband wanted to have those enchiladas for supper the next night. OF course they were no more! I found the empty tin container underneath the sofa bed when I was stripping it and putting it back together. My husband was extremely disappointed at his loss and Carly forever became known as Carlita in our house.
At least they enjoyed them, and, really . . . isn't that what good cooking is all about! You really need to try these enchiladas, especially if you are a fan of Tex Mex flavours!
Subscribe to:
Comments (Atom)











Social Icons