Hello all and welcome to my final Vintage Menu Madness for September! I have had a lot of fun doing these weekly Vintage Recipe posts and I think you have all enjoyed them as well, so it is a practice I plan on continuing.
For those of you who are just joining me, I am a person who loves vintage cookbooks and vintage recipes. I believe that they hold a lot of value for us and are filled with lovely recipes that we can all still enjoy.
Admittedly we no longer cook vegetables as long as they did in the old days, but that is something which easily remedied without any problem. For the most part they are very sound recipes.
The menu I am sharing this week comes from the Betty Crockery Good and Easy Cook Book, which was published in 1954. My book is a reprint of the original which I purchased on Amazon.
When I was a child I can remember thinking that Betty Crocker was a real person. She actually was and is not, but instead she is a figure head invented by the company to represent women in general.
Her image has been adapted and changed through the years to present a newer and more modern woman with every rebirth.
Originally created in 1921, her image has been changed and updated a total of eight times, with the latest being in 1996. One thing which hasn't changed however is "her" reputation for presenting us with quality recipes and products.
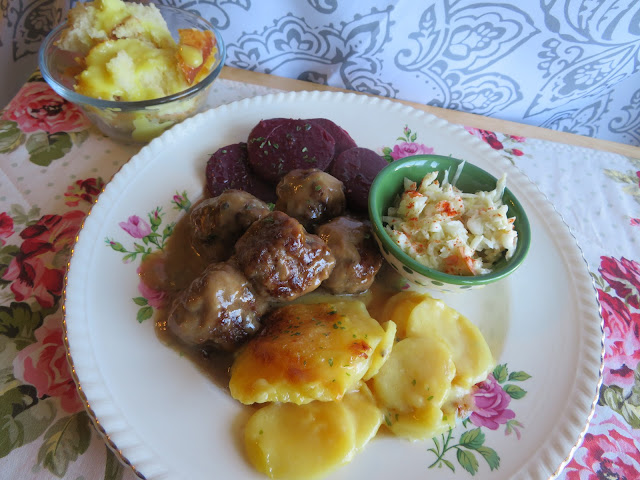
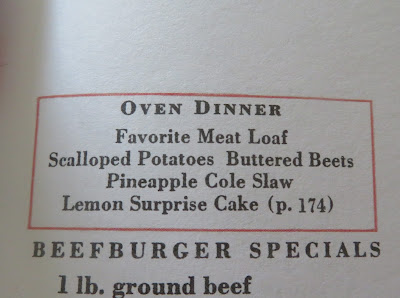
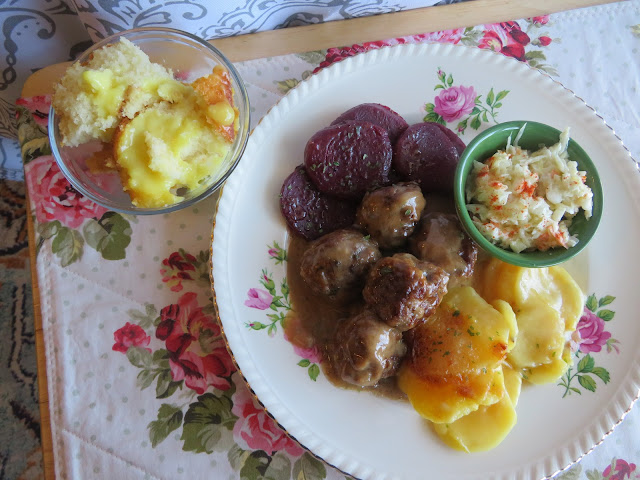
My Menu for this week came from the Dinner Chapter, for an oven dinner with the main dish focus being on Ground Beef. There were actually 3 separate Ground Beef recipes to choose from. I chose to do meatballs instead of meat loaf. Here is the menu I cooked.
OVEN DINNER
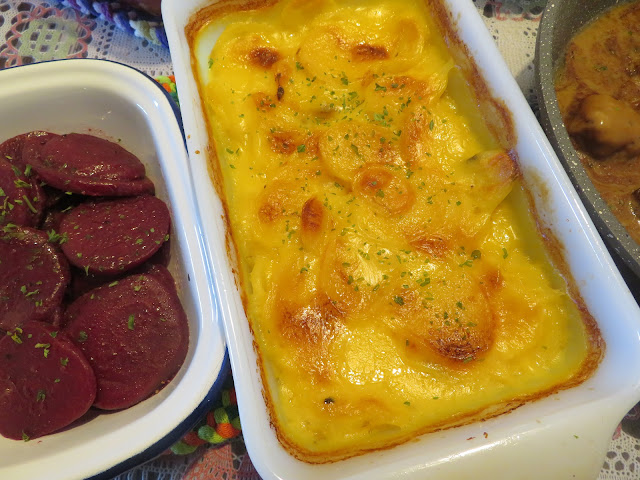
SCALLOPED POTATOES
BUTTERED BEETS
PINEAPPLE COLESLAW
LEMON SURPRISE CAKE
Yield: 4

Irene's Scalloped Potatoes
Ingredients
- 3 to 4 cups (about 5 medium potatoes) thinly sliced or coarsely grated peeled potatoes
- 1 TBS minced onion
- salt and black pepper
- 2 to 4 TBS butter
- 1 1/4 cups (300ml) whole milk, heated
Instructions
- Preheat the oven to 350*F/180*C/ gas mark 4. Arrange the potatoes in layers in a buttered 1 1/2 qt/1 1/2 liter baking dish. Sprinkle each layer with salt and pepper and dot with butter.
- Pour the hot milk over top. Bake uncovered for about 1 1/4 hour until golden brown and the potatoes test tender with the tip of a sharp knife.
Notes
My mother did her scalloped potatoes this exact same way, except she added a sprinkle of flour between each layer. I did as my mother did. This helps to thicken the sauce. I also probably ended up using a bit more butter than the recipe called for.

Lazy Daisy Meat Balls
Ingredients
- 1 pound (453g) extra lean ground beef
- 1 tsp salt ( I use kosher)
- 1/8 tsp each pepper, celery salt, garlic salt, nutmeg
- 1/2 cup (60g) dry bread or cracker crumbs
- 1/2 cup (120ml) water
- 2 TBS grated onion
- flour to roll
- fat to fry in (about 1 TBS)
- 1 (10 1/2 oz/298g) condensed cream of mushroom soup
- 1/4 soup can of water (about 3 ounces/85ml)
- gravy coloring, if desired
Instructions
- Gently mix together the ground meat, bread crumbs, water, seasonings, onion, and water to combine. Using your hands, divide and shape the mixture into 2 small balls. Roll the balls in flour.
- Heat the fat in a heavy bottomed skillet large enough to hold the balls in one layer. Brown the balls all over in the hot fat. (I used light olive oil.)
- Whisk the soup, water and gravy browning (if using) together until thoroughly combined. Pour over the meat balls.
- Cover, and simmer for about 30 minutes.

For the beetroot, I opened a can of sliced beetroot and drained it really well. I heated a tablespoon of butter in a small saucepan and added the drained beets. I gently heated then through in the butter until hot and then lightly seasoned with a bit of salt and black pepper.

Cole Slaw
Ingredients
- 1/2 a medium heat of white cabbage (hard cabbage)
- 1 medium onion, peeled and finely chopped
- 2 TBS white vinegar
- 1/4 cup (30g) dairy sour cream
- 1/4 cup (55g) salad dressing (mayonnaise)
- 1/4 tsp salt
- dash of black pepper
- 1/2 tsp dry mustard powder
- paprika to sprinkle on top
- 2 heaped TBS of well drained crushed pineapple (for the pineapple slaw)
Instructions
- Shred the cabbage very thin; place in a plastic bag in the refrigerator to crisp. (I did this the night before.)
- When you are ready to make your slaw, put the cabbage in a bowl and combine with the onion and vinegar. Stir in the pineapple if using.
- Whisk together the sour cream and the mayonnaise. Stir in the seasonings. Pour this over top of the cabbage and toss to coat. Sprinkle with paprika to serve.

Lemon Surprise Cake
Ingredients
- 1 (2 layer size) packaged white cake mix, plus ingredients required on the box for the cake
- 1 package (4 serving size) quick lemon pudding mix, plus 2 cups cold milk (480ml)
- confectioner's sugar to sprinkle (icing sugar)
Instructions
- Preheat the oven to 350*F/180*C/ gas mark 4. Prepare your pudding mix and spread it over the bottom of a 9 X 13 1/2 X 2 inch baking dish. Let stand while you beat the cake mix together.
- Prepare the cake mix as per the instructions on the box.
- Pour the cake batter evenly over the pudding in the pan, covering it completely. Bake in the preheated oven for 35 to 40 minutes, or until the top springs back when lightly touched.
- Sprinkle with confectioners sugar and serve warm.


I love vintage recipes!
ReplyDeleteI am sure your husband considers himself blessed :)
I was wondering if you can use cooked pudding in the Lemon Surprise?
If I had a husband I am sure he would! lol I can't see why you shouldn't be able to use the cooked pudding. I think it might even be better! xo
DeleteThank you Marie for solving the dinner question for me! I will make this on Friday. It sounds delicious! I remember my mother-in-law making this meal!
ReplyDeleteThanks Kate! I really hope that you enjoy it an that it brings back some lovely memories for you! xo
DeleteLove this vintage recipe, they are the best. I have a couple of cookery books that were my moms, and still use a few recipes from them.
ReplyDeleteThanks Linda! What great treasures those are I am sure! xo
Delete