

When my children were growing up it was terribly difficult to get them to eat anything at all for supper on Halloween. They were far too keen to get out and about Trick or Treating. As a mom, however, I really wanted them to eat something nutritious before they went out, or at least something that wasn't candy and so I used to try to tempt them with things that they really enjoyed, like pizza, tacos, or spaghetti, etc.


We only ever very rarely have a big breakfast at breakfast time unless we are eating out, which never happens unless we are on holiday. More often than not, something like this delicious breakfast casserole happens for supper. So . . . I guess I am a breakfast for supper kind of a gal! This french toast casserole is exceptional I have to say . . . what is it about calling something a crumble that automatically makes it taste twice as delicious?


1/4 teaspoon salt or to taste
1/2 heaping teaspoon sugar
3 heavy dashes ground black pepper
2 medium-sized potatoes, peeled and cut into cubes
1 heaping cup shredded cheddar cheese (120g)


I like to push the boundaries from time to time. I had some leftover cooked pumpkin and so I decided to do something savoury with it instead of something sweet. Lord knows I don't need any more sugar in my life! This savoury potato dish turned out really lovely.
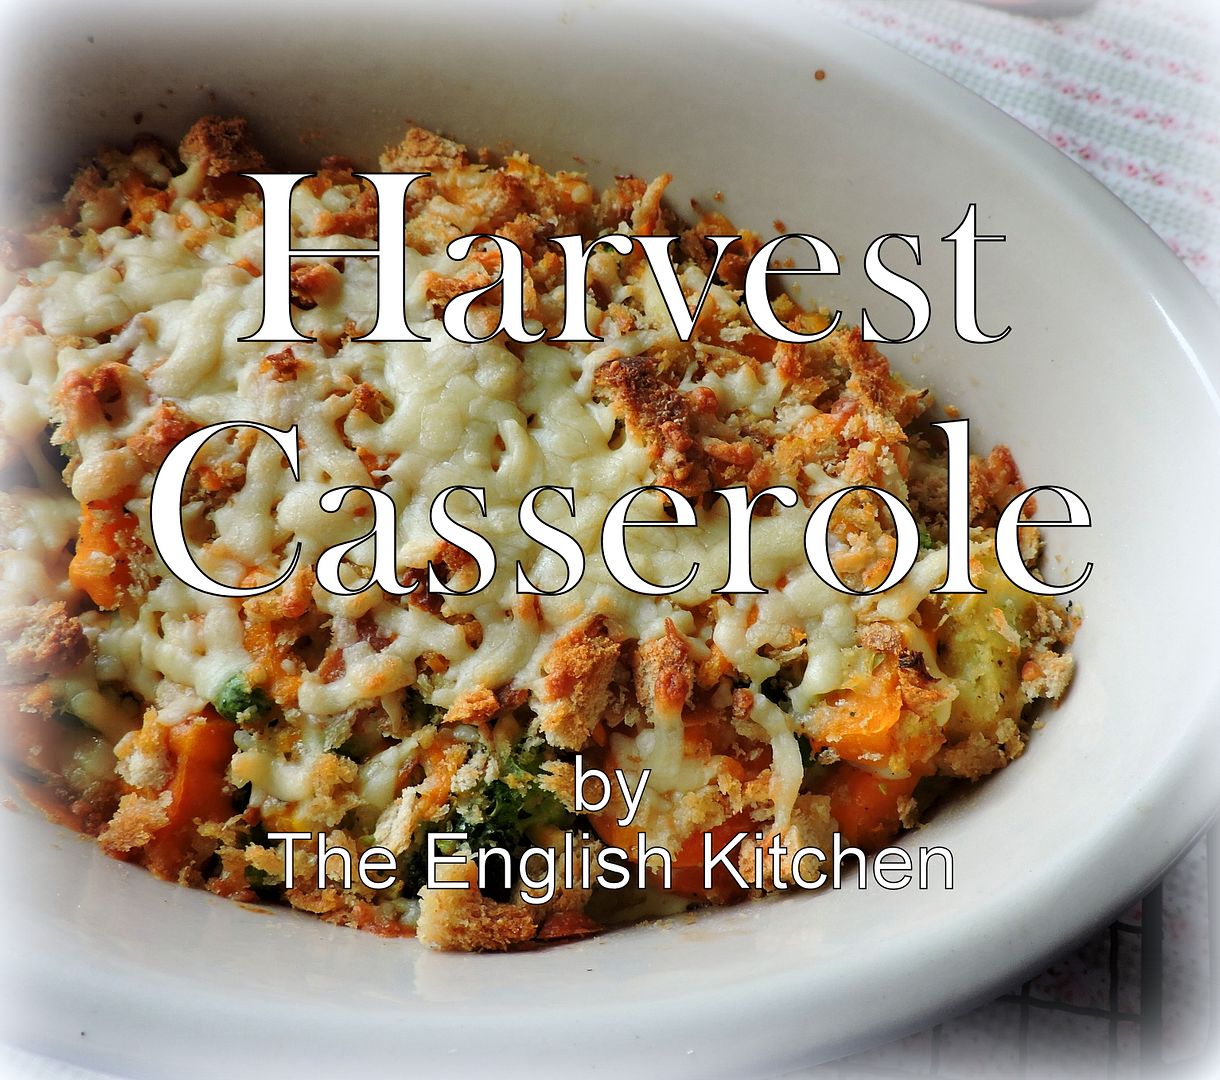
This is a recipe I have had written down in my notebook for yonks and yonks. Its really delicious. Every so often I dust it off and we have it for a side dish with chicken or fish. Harvest Casserole. The original recipe calls for diced butternut squash, courgettes (zucchini) and swede (rutabaga). A tasty combination.

What is a Bumbleberry? Ahhh . . . I think I might know the answer to that.

It is largely rumoured that they grow on Giggle Bushes in the Bumbleberry Valley . . . a closely hidden secret spot of beauty, I think.

Apparently you cannot grow them under anything because they must have the warmth of the sun in order to proliferate . . .

From what I understand, there are four different kinds of bumbleberry bushes, each one flowering at a different time of the year. One blossoms only in the spring and bears berries in the fall in the quiet time of the day, early in the morning, just before dawn.

The end result of course is that these wondrous Bumbleberries are available all year round! Which is very good news indeed.

Just perfect for being baked into a lovely traybake such as this one I have baked here today.

Of course that is a lot of old codswallop . . . but shhh . . . don't tell anyone.

*Bumbleberry Pie Traybake*
Makes one 9 by 13 inch pan
Printable Recipe
With it's crunchy shortbread cookie crust, rich berry filling and crisp streusel topping this traybake is sure to become a fast favourite!
For the crust and topping:
350g plain flour (2 1/2 cups)
290g granulated sugar (1 1/2 cups)
1/4 tsp salt
345g of cold unsalted butter, cut into cubes (1 1/2 cups)
For the filling:
4 large free range eggs
380g granulated sugar (2 cups)
120g of dairy sour cream (scant cup)
75g of plain flour (1/2 cup plus 1 TBS)
pinch salt
2 pounds of berries (I like to use raspberries, blackberries and blueberries)
(Thaw if frozen, and drain)

Preheat the oven to 180*C/350*F. gas mark 4. Butter a 9 by 13 inch baking pan. Set aside.
Whisk together the flour, sugar and salt for the crust in a large bowl. Drop in the butter and rub it into the flour with your fingertips, working quickly, until the mixture resembles fine bread crumbs. Alternately you can use a pastry blender, or cut it in using the metal blade in your food processor.
Reserve 1/4 of the crumb mixture for the topping. Press the remainder into the bottom of the buttered baking pan, pressing it in evenly. Bake in the preheated oven for 15 to 20 minutes, until golden brown. Allow to cool for at least 10 minutes before proceeding.
Whisk the eggs and sugar together for the topping. Whisk in the flour, sour cream and salt until smooth. Gently fold in the berries. Pour this mixture evenly over top of the crust. Sprinkle the reserved crumbs evenly over top. Bake for 45 to 55 minutes or until the crust is lightly browned. Allow to cool for at least an hour before cutting into squares to serve.
(Ideally you should get about 24 squares, which makes it ideal for a large crowd. You can also have the recipe quite successfully.)

Bon Appetit!

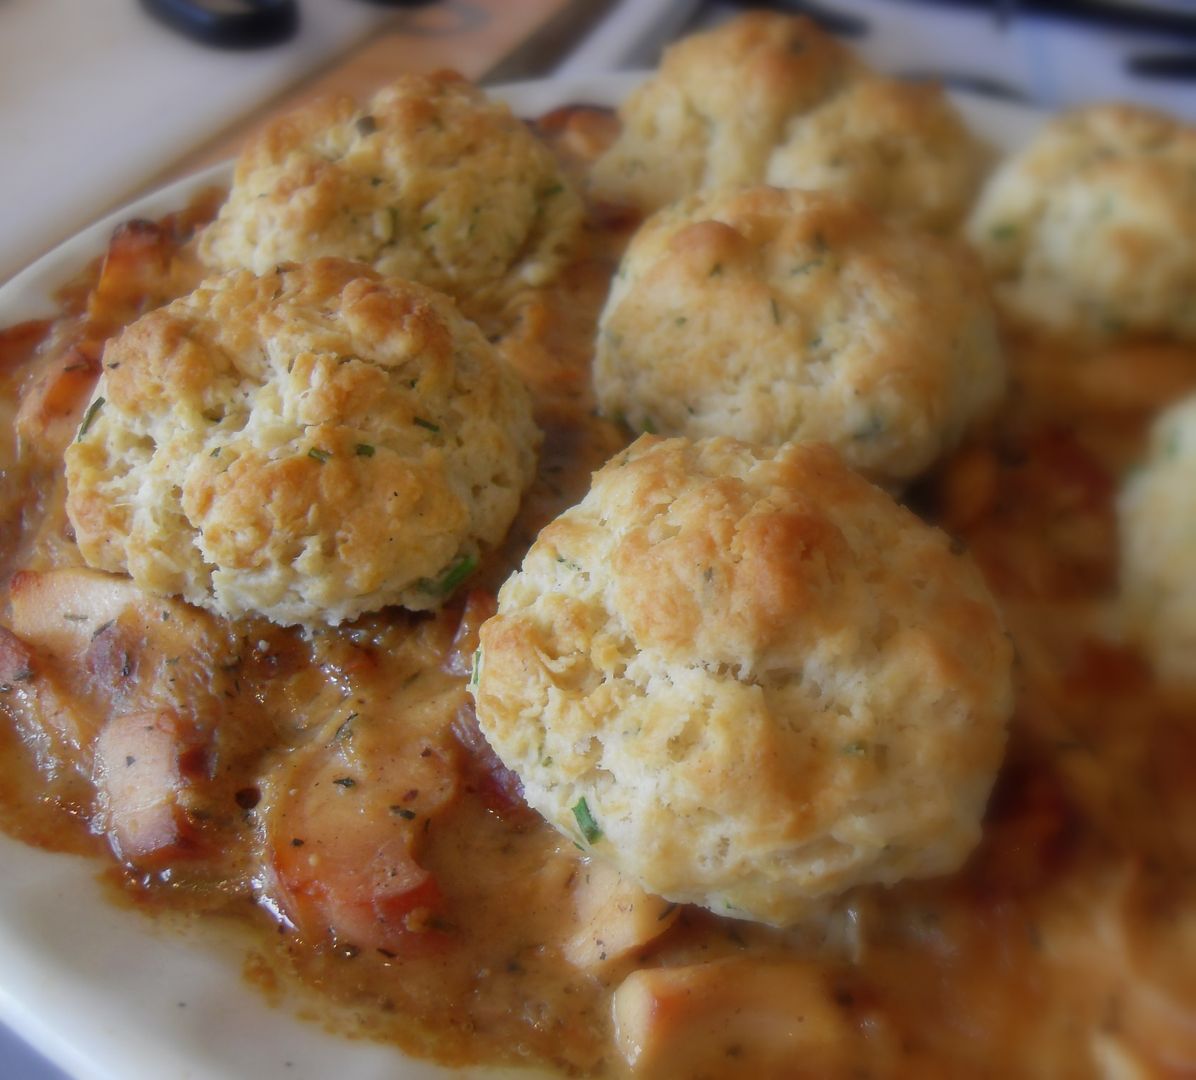
Oh I do so love when the cooler temperatures arrive and I can get down to the business of cooking comfort foods again. So does Todd. He does enjoy my salads, but he is a WW2 baby and he likes his stodge much more than those leafy greens and veg.
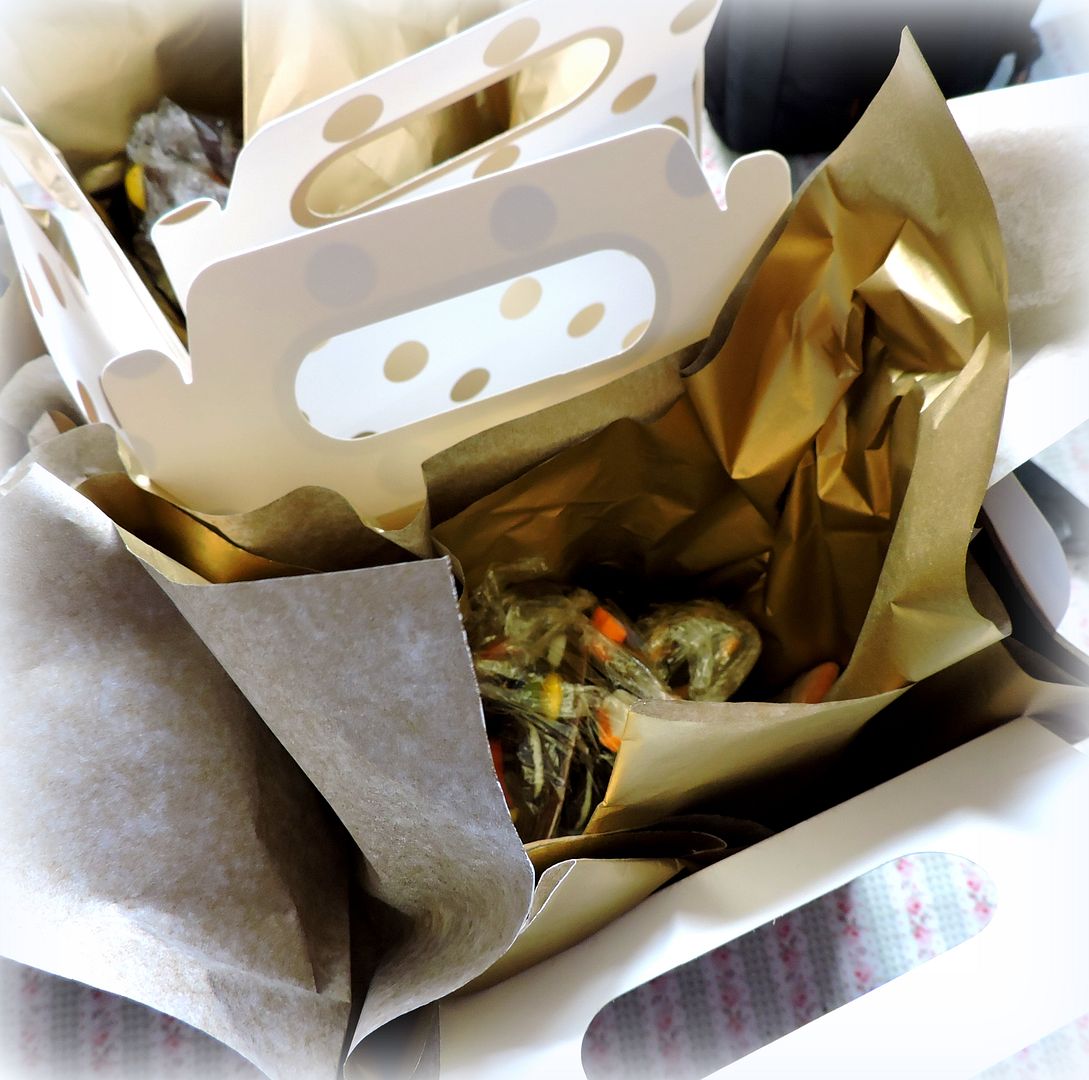
I recently put together some little Halloween Gift bags for the children of a friend of mine. I wanted to do something special for them because just a few weeks ago on FHE (Family Home Evening) they had popped over with some lovely cookies for us. It really touched our hearts that they would do something like this for us and so I wanted to do something nice in return. And so I did what any mom or nan would do at this time of year, I made them some Halloween treats!

Christmas is coming, Christmas is coming and I am getting in the mood for picking up some gifts now for family and friends. One of my favourite places to get quirky, unusual and delightful well priced items is dotcomgiftshop! I've been buying from there for several years now and have always been well pleased with the choice and what I have gotten. They carry everything from dedicated Christmas items to gifts for women, men, children and yes, pets . . . household items, vintage look items, craft items,etc. I love their hobby section, but then as dedicated hobbiest, I would!
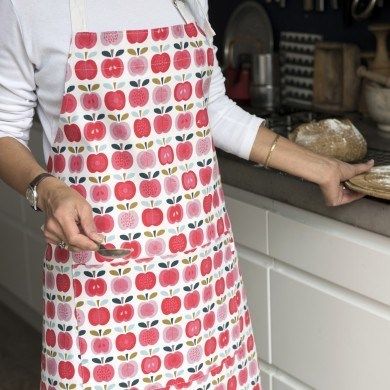
This is a fabulous apron. I just adore the vintage look print and the quality of it is excellent. 100% cotton duck, and very affordable at £12.95.
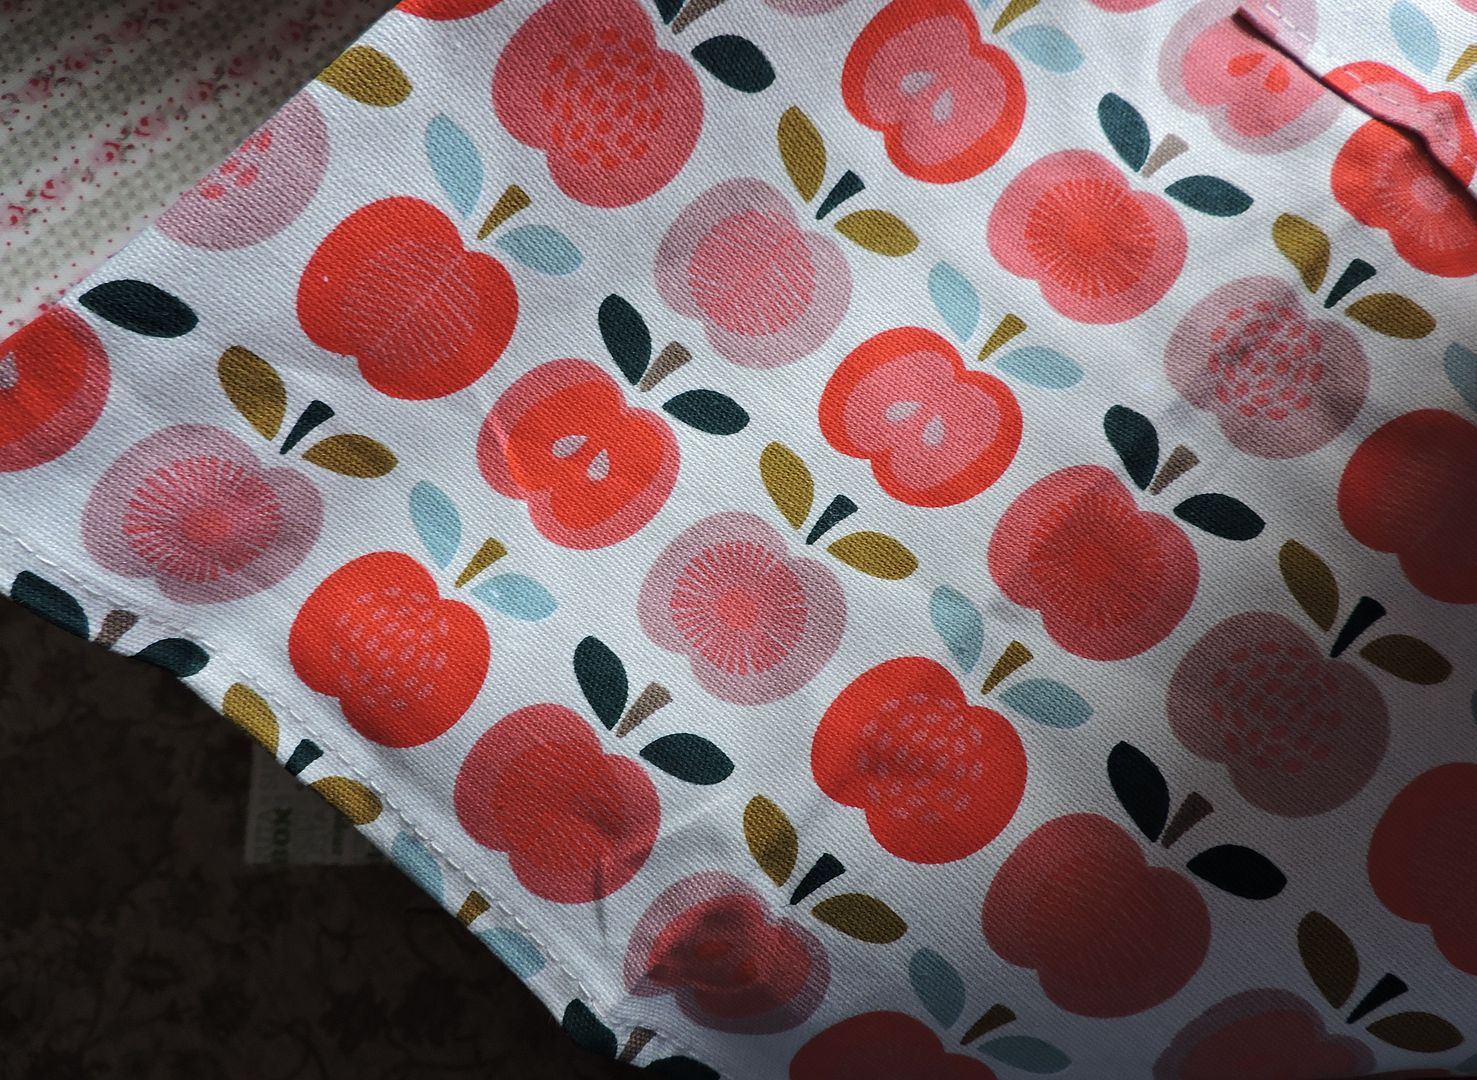
It is so cheerful! I love it. And they have a whole kitchen line which follows the same cheery design.
I recently ordered some kitchen items from them. I love their Japanese designs and their vintage kitchen items.

I love the quirky designs of these Japanese ceramic mugs. Just the right size, and these retro kitchen items, the sugar pourer and the salt and pepper shakers. Just what I was looking for. The mugs are priced at £4.95 each and the sugar pourer was £3.95 and the salt and pepper shakers were also only £3.95.

I also ordered myself an enamel basin. I had fallen in love with the photograph and the price was just right. £8.95 It arrived chipped however, but a quick e-mail to them, and lo and behold a few days later . . .
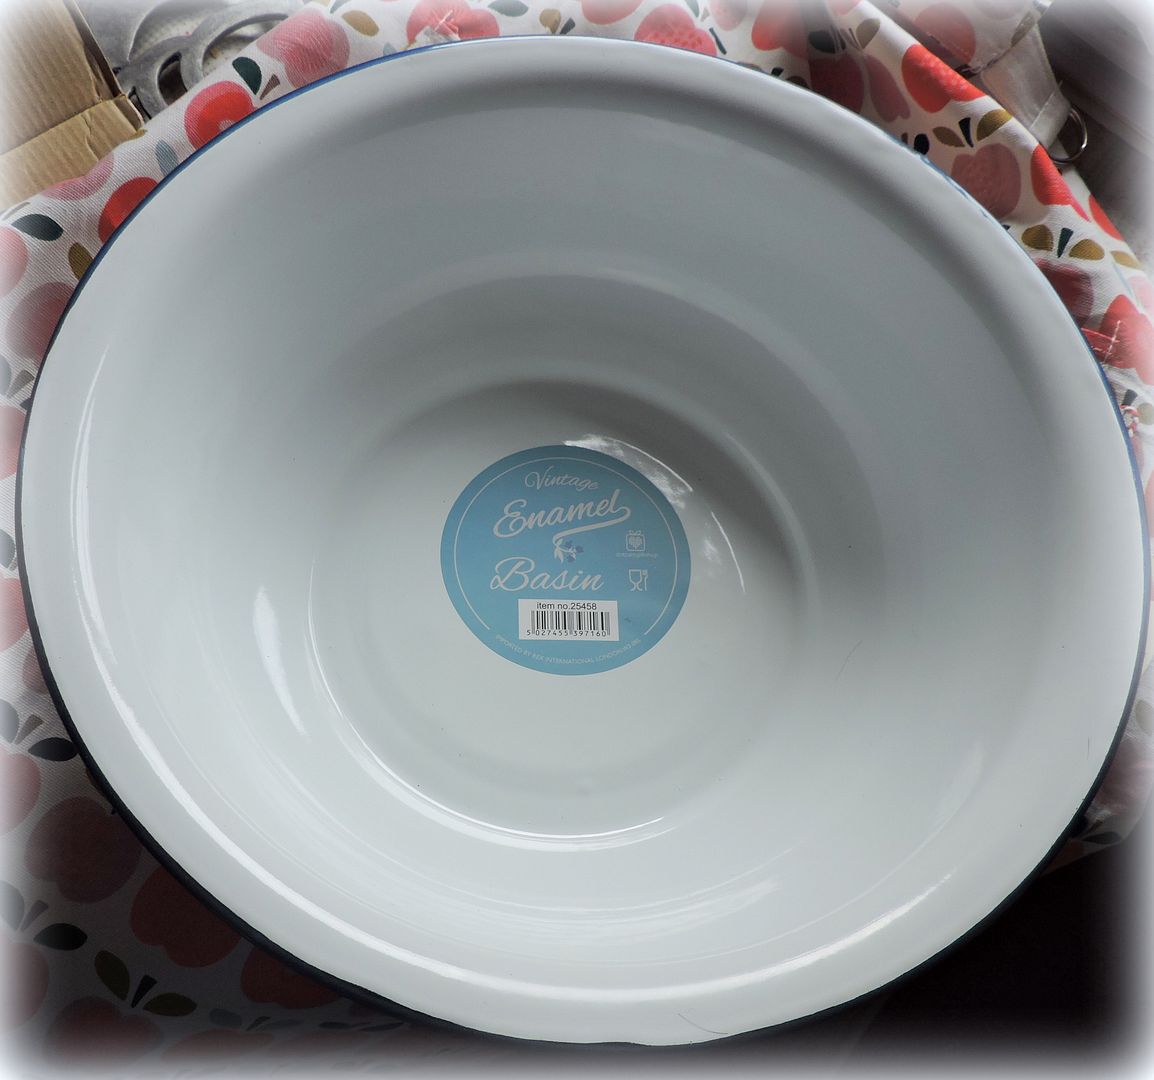
A brand new one arrived and in perfect condition!
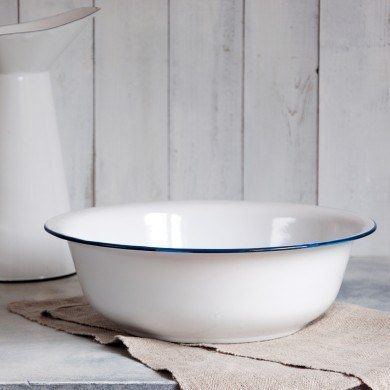
This is now going to be my dedicated bread mixing/rising basin. It reminds me so much of my mother's basin which was my grandmother's before hers and I am feeling very, very nostalgic about it.
Some of the reasons I like dotcom giftshop are:
- The prices are very reasonable, providing fairly good value for money spent.
- Delivery is quick and reasonsable, often free on orders over £20 in the UK.
- They have an incredible variety of gift items to choose from, for any age and gender! As well as for the home, for the crafter, for the holidays, etc.
- They have a dedicated wish list, so you can pop your favourites into it for shopping later on. (I hate it when I have really liked something in an online shop and then can't find it again very easily.)
- All items are well packaged and usually arrive intact, but if they don't, they quickly replace anything which has been damaged in transit.
- I adore their Vintage lines of, well . . . everything! Sewing, kitchen, toys, crafts, etc.
In short, I love dotcom.giftshop and I think you will too. They make online shopping a pleasure.
Note - I was sent a free apron and a gift certificate to purchase anything I wanted. I was not required to write any review at all. They were simply sent to me because I had been a previous customer in the past and I have a blog. I couldn't help sharing with you however because I . . . to be totally honest, do love the shop. Nothing was required of me in the least. End of.
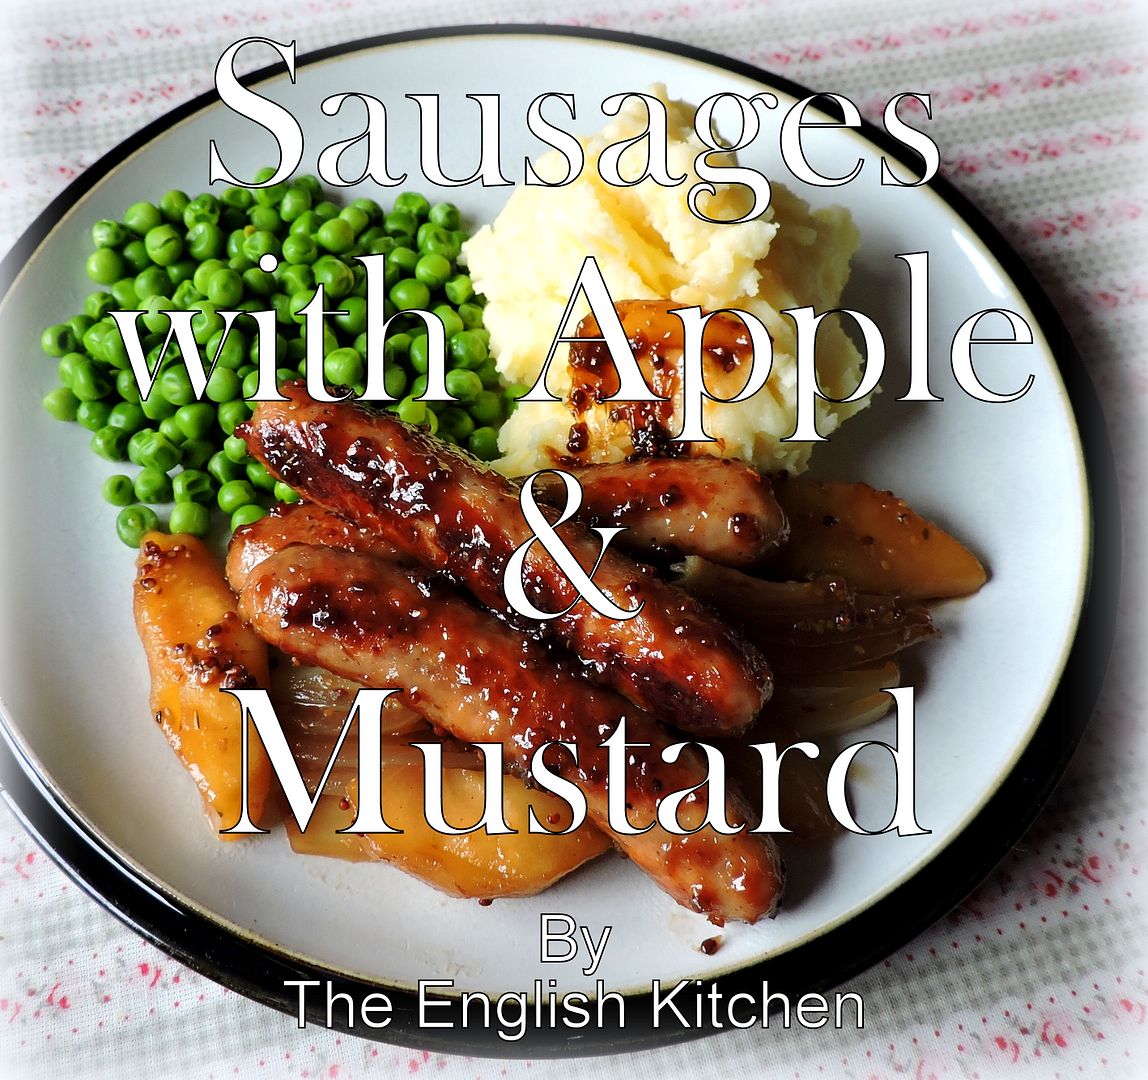
Todd is so happy that the cooler weather has arrived, not because he likes the cold, but because he knows there will be fewer salads on the menu and more meat and potatoes, and my Todd, he is a meat and potatoes kind of guy! Especially when it is a tasty entree like these Sausages with Apple & Mustard. How much more autumnal can you get!

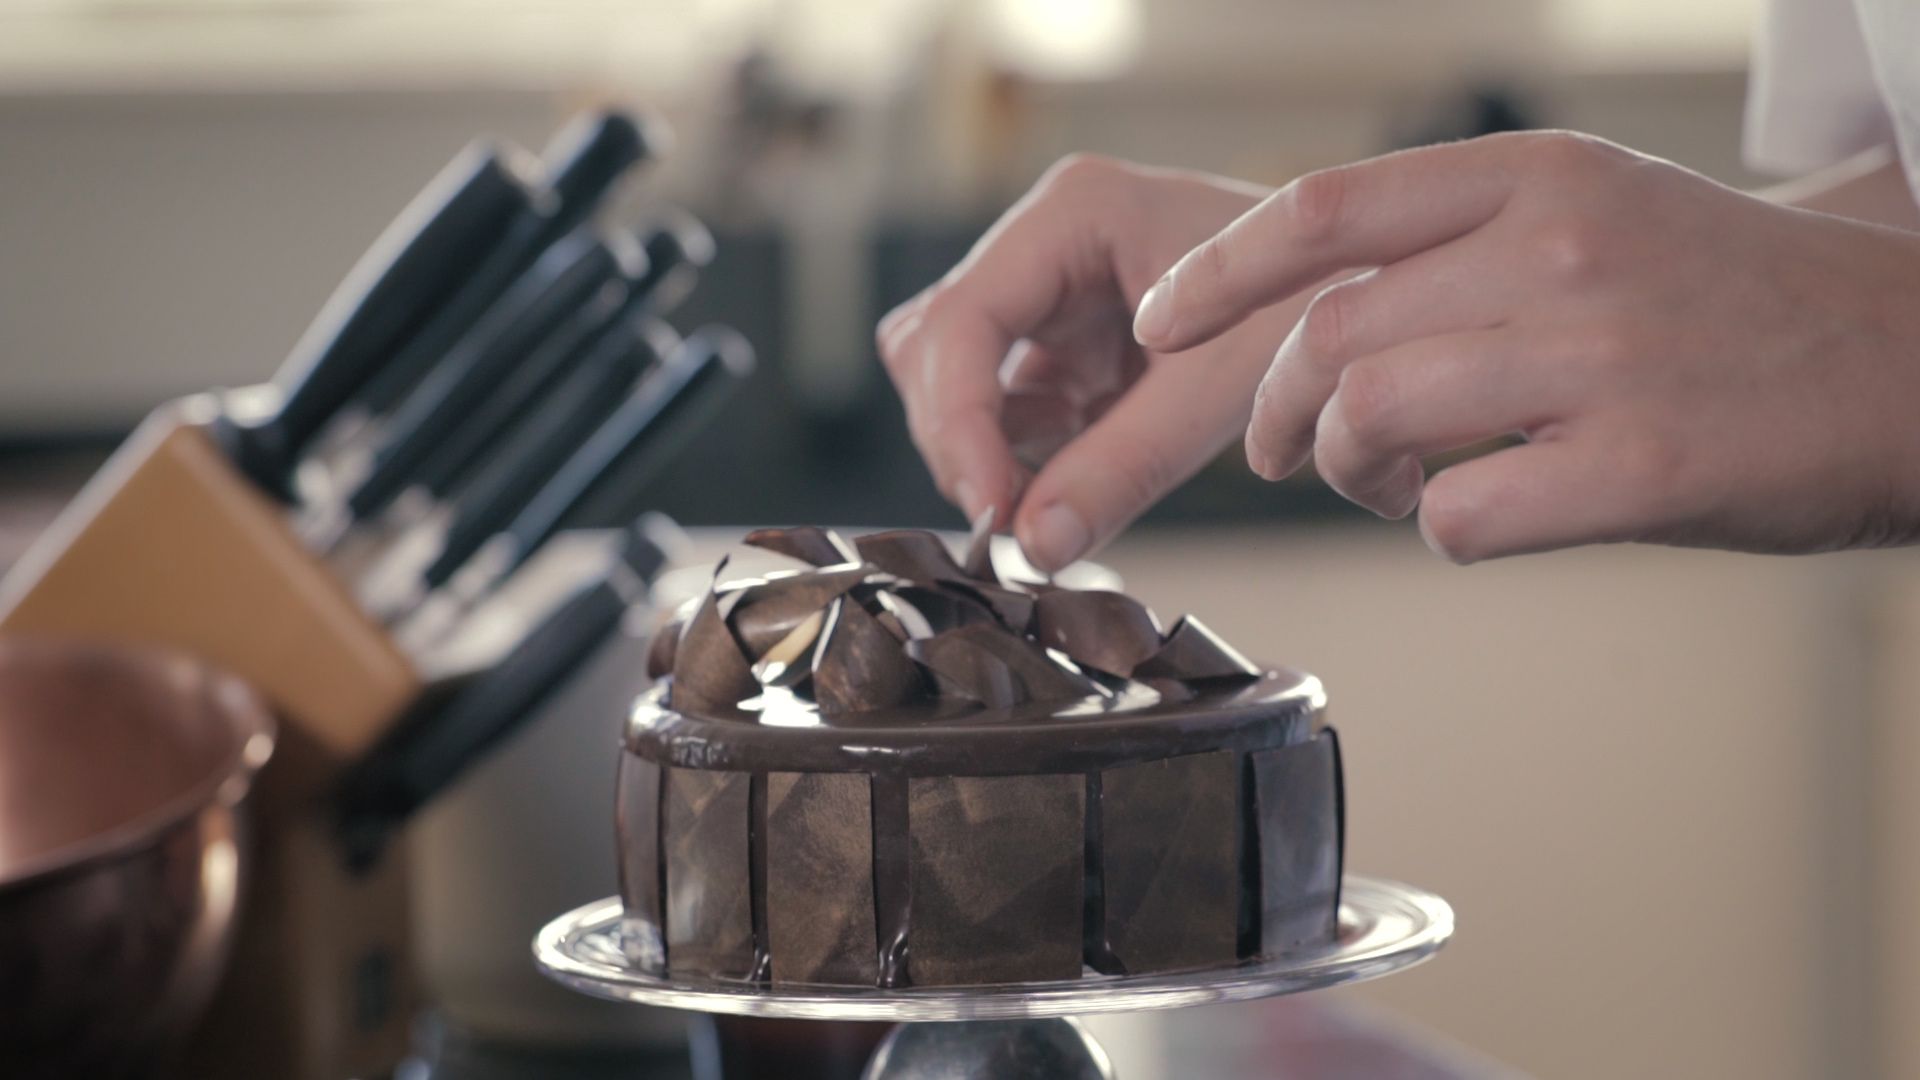
Its now Great British Bake Off Season here in the UK, and in honor of that each week Betty's will be sharing a delicious recipe, plus a video and their baking tips to go with each recipe. The kind of thing you won't find in any cookery book! Here is week Nine of their delicious hints and tips and recipe.
SACHER TORTE, the Betty's Way Part Two
SPECIAL EQUIPMENT
1 X 15 cm deep baking ringINGREDIENTS
For the chocolate glacage (Mirror glaze):50g caster sugar (1/4 cup fine sugar)
100g liquid glucose (1/4 cup)
50ml water (scant 1/4 cup)
220g dark chocolate (8 ounces)
100g butter, chilled and diced (7 TBS)
for the Torte:
50g apricot jam (1/4 cup)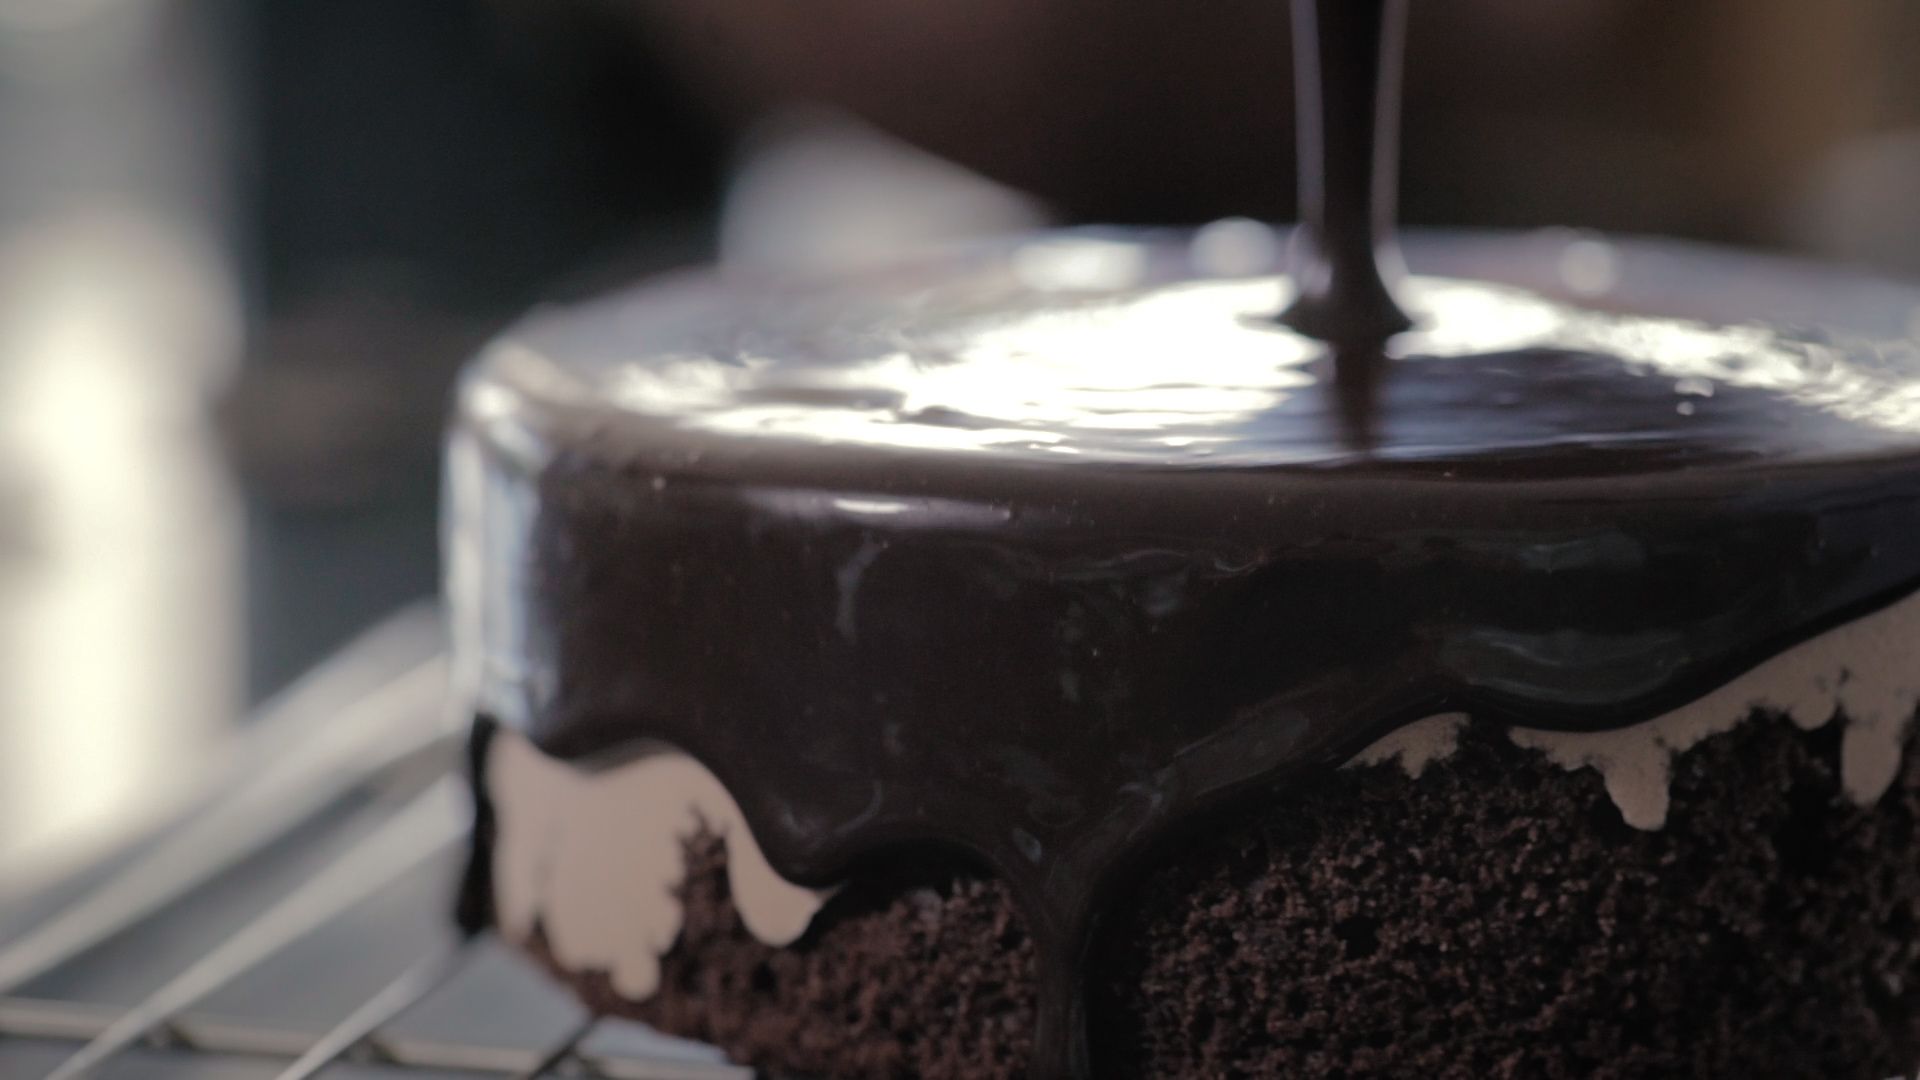
METHOD
In a heavy based pan, bring the caster sugar, liquid glucose and water to the boil until all the ingredients have dissolved into a syrup.Take off the heat, add the chocolate and the butter to the syrup and stir until completely dissolved to achieve a glossy finish.
Assemble the torte by slicing the sponge in half horizontally. Tyrn upside down so the flat base becomes of the top of your torte.
Spread all the apricot jam over the middle of sponge, then add 2 to 3 TBS of the chocolate glacage before sandwiching together.
Place in th baking ring.
Now to press it down. Cover the torte with a sheet of baking parchment and place a large pan on top of it. Place some tin cans inside the pan for extra weight.
Place in the refrigerator, wighted down, for 2 hours, or ideally overnight.
To fnish the torte gently reheat the remaining glacage over a low heat until it's fluid, but not too runny.
Remove the pressed torte from the baking ring.
Place the rote on a cooling wire with a sheet of paper beneath the wire.
Pour the glacage over the torte, allowing it to flood naturally over the top and sides. Leave to partially set for 15 minutes.
Use the excess chocolate glacage from beneath the cooling wire to fill a piping bag, then pipe the word Sacher onto the top of the torte. Leave to set.
NOTES IN THE MARGINS
Tempering Dark ChocolateCHOCOLATE'S IN CHARGE
Make sure you're feeling happy and relaxed - it's a delicate task which can be affected by a bad mood! As we like to say, "Chocolate's in charge".Switch off your phoe and prepare your working area fully. You won't have time to move things around or respond to calls.
Be aware that the weather can afect your chocolate work. It's very sensitive to temperature.
IT HAS A MEMORY
Chocolate has a memory - it will take on the qualities of the surface it touches. A shiny surface makes a shiny chocolate, so use a glass bowl to warm the chocolate.Glass it good for another eason: cereamic and metal are better conductors of heat and can over-heat the chocolate.
If using a bar, break the chocolate ino similar sized pieces so they melt easily.
Use more chocolate than you need. The larger volume means it changes temperature more slowly, giving you more time to work with it at specific heats.
NEARLY THERE IS THERE ENOUGH
Create a bain marie with a couple of centimetres of water simmering in a pan under the glass bowl. Don't let the water touch the bottom of the bowl.Work the chocolate with the back of a wooden spoon against the bowl.
Keep checking the temperature, but make sure your thermometer doesn't touch the surface of the bowl itself, or the temperature measurement may be wrong. Keep it moving around the chocolate, as some spots can be hotter than others.
Heat to 45-48*C, but remember - nearly there is there enough. Take it off at around 39-40*C as the temperature will continue to rise. If it does need a little more heat, use the bain marie in ten second bursts to stay in control.
WORK IT
Now bring it down to a tempered temperature of 25-27*C.Work the chocolate by movvin it around on a flat surface, gradually taking the temperature down. A marble or granite surface is best. Plastic or wood can dull the chocolate, so avoid that if possible.
When the chocolaate reaches 25-27*C, scoop it back into the bowl, place back over the bain marie and take it back up to 29-31*C. It's now ready to use.
Come back next week for the final part of our recipe for Sachertorte and to find out how to use your tempered chocolate to create stylish decorations. For more Betty's Baking Secrets visit www.bettys.co.uk/baking-secrets
You can pick up some tasty little goodies in the grocery store, and I'm not just talking about food. For years now I have been collecting little recipe cards, pamphlets and booklets that I thought had tasty recipes in or on them.


I was particularly interested when I was recently offered the chance of reviewing a new cookery book entitled, Ferment Pickle Dry, by Simon Pottley and Gaba Smolinska-Pottley. (Published by Frances Lincoln) There is something very Mother Earthly about wanting to grow what we eat and also to preserve what we eat, a deep seated desire which probably hearkens back to the very roots of mankind's beginnings.
Of course today we can go to the shops any time we want and pick up whatever we want, in season or not . . . but I think a certain sense of joy and accomplishment has been lost along the way. As a dedicated foodie, I want my food to mean more.
The authors of this very special book are passionate about growing, preserving and cooking using traditional techniques which they share and teach at their Walthamstow workshop, The Fermentarium.
Well organized and presented, this book is divided into three sections, or methods of preservation . . . Fermenting, Pickling and Drying.
Fermentation involves a metabolic change that converts sugars to acids, gases or alcohol. Many of the fermented foods you are familiar with have a distinctive sour taste that is down to the lactic acid produced by fermentation – foods like yoghurt, sauerkraut and kimchi. Most of us enjoy the fermentation of sugar to alcohol that creates beer, cider and wine.
Pickling uses an acid solution to preserve the produce within it by killing or vastly inhibiting the growth of the bacteria that cause food to spoil. In some cases, pickles are also partially fermented, and salt also contributes to the preservation process.
Drying foods simply means removing moisture, either by use of the sun, or man made heating. Since most of the bacteria and yeast that cause food to spoil or change thrive in moisture, dried foods discourage such spoilage.
In each section, you will find a very varied selection of recipes taking inspiration from the preserving traditions of countries all around the world. For each of these recipes, the authors also provide ‘partner recipes’ which offer clever and delicious dishes making use of the various preserves.

In the Ferment section, plain live yoghurt is used in blackcurrant yoghurt ice cream, fermented gherkins & grapes are used in a sour grape pickletini and in fermented gherkin & nasturtium caponata, long-fermented pizza dough is used to make peppe rosso 10-inch pizza onto which several fermented toppings are also used, cabbage & apple sauerkraut is used in sauerkraut bubble & squeak, preserved lemons feature in preserved lemon cous-cous and amazake is used in drunken rice pudding. This section also includes guidance on sourdough starters followed by a selection of sourdough bread recipes. Everything sounds positively delicious and looks simple enough to execute.
The Pickle section includes a vast array of pickled fruits and vegetables. Pickled cherry tomatoes feature in a Greek salad, pickled plums are used to great effect on a pickled plum flammekueche, pickled oranges lift a dish called pickled oranges, spice cuttlefish & squid ink linguine. The honey-pickled garlic starts my taste buds to tingling, and the recipe for pulled pork with swede mash, grilled nectarines & honey-pickled garlic sounds positively heavenly. I also love the sound of miso pickled mushrooms and miso pickled eggs both of which are used in misozuke and soba noodle salad. There are also recipes for herrings pickled in a variety of different ways. Most recipes in this section are savoury, but there are also dried fruit pickled in brandy which are shown to be used in a decadent coffee meringue cake. *Nom* *Nom*
The Dry section includes funghi, vegetables and fruit. I have my own dehydrater, which I sadly haven't used but I am looking forward to breaking it out to make dried wild mushrooms, which are a premium price ingredient in the shops, and there are recipes for using them in both wild porcini soup and dried mushroom sauce. The variety of vegetable ‘barks’ such as sweet potato crackling (which then features in a potato crackling fritata) sound very intriguing. A honey-glazed Chinese beef jerky has also sparked my interest. Many dried herbs are used to great effect in a variety of infusions and teas. I have a fondness for herbal teas. There are also methods for drying fruit and then using them.
There are a fair amount of photographs, (Photography by Kim Lightbody) not as many as I normally like, but the ones that are there are great!

Preceding the recipes, the introductory chapters of the book provide suggestions for basic equipment needed, a guide on how to sterilise and seal correctly, and an introduction to a few key ingredients. These, together with the straightforward recipes, make this a suitable book for those new to preserving, as well as those who simply want to expand their repertoire. I, myself, am looking forward to getting stuck into some of the recipes and methods! I have a bunch of apples and pears that I want to dry, and those apple and pear crisps are sounding pretty tasty!
This is a lovely book which teaches you how to preserve foods using the ancient methods of fermenting, pickling and drying. Its packed with recipes showing you how to use your newly preserved ingredient in everyday meals. From pickled oranges transformed in a squid and linguine dish, to dry kale and pickled celery incorporated into a vibrant stir-fry, the duel recipes in this cookbook will ensure you never end up with jars of forgotten and unloved preserves.
Ferment Pickle Dry, ancient methods, modern meals
By Simon and Gaba Poffley
Photography by Kim Lightbody
Publish by Frances Lincoln, September 2016 (£20)
Hardcover, 256 pages, colour
ISBN-10: 0711237786
ISBN-13: 978-0711237780
Many thanks to Frances Lincoln for sending me a copy to review. I was not required to do a positive review. Any opinions are my own.
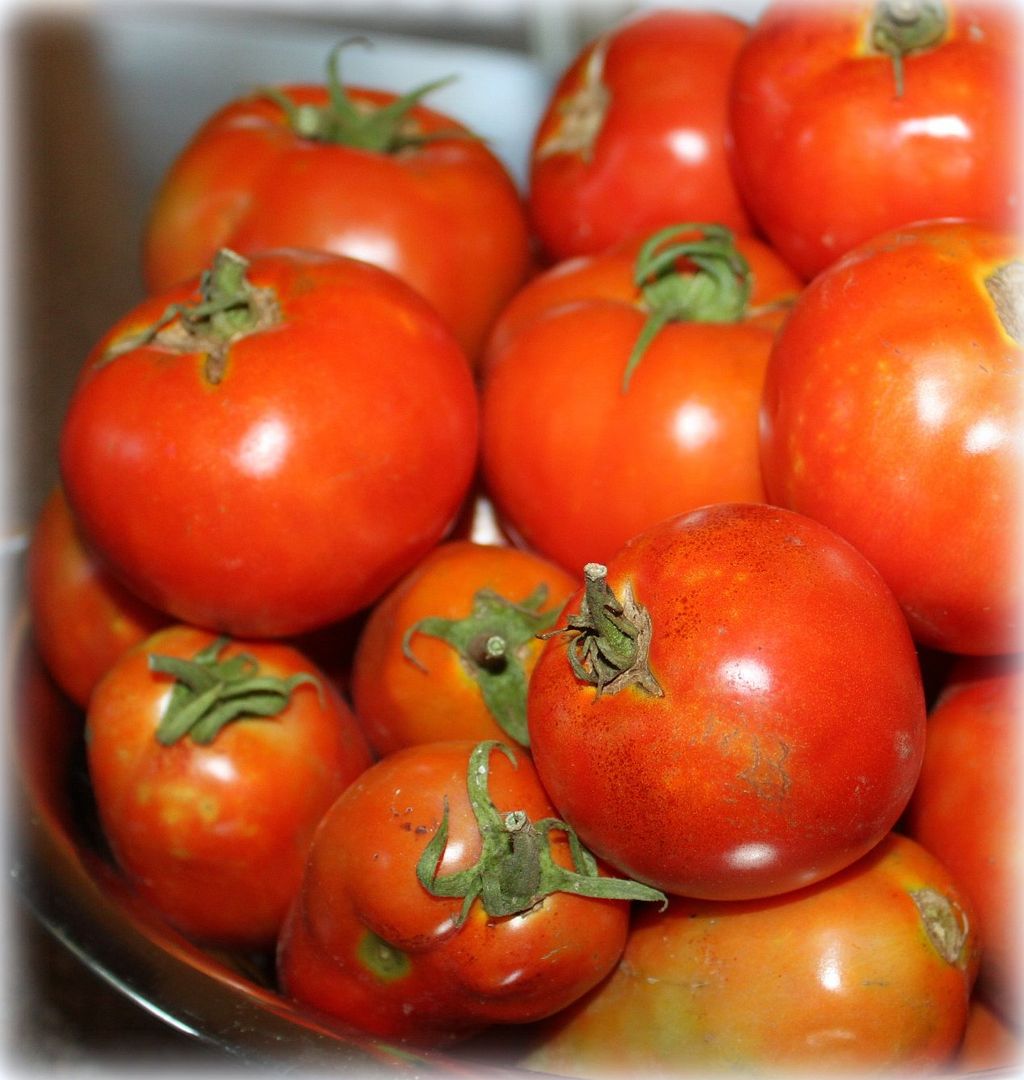
We had a windstorm a week or so ago and our tomato plants all blew over. I was force to pick them all. Most were green. I had thought to make some green tomato chow, but alas time got away from me and they ripened in the bowl before I could get that done. That was okay however because I love tomatoes and I am never at a loss as to what to do with tomatoes!
I quite simply love tomatoes and have been collecting ways to use them for years and years and years. This recipe today comes from a small green notebook which is filled with lovely home style old fashioned recipes, laboriously copied by myself years ago from books I took out from the local library. Unfortunately I was not quite so good at keeping a record of which book they came from. I can date this notebook to the years I was living in Meaford, Ontario, and I think it might have been from a book called Canadian Cookbook by Elizabeth Baird, but I could be wrong, so do forgive me if I am. In any case it is a delicious recipe.

When I was really small my mother used to bake us delicious goodies several times during the week . . . there was always fresh baked cookies in the cookie jar and the occasional pie and cake. She went back to work when I turned 11 though, so all the baking stopped . . . or homemade baking at any rate . . . .at least until I was trusted and allowed to experiment in the kitchen on my own.

One day last year I was baking this lovely loaf and I went out the front door to check on something and the wind from the back door blew the front door shut. This was somewhat of a disaster as if the front door closes and you don't have a key . . . you can't get back in. There I was stuck in the front garden, with a loaf in the oven, a small puppy at large inside, no cell phone on my person . . . and a padlocked 10 foot tall back gate that I had no hope of scaling. Thank goodness it wasn't raining.


I am having real issues with photographs. I have always stored my images on photobucket, and pay a premium price to do so. As of yesterday all of a sudden Blogger stopped working with my photobucket images. They just refust to show up. I can upload images individually to the page, but not drop in links. I have given up. I am hopeful that just as suddenly as they stopped showing up they will suddenly appear again, but you cannot imagine the devastation at having 7 years worth of photography just disappear. *sniff *sniff*
One of the most versatile leftovers has to be leftover roast chicken! I just love it. There is so much that can be done with it.

I have been blogging in one way or another since about 2003. I started over on My Space. It was just a way of keeping an online journal at that time and I had hoped that it would be a way that my children could keep up with the goings on in my life after I moved over here to the UK.
I moved from MySpace over to AOL Journals because it was a bit user friendlier and then I ended up moving over here to blogger and started my Year From Oak Cottage Blog. I hadn't been blogging for very long when I noticed that people loved it when I posted a recipe I had cooked. So I started adding recipes to my page.
Then I decided I wanted to separate the two and have a personal blog and a cookery blog and that is when The English Kitchen was born. I recently stopped paying for my domain at Oak Cottage since I haven't written there in several years and its been shut down, but I have wanted to move all of my recipes over here.
I cringe when I look at those early photographs. They were really bad. I had a lousy camera and knew nothing about taking food pictures. But they were all really sound and delicious recipes. I hope you will forgive me if every so often I do a post which features some of these old recipes.
Its a real mishmash today of this that and everything in between, but I think you will find a few treasures here, at least I hope you will!

*Spicy Pork Chops With Peaches*
Serves 4
Printable Recipe
Oh
my but these are some tasty. I just love peaches and pork is a meat that
goes so very well with fruit. Tender, juicy and spicy these chops
please on many levels. I simply served them with rice and a vegetable
and it was a meal fit for a king!
2 TBS brown sugar
2 TBS, plus 1/3 cup orange juice
2 TBS soy sauce
3/4 tsp ground cardamom
1/2 tsp mild curry powder
1/8 tsp freshly ground black pepper
4 boneless pork chops
2 tsp extra virgin olive oil
3 cups peeled and thickly sliced peaches
Combine
the brown sugar, 2 TBS of orange juice, soy sauce, cardamom, curry
powder and pepper in a small bowl. Stir to dissolve the sugar.
Trim
all the fat off of your pork chops. Place them into a heavy plastic bag
or between two sheets of cling film and bash them with a rolling pin
(gently) until they are about 1/3 of an inch thick and uniform in size.
(this also helps to tenderize them) Place them into a shallow glass dish
and pour the spice mixture over top. Allow to marinate for at least 15
minutes, or cover and place in the fridge to marinate for up to 2 hours.
Heat
the oil in a large non-stick frying pan over medium high heat. Shake
off any excess marinade (reserving marinade) and cook the chops in the
heated pan, browning well on both sides. This should take about 2
minutes per side. While the chops are browning, add the peaches to the marinade, turning them to coat them all over.
Add
the remaining 1/3 cup of orange juice to the pan and bring to a simmer,
stirring. Reduce the heat to medium low and simmer the chops, turning
occasionally,until the chops are cooked through, some 4 to 5 minutes.
Remove the chops from the pan to a plate and cover loosely with foil.
Keep warm.
Add the peaches and the reserved marinade to the pan.
Increase the pan heat and bring to a simmer. Cook, stirring often, until
the liquid is reduced to a light sauce. Stir any juices from the
resting pork chops. To serve, spoon the sauce and peaches over the
chops.

*Scalloped Turkey (or Chicken)*
serves 4 - 6
Printable Recipe
Delicious
dressing on the bottom and topped with tender slices of leftover
turkey. The whole thing is smothered in a tasty sauce and baked in the
oven. I simply cooked some vegetables and baby new potatoes to go along
and it truly was a meal fit for a king!
3 to 4 cups cooked turkey or chicken
4 ounces butter
1/2 cup flour
salt and black pepper to taste
2 1/4 cups chicken stock
1 cup milk
1 4-ounce tin of sliced mushrooms, drained well
(Or you can slice up some fresh mushrooms like I do, and brown them
off in a bit of butter)
For the dressing:
2 cups toasted bread cubes
2 small onions, peeled and chopped
1/2 cup coarsely chopped celery
1/2 tsp salt
black pepper to taste
1/2 tsp dried sage, crumbled
2 ounces butter
Pre-heat the oven to 180*C/350*F. Lightly butter a 2 quart casserole dish and set it aside.
Melt
the 4 ounces of butter in a saucepan. Blend in the flour and cook,
stirring for one minute. Slowly stir in the broth and the milk. Cook,
stirring constantly until bubbly and thickened. Season to taste with
some salt and pepper. Set aside.
Lightly toss the bread cubes,
onion, celery, 1/2 tsp salt, crumbled sage and the 1/4 cup of melted
butter together in a bowl. Add a grinding of black pepper to taste.
Arrange in the prepared casserole dish.
Place the sliced turkey
overtop of the dressing in the casserole dish. Top with the sliced
mushrooms and then pour the sauce over top, covering it completely.
Place in the heated oven and cook for about 1 hour, until nicely bubbling and well heated through. Serve hot.

Serves 4
Printable Recipe
Moist chicken, covered in a deliciously golden sweet and sour sauce,
this wonderful dish surely lives up to it's name. I love anything sweet
and sour. This went beautifully with some steamed rice and some string
beans.
1 (3 ounce) packet of lemon flavoured gelatin powder
3 TBS butter, melted
3 TBS prepared mustard (not the hot English mustard)
1 tsp salt
2 fat cloves of garlic, peeled and crushed
1/4 tsp ground black pepper
4 large boneless, skinless chicken breast halves
2 TBS thinly sliced almonds
Pre-heat the oven to 180*C/350*F.
Combine
the gelatin, butter, mustard, garlic, salt and pepper in a small bowl,
whisking well together. Place the chicken breasts in an ungreased 11
inch by 7 inch by 2 inch baking dish. Brush well with this mixture and
then pour any remaining mixture around the chicken in the dish.
Cover
and bake for 20 to 25 minutes, basting once halfway during the cooking.
Remove the cover, baste again and sprinkle with the almonds. Bake,
uncovered, for 15 minutes longer or until the chicken juices run clear.
Remove from the oven and serve.

*Little Pink Chicken*
Serves 6 - 8
Printable Recipe
This
recipe is attributed to Linda Robinson from the Belgrano Ward in the
South America South Area mission of the LDS church. Like me, she loves
to cook for the missionaries and always likes to give them a taste of
home if she can. This was one of the Elder's who was working in their
area's favourite thing from home that his mother always made, so she
e-mailed his mom and got the recipe and here it is. She says the elders
always love it and after having made and tasted it myself, I can
totally see why!! It's fabulous! Thank you Sister Robinson!
2 large chicken breasts
1/2 tsp garlic salt
cornstarch
1 egg, beaten with 1 TBS water
oil for frying
for the Sauce:
1 cup white sugar
1/3 cup white vinegar
1/3 cup tomato ketchup
1/4 cup chicken broth
1 tsp salt
2 TBS soy sauce
Cut
the chicken into bite sized pieces and sprinle it with the garlic salt.
Let sit for one hour. At the end of that time, coat each piece in
some cornstarch. (I put some cornstarch into a bowl and just stirred it
all together. I used about 1/4 cup)
Heat some oil, about 1/4
inch deep in a heavy skillet over medium high heat. Dip the cornflour
coated chicken bits into the beaten egg and then carefully cook them in
the hot oil until lightly browned. Scoop out into a shallow casserole
dish. Repeat until all the chicken pieces are browned.
Pre-heat the oven to 180*C/350*F.
Place
the sauce ingredients into a large microwavable beaker. Whisk
together. Cook on high for approximately five minutes, stirring it
halfway through the cooking time. Pour over the chicken in the
casserole dish.
Bake for 30 to 45 minutes until the sauce is nicely thickened. (Do not cover)
I served this with some egg fried rice and stir fried vegetables on the side. It was wonderful!

*Pecan Crusted Chicken Tenders and Salad with Tangy Maple Dressing*
Serves 4-6
Printable Recipe
This
is one of my favourite salads to eat in the warmer weather. I love the
crunch of the chicken and the crisp salad greens and it's sweet and
tangy dressing.
Chicken Tenders:
vegetable oil for frying
1 1/2 - 2 pounds chicken tenders
salt and freshly ground black pepper
1 cup flour
2 eggs, beaten together with a bit of milk or water
1 cup dry bread crumbs or cracker meal
1 cup of pecans, finely chopped or ground
1/2 tsp nutmeg, freshly ground
the zest of one orange
Dressing:
1/4 cup maple syrup
1/4 cup of barbeque sauce
1/4 cup balsamic vinegar
the juice of one orange
1/4 cup extra virgin olive oil
sea salt and freshly ground black pepper to taste
Salad:
3 hearts of romaine lettuce, chopped
a handful of cherry tomatoes, sliced in half
6 spring onions, sliced diagonally
Place
the flour in one shallow dish. Place the eggs in another shallow dish,
next to the flour. Place the bread crumbs, nutmeg, orange zest and
pecans in third shallow dish, mixing them together well.
Season
the chicken tenders with salt and pepper and then roll them in the
flour. Dip them into the beaten egg and then finally coat them in the
crumb mixture.
Heat some cooking oil in a large skillet over
medium high heat. Fry the tenders in the hot oil in small batches for 3
to 3 1/2 minutes on each side. Drain well on paper towels.
Whisk together all the dressing ingredients until amalgamated. Season to taste with salt and pepper.
Combine
the chopped lettuce and the spring onions in a large salad bowl. Toss
with 3/4 cup of the dressing. Divide the mixture amongst 4 to 6 chilled
serving plates.
Top each with several of the chicken tenders. Drizzle the remaining dressing over top. Serve.

*Hearty Ham Broth*
Serves 4
Printable Recipe
What a delicious soup this is,
just full of wonderful flavours and textures. It's easy, low in fat,
high in folic acid and easily counts as two of your daily five a day!
1 TBS olive oil
2 onions, peeled and finely chopped
1 carrot, peeled and finely chopped
2 large potatoes, peeled and cut into small cubes
2 ounces cooked ham, shredded
2 pints hot vegetable stock
2 ounces small pasta shapes or broken spaghetti
1/2 of a cabbage, shredded (I used Savoy)
salt and black pepper
Heat
the oil in a large pan. Add the onion, carrot and potato. Gently
sweat for about five minutes without colouring. Add the pieces of ham
and the vegetable stock. Bring to the boil. Reduce the heat and then
allow it to simmer for about 10 minutes, or until the potato begins to
soften.
Add the pasta and cook for a further 10 minutes, until
the pasta is cooked and the potatoes begin to break down and thicken the
soup. Stir in the cabbage and cook for several minutes longer, just
until the cabbage is cooked. Taste and add some salt (if needed) and a
healthy grind of black pepper. Serve up in heated bowls with some
buttered crusty bread on the side.

*Cauliflower Cheese Soup*
Makes 5 cups
Printable Recipe
1 medium head of cauliflower, trimmed and broken into florets
2 cups chicken stock
1/4 cup butter
1 small onion, peeled and chopped
1/4 cup all purpose flour
1/2 tsp salt
1/8 tsp black pepper
2 cups milk
1 cup grated strong cheddar cheese
For the buttered bread crumbs:
1 cup fresh soft white bread crumbs
2 TBS butter
1/4 tsp celery salt
1/8 tsp black pepper
Place
the cauliflower into a pot with the chicken stock. Bring the boil, then
cover and simmer until the cauliflower is tender. Do not drain. Allow
to cool for a bit, then run it through a blender to puree. Set aside.
Melt
the butter in a medium sized saucepan. Add the onion and saute until
the onion is softened and fragrant. Do not brown. Stir in the flour,
salt and pepper. Cook for a minute then slowly whisk in the milk. Heat
and whisk until it boils and thickens. Add the cauliflower mixture and
the cheese, stirring until the cheese melts. Give it a blitz with a
stick blender if you want it to be completely smooth.
To make the
toasted bread crumbs, melt the butter in a small skillet and then when
it begins to foam toss in the breadcrumbs. Add the seasonings. Cook and
stir until the bread crumbs begin to brown and crisp up.
Serve the soup in heated bowls with a spoonful of the bread crumbs on top of each.

*Ham and Eggs In A Bun*
Serves 4
Printable Recipe
This
is such a wonderful way to serve your ham and eggs. There’s very little
mess and it’s so charming. The kids, both big and small, will love this
one!
4 whole wheat rolls
Softened butter
4 large free range eggs
4 slices of ham, slivered
2 spring onions, chopped, both green and white parts
4 slices of Swiss emmenthal cheese
1 tsp sweet paprika
Salt and freshly ground black pepper to taste
Chopped fresh flat leaf parsley
Pre-heat your oven to 180*C/350*F.
Take
your buns and cut into them with a sharp knife, hollowing them out and
leaving a sturdy outside shell. You don’t want it to be flimsy. You want
it to be sturdy enough to hold the filling without collapsing. (you can
use the crumbs to feed the birds or to make some bread crumbs to keep
in the freezer for future uses) Butter all the insides of the bread
shells and then place them on a baking tray and toast them lightly in
the heated oven. Remove them from the oven and proceed as follows.
Divide
the ham up and put half of it into the bottoms of each bread shell.
Divide the onions up and put half of them into the bottoms of each bread
shell as well. Break an egg into each hole and season each with some
salt and cracked black pepper. Top each with a mixture of the remaining
ham and onion. Finally place a slice of cheese over the top of each one
and dust with paprika. Cover lightly with a sheet of foil, shiny side in
and place the baking sheet back in the oven. Bake for about 10 to 15
minutes, depending on how well you want your egg done. Remove the foil
and place under the grill for a few seconds until the cheese turns
golden brown and bubbly. Remove from the oven and let sit for a few
minutes. Scatter with some chopped parsley just before serving. Enjoy!

*Chili Dog Enchiladas*
Serves 5
Printable Recipe
I don't know a child alive who doesn't love these . . . or a husband! Quick, easy and delicious.
10 corn tortillas (the smaller sized ones, about 6 inches in diameter)
10 hot dogs (If you can get the all beef ones, use them.)
1 tin (15 to 16 ouncees) of chili (I buy Stag)
2 cups of tomato salsa (I prefer the mild)
1 cup of coarsely grated cheddar cheese (4 ounces)
Preheat the oven to 180*C/350*F/ gas mark 4. Butter a 13 by 8 by 2 inch dish. Set aside.
Soften
the tortillas according to the package instructions. Place one hot dog
and 3 TBS of the chili on each tortilla. Roll up tortillas and place,
seam sides up, in the baking dish. Spoon the salsa evenly over top,
pressing the edges of the tortillas together. The salsa will help to
keep the tortillas from opening during baking.
Cover with foil
and bake for 20 minutes. Remove the foil and discard. Sprinkle the
cheddar cheese over top. Bake for a further 5 minutes, to melt the
cheese.

*Tomato Dumplings*
Serves 4 - 6
Printable Recipe
Light
and fluffy, and wonderfully savoury, these dumplings float on a
delicious sea of a robust and tasty tomato sauce. What’s not to like
about these lovely taste tempting babies?
½ cup peeled and finely chopped onion
¼ cup finely chopped green pepper
¼ cup finely chopped celery
¼ cup butter
1 bay leaf, broken in half
28 ounces of tinned chopped tomatoes, in their juices, undrained
1 TBS soft light brown sugar, packed
½ tsp dried basil
½ tsp salt
¼ tsp freshly ground black pepper
For the Dumplings:
1 cup plain flour
1 ½ tsp baking powder
½ tsp of Italian garlic seasoning
1 TBS cold butter
1 TBS snipped fresh parsley
2/3 cup of milk
Melt
the butter in a large skillet (with a lid) over medium high heat.
Whenit begins to sizzle add the onion, pepper and celery. Cook,
stirring, until they are tender. Add the bay leaf, tomatoes, brown
sugar, basil, salt and pepper. Cover, reduce the heat, and simmer for 5
to 10 minutes.
Make the dumplings as follows.
Whisk the
flour, baking powder and garlic seasoning together in a bowl. Rub in the
butter with your fingertips until the mixture resembles bread crumbs.
Stir in the parsley and then finally stir in the milk, mixing it only
until mixed together and all the dry ingredients are uniformly moist.
Remove
the lid from the simmering tomato mixture and drop the dumpling batter
onto the top of the simmer liquid by tablespoonfuls. Cover tightly with a
lid and simmer for another 10 to 15 minutes without peeking, until a
toothpick inserted into one of the dumplings comes out clean and they
look set and somewhat dry on top. Serve immediately, spooned out onto
warm plates.

*Mashed Carrots and Parsnips*
Serves 4
Printable Recipe
These two vegetables go really well together. I could eat a big bowl of just this and nothing else.
4 large carrots (about 1 pound) peeled and coarsely chopped
6 large parsnips (about 1 pound) peeled and coarsely chopped
3 whole cloves
2 tsp white sugar
1/2 tsp salt
2 TBS butter
2 TBS brown sugar
Place
the vegetables into water to cover in a saucepan, along with the
cloves, white sugar, and salt. Bring to the boil and then cover and
simmer for 25 to 30 minutes, or until very tender. Drain well, removing
the cloves. Return to the hot pan. Place over the residual heat on the
burner and give them a good shake to dry off any remaining water. Add
the butter and brown sugar and mash together with a potato masher. I
like to leave some chunks in mine, but you can mash them as smoothly as
you prefer. Serve hot.

*Nutty Wheat Bread*
Makes 2 loaves
Printable Recipe
A delicious light textured bread with the nuttiness of wheat germ and toasted walnuts added.
3 1/2 to 4 cups plain flour
1 tsp salt
2 pkg of rapid rise dry yeast (4 1/2 tsp)
1 1/2 cups milk
1/2 cup water
1/3 cup runny honey
1/4 cup butter
1 1/2 cups whole wheat flour
2/4 cup chopped toasted walnuts
1/4 cup wheat germ
Butter two 8 by 4 inch loaf pans. Set aside.
Measure
2 cups of the plain flour into a large bowl, combine with the salt and
yeast, mixing together well. Combine the milk, water, honey and butter
in a saucepan. Warm to melt the butter and melt the honey. (120
-130*F) Add the warm liquid to the flour mixture. Blend at low speed
with an electric hand whisk until moistened, then at .medium speed for
two minutes. Add the whole wheat flour, another 1 cup of plain flour,
the walnuts and wheat germ by hand.
Tip out onto a floured
surface and knead in the remaining 1/2 to 1 cup of flour until the dough
is smooth and elastic, about 5 minutes. Place dough into a greased
bowl, turning to grease the top, cover loosely with plastic wrap or a
tea towel and leave to rise in a warm place for about an hour, until
light and doubled in size.
Punch down the dough several times to
remove all air bubbles. Divide the dough in half. Roll each half out
on a lightly floured surface to a 10 by 8 inch rectangle. Starting with
the shorter side, roll up tightly, pinch edges and ends firmly to
seal. Place seam side down into the greased pans. Cover and let rise i
a warm place until the dough fills the pans and the tops are about 1
inch above the edge of the pans, 35 to 40 minutes.
Preheat the
oven to 180*C/350*F/ gas mark 4. Bake the bread for 30 to 40 minutes
or until the loaves sound slightly hollow when tapped on the bottoms.
Remove from the pans and allow to cool on a wire rack.

*Cheese and Pepper Bread*
Makes one loaf
Printable Recipe
2 cups flour
1 cup shredded sharp cheddar cheese
1 TBS sugar
1/2 tsp baking powder
1/2 tsp baking soda
1/2 tsp salt
1/2 tsp fresh coarsely ground black pepper
1 cup buttermilk *
1/3 cup melted butter
2 large eggs
Pre-heat
the oven to 180*C/350*F. Grease the bottom only of a 9 by 5 or an 8 by 4
inch loaf pan. Whisk the flour, cheese, sugar, baking powder, baking
soda, salt and pepper together in a medium sized bowl.
In another
small bowl, whisk together the buttermilk, melted butter and the eggs.
Add all at once to the dry ingredients. Mix together just until the dry
ingredients are moistened. Pour into the greased pan.
Bake for 35
to 45 minutes, or until a toothpick inserted into the centre comes out
clean and the top springs back when lightly touched. Remove from the pan
to cool on a wire rack.
Serve warm with butter for spreading.
*Note - if you don't have any buttermilk you can use 1 TBS of vinegar or lemon juice plus milk added to make 1 cup.

Printable Recipe
Toasted English muffins topped with salty baked ham, sweet pineapple and a yummy cheese topping. These are really, really good. I normally have all the ingredients at hand.
2 wholemeal English muffins, split and lightly toasted
4 thick slices of cooked ham
2 tsp honey mustard (I used honeycup, it's quite spicy and
went really well with the saltiness of the ham and the
sweetness of the pineapple)
4 pineapple rings, well drained and dried off with some paper towels
2 ounces grated mature cheddar cheese
a spash of Worcestershire sauce
Pre-heat your grill (broiler) to medium. Place the toasted muffin halves onto a grill pan. spread each half with some of the mustard. Top with a slice of ham, a pineapple ring and some cheese. Grill for 3 to 4 minutes until bubbling and golden. Remove from the grill and spash on some Worcesterhire sauce. Serve immediately.
These go very well with a side salad, but for a more substantial meal such as supper why not make some homemade oven chips to go along on the side!

*Heaven and Earth Casserole*
Serves 4
Printable Recipe
Sweet potatoes make a change from regular potatoes. It may sound like an unusual combination to put together sweet potatoes, onions and apples, but trust me when I say they go together beautifully!!! The original recipe was called Sausage and Sweet Potato Casserole, but I changed it to Heaven and Earth, because to me it epitomizes all the best of both . . . the apples from the tops of heavily laden apple trees, and the sweet potatoes and onions from the earth, and everything in between . . .
1 pound of pork chipolata sausages (I used Cumberland)
3 cups peeled and thinly sliced raw sweet potatoes
½ cup peeled and sliced onion
1 tsp salt
¼ tsp freshly ground black pepper
2 peeled and thinly sliced apples
1 TBS packed brown sugar
¼ cup chicken stock
1 cup grated cheddar cheese
Preheat the oven to 200*C/400*F/gas mark 6. Lightly grease a casserole dish and set it aside. Start browning the sausages in a heavy skillet over medium low heat.
Begin layering the vegetables in the prepared casserole dish. Start with some sweet potatoes and the apples. Sprinkle with a bit of salt and pepper. Then layer on some onion. Repeat the layers until all are used up, ending with a final layer of sweet potatoes. Pour the ¼ cup of stock over all, sprinkle the brown sugar evenly over top, and then put on the lid. Bake in the heated oven for 30 minutes.
Remove from the oven. Top with the sausages and scatter the cheese evenly over top. Bake for another 15 minutes or until the cheese is melted and beginning to turn golden brown.
Remove from the oven and let sit for a few minutes before serving. Delicious!

*Upside Down Pizza*
Serves 6
Printable Recipe
If you like pizza you will love this novel casserole, which has the pizza toppings on the bottom!
1 pound of extra lean ground beef
2 TBS oil, divided
1 small onion, peeled and finely chopped
1 small green pepper, peeled, deveined and finely chopped (optional)
1 clove of garlic, peeled and chopped
1 (14 to 15 ounce) jar of pizza sauce (Can use Spag bol sauce if you wish. I like the Napolina Tomato and Basil sauce)
2 large free range eggs
1 cup milk
1 cup of plain flour
1/2 tsp salt
2 cups (8 ounces) of grated strong cheddar cheese
2 medium spring onions, chopped
Preheat the oven to 220*C/425*F/ gas mark 7.
Heat a large nonstick skillet over medium heat. Add 1 TBS of the oil and heat til it shimmers. Crumble in the ground beef, onions, peppers and garlic. Cook, stirring for about 10 minutes, until the beef is browned completely and the vegetables are softened. Stir in the sauce. Heat to a boil, then reduce heat to low and keep warm.
Whisk together the eggs, milk, remaining TBS oil, flour and salt together until foamy.
Spread beef mixture into a 13 by 9 by 2 inch baking dish. Sprinkle with the cheese. Pour the batter over top of the cheese. Sprinkle with the onion.
Bake for 25 to 30 minutes until puffy and golden brown. Serve immediately. Delicious!

*Chicken, Cheese and Rocket Salad*
Serves 4
Printable Recipe
I just love the variety of flavours in this salad. You get the punchiness of the rocket, the creamy tanginess of Stilton cheese, the sweet crunch of ripe pears and then of course the lovely nutty flavour of the toasted walnuts. There's plenty of goodness to enjoy here.
5 ounces of a rocket salad leaf mix
2 sticks celery, trimmed and sliced
1/2 English cucumber sliced (peeled or not as you wish)
2 spring onions, trimmed and slices thinly
2 TBS chopped fresh flat leaf parsley
1 ounce of toasted walnut pieces
12 ounces boneless roast chicken, sliced
4 1/2 ounces Stilton cheese, crumbled
2 ripe red pears, cut into cubes
(You can use halved red grapes instead if you wish)
sea salt and freshly ground black pepper
DRESSING:
2 TBS olive oil
1 TBS sherry vinegar
1 tsp dijon mustard
1 TBS chopped mixed fresh herbs
(Parsley, oregano, basil, thyme)
Wash your salad leaves and pat them dry with kitchen paper. Place them into a large salad bowl. Add the celery, cucumber, spring onions, parsley and toasted walnuts. Mix together well.
Arrange the chicken slices over all and then scatter with the cheese and chopped pears. Season to taste with some sea salt and freshly ground black pepper.
Place all the dressing ingredients into a jar with a screw top lid. Shake until well combined and then drizzle over top of the salad and serve.

*Cheater's Apple and Cherry Crumble*
Serves 8
Printable Recipe
This makes a large dessert, just perfect for taking to a pot luck! It's delicious and easy to make.
1 tin (21 ounce) apple pie filling (use a fruity one)
1 tin (21 ounce) cherry pie filling (again use a fruity one)
1 tsp apple pie spice )If your apple pie filling is a spicy oen, omit this ingredient)
12 flat style granola bars (ones like Nature's Valley that come two in a pack)
1/2 cup flour
1/2 cup butter, melted
1/4 cup sliced almonds
Preheat the oven to 180*C/350*F/ gas mark 4. Spritz a 2 quart baking dish with cooking spray set aside.
Stir together the pie fillings in a bowl, along with the apple pie spice, if using. Spread this mixture in the baking dish.
Place the granola bars into a zip lock baggie and give them a good bash with the side of a rolling pin to crush them into small pieces. Dump this into a bowl. Stir in the flour and butter, mixing all together until crumbly. Stir in the almonds. Sprinkle this mixture over top of the filling mixture, spreading it out evenly.
Bake for 25 to 30 minutes, until the edges are bubbly and the centre is thorougly heated. Allow to cool slightly before serving. Serve warm or cold with a scoop of vanilla bean ice cream if desired! (Or Todd's favourite, warm custard)

*Sweet Yellow Cake*
Makes one 9 inch square cake
Printable Recipe
Five minutes in the bowl, 30 minutes in the oven and served warm. It's crowning glory is the warm chocolate glaze that you spoon over top of it as soon as it comes out of the oven. This is scrumptiously moreish, need I say more?
6 TBS butter, softened
1 cup white sugar
2 large eggs
1 cup plain flour
1/2 tsp baking powder
1/4 tsp baking soda
pinch salt
1/2 cup sour milk
(place a tsp of lemon juice in a measuring cup and fill with milk to the half cup level)
1 tsp vanilla extract
For the Glaze:
6 ounces good quality chocolate broken into pieces
(I use a mixture of Green and Black's milk chocolate and Lindt dark)
1/4 cup white sugar
1/3 cup milk
2 TBS butter

Pre-heat the oven to 180*C/350*F. Lightly grease a 9 inch square cake pan. Set aside.
Cream the butter and sugar together in a bowl, until light and fluffy. Beat in the eggs, one at a time, mixing well together. Place the flour, baking powder, baking soda and salt in another bowl and whisk well together. Stir the milk and vanilla together.
Add the flour mixture to the creamed mixture in thirds alternating with one third of the milk mixture, mixing until all the ingredients are combined and no flour is visible.
Pour the batter into the prepared pan and place in the oven to bake. Bake for 25 to 30 minutes until cake tests done and either a toothpick inserted in the centre comes out clean or the top springs back when lightly touched with a fingertip.
Make the glaze while the cake is baking. Place the chocolate, milk and sugar into a small saucepan and cook over medium low heat, cooking and stirring until the chocolate has melted and the sauce thickens slightly. Remove from the heat and stir in the butter. Stir until the butter has completely melted and amalgamated into the sauce. Keep warm until the cake comes out of the oven.
When the cake is done and out of the oven, poke holes all over the top with a skewer or the tines of a fork. While the cake is still hot and in the pan, pour 1/2 cup of the glaze over the top and let it soak into the cake for 5 to 10 minutes. Cut the cake into squares and serve while still warm, with some more of the chocolate sauce spooned over top. Scrumdiddlyumptious!

*Molasses Spice Cake, with Ginger Syrup*
Serves 8 to 9
Printable Recipe
There is nothing more comforting than the homey smell of a cake full of cinnamon and cloves baking in the oven. When you combine that served up warm with bits of preserved ginger and the syrup drizzled over top with a big dollop of whipped cream, well, you’ve just died and gone to heaven!
CAKE:
¾ cup milk
2 TBS calvados
1 ½ tsp cider vinegar
2 cups plain flour
1 ½ tsp baking soda
¼ tsp salt
1 tsp ground cinnamon
1/8 tsp ground cloves
½ cup butter, at room temperature
1/3 cup sugar
2 eggs
¾ cup light molasses (over here in the UK use ½ cup of golden syrup and ¼ cup of dark treacle mixed)
TO FINISH:
4 knobs of preserved ginger, chopped
Syrup from the jar for drizzling
Softly whipped cream
Pre-heat the oven to 180*C/350*F. Butter a non-stick 9-inch square or round baking pan really well and dust the insides with flour. Set aside.
Combine the milk, calvados and vinegar in a small bowl. Sift the flour, baking soda, salt, cinnamon and cloves into another bowl. Using an electric mixer, cream the butter and sugar together in a large bowl until light and fluffy. Beat in the eggs, one at a time, until completely incorporated. Add the molasses and mix in well. Add the dry ingredients alternately with the wet, mixing well after each addition. Pour the batter into the prepared pan and then bake it in the pre-heated oven for approximately 25 to 30 minutes, or until it tests done when a toothpick is inserted in the middle and comes out clean. Remove from the oven to a wire rack to cool until just warm, or at room temperature.
Cut into 3 inch squares or wedges to serve. Sprinkle each serving with some of the chopped ginger and drizzle some of the syrup from the jar over. Top with a big dollop of whipped cream. Delicious!

*Apple Crumble Pie*
Makes one 9 inch pie
Printable Recipe
Picture apples, tender and sweet, tucked in beneath a crumbly and short sweet and spicy blanket, and all nestled into a crisp crusty bed . . . what could be any better?
1 un-baked 9 inch pastry shell
Filling:
2/3 cup sugar
1 tsp cinnamon
1/4 tsp freshly grated nutmeg
2 tsp flour
6 cups tart apples, peeled, cored and sliced
(I used Granny Smith's)
Topping:
1 cup flour
1/2 cup soft light brown sugar, packed
1/2 cup cold butter
1/2 tsp cinnamon
1/2 cup chopped toasted walnuts (optional)
Pre-heat the oven to 200*C/400*F. Line a 9 inch pie tin with pastry, your own or shop bought. Flute the edge and set aside.
Mix the sugar, cinnamon, nutmeg and flour for the filling in a large bowl. Add the apples and toss well together. Pour this into the pie shell.
TO make the topping, place the sugar, flour, cinnamon and butter together in a bowl. Blend together with a pastry blender until the mixture is crumbly. Stir in the chopped nuts if using. Sprinkle this evenly over top of the apples in the pie shell.
Place onto a foil lined baking sheet and slide this into the oven. Bake for 45 to 50 minutes until the apples are soft and bubbling and the topping is golden brown.**
Remove from the oven and allow to cool to room temperature before eating.
Note** If you find the crust is browning too quickly, cover with foil.

*Luscious Lemon Snacking Cake*
Serves 8
Printable Recipe
This is one of those tasty and moist cakes that you make, bake and serve all from one pan. No fuss, no mess and plenty of taste! If you like lemon, this cake's for you.
For the Cake:
1 1/4 cups flour
1 cup sugar
1 1/2 tsp baking powder
1/2 tsp salt
1 egg
2 tsp freshly grated lemon zest
1/2 tsp lemon extract
1/4 cup melted butter
3/4 cup milk
For the Glaze:
3/4 cup icing sugar
1 TBS melted butter
2 to 3 tsp fresh lemon juice
Pre-heat the oven to 180*C/350*F. Lightly grease an 8 inch square baking pan.
Sift the flour, sugar, baking powder and salt into the pan. Level it off and then make two deep indentations in it. Beat the egg and lemon zest together in a small bowl. Pour this mixture into one indentation. Pour the melted butter into the other indentation. Pour the milk over all and then mix well with a fork. (There will be some lumps that remain, just do your best and make sure you get into the corners)
Bake for 30 to 35 minutes, or until a toothpick inserted in the centre of the cake comes out clean or until it springs back when lightly touched in the middle. Remove from the oven and allow to cool completely in the pan.
For the the glaze combine the icing sugar, melted butter and enough lemon juice in a small bowl, using only as much lemon juice as is desired to make a glazing consistency. Spread over the cooled cake.

*Fresh Berries With White Chocolate Sauce*
Serves 4
Printable Recipe
I know there are umpteen versions of this floating around. This one is mine. I think that it's important to use the best
white eating chocolate you can buy. Simple yes, but the flavour is amazing. I would certainly serve this to company.
6 ounces good quality white chocolate, broken into small pieces
(I used Green and Black's organic. You can see the flecks of Vanilla in it. Just wonderful)
2/3 cup double cream
4 cups fresh mixed berries (raspberries, blueberries, raspberries and halved strawberries)
Put the cream and chocolate bits into a microwaveable measuring cup. Place into the microwave for about 35 to 40 seconds on high. Remove from the microwave and let sit for a minute
before whisking it together into a smooth sauce with a small whisk. (Your chocolate should be completely melted) Alternately you can heat the two together in a heatproof bowl set over a pan of simmering water. Stir until the chocolate has just melted, then remove from the heat. Pour the sauce into a jug.
Place all the berries into a bowl and give them a mix. Divide them into 4 shallow serving bowls. Pour the white chocolate sauce over them at the table. Delicious!


Social Icons