


I was recently afforded the opportunity to try out the Cookhouse Compact Cold Press Slow Juicer. This is a Masticating Whole Food Juice Extracter, which means that it is a juicer which is able to extract a more nutritious juice. It does this by breaking down plant fibres more thoroughly with a chewing and grinding action, before extracting the juice under pressure. For many health enthusiasts a Masticating Juicer is the tool of choice for getting more from their juicing!!

The Cookhouse Compact Cold Press Slow Juicer has a wide Chamber, is easy Clean, and has a specialised motor for maximum nutrition & pulp extraction of fruit & vegetable juice
✔ WIDE FOOD CHAMBER FOR WHOLE FRUITS - Place whole fruits and vegetables in the wide chamber for quick, easy preparation. No thin slicing or chopping required!
✔ QUIET MOTOR - The slow masticating engine not only extracts nutrients more efficiently - it's quieter than standard juicers for a more peaceful kitchen!
✔ COMPLETELY SEPARATES PULP FROM JUICE - Don't leave valuable vitamins and minerals behind - our specially designed juicer completely gathers all pulp and separates it for the best and smoothest possible drink experience!

As you can see its fairly compact and doesn't take up much counter room in my small kitchen! It also comes with a fine juice strainer, a sorbet strainer (for when you want a thicker juice containing pulp), a handy brush for cleaning the strainers and other parts, and a container to catch the pulp as it comes out of the machine. It separates the pulp from the juice perfectly.

The first juice I decided to make was an apple/carrot/ginger juice. I peeled my carrots and ginger, and cored my apples and cut them into manageable pieces.

Popped them into the juicer, and turned it on. It comes with an excellent instruction booklet which will help you to assemble your juicer properly and prepare your fruit/veg in the best way possible for extraction!

I used two medium carrots, two eating apples and a nice knob of ginger and as you can see I ended up with one nice large sized glass of delicious juice!

It was very easy to do and I was really pleased with the results! A quick rinse through and I was ready to try something else.

The next juice I tried was a combination of strawberries, watermelon and mint.
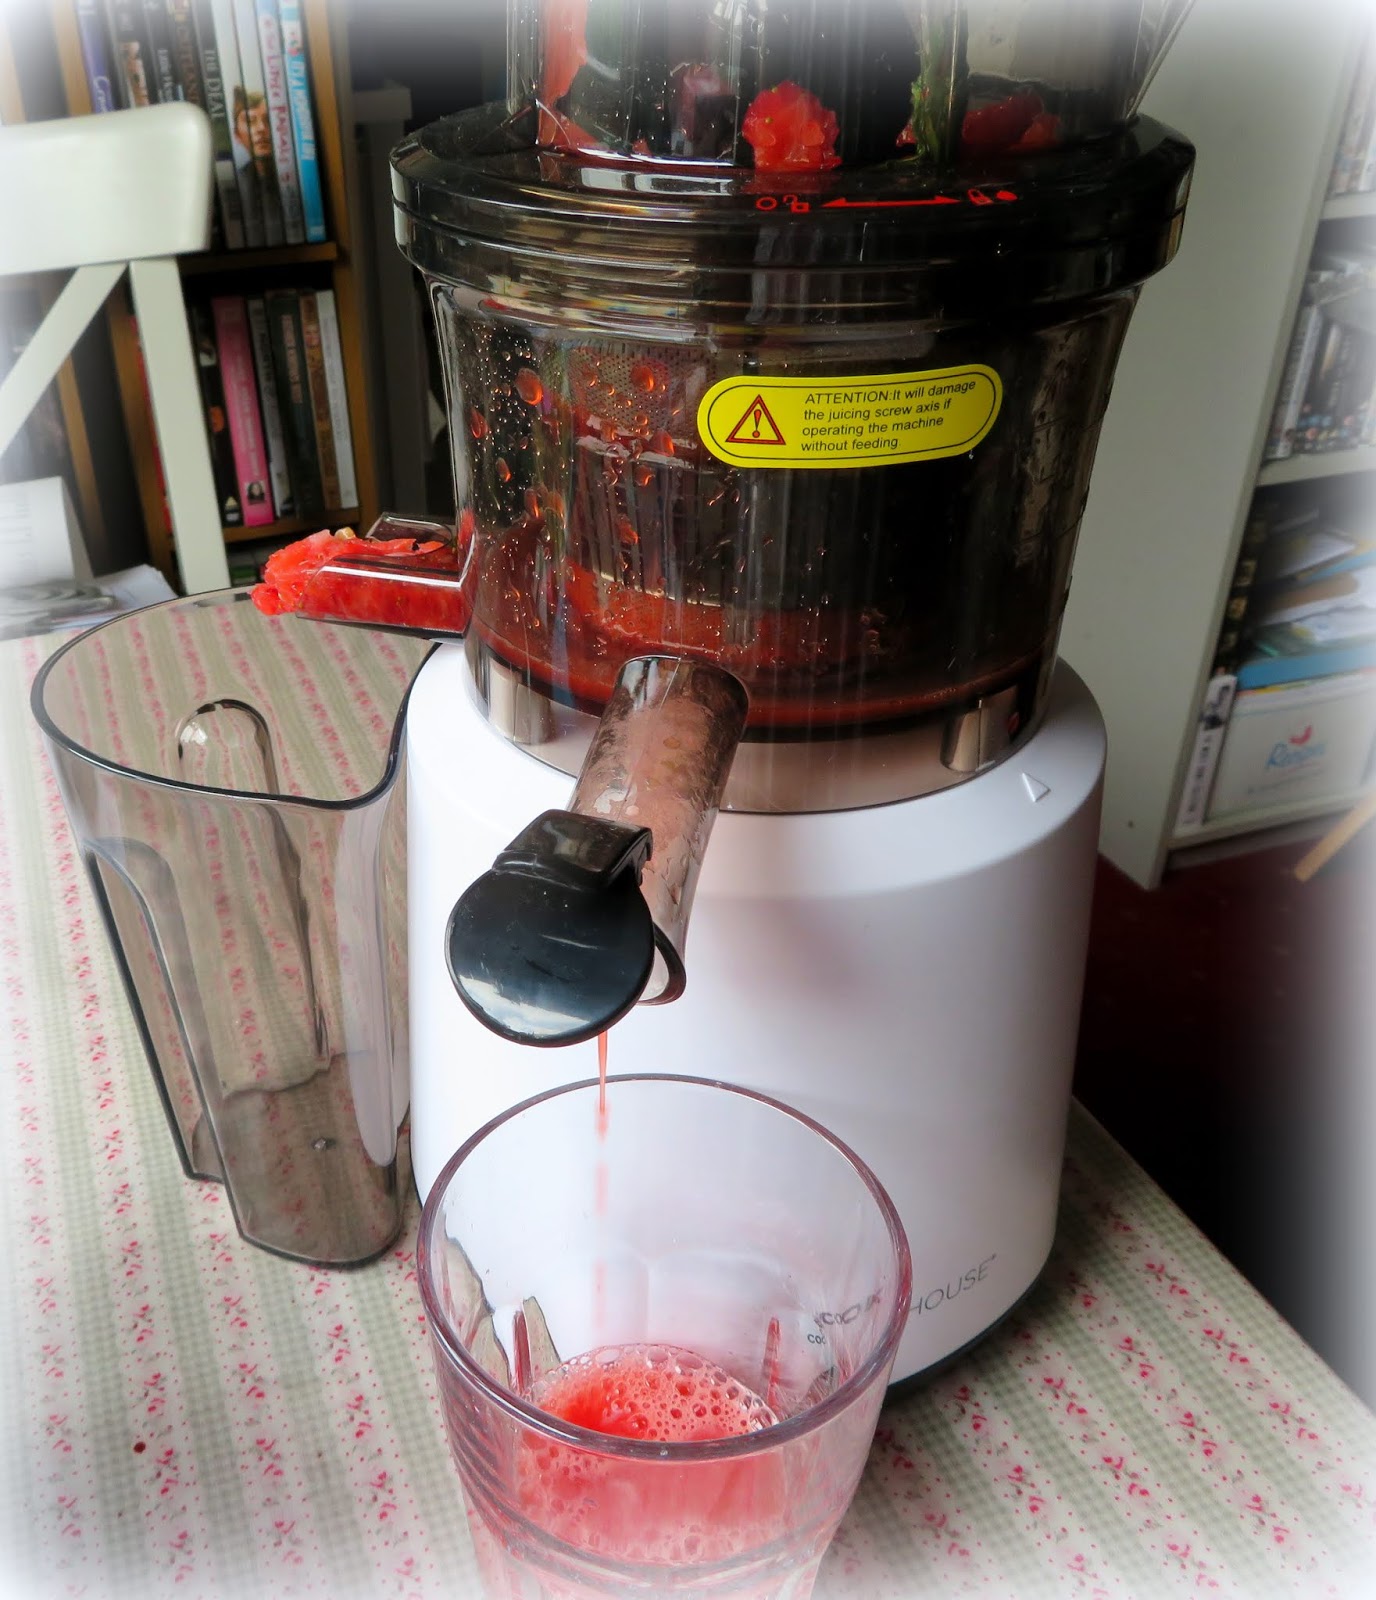
I used 600g of fresh berries, which I trimmed and cut in half . . . 200g of watermelon chunks, and a healthy sprig of fresh mint, feeding them into the juicer alternately.

This was quite ambition as I ended up with a LOT of juice! But a very tasty juice!

You can see it in operation here. I wish I knew how to post videos, but I haven't be able to figure that out just yet! They do say a picture is worth a thousand words, so I have shared several thousands of words with you here!
I tried to make some strawberry curd with some of my strawberry juice, but it didn't work well, so back to the drawing table on that one. It sounded like a tasty idea and I am not giving up. Another day!

As you can see it cleaned up really well with very little effort. That made me happy. I was able to handwash all of the components easily and without much trouble at all. Bonus! (I am rather lazy you know.)
I am really looking forward to trying out other combinations and varieties of juice now. This machine was very easy to use and gave excellent results, with no need to strain the resulting juice. It was also easy to clean and easy to store, two things which are very important to me. Its also very reasonably priced, which is also important to a couple of pensioners! No waste as any pulp can be very easily composted. I highly recommend! I am truly looking forward to trying other combinations. Watch this space!
To find out more do check it out on the Amazon UK page.
Note - I was sent a juicer free of charge for the purpose of review, but I was not required to write a positive review in exchange. Any and all opinions are entirely my own.


Spiced Carrot Soup. I guarantee you are going to love this carrot ginger soup. Its easy to make and oh so delicious!
We are at that time of year now where our stored and root vegetables are beginning to get tired and no longer at their very best.
Too early for the fresh crops, we make do with what we can get . . . I often find that my onions have started to go a bit . . .

I find myself having to peel off and discard several layers before I get to what is good and usable . . . all of these winter vegetables might be a bit past their prime, but they are still fabulous for things like soups and stews.
You are going to love this soup I am sharing with you today . . . Spiced Carrot Soup, or the soup that almost wasn't! Today was one of those days . . . when anything that could go wrong went wrong . . .

Everything for the soup went together quickly and easily . . . it makes good use of onions, garlic, and carrots . . . some grated fresh ginger root . . . warm spices . . .

Ground cumin, turmeric, cinnamon . . . all very aromatic and when combined most delicious . . .

These are cooked in chicken stock until the carrots are meltingly tender . . . be warned it smells heavenly when it is cooking . . .

After that all you need to do is puree it . . . simple. Right??? Right!!! Normally I would use my stick blender, but do you think I could find the motor for mine today???

It was nowhere to be found. All of the attachments were at the ready, but no motor, and I looked every where . . . even in places it couldn't possibly be, but I thought I would check anyways.
I even had my husband come in and look . . . sometimes you can't see the forest for the trees and I thought perhaps he could see what I couldn't.

I opened one of the upper cupboards to see if I had crazily put it in there and my pack of Miso Paste flew out of the cupboard landing in the soup and splattering it all over the counter top and back splash . . . dripping off my knife block and cutting boards . . . into our toaster . . . grrrr . . .
You know how turmeric stains . . . BLAH! Most annoying

I could not find it anywhere.
I can only think (and I really hope that this isn't what happened) that it got accidentally thrown out the last time I used it, which doesn't make sense, but I don't know where else it could be. I have looked everywhere.

After I cleaned up the mess, I had to dig my big blender out from the back of the wardrobe upstairs, where it is stored.
I was quite happy at that point that I hadn't given it away. It did need a good cleaning however.

Its so big and bulky that it just can't live in my kitchen.
The stick blender does a great job, takes up a lot less room and is a lot easier to clean, so that is normally what I use.
But meh . . . today I had to do what I had to do.

So into the now cleaned blender on the now cleaned counter the soup went. It blitzed up beautifully in about 30 seconds.
I threw poured it back into the saucepan and reheated it gently until it was hot again, and stirring in some lime juice and a bit of brown sugar, it was then ready to eat.

With a dollop of plain yogurt on top and a sprinkling of lemon zest and black pepper it was THE BEST CARROT SOUP EITHER OF US HAS EVER EATEN!

I kid you NOT . . . simple to make (aside from the comedy of errors and happenstances), using simple ingredients, but totally, TOTALLY delicious.
What a wonderful combination of flavours. My husband had two helpings and I was sorely tempted to do the same!
Spiced Carrot Soup

Yield: 4
You can thicken the soup with a handful of basmati rice if you wish. This soup is really delicious as is. If you don't have or can't find sumac, you can substitute a mix of lemon zest and coarse black pepper for it.
ingredients:
- 2 TBS olive oil
- 2 medium onions, peeled and diced
- 2 tsp freshly grated ginger root
- 2 cloves garlic, peeled and crushed
- 1 tsp ground cumin
- 1 tsp ground turmeric
- 1 1/2 tsp ground cinnamon
- 1 kg carrots, peeled and sliced (2.2 pounds)
- 1 1/2 litres of chicken stock (about 6 cups)
- 1 tsp brown sugar
- 1 TBS lime juice
- fine sea salt
To serve:
- Plain yogurt
- ground sumac to sprinkle
instructions:
How to cook Spiced Carrot Soup
- Heat the oil in a large saucepan with a heavy bottom. Add the onions and cook, stirring occasionally, until softened and translucent without colouring. Add the garlic, grated ginger and all of the spices. Cook, stirring until quite fragrant. Add the carrots and toss to coat them with the spice mixture. Add the chicken stock and bring to the boil. Reduce to a simmer and cook over low heat for about 30 minutes until the carrots are soft and meltingly tender.
- Remove from the heat and puree using a stick blender, or very carefully in a full sized blender or food processor. Take care as it will be quite hot and you don't want to scald yourself. Return to the stove and gently reheat. Stir in the lime juice and brown sugar. Taste and adjust seasoning as required with salt.
- Ladle into heated bowls, garnishing each with a dollop of yogurt and a sprinkle of sumac. Delicious!

This content (written and photography) is the sole property of The English Kitchen. Any reposting or misuse is not permitted. If you are reading this elsewhere, please know that it is stolen content and you may report it to me at mariealicejoan at aol dot com.
Follow my blog with Bloglovin


Tim Hortons is a bit of a Canadian Institution. It is a coffee/doughnut shop that feels like a second home to many Canadians. I worked there for a time prior to moving over here to the UK.

When I worked there, they would have a baker come in every night and he would work from 10:00 pm until about 6 in the morning baking cakes, frying doughnuts, baking pies, etc.
When you went into work in the morning there would be trays and trays of the freshly finished goodies sitting and waiting to go out onto the shelves.

I understand that they don't have in-store bakers these days, and that all the goods are brought in baked and frozen, ready to thaw out and pop onto the shelves.
Its called progress, but I understand that their goodies are not as nice as they used to be, or so I have been told.

I can't help but think that in losing the personal touch, in favour of more profits, they have lost something very special . . . it is a common complaint today.

One of my favourite doughnuts that they sold was the "Dutchie." It was a square, sultana filled, yeast-lifted and sugar glazed doughnut.
You could also get them as donut holes. I understand that they no longer make them, and mores the pity. They were a real favourite of many people.

My daughter and I were talking one day and I was telling her that one of the things I missed from Canada was the Dutchie Doughnut, and she informed me that they no longer make them.
Can we please have a minute of silence here to mourn their loss?

Well, you know how that goes . . . when you can't get something you love any longer . . . it increases your craving for it.

For months now I have been craving a Dutchie Doughnut! Craving, craving, craving . . .

Today I decided to scratch that itch and make some from scratch. They were very simple to make.
I searched online and found a recipe for them on the Chatelaine Magazine page (another Canadian Institution), the difference being they called them Duchesse Doughnuts . . .

Duchesse . . . Dutchies . . . a rose by any other name. Any Canadian worth his salt knows these are Dutchies. Their recipe made 12. There is no way on earth I wanted to be tempted by a dozen Dutchies . . .

So I cut the recipe in half, with great success and made us a lovely half dozen puffed and glazed, raisin studded delights!

I also added a half teaspoon of cinnamon to the dough because if my memory serves me well, they had just a hint of cinnamon flavour, but that could just be my rose coloured glasses . . .
Yield: 6
Canadian Dutchies
These sultana studded glazed Doughnuts are a bit of a Canadian Institution! Not as hard to make as you might think. You can easily double and make more.
Ingredients
- 75g of sultana raisins (1/2 cup)
- 120ml milk (1/2 cup)
- 4g of quick rise yeast (1 1/4 tsp)
- 2 TBS granulated sugar
- 30g butter, melted (2 TBS)
- 1 small free range egg, beaten (or 1/2 a large one)
- 1/4 tsp salt
- 175g of bread flour (1 1/4 cups)
- Canola oil for frying
For the glaze:
- 130g icing sugar, sifted
- 2 TBS water, or as needed to make a thin smooth glaze
Instructions
- Put the sultanas into a measuring cup and cover with 1/2 cup boiling water. Let stand for 10 minutes, then drain very well.
- Heat the milk in the microwave for 30 seconds, until warm. Pour into the bowl of a stand mixer. Add the yeast and stir. Let sit for 10 minutes. Beat in the well drained raisins, sugar, melted butter, egg and salt. Add the flour and beat on medum high with the dough hook on the stand mixer for 5 to 8 minutes, or until the dough forms a ball and pulls away cleanly from the sides and bottom of the bowl. (You may need to add a bit more flour. I did.)
- Scrap into a lightly oiled bowl. Oil the top and cover with a damp tea towel. Leave to rise in a warm place until doubled in size, about 1 hour.
- Line a large baking sheet with some buttered foil. Pat or roll the dough out into a rectangle which is roughly 1/2 inch thick. Cut into six equal sized pieces and place each on the prepare foil. Cover lightly with the damp tea towel again and leave in a warm place to rise until double, a further 45 minutes.
- Pour cooking oil into a large pot to the depth of one inch. Clip on a deep frying thermometer. Heat the oil over medium heat until the temperature reaches 180*C/ 350*F. Adjust the heat as required during cooking to maintain this temperature.
- Add the doughnuts to the hot oil, 2 at a time, flipping them over halfway through the cook time, until golden brown on both sides, about 3 to 4 minutes in total. Drain on paper towels.
- Place a wire rack over a piece of parchment paper or paper kitchen toweling. whisk together the icing sugar and water until smooth. Dip each doughnut one at a time, turning the to coat them on all sides, and allowing any excess to drip away. Place onto the wire rack and let stand until the glaze is firm. The last one of two you may need to use your fingers to make sure the glaze coats them completely. Not a problem if you don't mind sticky fingers, and I don't.

Oh boy am I ever glad I only made six of these! They are indeed very dangerous to have around. I think I am going to have to lock up the extra four! They were very easy to make and tasted every bit as good as my memory of them was! (Just make sure your oil is hot and you keep an eye on it so that it doesn't cool down too much when you add the doughnuts to it.) Today you can call me a very happy Canadian Ex-pat, with a lovely satisfied grin on my face. Nom Nom!
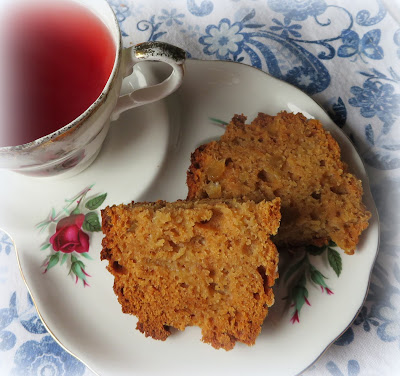

Todd was wanting some cake, but of course my oven isn't working reliably at the moment, so I was in a bit of a quandary as to what to do. I don't really like store bought cakes very much. They are always dry in comparison to homemade. Yes, we are very spoilt! Then I remembered my bread machine and I remembered seeing some recipes in it's manual for baking cakes. You can also make jam in it and fruit compotes, although I never have.

My bread machine is the Panasonic Automatic Bread maker, Model No. SD-2501

I figured I didn't have anything to lose and so I picked the Apple & Ginger recipe, which sounded really good. I also had everything I needed to make it . . .

Golden syrup, Granny Smith apples, preserved ginger . . .

Cloves, cinnamon . . .

Todd adores anything with cloves and ginger and cinnamon and apples . . . they are his favourite things to eat! I was pretty certain he would love this cake.

It was actually very easy to put together . . .


Todd was out when I started it and as soon as he came in, he said, oh boy something smells good! that's always a really positive sign!

It has a beautiful texture. Its a bit sturdier than a normal cake . . . I would say more like a tea loaf.

Lovely flavours with the cinnamon and cloves . . . and those bits of preserved ginger. I adore preserved ginger!

It is well studded throughout the loaf . . .

The Demerara sugar on top gives it a lovely crunch! (This is Turbinado sugar in North America)

This is the perfect cake to sit down and enjoy a nice hot cuppa with!
Apple & Ginger Cake

Yield: Makes 1 loaf
A moist apple cake filled with lots of flavour. This bakes in the bread machine, although I am very sure you could also bake it in a regular loaf tin.
ingredients:
- 120g butter (1/2 cup)
- 200g golden syrup (2/3 cup)
- 300g self raising flour (2 cups plus 3 TBS)
- 1/2 tsp baking powder
- 1/2 tsp ground cinnamon
- 1/2 tsp ground cloves
- 2 medium free range eggs, lightly beaten
- 2 granny smith apples, peeled and grated
- 4 knobs preserved Stem ginger, drained and finely chopped
- 1 1/2 TBS Demerara sugar
instructions:
How to cook Apple & Ginger Cake
- Heat the butter and golden syrup together to melt the butter. Let stand for a few minutes to cool a bit.
- Sift the flour, baking powder, cinnamon and cloves into a bowl. Add the syrup mixture and the beaten eggs. Stir to combine well. Stir in the grated apple and the chopped ginger.
- Remove the kneading blade from the bread pan (bread machine) and line the pan with baking parchment, bottom and sides.
- Spoon the batter into the pan, taking care to keep it inside the baking paper. Sprinkle the Demerara sugar carefully over top.
- Select Menu 15 on your bread machine (my model is SD-2501) or 14 (SD-2500) and enter 1 hour 5 minutes on the timer.
- At the end of that time when the bread machine beeps, test with a skewer to make sure it is cooked. if it isn't done, then select 15 again and cook for a further 5 minutes or so. If it is still slightly sticky this will cook through during the stand period.
- Using an oven glove, remove the pan from the bread machine and let stand for 5 to 10 minutes before tipping out onto a wire rack to cool completely.
NOTES:
If you don' t have a bread machine, you can still bake this in a normal loaf tin. Use a medium loaf tin, line with baking paper and bake at 180*C/350*F/ gas mark 4 for 50 to 60 minutes.

One thing for sure, not having a working oven is inspiring me to step outside my comfort zone and try some new things I had not considered before! Don't worry if you are not the owner of a bread machine. You can still bake this delicious cake in a regular loaf tin and oven!!

Subscribe to:
Posts (Atom)





Social Icons