


- all purpose plain flour
- baking powder (the recipe says double acting, but I think all baking powder is double acting today.)
- salt
- mace (if you cannot find it you may use nutmeg in its place)
- sugar (fine granulated or caster sugar)
- one egg (I always use large free range eggs)
- milk (I only ever have full fat milk in my house.)
- melted butter (I basically only ever have salted butter in the house)
- butter, sugar and cinnamon/mace to dust.


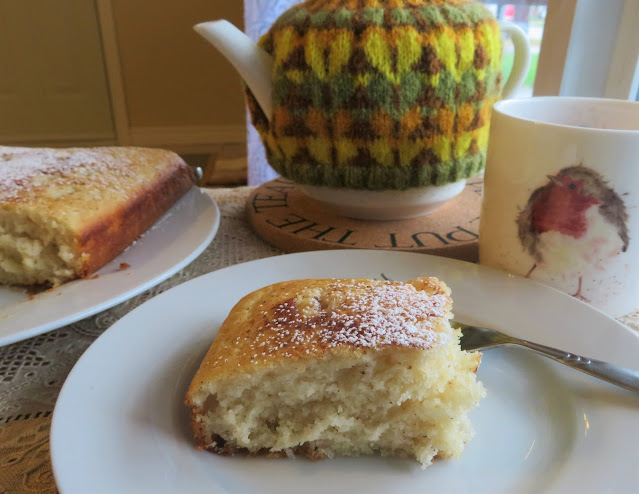
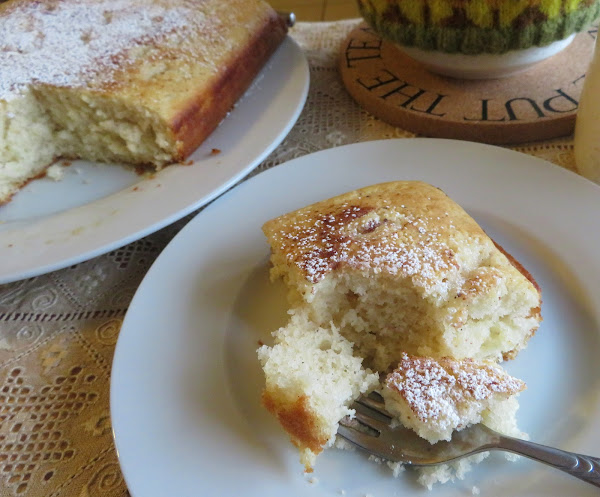
James Beard's Coffee Cake
Ingredients
- 1 1/2 cups (210g) less 2 TBS of all purpose plain flour
- 2 tsp double acting baking powder
- 1/2 tsp salt
- 1/2 tsp mace
- 1/2 cup (100g) sugar
- 1 large free range egg, well beaten
- 1/2 cup (120ml) whole milk
- 3 TBS melted butter
- Additional butter and sugar for topping (see instructions)
- mace or cinnamon to top
Instructions
- Preheat the oven to 400*F/200*C/ gas mark 6. Butter a 8-inch square baking tin really well. Set aside.
- Sift the flour, baking powder, mace, and salt together into a bowl. Stir in the sugar.
- Beat together the egg and milk with the melted butter. Add all at once to the dry ingredients and beat together until smooth. Pour into the prepared baking dish.
- Dot with butter which has been rolled in sugar. (Although amounts were not given, I used 1 1/2 TBS of butter cut into bits and about 2 TBS of sugar) Dust with mace or cinnamon.
- Bake for 25 minutes until golden brown and puffy. Serve hot with a nice hot cuppa.


Optional - a few whole salted peanuts to garnish each cookie

Cream together both sugars and the butter until light and fluffy. Beat in the egg and vanilla. Beat in the remaining ingredients, mixing well together.
Roll in your hands into walnut sized balls and place spaced well apart on the baking sheet. Flatten slightly and top each (optional) with a few more salted peanuts.
Bake for 12 to 15 minutes until golden brown on the edges. Leave to cool on the baking sheet for 15 minutes before scooping off onto a wire rack to cool completely. Repeat as necessary until all the cookies have baked. Store in an airtight tin.


I first saw this Carrot Cake Roll on La Table De Nana (one of my favourite spaces) back in July of this year.
It looked fabulous, but then everything she makes looks fabulous. Monique is such a talented lady in so very many ways.

As recipes go, she had purloined it from French at Isa's, but also gave a link to an English version to be found here.
It is a fabulous cake in any language.

Carrot cake is my husband's favourite kind of cake. As soon as I saw Moniques, I had in mind to make this for him and that's just what I did today. It only took me two months to get to it, haha.
And then I had to search and search for her photo of it so I could find the recipe. Note to self: from now on pin what you want to make. Just don't take it for granted that you can easily find it again!

So after much searching I found it again and set out to make it for my husband. I used the English version and adapted it a tiny bit.
I have incuded the recipe in both linear and metric measures.

Its a very easy cake to make. There is no fat in the batter, unless you count the eggs. I used large free range eggs. The size had not been specified, but large free range worked perfectly.
There is rather a lot of sugar however . . . almost as much sugar as flour. I am not sure if you could cut that down or not.


My filling didn't turn out as solid as the original recipe did. I think that is because of the difference in cream cheese between North America and over here in the UK.
Our has a lot more liquid in it. Not sure how I can fix that either . . . but as far as taste went, it didn't really matter too much.


Crack the eggs into bowl and beat well for about 5 minutes until thick and creamy. They should get lighter in colour. Beat in the sugar, salt and vanilla. Sift the flour and spices together. Stir in the raisins and walnuts. Stir this into the egg mixture to combine. Stir in the carrots. Spread the mixture into the prepared pan, spreading it to completely cover and fill to the edges.
Bake for 9 to 11 minutes, until just done. The top should spring back when lightly touched, but it should not have browned too much.
While the cake is baking place a large cotton tea towel on a flat surface and dust with icing sugar. As soon as you remove the cake from the oven, carefully invert it over the icing sugar dusted tea towel. Carefully remove the foil. (If you have sprayed it generously, this won't be a problem) Starting from a short end, fold a bit of the end of the tea towel over the end of the cake and the roll it up tightly in the towel. Leave to cool completely.
To make the filling beat the cream cheese and butter together until fluffy. Beat in the icing sugar and vanilla.
When the cake is completely cold, carefully unroll and spread the filling evenly over top. Re-roll. Refrigerate for about an hour to firm it up. Place onto a decorative plate, dust with icing sugar, place toasted walnut halves decoratively on top and serve. Cut into slices to serve.
Store in the refrigerator. You can freeze the finished cake, wrapped tightly in cling film, for up to one month.

This made the perfect cake to celebrate the beginning of Autumn and the weekend.
This content (written and photography) is the sole property of The English Kitchen. Any reposting or misuse is not permitted. If you are reading this elsewhere, please know that it is stolen content and you may report it to me at: mariealicejoan at aol dot com Thanks so much for visiting. Do come again!


Border Biscuits here in the UK make a gorgeous Chocolate covered Gingernut biscuit. I just adore them, they are hot and spicy with lots of ginger flavour and coated in either dark or milk chocolate. They are so crisp they snap when you bite into them and the chocolate melts on your fingers as you are eating them. A bit of a mess to eat, but oh so tasty.

These are not them, but they are every bit as good. This is like a shortbread biscuit almost . . . buttery and short . . . crisp . . .

Studded with candied ginger and flavoured with ginger extract . . . just a few drops. If you can't get the ginger extract, then add about 1/4 tsp of ground ginger-root powder in it's place . . .

Dark chocolate drizzled over top are their crowning glory and makes them very scrummy indeed. Dark chocolate and ginger are a marriage made in heaven. Combine them in a delicious biscuit and you have some very incredibly edible indeed! Mmmm . . . soooo good!

Press down with a fork. Bake for 13 to 15 minutes until light golden brown and just firm on top. Leave on baking sheet to cool for five minutes before transferring to a wire rack to finish cooling.

When I eat these I am reminded of the dark chocolate coated bits of candied ginger we treat ourselves to at Christmas time. You won't be able to eat just one of these, I guarantee! Bon appetit and happy dunking!


Today's recipe is a traditional one that I have adapted from a great National Trust cookery book I have entitled, Complete Traditional Recipe Book, by Sarah Eddington. I love these old traditional recipes. There is always a story behind them. They are also very simple and uncomplicated as well as being very delicious!


To me they seem to be somewhat of a cross between a cookie and a pastry . . . nice and buttery . . .and short, but not as short as a shortbread biscuit would be . . .


These are not studded with raisins alone . . . nor is there any spice . . .instead they are studded with a mix of dried fruit and chopped nuts. I have used glace cherries, sultanas, currants and citrus peel, along with chopped toasted hazelnuts.


I love a good dunking biscuit don't you? Its a bit of a comfort thing I believe . . . and these are very comforting. I do love these fabulous traditional foods of these beautiful Islands, and all of their the history and folklore behind them!

1/2 tsp baking powder
and finely chopped toasted hazelnuts)

Cream the butter and sugar together until light and fluffy. Sift together the flour and baking powder. Stir in the dried fruit and nuts. Add to the creamed mixture, alternating with the well beaten egg, stirring until you have a batter which is stiff enough for rolling out. You don't want it too sticky.
Lightly flour your countertop. Working with half of the dough at a time, roll out approximately 1/3 of an inch thick, using a lightly floured rolling pin. Take a 3-inch fluted round cutter and stamp out rounds. Transfer to a baking sheet, leaving about an inch of space in between each. Add the scraps to the second half of the dough and lightly knead together, roll out again as before and stamp out more rounds, again placing them onto the baking sheets. Repeat until you have used all the dough.
Bake in the preheated oven for 15 to 20 minutes until golden brown on the edges. Sprinkle with additional caster sugar and leave on the baking sheets to cool for about 5 minutes prior to scooping off to a wire rack to finish cooling completely. Store in an airtight container. These will keep for several days.

I love the idea of sprinkling hot biscuit/cookies with fine sugar right when they come out of the oven. The heat from the cookie makes it stick, and it adds a glorious gild to that tasty lily! Fire up the oven, you won't want to miss out on these! Bon Appetit!


Social Icons