


When I was raising a family of five hungry children my summer months were often spent preserving the summer's bounty. Jams, jellies, pickles, etc. all came under my wheelhouse of care. I loved doing it and I can say with all honesty that none of it ever went to waste. Now that I am an old woman, living alone, I do very little preserving. Occasionally however I do like to put aside a small batch of something I think I will use up.
I was lucky enough to bag a real bargain of dark sweet cherries earlier this week. Usually, they are so cost prohibitive that I cannot afford to really buy much to do anything with them, except to eat out of hand. At only $2.99 a pound however, I was quick to snap up a big bag.
I enjoyed my fill of eating some of them fresh out of hand, and then I decided to make a small batch of Cherry Compote using the remainder of them. Something delicious for me to enjoy in the Winter months ahead. A little taste of summer.


- 1 1/2 pounds (680g) sweet cherries, washed and dried
- 1 cup (200g) sugar
- the finely grated zest of one small lemon
- 1/2 tsp of almond extract


- Prepare a boiling water bath (see instructions below) and 2 half-pint jars (again see instructions). Place the jar lids in a small saucepan of water and bring to a gentle simmer.
- Pit the cherries according to your favorite method, discarding any stems and pips.
- Place the cherries in a large saucepan, along with the sugar and lemon zest. Give them a good stir and then leave them to sit for fifteen minutes.
- Set the saucepan over medium-high heat. Bring to a simmer and simmer, stirring regularly, until the cherries have begun to soften somewhat and a nice amount of syrup has developed. This will take 4 to 6 minutes.
- Stir the almond extract into the cherries during the last minute of cooking.
- Remove the pan from the heat. Spoon the cherries and their syrup into the prepared jars, leaving 1/2 inch of headspace.
- Wipe the rims of the jars and then apply the hot and sterile lids. Add the rings and then process in a boiling water bath for 10 minutes. Remove the jars carefully and set aside to cool.
- You will know that they have sealed properly as the lids will suck in.


- Put the rack into the canning pot and put the jars on top.
- Fill the pot and the jars with water to cover and bring to the boil.
- Put the lids in a small saucepan of water to cover and bring them to a simmer.
- Bring the canner and water to the boil while you prepare your preserves.
- Remove the jars from the boiling water and set them on a clean towel on the counter.
- Remove the lids with tongs and place on the clean towel also.
- Carefully fill the jars with the preserves, leaving 1/2 inch of headspace. (I use a funnel)
- Wipe the rims of the jars clean with some clean and damp paper towel.
- Apply the lids and screw the bands onto the jars to hold the lids down. Tighten the lids with the tips of your fingers just to "Fingertip tight."
- Carefully lower the jars into the canner. The water should cover the tops of the jars by an inch.
- Once the water has returned to the boil, start timing. Process for the required time as recorded in the recipe.
- Promptly remove the jars at the end of that time and place onto the towel-lined countertop and leave to cool
- The jars should ping soon after they have been removed. This is the sign of a good seal.

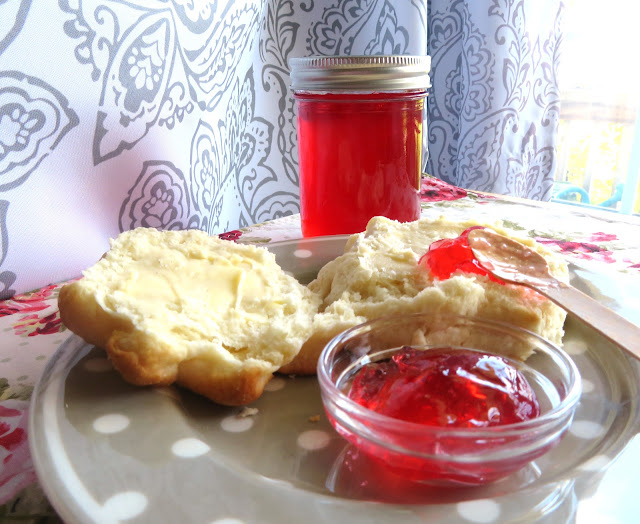
PEAR & SAFFRON JAM - Saffron gives this jam a lovely color. The recipe makes one delicious jar of pear jam. Beautiful to look at and beautiful to the taste. This is lovely on toast in the mornings and makes a really nice filling for layer cakes.
HONEY STRAWBERRY JAM - This is a beautiful strawberry jam which is naturally sweetened with honey and which requires no pectin. This is a very simple recipe, using only a minimum of simple ingredients. The recipe makes only two half pints of delicious jam.

Cherry Compote (small batch)
Come the winter months, I am going to be really pleased with this simple and delicious cherry compote. In fact, I will probably be wishing I had made more!
Ingredients
- 1 1/2 pounds (680g) sweet cherries, washed and dried
- 1 cup (200g) sugar
- the finely grated zest of one small lemon
- 1/2 tsp of almond extract
Instructions
- Prepare a boiling water bath (see notes) and 2 half-pint jars (again see notes). Place the jar lids in a small saucepan of water and bring to a gentle simmer.
- Pit the cherries according to your favorite method, discarding any stems and pips.
- Place the cherries in a large saucepan, along with the sugar and lemon zest. Give them a good stir and then leave them to sit for fifteen minutes.
- Set the saucepan over medium-high heat. Bring to a simmer and simmer, stirring regularly, until the cherries have begun to soften somewhat and a nice amount of syrup has developed. This will take 4 to 6 minutes.
- Stir the almond extract into the cherries during the last minute of cooking.
- Remove the pan from the heat. Spoon the cherries and their syrup into the prepared jars, leaving 1/2 inch of headspace.
- Wipe the rims of the jars and then apply the hot and sterile lids. Add the rings and then process in a boiling water bath for 10 minutes. Remove the jars carefully and set aside to cool.
- You will know that they have sealed properly as the lids will suck in.
Notes
How to Process:
- Put the rack into the canning pot and put the jars on top.
- Fill the pot and the jars with water to cover and bring to the boil.
- Put the lids in a small saucepan of water to cover and bring them to a simmer.
- Bring the canner and water to the boil while you prepare your preserves.
- Remove the jars from the boiling water and set them on a clean towel on the counter.
- Remove the lids with tongs and place on the clean towel also.
- Carefully fill the jars with the preserves, leaving 1/2 inch of headspace. (I use a funnel)
- Wipe the rims of the jars clean with some clean and damp paper towel.
- Apply the lids and screw the bands onto the jars to hold the lids down. Tighten the lids with the tips of your fingers just to "Fingertip tight."
- Carefully lower the jars into the canner. The water should cover the tops of the jars by an inch.
- Once the water has returned to the boil, start timing. Process for the required time as recorded in the recipe.
- Promptly remove the jars at the end of that time and place onto the towel-lined countertop and leave to cool
- The jars should ping soon after they have been removed. This is the sign of a good seal.

This content, written and photography, is the sole property of The English Kitchen. Any reposting or misuse is not permitted. If you are reading this elsewhere, please know that it is stolen content and you may report it to me at mariealicejoan at aol dot com.

One thing that I always enjoyed in the late summer and Autumn was making my own jellies, jams and preserves. This is something I have not done a lot of in recent years, probably because I now live on my own and I simply could not use it all up.
Recently my sister and I saw some beautiful brilliant red crabapples in the grocery store. They were so brilliant, and we both were feeling very nostalgic about our past days of preserving. We decided to say what the heck, and go for it. We would make a batch of crabapple jelly and share it between the two of us!
Fruit jellies ae made by combining fruit juice and sugar in correct proportions and cooking the mixture until the mixture will jelly when cool. A good jelly is clear and sparkling and free from any sediment or sugar crystals. It retains the natural color and flavor of the fruit used.
When turned out from the glass, a good jelly will hold its shape but will quiver, just like Santa's belly. When cut with a knife, you will see sharp edges and the jelly will not cling to the knife, but fall off easily.

WHAT FRUITS ARE SUITABLE FOR MAKING JELLIES
In order to make a good jelly, the fruit chosen should be rich in both pectin and acid, otherwise it must be combined with another fruit which will supply whatever substance is lacking. This is why a lot of jellies will call for the use of lemon juice.
Fruits which contain both acid and pectin in appropriate quantities are: Apples (tart), blackberries, crab apples, currants, gooseberries, grapes, loganberries, plums, quinces and raspberries.
Fruits lacking in sufficient pectin are: Cherries, peaches, pineapple, rhubarb, strawberries.
Fruits lacking in sufficient acid are: Apples (sweet), blueberries, huckleberries, pears.
Slightly underripe fruit contains mor acid and pectin than fully ripe fruit, but unfortunately the flavor is not as good. A proportion frequently used is a mix of 1/4 underripe fruit and 3/4 ripe fruit. You can also combine fruits lacking with pectin or acid with tart apples as the juice from the apples will affect the color and flavor the least.
Another way to ensure success no matter the fruit, is to use a commercial Pectin product such as Certo. It comes in both powdered and liquid form. Juice from just about any fruit can be made into jelly bu the addition of pectin and a large amount of sugar.
One of the advantages of using a commercial Pectin product is that much less time will be required, any fruit can be used and the resultant jelly will have a fresher, more delicate flavor due to the shorter cooking time. A successful gel is more certain as well.
The variety of crabapples we used for our jelly was Dolgo. Dolgo crabapples are an incredibly tasty crabapple and produce a brilliant pink to red jelly. We were both very excited at the prospect at being able to make some of these precious jewels to enjoy over the winter months. We also decided to use a commercial pectin product in our jelly just to ensure success and cut down the cook time.

EXTRACTING THE FRUIT JUICE
The firs thing you will need to do when making a fruit jelly is the extract the juice from the fruit. Look over the fruit very carefully, removing and discarding stems and discarding any fruit which shows signs of decay. Large fruits, such as apples, will need to be cut up. The cores of quinces will need to be discarded. Crush really juicy fruits and add no water, or only a small amount. To less juicy fruits, add just enough water to be seen through the pieces of fruit when it is in the saucepan.
Place all fruits in the saucepan with the required amount of water. Cover and cook until the fruit is tender and the juices run freely. Do NOT overcook. Apples require about 15 minutes, citrus fruits 1 hour and berries only 1 to 3 minutes.
You will need some type of cloth bag that you can suspend over a bowl. The fruit and its juices are put into this bag and the juice allowed to drip through the bag into the bowl. The jelly set shown above can be purchased from Amazon and is ideal, but any clean fabric, flour sack, flannel can be used. In the past I have often tied it to the cupboard door knob and left it suspended over the bowl to drain over night.
DO NOT SQUEEZE THE BAG if you want a nice clear jewel-like jelly. Sure, more juice can be extracted if you squeeze the bag, but the resulting jelly will be cloudy and not as pretty.
Once we had the juice extracted from our crabapples, the juice was put into a large covered canning jar and refrigerated until we were really to make the jelly.

You will need a quantity of canning/preserve jars to put the finished jelly into once it is done, ready to store. These can be purchased in most hardware and department stores and even grocery stores at this time of year. We decided to use half-pint jars which each hold a little more than a cup of liquid.
Check the jars for any nicks or cracks, discarding any jars that are not perfect. It is also important that you wash the jars clean in hot soapy water, rinsing off any soap residue with more hot water. You can also put them through a wash in the dish washer.
These jars will need to be sterilized when you go to make your jelly. This is easily done by placing the clean jars onto a baking tray and then placing the tray into an oven which has been preheated to 320*F/160*C. It is best to do this while the jars are still warm after having been washed to avoid them cracking in the sudden heat of the oven.


If you are not using commercial pectin you can see the quantities of juice and sugar needed in the chart above. It is important to note that if you do not use a commercial pectin you will need to cook the jelly for a much longer period of time than if you are.
Most jelly failures are caused from adding either too much or too little sugar. Generally speaking, 2/3 as much sugar as fruit juice is sufficient.

COOKING THE JELLY
The best color, flavor and texture are obtained by cooking 2 quarts/liters or less of juice at a time. Use a large kettle with a large diameter to allow more rapid of an evaporation. Heat juice to boiling, then add the sugar gradually, stirring slowly. Boil rapidly until the jellying stage is produced.

This is determined by allowing a small amount of the juice to drop from a metal spoon. When the last two drops run together and sheet off of the spoon the jellying stage has been reached and the jelly should be removed from the heat. Long cooking after the sheet test has been obtained causes the pectin to break down so that the mixture will become a syrup and not a jelly.
We used a commercial pectin and so this was not an issue. We used 5 cups of prepared juice, 2 TBS of lemon juice, 7 1/2 cups of sugar and one pouch of pectin. The fruit juice, sugar and lemon juice were put into a large saucepan and stirred whilst we brought it to the boil. We boiled it for 1 minute exactly and then removed the saucepan from the heat and stirred in the commercial pectin.


Have your clean and hot jars ready and waiting for you to decant the hot jelly into them. A wide mouth funnel is a great help when doing this and helps to keep the lips of the jars clean. Fill your hot jars with the hot jelly to within 3/8 inch of the top of the jar.
Once filled, wipe the rims clean with a damp piece of clean kitchen toweling, top with the rubberized lid and carefully screw on the bands. Set aside on a wire rack in a cool dry place to cool completely.


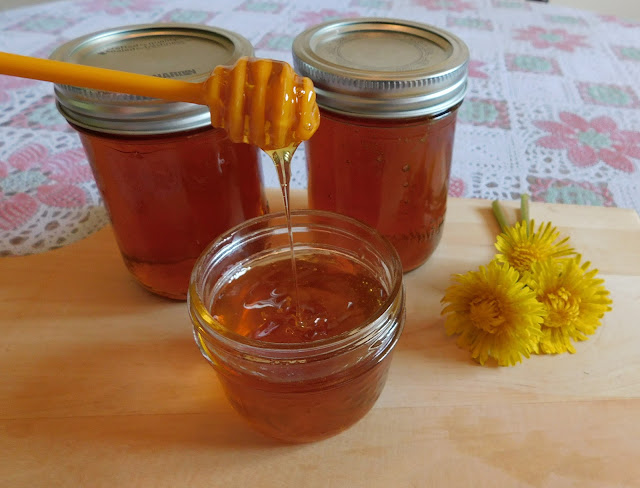

Dandelion Honey: A Sweet and Nutritious Alternative to Traditional Honey


- 250-300 dandelion blooms
- 4 1/4 cups (1 liter) water
- 1 orange, unpeeled and sliced
- 1 lemon, unpeeled and sliced
- 4 cups + 3 TBS (800g) granulated sugar


- Use dandelion honey in moderation, as it is still a sweetener and can add calories to dishes.
- Store dandelion honey in an airtight container in a cool, dark place to prevent it from crystallizing.
- Experiment with different flavor combinations to find your favorite way to use dandelion honey.


If you are a fan of preserving, you might also be interested in the following preserves I have made in my kitchen:
HONEY & STRAWBERRY JAM - This is a small batch recipe making 2 delicious half pint jars of jam. This is the perfect recipe for the smaller family and with strawberry season right round the corner is sure to come in handy.
SPICED PEAR CHUTNEY - This is one of my all time favorite chutneys. This is the perfect balance of sweet, spicy and sour and works very well when served with meats and cheeses, making it the perfect chacuterie board addition!
Dandelion Honey
Ingredients
- 250-300 dandelion blooms
- 4 1/4 cups (1 liter) water
- 1 orange, unpeeled and sliced
- 1 lemon, unpeeled and sliced
- 4 cups + 3 TBS (800g) granulated sugar
Instructions
- Place the dandelion blooms in a large non-reactive saucepan along with the water, and the sliced citrus fruit. Bring to a simmer and leave to simmer for 30 minutes.
- Remove from the heat, cover with a tea towel and leave to stand at least 12 hours or overnight.
- When you go to make the honey make sure you have some sterilized jars and lids read to go.
- Strain the dandelion mixture through a fine sieve into a clean saucepan. Discard any solids.
- Add the sugar and stir. Bring to the boil. Reduce to a simmer and allow to simmer for 30 minutes, stirring frequently. (see note)
- Pour into sterile jars and seal.
- Store honey in a cool and dark place. It will keep for 6 - 12 months.
Notes
To test for doneness: Put 2-3 teaspoons of the honey on a ceramic plate and leave to cool briefly. If the honey is too runny, you can continue to boil the honey until the desired consistency is reached. If it is too thick, you can add a little boiled water, stirring it in well.


Social Icons