


As I have often said and as anyone who has been reading me for a while knows, the potato is my favourite vegetable. I love them in any way, shape or form.
One of my favourite of course is chips, or fries as they are also called, and the Perfectly Seasoned Chips/Fries are one of my favourite ways to prepare them.

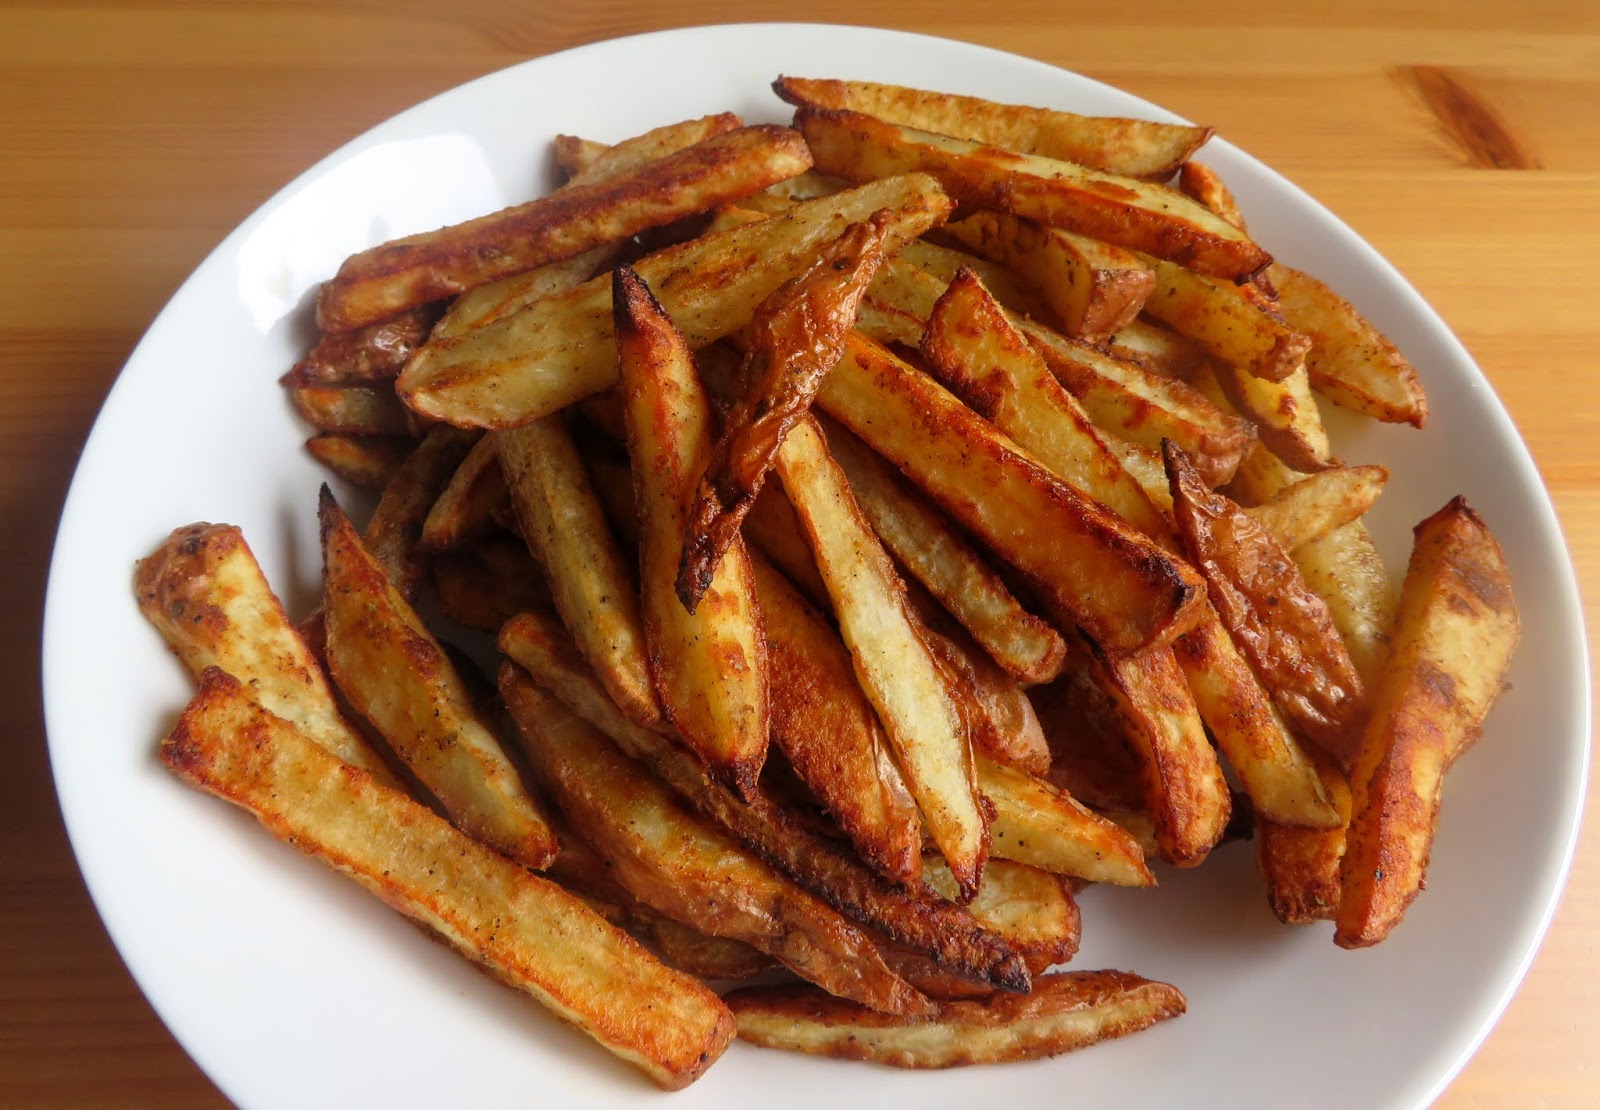
This recipe is a great way of enjoying chips without having to drag out the deep fryer and they turn out crisp and wonderfully favoured every time. They are little bit spicy and a whole lot of tasty!
Every now and then I will deep fry chips, but more often than not I will make them this way. I hate the smell that accompanies deep frying and I hate having my house smell like a chippie.

You will want to use a nice floury/baking/mashing type of potato for these. My mother always said you couldn't make mashed potatoes with new potatoes, and this is true.
New potatoes are not ideal for mashed or baked or chips. They are too waxy and the consistency is just not right. You want a "fluffy" type of potato.
I recommend here in the UK that you use a Maris Piper, or King Edward. In North America a Russet. These will give you the best results.

You can peel your potatoes or not as you wish. I love potatoes with the peels left on, so that's how we enjoy them. If they are really washed well (and why would you leave them dirty??) they are perfect with the skins left on.
In a baked potato, my favourite part has always been the skin. I mean . . . who doesn't enjoy crisp "Potato Skins" served with dip. Yumma Yumma!
There is a little bit of faffing with these, but not as much as if you were deep frying and I promise you, you will enjoy these every bit as much.
I have never lied to you before and I am not about to start now. Anyone who has been reading me for a while knows that I don't go in for a lot of faffing about. My goal is to have easy, yet delicious food. Sometimes it can't be helped however and there is a little bit of faff involved.

If there is any faffing you know that it will be worth it. I am basically very lazy so any faff has to be worth it in taste.
I like to cut my potatoes into finger sized chips. No more than about a third to a half an inch in diameter. Skinny fries! This size will give you the crispest chips!

You need to rinse them really well under cold running water to get rid of any excess starch. This is very important.
Once I have don this, I like to soak them for about 10 minutes in cold water while I am preheating the oven and getting together the spices I am going to use to season them with.

I make my own Old Bay Seasoning for this. (And for other things.) Its so delicious and such a simple thing to do. I actually make a lot of my own seasonings. You know what is in them and they taste amazing.
Make Your Own Old Bay Seasoning: Mix together 2 TBS
Powdered Bay leaf (do this in a spice or coffee grinder) 2 TBS celery
salt, 1 TBS dry mustard powder, 2 tsp ground black pepper, 2 tsp ground
ginger, 1 tsp sweet paprika, 1 tsp smoked paprika, 1 tsp white pepper, 1
tsp ground nutmeg, 1 tsp ground cloves, 1 tsp ground allspice, 1/4 tsp
cayenne pepper, 1/2 tsp ground mace, 1/2 tsp ground cardamom, 1/4 tsp
ground cinnamon. Mix together well and store in an airtight container
out of the light for up to 6 months.

I use a light olive oil. Not extra virgin olive oil. I save that for salads. Light olive oil works very well.
It is a waste of a good extra virgin olive oil to use it in cooking things like this. I still use a good name brand, its just not from the first press. You could also use regular canola oil.

As you can see they turn out lovely and crisp. I think these are pretty amazing for not having been fried.
Crisp is very hard to create without frying but it is achievable. You do want to eat them as soon as possible after cooking however and if you layer them up like in this bowl the heat from the chips will start to soften them, so serving them quickly is key.

These are beautifully flavoured as well. I think this is the perfect mix of seasonings.
When your chips are seasoned well, you don't need anything else. Not ketchup, not mayonnaise, not fry sauce, nothing. Just the chips are enough.

We really love to have chips with our steaks when we do have a steak. (We don't eat red meat very often and when we do I will either have a baked potato or chips.)
My friend Pat had sent me over some Haupy's Beaver Rub/Seasoning. Oh my but it is sooooo good. A little taste of home. Today I used this on our steaks.

I also made us a simple Caesar Salad to enjoy with the steak and chips. Caesar Salad is my favourite salad. I have a real weakness for Caesar Salad. Like lemon and chocolate, it is impossible for me to resist.
And so many restaurants get it so wrong! What's up with that! Trust me when I say salad is one of the things restaurants do REALLY badly here in the UK. I have even been served salad with mould growing on the tomatoes. Who lets somethin glike that leave their kitchen!

This was the best meal, as good as any you would get in a restaurant and not a lot of trouble to put together. Making the chips was the most labour intensive part of the meal.
But I can promise you they are well worth the effort. WELL worth the effort. They were just yum, yum, yummy!!

These chips are a lot better for you than deep fried chips and your house doesn't smell like a fat fryer when you are done. That's one thing I really hate about frying . . . I hate my house smelling like a chippy!
You really don't get much better than this! I hope you will give them a
go and that you enjoy them. If you want your chips even crisper then by
all means bake them for a bit longer. It all depends on how hot your
oven runs! Enjoy!
Perfectly Seasoned Chips
Yield: 4
prep time: 20 Mcook time: 35 Mtotal time: 55 M
These are crisp and perfectly seasoned. There is no frying involved as they are baked in the oven. You will need a floury type of potato for these, something like a Russett, Maris Piper, or King Edward would do, or a good all rounder. New Potatoes or waxy potatoes are not suitable.
Ingredients:
- 4 large baking type of potatoes (about 3 pounds)
- 3 TBS light olive oil
- 1 tsp smoked paprika
- 1 tsp garlic powder
- 1 tsp Old Bay Seasoning (see note)
- 1/2 tsp ground black pepper
- 1 tsp sea salt
Instructions:
- Wash your potatoes and cut them into chips. I don't bother to peel them as we quite like the skins. Rinse them under cold running water until the water runs clear to remove any excess starch, then leave them covered in a bowl of cold water for 10 minutes while you preheat the oven and make the seasonings.
- Preheat the oven to 225*C/425*F/ gas mark 7. Line two large baking sheets with baking paper.
- Drain the potatoes and dry them well with a clean kitchen towel. Put them into a bowl and toss them together with the olive oil and the seasonings to coat.
- Spread the potato slices out onto the baking sheets, leaving plenty of space around each for the air to circulate. Place one sheet pan on the top rack and the other on the bottom rack and bake for 20 minutes in the preheated oven. Remove from the oven and flip them over. Return to the oven reversing the top to bottom and bottom to top. Bake for a further 10 to 15 minutes until they are perfectly crisp.
- Taste and adjust seasoning as required. Serve immediately.
notes:
Make Your Own Old Bay Seasoning: Mix together 2 TBS Powdered Bay leaf (do this in a spice or coffee grinder) 2 TBS celery salt, 1 TBS dry mustard powder, 2 tsp ground black pepper, 2 tsp ground ginger, 1 tsp sweet paprika, 1 tsp smoked paprika, 1 tsp white pepper, 1 tsp ground nutmeg, 1 tsp ground cloves, 1 tsp ground allspice, 1/4 tsp cayenne pepper, 1/2 tsp ground mace, 1/2 tsp ground cardamom, 1/4 tsp ground cinnamon. Mix together well and store in an airtight container out of the light for up to 6 months.

This content (written and photography) is the sole property of The
English Kitchen. Any reposting or misuse is not permitted. If you are
reading this elsewhere, please know that it is stolen content and you
may report it to me at: theenglishkitchen@mail.com


With all of the fresh tomatoes we are enjoying at the moment its fair to say that we are also enjoying our favourite Bacon Lettuce and Tomato Sandwiches. There is nothing so delicious on earth as a BLT made with fresh garden tomatoes and crisp streaky bacon. We love them and this is the season now for beautiful garden tomatoes.
The most common way of cooking bacon is in a skillet on top of the stove. This requires lots of standing and flipping and can be quite time consuming and somewhat messy as it can spatter all over the top of your stove.
Did you know you can cook bacon perfectly in the oven, and that you can do so easily with a lot less fuss, muss and mess? Its true you can and here are two ways of doing it that will yield two completely different results depending on what you want to use the bacon for. Chewy or Crisp, the choice is yours. (Todd is not fond of overly crisp bacon and prefers his to be a bit chewy.)
FOR CHEWIER BACON
You get a chew finish on your bacon when you bake it directly on the baking tray. (Depending on how long you cook it for that is. Obviously if you leave it in for a longer time than suggested you will get a crisper finish.)

Preheat the oven to 190*C/375*F and line a baking tray with sides with some aluminium foil for a really easy clean up. Lay your bacon rashers out on the tray in a single layer, leaving space in between them. Don't allow it to overlap.

Place into the preheated oven and bake for 15 minutes.

Remove from the oven, flip the rashers over using some tongs. Return the baking tray to the oven and bake for a further 5 minutes.

Remove the cooked bacon to a tray or plate lined with paper kitchen toweling to drain.
FOR CRISPIER BACON
Cooking your bacon on an baking rack, directly over an oven tray results in a crisper finish as the hot air of the oven circulates completely around the bacon. Do note that you will need to use a cooling rack that has an oven-safe coating on it as if it doesn't, it could be permanently damaged, or worse transfer something you don't want to be eating to your bacon.

Preheat the oven to 190*C/375*F. Line a large baking tray with a lip with some aluminium foil. Place the cooling rack on top of the baking tray. Lay the rashers of bacon on top of the cooling rack in a single layer, leaving space between them and taking care not to overlap them.

Roast in the preheated oven for 15 minutes. Remove from the oven.

Using a pair of tongs, carefully flip the bacon rashers over and then return the pan to the oven.

Roast for a further 8 to 10 minutes until completely cooked and crisp. Remove to a paper towel lined plate or tray to drain.

Here you can see the difference between the two methods of roasting. For a Bacon and tomato sandwich I prefer the bacon a bit chewy, baked directly on the baking sheet. For something like a Caesar salad or another dish where you will be crumbling the bacon I like to roast it on a rack.
When I cook my bacon I always cook the full package. Once cooked and drained, you can store it in a zip lock bag in the refrigerator for up to a week, or freeze it in an airtight container for longer, ready to take out as and when you need it. Why pay a premium price for already cooked bacon when it is so very easy to do yourself and so easy to store, handy and ready to use as and when.
I often buy bacon when it is on offer and will cook up the whole lot. Obviously these timings are just guidelines and works well for thin rashers of bacon. If you have thick sliced bacon it may take a few minutes longer.
Any cooked bacon can be simply reheated in the microwave. Wrap in a slice of paper towel and nuke it for about 15 seconds on medium to reheat.
Here are some of my favourite ways to use cooked bacon! Simply click on the recipe titles to go to the recipe.

The Hearty Salad Sarnie (Sarnie is another word for sandwich.) An open faced knife-and-forker with sour dough bread, baked deli ham, sliced deli turkey, sliced ripe tomatoes, sliced hardboiled egg, lettuce and crisp bacon, accompanied with a rich and tangy dressing.

All Dressed Blooming Baked Potatoes. Petal cut potatoes, specially dressed with a butter baste prior to baking in the oven, topped with cheese and crisp bacon. Serve hot wih sour cream and spring onions.

Bacon, Egg and Creamed Spinach on Toast. Toasted Ciabatta rolls topped with creamed spinach, crisp rashers of bacon and fried eggs. Incredibly simply delicious!

Bacon and Egg McMuffin Casserole. This is like having your favourite fast food breakfast sandwich in the
comfort of your own home. This is a delicious casserole and is sure to
please the whole family! You can have it for breakfast, but in all
honesty, we enjoy it for supper. You can serve it with ketchup if you
like or syrup. I am partial to Maple syrup on this.

Two Hander BLT Sandwich. This is the absolute BEST BLT you will ever eat. Seriously. With a Basil Pesto
Mayonnaise, crisp bacon, fresh ripe tomatoes, house dressing and lots
of lively fresh rocket leaves . . . and a sturdy baguett.

World's Best BLT. What makes it the best? Well maybe it's the Pesto
Mayo . . . or it could be that lovely Balsamic House Dressing that you
drizzle over the tomatoes. Whatever it is, it IS the world's best,
hands down.

And then of course you can just go old-school with some toasted bread, mayonnaise, crisp bacon, sliced ripe tomatoes and plenty of crisp lettuce.
All of this talk about bacon is making me hungry again!! Its a good thing I have some already cooked and waiting in the refrigerator!


There is no doubt about it, if push comes to shove I will choose a turkey burger over a beef burger any day of the week, and this Spicy Ranch Turkey Burger Recipe is one of my favourite ways to make them.

Its filled with lovely flavours and always goes down a real treat!
From the cool and creamy ranch slaw that gets tucked into it to the spiciness of the burger it is a real taste sensation!

You might be thinking that is a mighty odd looking burger bun and you would be right. Its not a burger bun, its a finger/hot dog bun.
That's what you get when hubby makes a trip to the shops.

Beggars can't be choosers and it tastes exactly like a round burger except it is torpedo shaped. Why quibble about a shape when something tastes this good, right?

One reason I really like turkey burgers is because I love the flavour of turkey and the consistency. There is something about ground beef that puts me off more often than not.

And yet . . . in a chili or a sauce, or a meatball, I prefer beef. There's naught so queer as folk they say here in the UK. We like what we like . . .

I like to melt a slice of Jack cheese over my burgers. If you want it really spicy use Mexi-Jack cheese, which packs a wallop.

Me, I like it just normal, ordinary, not spicy. There's enough spice in the burgers for me, with jalapeno pepper, red onions, green tabasco . . . I want to bite my burger. I don't want it to be biting me!!

That creamy ranch slaw helps to cool down the spice a bit and goes so well with the flavour of the turkey. It doesn't make the bun soggy either, so long as you don't leave it sitting for too long . . .

And any extras go very well on the side.

I served these with skin on oven chips . . . and altogether this was a fairly lowish fat supper for us.

If you are low-carbing it, just eat the burgers with the cheese on top and the slaw. No need for the bun or chips. Unless you have a way of doing low carb chips! (And I haven't figured out how to that yet!)
Spicy Ranch Turkey Burgers

Yield: 4
prep time: 40 Mcook time: 15 Mtotal time: 55 M
This low fat burger is filled with lovely flavours. A spicy fresh lean turkey patty tucked into a toasted roll with ranch coleslaw. Delicious!
Ingredients:
- 1 pound lean ground turkey
- 1 medium carrot, peeled and grated
- 2 TBS soft whole wheat bread crumbs
- 2 TBS minced red onion
- 1 TBS chopped fresh coriander
- 1 fresh jalapeno chili, trimmed, deseeded and minced
- 1 clove garlic, peeled and minced
- 1 TBS green Tabasco sauce
- 1 large free range egg white, lightly beaten
- salt and black pepper to taste
- some spray oil to grill
For the slaw:
- 1 1/2 cups hand shredded red and green cabbage
- 1 small carrot, peeled and grated
- 2 TBS minced red onion
- 1/2 cup your favourite ranch dressing
- seasoning as desired
You will also need:
- 4 toasted burger buns
- 4 slices Monterey Jack Cheese
Instructions:
- Combine all of the burger ingredients until well blended. Shape into 4 equal sized pattys. Place in the refrigerator to chill for about half an hour to set up.
- While the burgers are chilling make the coleslaw. Combine all of the ingredients in a bowl, tossing together to combine well. Taste and adjust seasoning as desired.
- Heat a grill pan, electric grill or skillet. Spritz with some oil. Add the turkey burgers and grill them on both sides until cooked through. (180*F or 80*C should be the internal temperature.) Slap a slice of cheese on top of each and let it melt while you toast the buns.
- Top each toasted bun with some of the slaw , slap on a turkey burger and serve immediately.

Just looking at these photos is making me hungry for these all over again. What's your favourite burger fix? I really want to know!
Subscribe to:
Posts (Atom)





Social Icons