
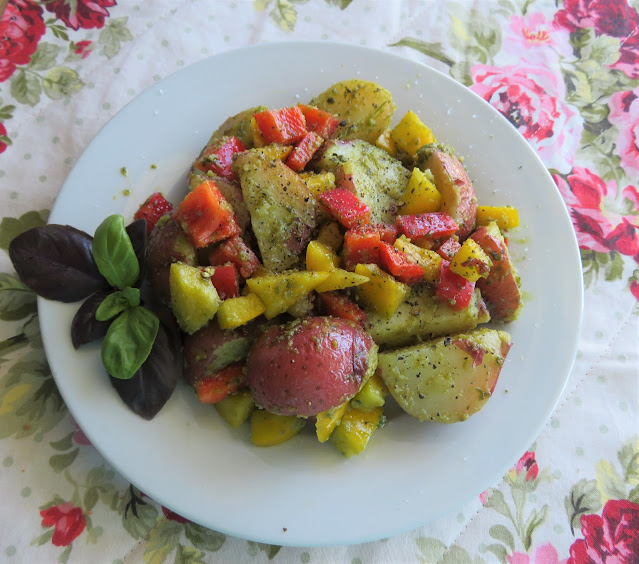

I hope you will fall in love with this deliciously simple Pesto Potato Salad recipe I am sharing with you today. It is filled with delightfully fresh flavors, colors and textures!
It is a bit different than a regular potato salad in that there is n o creamy mayonnaise dressing. Instead the salad is simply dressed with pesto, which makes it a very simple make.
.JPG "Pesto Potato Salad")
You can either make your own homemade pesto to use with this tasty salad, or you can use a good store bought pesto.
Once my herb garden gets going I really like to make my own pesto from scratch. It is such a simple thing to make and has such a lovely color and fresh flavor.
You can find my recipe for a great homemade pesto here. Its a real favorite around here. Until then I am using a quality store bought fresh pesto. I do prefer the fresh over the jarred, but I can appreciate that its not always available, so just use the best that you can buy!
.JPG "Pesto Potato Salad")
Pesto is one of those ingredients that comes in really handy. It makes a tasty addition to sauces, or pizzas, garlic toasts, etc.
Chicken with Pesto and Mushroom Sauce is a real favorite of mine. It is rich and creamy and goes really well over rice.
.JPG "Pesto Potato Salad")
One Pan Pesto Fusilli is another favorite recipe I make. Quick, easy and delicious, its perfect for those busy nights when you are lacking in time and inspiration! You can't get much easier!!
In short, pesto is a kitchen ingredient that you never need to worry about using up. Plus it freezes well. I tend to freeze it in ice cube trays and then pop the cubes out and into a zip lock baggy, ready to grab a TBS here and there when I need it.
.JPG "Pesto Potato Salad")
Today though I used it to make a delicious potato salad inspired by one I found in a cookery book by Ellie Krieger entitled The Food You Crave. I love Ellie's recipes as they are really healthy and pretty simple.
The original recipe made 8 servings so I cut it in half to make 4. It will keep for up to three days so I have been enjoying it on the side for a couple days now! It really is delicious!
.JPG "Pesto Potato Salad")
WHAT YOU NEED TO MAKE PESTO POTATO SALAD
It really is simple and requires not a lot!
- 3/4 pound of small red potatoes, scrubbed well, unpeeled
- 1/2 medium red bell pepper, seeded and coarsely chopped
- 1/2 medium yellow bell pepper, seeded and coarsely chopped
- 3 TBS Basil Pesto (click link for recipe) or store bought
- fine sea salt and freshly ground black pepper to taste
.JPG "Pesto Potato Salad")
If you want you can add a few other vegetables into the mix. Steamed crispy tender green beans are really nice as are baby peas, or snow peas, or even all three!
But it really is quite nice just the way it is!
.JPG "Pesto Potato Salad")
HOW TO MAKE PESTO POTATO SALAD
This is probably one of the easiest potato salads to make. You really can't go wrong.
Steam the potatoes over boiling water for 15 to 20 minutes until the tip of a knife inserts easily, but the skins remain intact. Set aside to cool completely.
Quarter the potatoes and place them in a bowl. Add the peppers and pesto, tossing gently together to thoroughly combine. Season to taste with salt and black pepper.
Cover a refrigerate until completely cold. This salad will keep, covered, in the refrigerator for up to 3 days.
.JPG "Pesto Potato Salad")
This is really nice as a light lunch all on its own but really shines when paired up with proteins. I have enjoyed it with grilled chicken and fish.
True confession the last of it, I folded some good canned tuna into it and that was also fabulously tasty! It really is a truly versatile and tasty side dish! It may not be as attractive as some, but don't let that put you off as you will be missing out on something really special if you do!
Quick to make, incredibly easy and delicious. You couldn't ask for much more!
Pesto Potato Salad
Yield: 4
Prep time: 20 MinCook time: 5 MinTotal time: 25 Min
With beautiful red potatoes, crisp bell peppers and a punchy pesto dressing, this simple side salad is a real people pleaser.
Ingredients
- 3/4 pound of small red potatoes, scrubbed well, unpeeled
- 1/2 medium red bell pepper, seeded and coarsely chopped
- 1/2 medium yellow bell pepper, seeded and coarsely chopped
- 3 TBS Basil Pesto (click link for recipe) or store bought
- fine sea salt and freshly ground black pepper to taste
Instructions
- Steam the potatoes over boiling water for 15 to 20 minutes until the tip of a knife inserts easily, but the skins remain intact. Set aside to cool completely.
- Quarter the potatoes and place them in a bowl. Add the peppers and pesto, tossing gently together to thoroughly combine. Season to taste with salt and black pepper.
- Cover a refrigerate until completely cold. This salad will keep, covered, in the refrigerator for up to 3 days.

This content (written and photography) is the sole property of The English Kitchen. Any reposting or misuse is not permitted. If you are reading this elsewhere, please know that it is stolen content and you may report it to me at: mariealicejoan at aol dot com
Thanks so much for visiting! Do come again!

I am still in a very festive Queen's Jubilee mood! 70 years on the throne! World's longest reigning Monarch. What a wonderful excuse for celebrating! I have really enjoyed watching all of the festivities on the television!
What I could get anyways. I am feeling very nostalgic and homesick for the UK this weekend I can say! Its all been very lovely.

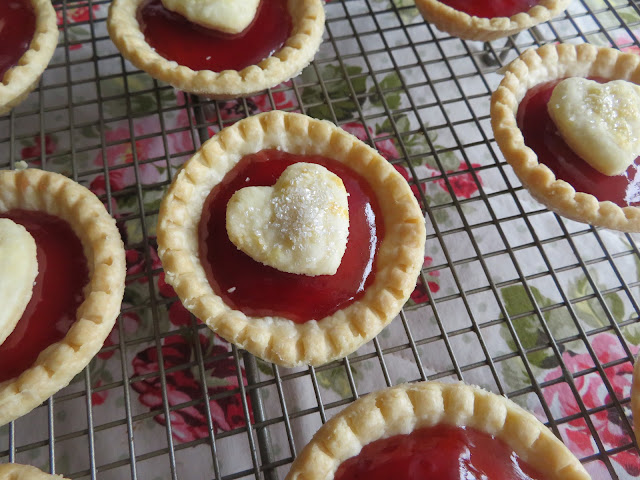
Can you handle one last bake in honor of Her Majesty? Oh, I am sure that you can! Especially when it is as something as good as this Queen of Hearts Tarts recipe!
Crisp and flaky pastry cases, filled with a delicious almond frangipane, which is then topped with warm jam and crisp pastry hearts. Perfect for a truly royal celebration!

These are incredibly easy bakes, requiring very few ingredients and they are so delicious and pretty when they are done. You can make your own pastry from scratch or you can use ready roll pastry. It is all up to you!
Lets get baking!
.JPG)
WHAT YOU NEED TO MAKE QUEEN OF HEARTS TARTS
Not a lot really!
- Plain flour to dust
- 1/2 pound of pastry (250g) made with a bit of sugar
- 2 TBS butter at room temperature
- 2 TBS fine granulated sugar
- 2 TBS beaten egg (use rest to glaze the hearts)
- scant 1/2 cup (40g) ground almonds
- 1/4 tsp almond extract
- 1/3 cup (100g) seedless raspberry jam
- sugar to sprinkle (optional)
.JPG "Queen of Hearts Tarts")
As I said you can use ready made pastry or you can make your own. I made my own. I highly recommend my Butter and Lard Pastry. Its beautiful and flaky.
For a sweet bake such as this I would add two teaspoons of sugar to the flour mixture.
You can use whatever kind of jam you like. I think red jams are particularly festive looking. You will want a seedless jam. Raspberry is particularly good as is strawberry.
.JPG "Queen of Hearts Tarts")
If you want to you can brush the little cut out hearts with a bit of egg wash and sprinkle with some sanding/coarse sugar. It adds a bit of sparkle.
Doesn't a special occasion call for a bit of sparkle? I think so too!
The almonds for the filling are finely ground. You can use almond flour. I used the ground almonds that you can buy at Costco. Kirkland brand.
.JPG "Queen of Hearts Tarts")
HOW TO MAKE QUEEN OF HEARTS TARTS
These really are very simple to make. They only look complicated!
Lightly dust the countertop with flour. Roll out your pastry about 1/4 inch thick. Cut into 12 (3-inch) rounds using a fluted cutter. Use to line 12 small tart tins. Prick the bottoms and chill in the refrigerator while you make the filling and bake the pastry hearts.
Gather the scraps of pastry and cut out 12 1-inch hearts. Place onto a baking tray lined with baking paper.
.JPG "Queen of Hearts Tarts")
In a small bowl, beat together the butter and sugar until pale and creamy. Stir in the 2 TBS egg yolk, ground almonds and almond extract to combine well.
Remove the tart shells from the refrigerator. Divide the almond mixture between each tart shell evenly, smoothing the tops with the back of a metal spoon.
Brush the remaining egg onto the tops of the pastry hearts and sprinkle with some sugar if desired. Bake the hearts in the preheated oven for 5 to 8 minutes until golden brown.
.JPG "Queen of Hearts Tarts")
Place the filled tart tins onto a baking sheet and bake in the preheated oven for 15 minutes until light golden. Remove from the oven and press the almond filling down lightly with the back of a teaspoon just to flatten slightly.
Heat the jam in a small saucepan and then spoon a little bit over the top of each tart to cover the almond filling. Top each with a pastry heart.
Allow to cool before eating or storing.
.JPG "Queen of Hearts Tarts")
These really are lovely tarts. Perfect for tea parties or children's parties or as part of a celebratory buffet. They make a really pretty addition to the tea table.
You can make them up to a day ahead and they also freeze very well, which means you can make them well ahead of time. Just pop into air tight containers and freeze, taking them out several hours prior to your needing them.
.JPG "Queen of Hearts Tarts")
If you are a fan of tarts you may enjoy the following:
BAKEWELL TARTS - Crisp pastry shells filled with jam, topped with frangipane, a glaze and a cherry!
CANADIAN BUTTER TARTS - You can't go wrong! Crisp pastry filled and baked with a sweet almost caramel like filling, studded with raisins. Very rich and moreish.
SCOTTISH COCONUT AND JAM TARTS - Crisp pastry shells filled with jam topped with a moreish baked coconut, almost macaroon like topping!
Queen of Hearts Tarts
Yield: 12
Prep time: 20 MinCook time: 30 MinTotal time: 50 Min
These very pretty tarts are delicious and can be made a day ahead. They can also be frozen.
Ingredients
- Plain flour to dust
- 1/2 pound of pastry (250g) made with a bit of sugar
- 2 TBS butter at room temperature
- 2 TBS fine granulated sugar
- 2 TBS beaten egg (use rest to glaze the hearts)
- scant 1/2 cup (40g) ground almonds
- 1/4 tsp almond extract
- 1/3 cup (100g) seedless raspberry jam
- sugar to sprinkle (optional)
Instructions
- Lightly dust the countertop with flour. Roll out your pastry about 1/4 inch thick. Cut into 12 (3-inch) rounds using a fluted cutter. Use to line 12 small tart tins. Prick the bottoms and chill in the refrigerator while you make the filling and bake the pastry hearts.
- Gather the scraps of pastry and cut out 12 1-inch hearts. Place onto a baking tray lined with baking paper.
- Preheat the oven to 350*F/180*C/ gas mark 4.
- In a small bowl, beat together the butter and sugar until pale and creamy. Stir in the 2 TBS egg yolk, ground almonds and almond extract to combine well.
- Remove the tart shells from the refrigerator. Divide the almond mixture between each tart shell evenly, smoothing the tops with the back of a metal spoon.
- Brush the remaining egg onto the tops of the pastry hearts and sprinkle with some sugar if desired. Bake the hearts in the preheated oven for 5 to 8 minutes until golden brown.
- Place the filled tart tins onto a baking sheet and bake in the preheated oven for 15 minutes until light golden. Remove from the oven and press the almond filling down lightly with the back of a teaspoon just to flatten slightly.
- Heat the jam in a small saucepan and then spoon a little bit over the top of each tart to cover the almond filling. Top each with a pastry heart.
- Allow to cool before eating or storing.

Thanks so much for visiting! Do come again!

Today all over the UK people will be celebrating the Queen's 70th Jubilee with street parties and tea parties. Oh how I miss things like that. Nobody celebrates like the British!
I have been glued to YouTube these past days watching the celebrations and have been filled with plenty of nostalgia for my adopted homeland. I truly loved that country and felt very much at home there. I miss it very much, although I am very happy to be living near my family again.
.JPG "Rhubarb & Ginger Scones")
Street parties are a lot of fun! Whether its to celebrate a Royal Wedding or just to instill community spirit, the British never miss an opportunity to celebrate with a traditional street party!
This weekend millions will be spilling out of their homes and into the streets to enjoy some festive camaraderie and delicious food!
.JPG "Rhubarb & Ginger Scones")
Most people will associate the street party with the end of the second world war and VE Day, but street parties actually have a history which goes much further back than that.
The tradition of the street party actually began in 1919 with so-called ‘peace teas’ being set up between households across the country to mark the end of the Great War. Originally designed for children it wasn't long before everyone was joining in.
.JPG "Rhubarb & Ginger Scones")
As the years went by, the street party became more and more common
place, with residents closing off streets for many national events and celebrations.
VE day, the Queens Coronation, the Silver and Golden Jubilees’ and the millennium
could all be characterized by the nations desire to mark the occasion with bunting
and jelly and ice-cream!
I know many of my friends are holding tea parties to commemorate the occasion, and why not! The Queen herself often holds garden tea parties and they are very well attended!
.JPG "Rhubarb & Ginger Scones")
I love the Queen and I am not adverse to having a tea party myself, however this is my brother in law's birthday celebration and so we will be having cake etc. at my sisters.
There was nothing to stop me, however, from making some scones for myself and enjoying one with a hot drink, in honor of the Queen of course! And that is just what I have done.
.JPG "Rhubarb & Ginger Scones")
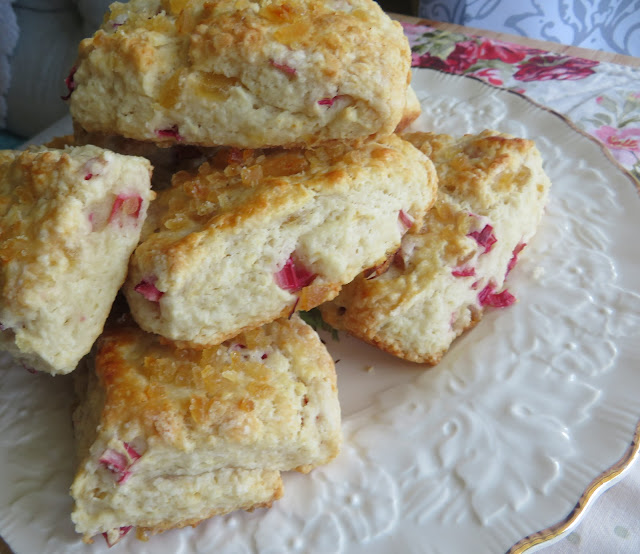
This is one of the best scone recipes! Rhubarb & Ginger Scones. A delicious pairing of two of my favorite flavors. I have taken full advantage of it being rhubarb season here in Nova Scotia by adding some to these lovely scones.
Rhubarb and ginger go very well together and so I have taken the liberty of adding some chopped candied ginger as well, not only in the body of the scones, but sprinkled on top of the scones before baking as well.
This made for a nice zippy sweet crunch! Oh so tasty!
.JPG "Rhubarb & Ginger Scones")
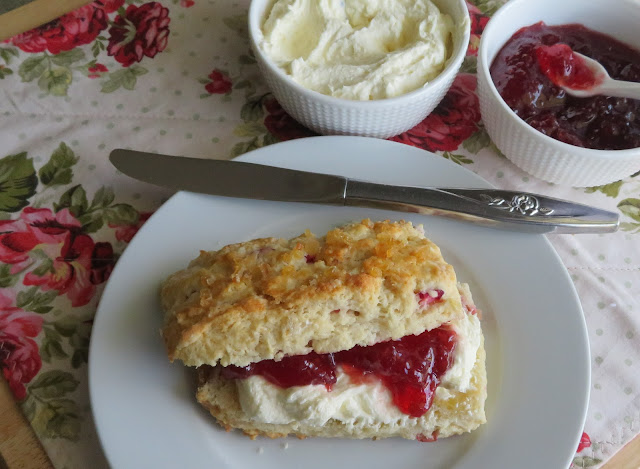
I also did up a batch of Mock Devonshire Cream to go with them. Essentially it is meant to mock clotted cream, but I can tell you it is nowhere near the same thing really, however delicious it might be.
But it is rich and creamy and went very well with these scones and some jam. It also makes a lovely filling for a strawberry tart. You can find my recipe for a Strawberry Devonshire Tart here. Trust me when I tell you it is delicious.
.JPG "Rhubarb & Ginger Scones")
WHAT YOU NEED TO MAKE RHUBARB AND GINGER SCONES
Simple, simple, simple . . .
For the scones:
- 1 stick of rhubarb, chopped (about 3/4 cup)
- 3 TBS chopped candied ginger (you will need more for the topping)
- 1/2 cup (100g) granulated sugar
- 2 1/4 cups (315g) all purpose plain flour
- 1 TBS baking powder
- 1/2 tsp salt
- 1 tsp pure vanilla extract
- 8 TBS (115g) cold butter, cut into bits
- 1/2 cup (120ml) cold buttermilk (may need more)
To finish the scones:
- 2 TBS minced candied ginger
- buttermilk to brush
For the mock cream:
- 4 ounces (115g) full fat cream cheese, at room temperature
- 1/4 cup (56g) butter, at room temperature
- 1/4 cup (30g) full fat sour cream
.JPG "Rhubarb & Ginger Scones")
You don't have to use candied ginger in these. You can use all rhubarb if you wish, but the two things really do go very well together. You can use frozen rhubarb if that is all you have. Use it frozen without thawing.
If you don't have any buttermilk, you can use cream in its place. It makes an even richer scone.
You could also leave the ginger off the tops and glaze them with a simple vanilla glaze. (1 cup icing sugar thinned with just enough milk to give you a thick drizzle) You could even do the glaze and then sprinkle some candied ginger on top after glazing. Not as crunchy as baked, but still very good!
.JPG "Rhubarb & Ginger Scones")
HOW TO MAKE RHUBARB AND GINGER SCONES
A food processor makes very short work of these. You can make them without one, but it will take longer. Preheat the oven to 375*F/190*C/ gas mark 5. Line a baking sheet with baking paper. Set aside.
Measure the flour, sugar, salt and baking powder into the bowl of a food processor. Pulse to combine. Drop in the cold butter and pulse until the mixture resembled coarse crumbs. (f doing by hand, measure the flour etc. into a bowl and cut the butter in using a pastry blender until you have coarse crumbs.)
Dump the flour mixture into a bowl and stir in the rhubarb and the ginger. Stir in the buttermilk and vanilla gently with a spoon until you have a dough that just comes together. It may be a bit crumbly, that is okay. If it is too dry, add some more buttermilk, but only as needed.
Tip out onto a lightly floured surface and knead gently a couple times to bring together and then pat out into a rectangle that is 4 X 8 inches in size. Cut into 8 scones, making one cut lengthwise and then 1 cut cross wise. This will give you four pieces. Cut each fourth in half crosswise yet again.
.JPG "Rhubarb & Ginger Scones")
Place onto the prepared baking sheet, leaving 2 inches between each scone. Brush the tops with some buttermilk and sprinkle with finely chopped candied ginger.
Bake in the preheated oven for 30 to 35 minutes until golden brown on the bottoms and just starting to turn golden brown on the tops.
Remove to a wire rack to cool.
While they are cooling make the cream. Measure all of the ingredients into a bowl and beat with an electric hand whisk until smooth and fluffy. Serve on split and cooled fresh scones along with some jam. This cream will keep in the refrigerator for about a week. Let sit at room temperature for 15 to 20 minutes before using.
.JPG "Rhubarb & Ginger Scones")
Not a fan of rhubarb? I have plenty of other scone recipes here in The English Kitchen for you to enjoy!
CHERRY VANILLA SCONES - delicious light and flaky vanilla flavored scones studded throughout with lovely pieces of candied cherries!
CARROT CAKE DROP SCONES - no fuss no muss, these delicious drop scones have all the flavors of your favorite carrot cake, are studded with raisins and boast a sweet drizzle glaze!
HONEY AND DATE SCONES - sweet and studded with dried dates. Delicious served spread with Dulce de Leche and clotted or whipped cream!
.JPG "Rhubarb & Ginger Scones")
Happy Jubilee!
This content (written and photography) is the sole property of The English Kitchen. Any reposting or misuse is not permitted. If you are reading this elsewhere, please know that it is stolen content and you may report it to me at: mariealicejoan at aol dot com
Rhubarb & Ginger Scones (with Mock Devonshire Cream)
Yield: 8
Prep time: 20 MinCook time: 35 MinTotal time: 55 Min
These are really pretty scones studded with bright scraps of red rhubarb and zingy sweet bits of candied ginger. More candied ginger is sprinkled on top giving a bit of sweet crunch. Delicious served with strawberry jam and the rich cream.
Ingredients
For the scones:
- 1 stick of rhubarb, chopped (about 3/4 cup)
- 3 TBS chopped candied ginger (you will need more for the topping)
- 1/2 cup (100g) granulated sugar
- 2 1/4 cups (315g) all purpose plain flour
- 1 TBS baking powder
- 1/2 tsp salt
- 1 tsp pure vanilla extract
- 8 TBS (115g) cold butter, cut into bits
- 1/2 cup (120ml) cold buttermilk (may need more)
To finish the scones:
- 2 TBS minced candied ginger
- buttermilk to brush
For the mock cream:
- 4 ounces (115g) full fat cream cheese, at room temperature
- 1/4 cup (56g) butter, at room temperature
- 1/4 cup (30g) full fat sour cream
Instructions
- Preheat the oven to 375*F/190*C/ gas mark 5. Line a baking sheet with baking paper. Set aside.
- Measure the flour, sugar, salt and baking powder into the bowl of a food processor. Pulse to combine. Drop in the cold butter and pulse until the mixture resembled coarse crumbs.
- Dump the flour mixture into a bowl and stir in the rhubarb and the ginger.
- Stir in the buttermilk and vanilla gently with a spoon until you have a dough that just comes together. It may be a bit crumbly, that is okay. If it is too dry, add some more buttermilk, but only as needed.
- Tip out onto a lightly floured surface and knead gently a couple times to bring together and then pat out into a rectangle that is 4 X 8 inches in size. Cut into 8 scones, making one cut lengthwise and then 1 cut cross wise. This will give you four pieces. Cut each fourth in half crosswise yet again.
- Place onto the prepared baking sheet, leaving 2 inches between each scone. Brush the tops with some buttermilk and sprinkle with finely chopped candied ginger.
- Bake in the preheated oven for 30 to 35 minutes until golden brown on the bottoms and just starting to turn golden brown on the tops.
- Remove to a wire rack to cool.
- While they are cooling make the cream. Measure all of the ingredients into a bowl and beat with an electric hand whisk until smooth and fluffy. Serve on split fresh scones along with some jam. This will keep in the refrigerator for about a week. Let sit at room temperature for 15 to 20 minutes before using.

Thanks so much for visiting! Do come again!
Subscribe to:
Posts (Atom)





Social Icons