


Québécois Maple Pudding, or Pouding chômeur à l’érable, as it is also known is a traditional Canadian dessert with its origins in the Province of Quebec. It is also known as Poor Man's Pudding, or the pudding of the unemployed.
The recipe is said to have been developed during the great depression, using ordinary every day simple ingredients that most people would have in their homes.

It has long been a favorite in my family and for no small reason. It is, simply put, incredibly delicious. I have been making it in one form or another for my family for years and years.
I adapted the original recipe from a library book, entitled The Cooking of Provincial Quebec by Mirielle Beaulieu. It made a huge panful, and so, in this empty nest era of my life, I have small batched it so that it makes only 5 servings instead of 10.
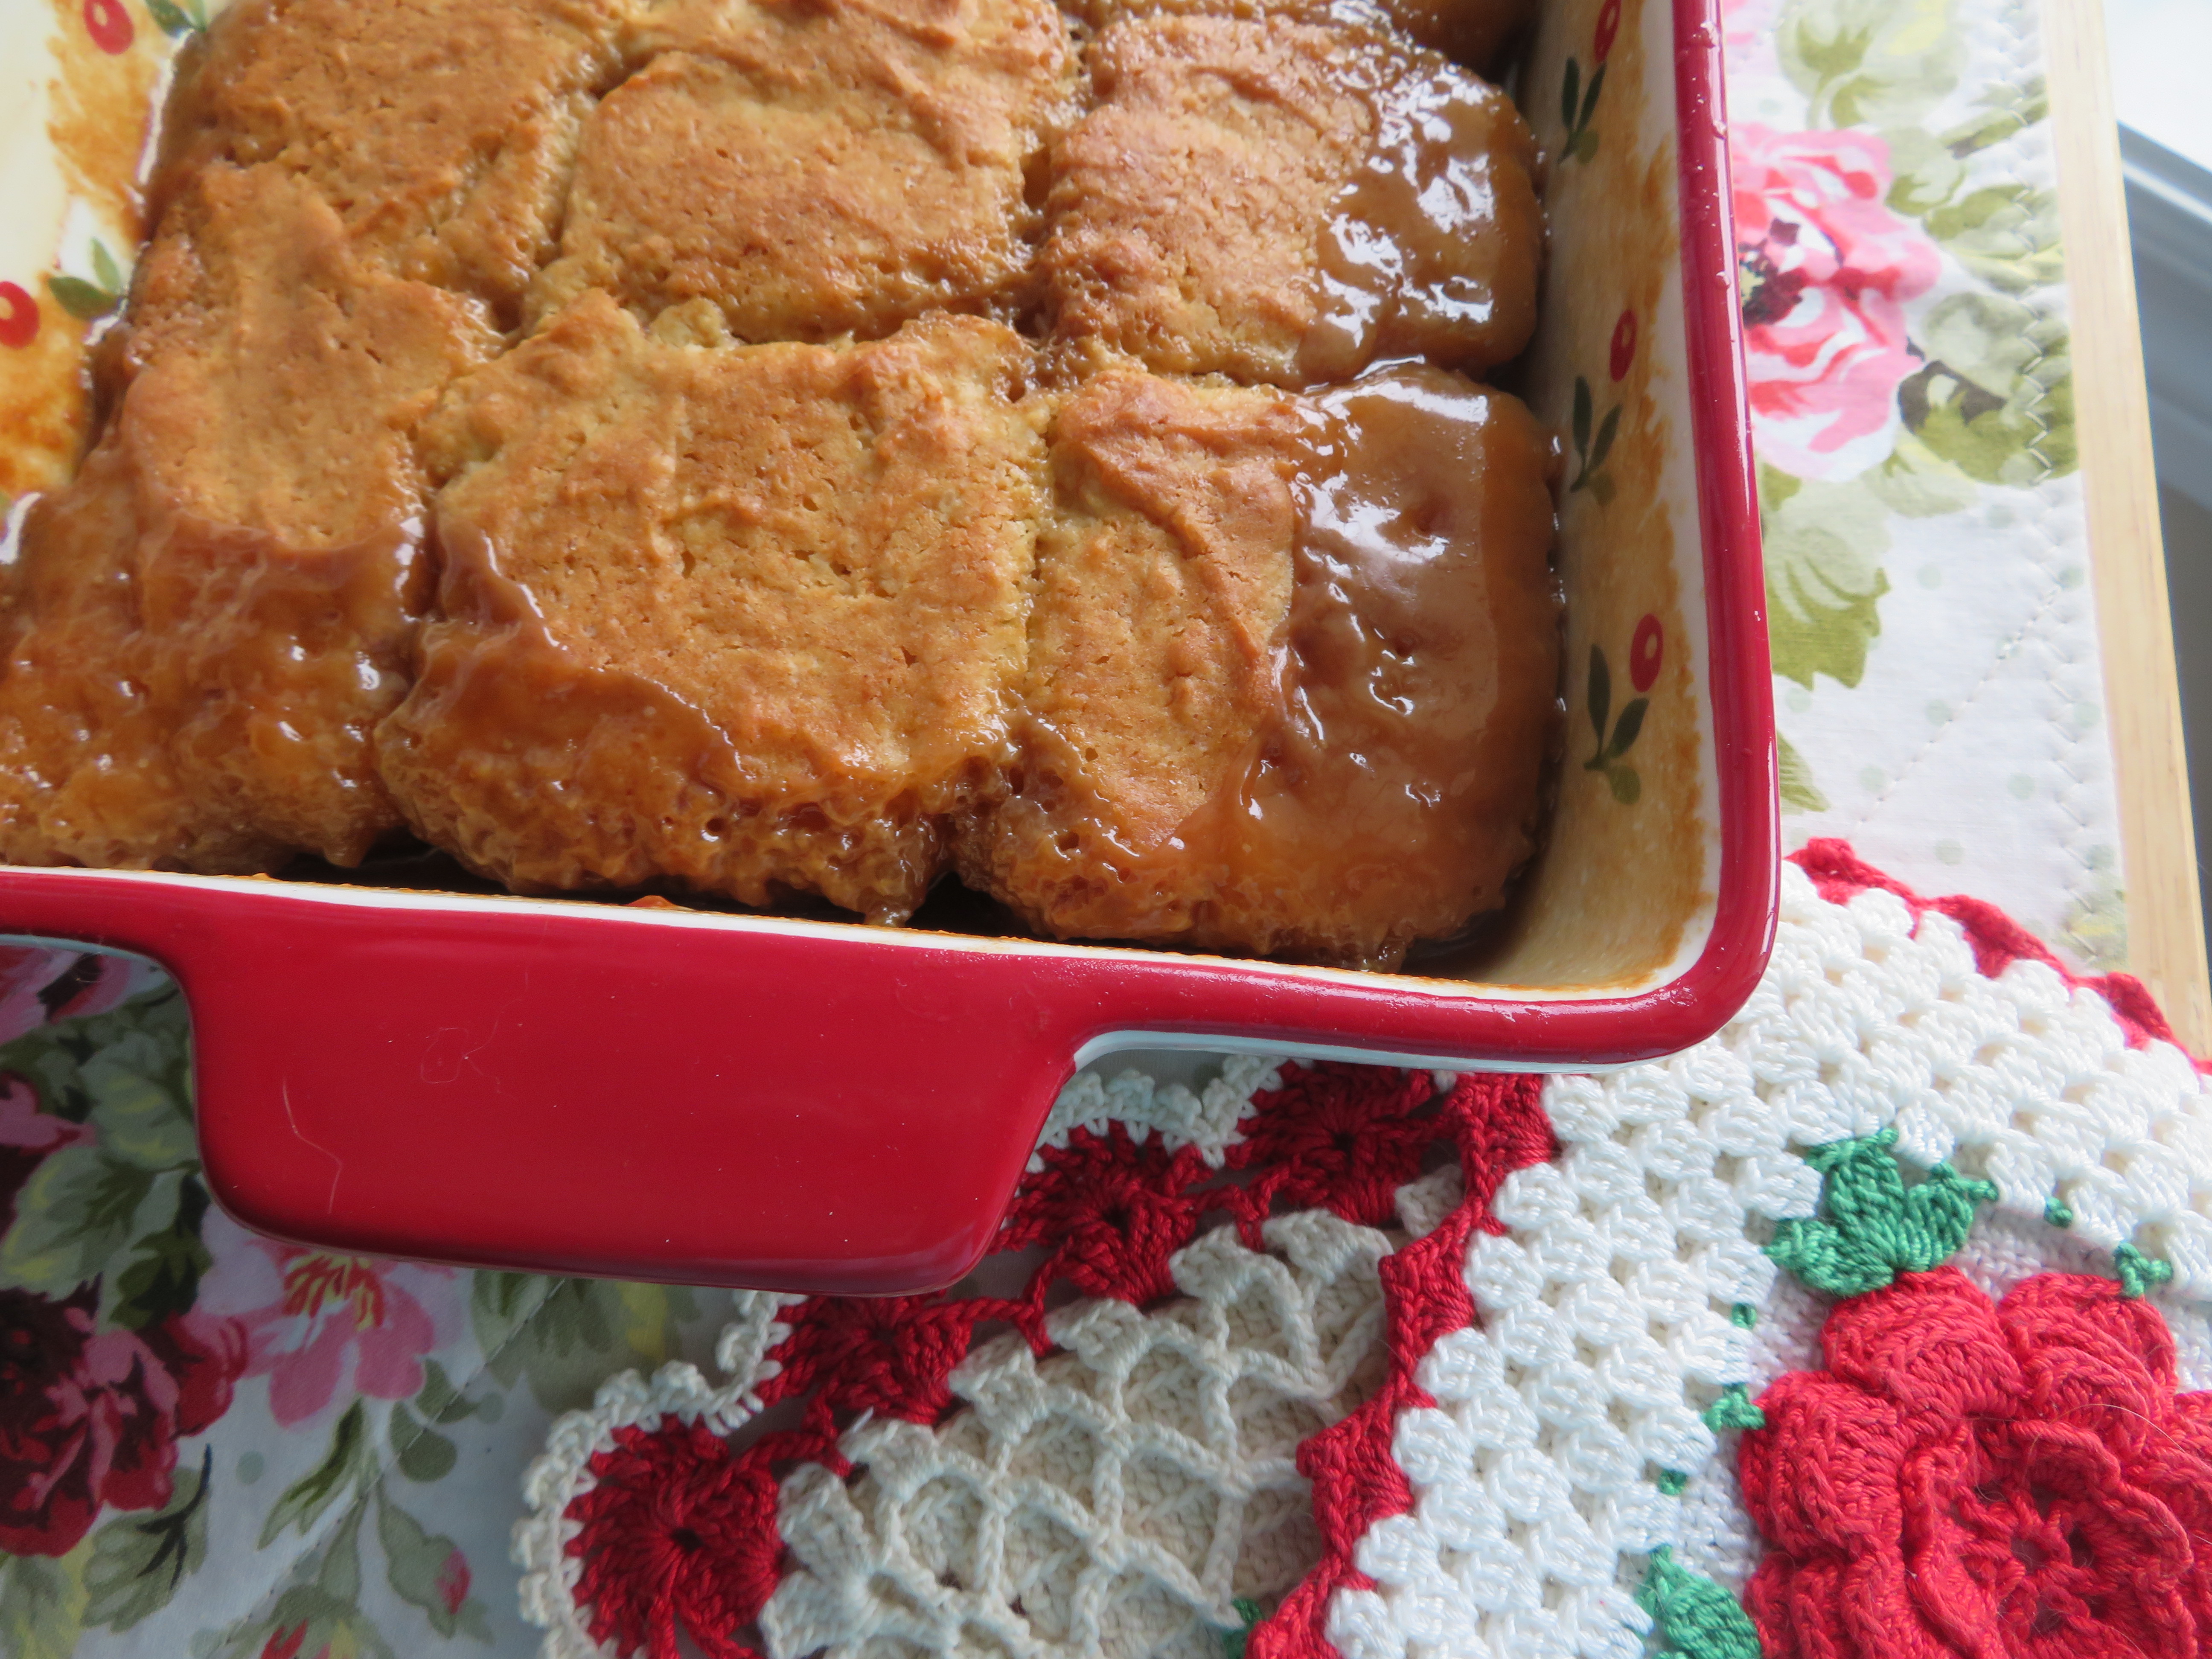
I confess to having a great love of Maple syrup and maple desserts. I remember when I first moved over to the UK, I brought with me a large 4-liter metal container of maple syrup. There were some things I knew that I could live without, but maple syrup was not one of them!
At that time, it was very difficult to find pure maple syrup in the UK. It is much easier now. You would never be able to get on an airplane now lugging a large can of maple syrup like that! This was a year before 9/11.
.JPG "Québécois Maple Pudding")
I used to make this dessert frequently when my children were growing up. They loved it! I did not always use maple syrup, but more often than not made the brown sugar syrup option as it was more affordable for me in those days.
It made a quick, easy and economical dessert that I could make that would satisfy my large family and not bust my food budget. I always had the ingredients for it in my cupboard.
.JPG "Québécois Maple Pudding")
These days when I make this pudding, I always make the maple syrup version of the sauce. The cream makes it extra rich and indulgent. And when you serve it warm with lashings of cream drizzled over top, it is even more so.
Of course, you can enjoy it with scoops of vanilla ice cream as well, which is how my children used to like eating it. I got into the habit of enjoying cream drizzled on my desserts when I lived in the UK as it was a very common thing to do over there.
.JPG "Québécois Maple Pudding")
They always like to enjoy their dessert/puddings with lashings of cream or warm custard sauce. Ice cream is almost never an option. Some people will enjoy some of both the cream and the custard!
I can promise you that whether you enjoy it with cream, or custard, or both, or even ice cream, one thing is certain and that is that you WILL enjoy it! How could a person not enjoy a dessert which has been pleasing families for years and years!
.JPG "Québécois Maple Pudding")
WHAT YOU NEED TO MAKE QUEBECOIS MAPLE PUDDING
Very simple everyday ingredients. There are two sauce options. You decide which one you want to use.
For the Maple sauce choice:
- 3/4 cup (180ml) pure maple syrup
- 3/4 cup (180ml) heavy cream
- pinch of sea salt
For the brown sugar sauce:
- 3/4 cup (150g) soft light brown sugar, packed
- 3/4 up (180ml) water
- 1/2 tsp maple extract
- 1 TBS all-purpose plain flour
For the cake:
- 3/4 cup (105g) all-purpose flour
- 1 tsp baking powder
- 1/4 tsp fine sea salt
- 1/4 cup (60g) unsalted butter, softened
- 1/2 cup (100g) granulated sugar
- 1 large free-range eggs
- 3 fluid ounces (85ml) milk
- 1/2 tsp pure vanilla extract
.JPG "Québécois Maple Pudding")
I don't think much explanation is needed when it comes to the ingredients. They are all simple everyday ingredients. Do NOT be tempted to use artificial syrup when it comes to the maple syrup. It simply doesn't work.
Use only pure maple syrup or make the brown sugar option as detailed in the recipe.
.JPG "Québécois Maple Pudding")
HOW TO MAKE QUEBECOIS MAPLE PUDDING
Seriously nothing could be easier.
Preheat the oven to 400*F/200*C/ gas mark 6. Butter a 7 by 11-inch baking dish really well.
Whisk together the flour, baking powder and salt. Set aside. Whisk together the milk and vanilla extract. Set aside.
To make the maple syrup sauce, combine the ingredients in a saucepan and bring to the boil, stirring occasionally. Pour into the baking dish.
To make the brown sugar sauce, whisk the sugar and flour together in a saucepan. Whisk in the maple flavoring and the water. Bring to the boil, whisking constantly. Pour into the prepared baking dish.
.JPG "Québécois Maple Pudding")
Cream together the sugar and butter for the cake batter until light and well combined. Beat in the egg. Add the flour mixture alternately with the milk/vanilla mixture, making three dry and two wet additions. Mix just to combine.
Spoon the cake batter over top of the hot syrup mixture evenly.
Place onto a baking sheet and bake in the preheated oven for 35 to 40 minutes until bubbling and golden brown. The cake should test done. A toothpick inserted in the center should come out clean.
Leave to cool for about 10 minutes and then spoon into bowls. Serve warm topped with either lashings of cream or a scoop of vanilla ice cream.
.JPG "Québécois Maple Pudding")
This is the perfect comforting midwinter dessert for the family. If you want to double it to make the full size, simply double all of the ingredients. The timing for baking will be approximately 45 minutes.
This simple dessert will keep for up to five days, covered, in the refrigerator. Sometimes I add raisins to the cake.
.JPG "Québécois Maple Pudding")
MOM'S BEST APPLE CRISP - With its crisp and buttery oat topping and sweet apple filling, this is a dessert everyone loves. Nothing says home sweet home better than a warm apple crisp!
SKILLET CHERRY COBBLER - A small sized cherry dessert for two that always pleases. Cherry pie filling on the bottom and a sweet cakey cobbler topping on top. What's not to love!
Yield: 5
Québécois Maple Pudding
Prep time: 15 MinCook time: 40 MinTotal time: 55 Min
This is also known as "Poor Man's Pudding." It is anything but poor. Simple ingredients put together in a most delicious way. Serve warm, spooned into bowls with pouring cream drizzled overtop, or with a scoop of vanilla ice cream. This is the small batch. The original version made 10 servings. You have two choices of sauce. Maple or brown sugar. You decide.
Ingredients
For the Maple sauce choice:
- 3/4 cup (180ml) pure maple syrup
- 3/4 cup (180ml) heavy cream
- pinch of sea salt
For the brown sugar sauce:
- 3/4 cup (150g) soft light brown sugar, packed
- 3/4 up (180ml) water
- 1/2 tsp maple extract
- 1 TBS all-purpose plain flour
For the cake:
- 3/4 cup (105g) all-purpose flour
- 1 tsp baking powder
- 1/4 tsp fine sea salt
- 1/4 cup (60g) unsalted butter, softened
- 1/2 cup (100g) granulated sugar
- 1 large free-range eggs
- 3 fluid ounces (85ml) milk
- 1/2 tsp pure vanilla extract
Instructions
- Preheat the oven to 400*F/200*C/ gas mark 6. Butter a 7 by 11-inch baking dish really well.
- Whisk together the flour, baking powder and salt. Set aside.
- Whisk together the milk and vanilla extract. Set aside.
- To make the maple syrup sauce, combine the ingredients in a saucepan and bring to the boil, stirring occasionally. Pour into the baking dish.
- To make the brown sugar sauce, whisk the sugar and flour together in a saucepan. Whisk in the maple flavoring and the water. Bring to the boil, whisking constantly. Pour into the prepared baking dish.
- Cream together the sugar and butter for the cake batter until light and well combined. Beat in the egg. Add the flour mixture alternately with the milk/vanilla mixture, making three dry and two wet additions. Mix just to combine.
- Spoon the cake batter over top of the hot syrup mixture evenly.
- Place onto a baking sheet and bake in the preheated oven for 35 to 40 minutes until bubbling and golden brown. The cake should test done. A toothpick inserted in the center should come out clean.
- Leave to cool for about 10 minutes and then spoon into bowls. Serve warm topped with either lashings of cream or a scoop of vanilla ice cream.

Thanks so much for visiting. Do come again!


It must have been in the mid 1980's when I was having coffee with my friend from across the road and she said to me, "You need to try this dessert I made! It's delicious!"
She cut me a piece and I enjoyed it with my coffee and agreed that it was one of the most delicious desserts I had ever eaten. "What's it called?" I wanted to know!

"Sex in a pan!" She piped up. Cue in nervous laughter here. "That's a racy name!" I said. "That's a racy dessert!" she replied.
I don't think I ever really got quite comfortable with the name, but I know that my family surely loved the dessert. It was a firm favorite at my table for many, many years.
.JPG "Layered Chocolate Dessert")
Now that I am a singleton, I thought that I would never taste it again, not unless I was having loads of people over for dessert. If you think it's hard having a full-sized main course hang around your refrigerator for a few days, try it being dessert!
There is nothing worse than having a full-sized dessert in the refrigerator and there only being you to eat it! And I'm not joking when I say that. Too much of anything is well, just TOO much! And, to be honest, I just don't need to be eating that much dessert!
.JPG "Layered Chocolate Dessert")
I picked up this Taste Of Home Magazine/book at the grocery store the other week, entitled Cooking for Two, 124 recipes sized just right. This is the second or third recipe I have been tempted to cook from it.
I flagged it as soon as I saw it! It was a smaller, two serving sized recipe, for my old favorite! Layered Chocolate Pudding Dessert! I set my mind towards making it as soon as I could get in all the ingredients.
.JPG "Layered Chocolate Dessert")
WHAT YOU NEED TO MAKE LAYERED CHOCOLATE PUDDING DESSERT
Nothing too extraordinary really. Some ingredients might be a bit more difficult to find in the UK. Wherever possible I have made a suitable suggestion for substitutions!
- 1/3 cup (41g) all purpose, plain flour
- 3 TBS finely chopped toasted pecans
- 3 TBS butter, melted
- 3 ounces (85g) cream cheese, softened
- 1/3 cup (43g) icing sugar
- 1 cup whipped topping, divided (120ml/1/2 cup cream whipped until stiff)
- 2/3 cup (156ml) cold milk
- 3 TBS dry instant chocolate pudding powder (In the UK use chocolate angel dessert mix powder)
.JPG "Layered Chocolate Dessert")
I always like to toast my nuts for baking and cooking with. I usually do them a whole bag at a time and keep them tightly covered in a container in my freezer.
To toast nuts, spread them out into a single layer on a rimmed baking sheet. Toast in a preheated moderate oven (375*F/190*C/ gas mark 5) for 8 to 10 minutes. You will know they are done when you can smell them. Nice and toasty!
.JPG "Layered Chocolate Dessert")
Toasting really enhances the flavor of nuts. And it's not really a difficult thing to do. For this recipe you will want to chop your nuts fairly fine. I use one of these Zyliss food choppers.
I had a Pampered Chef one in the UK. I would never want to be without one of these. They are great for chopping small amounts of nuts, onions, celery, etc. As Martha would say, it's a good thing!
.JPG "Layered Chocolate Dessert")
You can use low fat pudding mix and cream cheese. Both will work fine. I know that you can't get pudding mix in the UK, or at least you couldn't when I was living there, but Angel Delight is pretty close to the same thing and will work beautifully in this recipe.
Icing sugar is powdered sugar, or confectioner's sugar as it is also called.
.JPG "Layered Chocolate Dessert")
HOW TO MAKE LAYERED CHOCOLATE PUDDING DESSERT
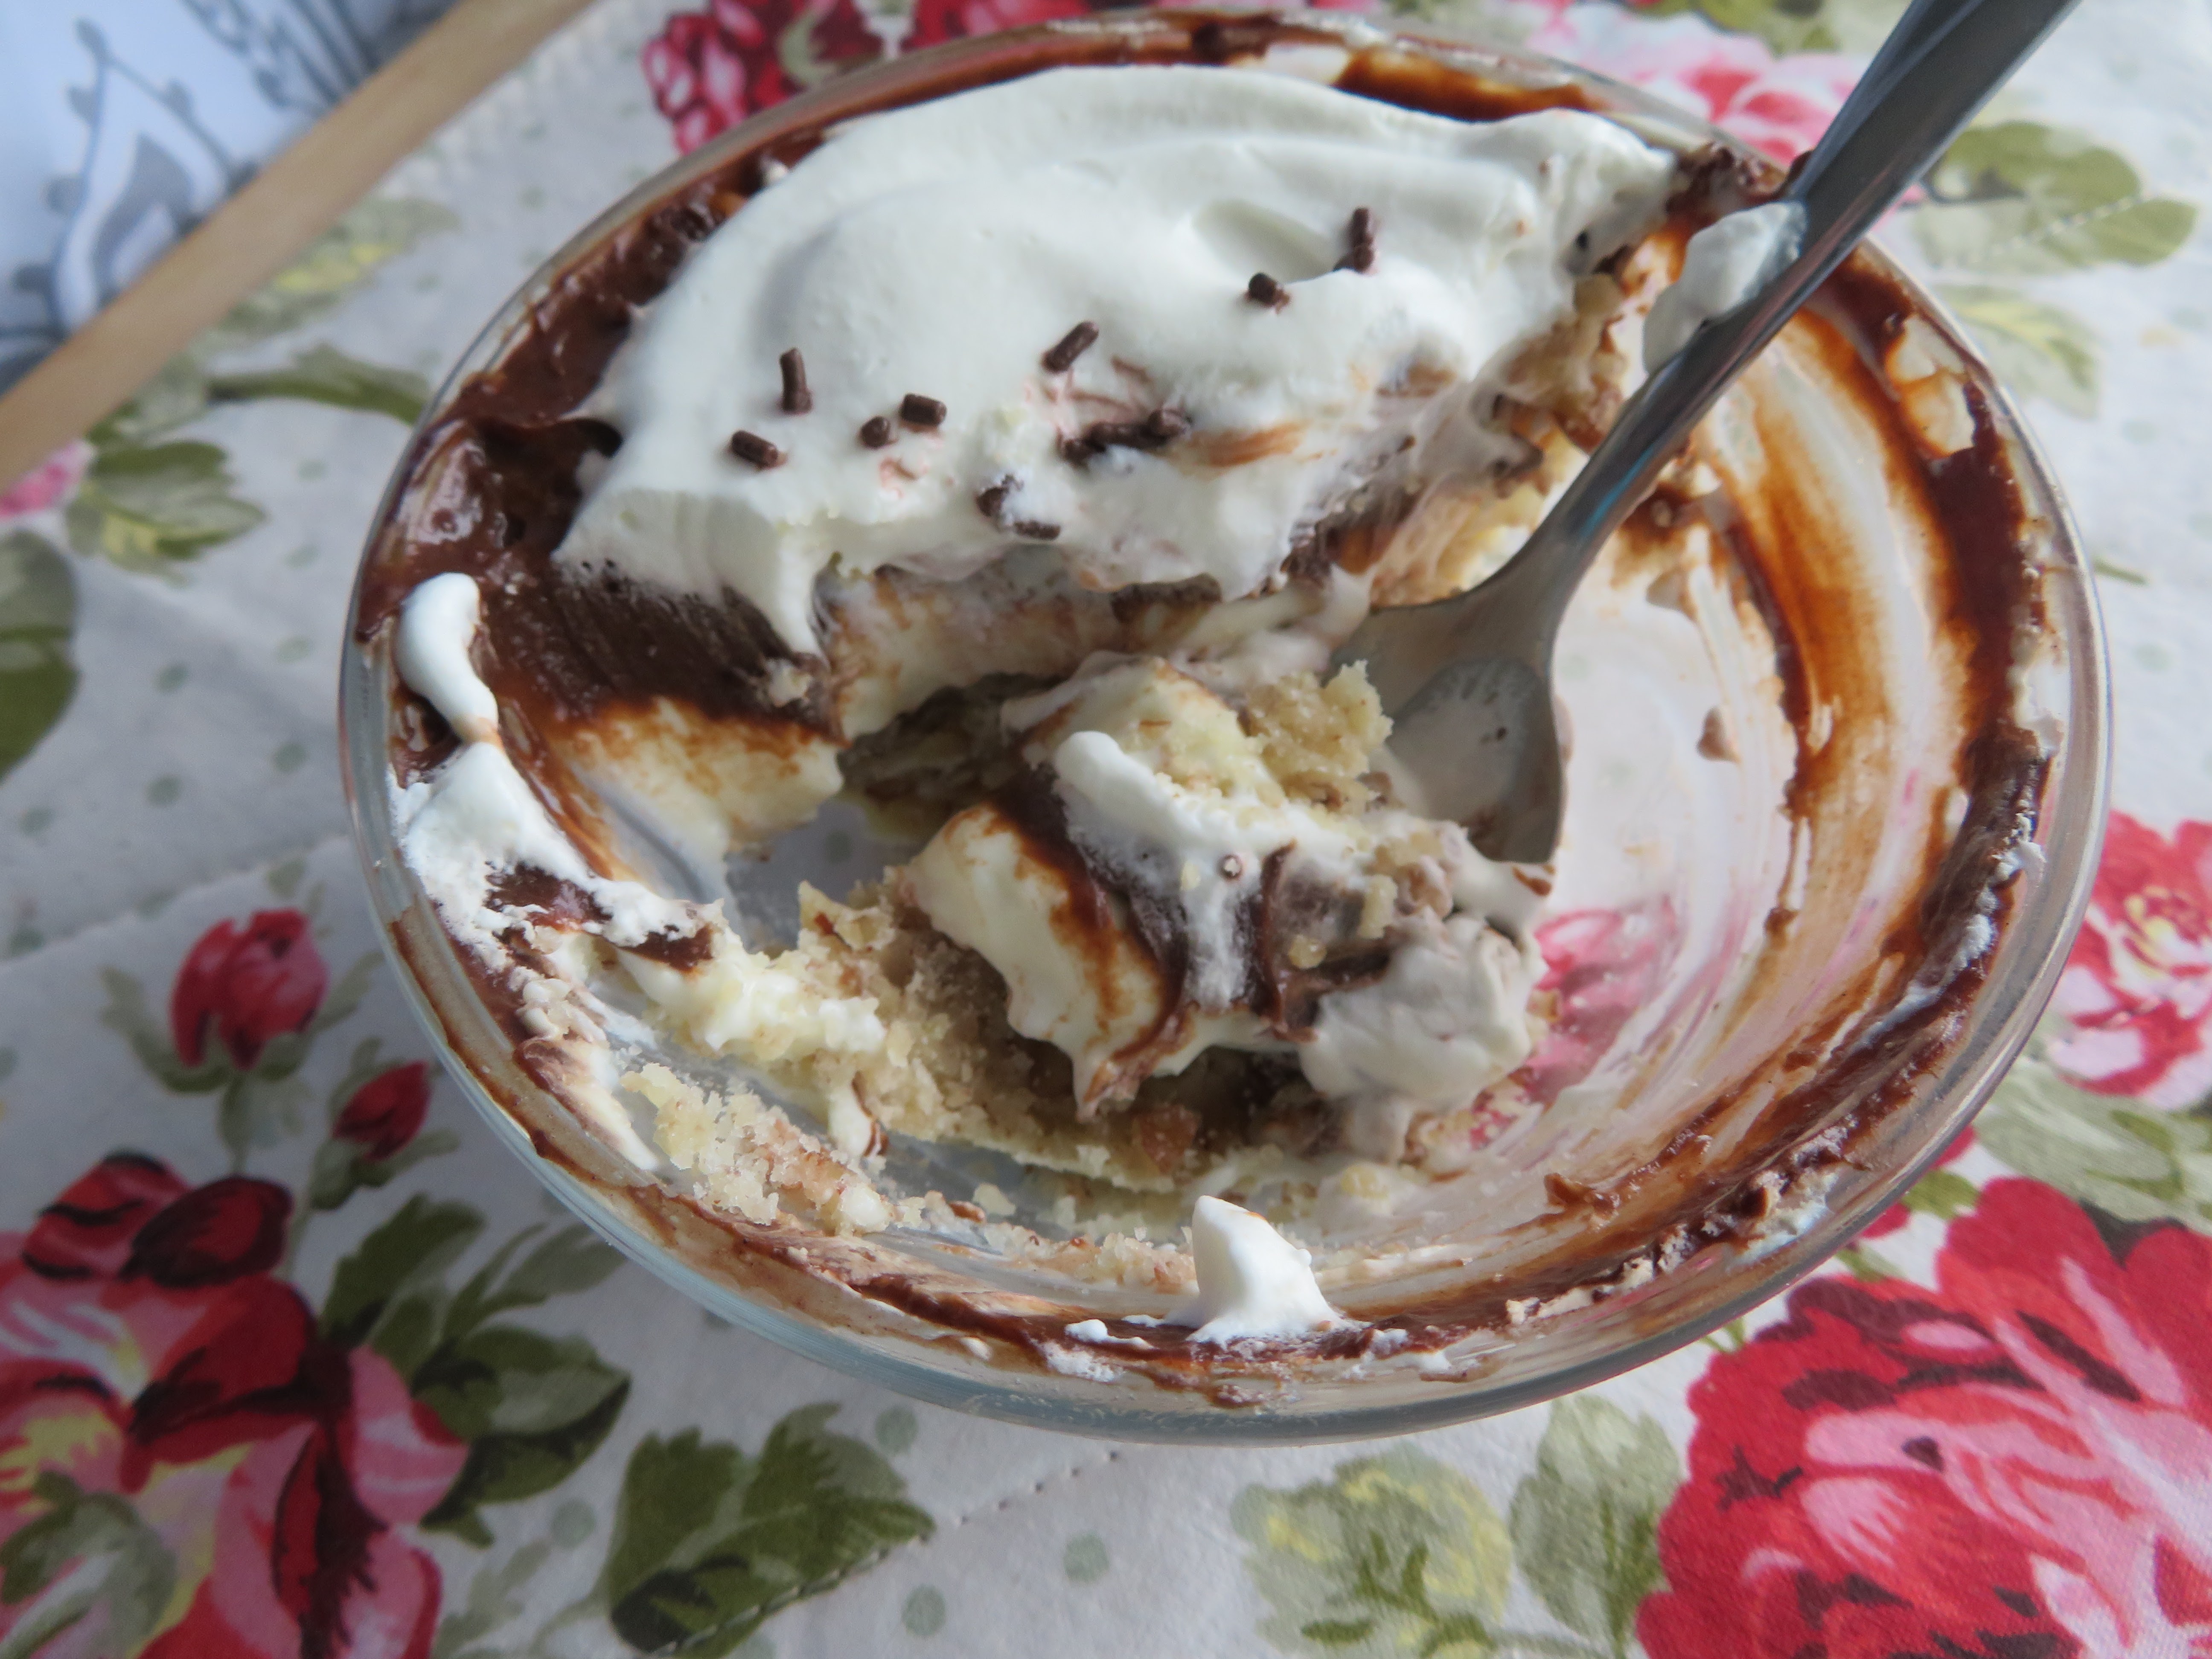
There are three basic components to the dessert. The crust, which must be baked, and then a cream cheese, plus a chocolate pudding layer. Whipped cream sits on top.
None of it is very difficult to make.
.JPG "Layered Chocolate Dessert")
Preheat the oven to 350*F/180*F/ gas mark 4. Have ready two 8-ounce dessert cups.
Whisk the toasted pecans and flour together. Add the melted butter and mix well to combine. Press this mixture down into the bottom of each dessert cup, pressing it in firmly and dividing it up equally.
Bake in the preheated oven for 10 to 12 minutes, until lightly browned. Remove from the oven and leave to cool completely on a wire rack.
Whip your cream until stiff. Divide it in half.
Whip the cream cheese together with the icing sugar until smooth. Fold in half of the whipped cream. Divide this mixture equally between the two dessert cups, placing it on top of the crust and smoothing it out.
Whip the chocolate pudding mix and the milk together until smooth and soft set. Spoon half of the mixture into each dessert cup, covering the cream cheese mixture and smoothing it out. Divide the remaining whipped cream between both cups and smooth it out over top of the chocolate pudding.
Chill in the refrigerator until ready to serve.
.JPG "Layered Chocolate Dessert")
This was every bit as delicious as I remember it being. Incredibly moreish. So good that I am secretly relieved that there are only two servings. One for me to enjoy, and then one to share with a neighbor. She never complains.
I do have a similar full sized dessert recipe here on the blog for those of you who have larger families. Refrigerator Fudge Cake. It is not in layers like this, and is a bit more complicated to make, but I can promise you it's delicious. Nobody will complain!
.JPG "Layered Chocolate Dessert")
DARK CHOCOLATE LAYER CAKE FOR TWO - A moist and delicious six-inch layer cake. Filled and topped with a lush vanilla buttercream. I added a layer of cherry jam in the middle as well. Cuts into 4 perfect pieces.
RICE PUDDING FOR TWO - Almost nursery food . . . warm hug food. Little kernels of rice encircled by rich milky custard. I love the skin on top. It's my favorite bit. This is perfect food for the winter blues. I like mine with a dab of jam. How do you enjoy yours?
Yield: 2
Layered Chocolate Pudding Dessert
Cook time: 30 MinTotal time: 30 Min
A cool, creamy and chocolatey indulgence for two people. You can make it as low fat as you like, depending on what you use to make it.
Ingredients
- 1/3 cup (41g) all purpose, plain flour
- 3 TBS finely chopped toasted pecans
- 3 TBS butter, melted
- 3 ounces (85g) cream cheese, softened
- 1/3 cup (43g) icing sugar
- 1 cup whipped topping, divided (120ml/1/2 cup cream whipped until stiff)
- 2/3 cup (156ml) cold milk
- 3 TBS dry instant chocolate pudding powder (In the UK use chocolate angel dessert mix powder)
Instructions
- Preheat the oven to 350*F/180*F/ gas mark 4. Have ready two 8-ounce dessert cups.
- Whisk the toasted pecans and flour together. Add the melted butter and mix well to combine. Press this mixture down into the bottom of each dessert cup, pressing it in firmly and dividing it up equally.
- Bake in the preheated oven for 10 to 12 minutes, until lightly browned. Remove from the oven and leave to cool completely on a wire rack.
- Whip your cream until stiff. Divide it in half.
- Whip the cream cheese together with the icing sugar until smooth. Fold in half of the whipped cream. Divide this mixture equally between the two dessert cups, placing it on top of the crust and smoothing it out.
- Whip the chocolate pudding mix and the milk together until smooth and soft set. Spoon half of the mixture into each dessert cup, covering the cream cheese mixture and smoothing it out. Divide the remaining whipped cream between both cups and smooth it out over top of the chocolate pudding.
- Chill in the refrigerator until ready to serve.
This content (written and photography) is the sole property of The English Kitchen. Any reposting or misuse is not permitted. If you are reading this elsewhere, please know that it is stolen content and you may report it to me at: mariealicejoan at aol dot com
Thanks so much for visiting. Do come again!
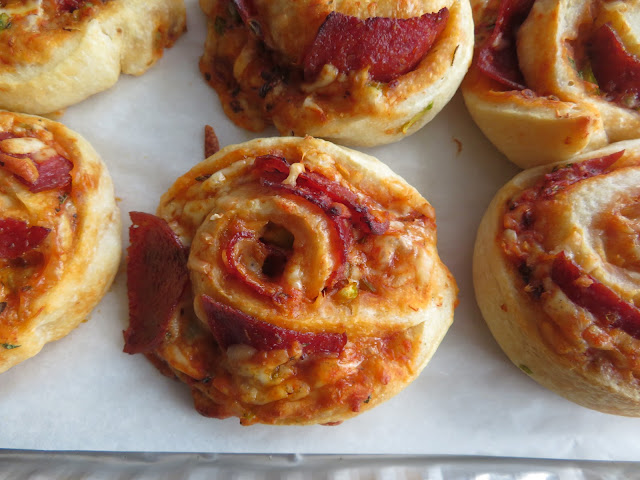

Looking for something tasty and different to pop into the kid's lunch boxes, or for an afterschool snack? How about something tasty to serve when you are enjoying a game night? Or even as a light supper with either some soup or a salad?
Look no further! These fabulously quick and easy Pizza Pinwheels fit the bill on all counts!
.JPG "Pizza Pinwheels")
When my youngest son was growing up, he was the fussiest of fussy eaters! He went through a period of time where he would only eat toast, and it couldn't be too dark or too light.
Then there was the rice period, where he would only eat rice. Hot dogs, same thing. And then there was pizza pockets. He went for a very long time where he would only eat pizza pockets.
.JPG "Pizza Pinwheels")
I used to despair and worry about how he was going to turn out. I worried about malnourishment and all sorts. Thankfully he outgrew that fussy stage and, as far as I know, he eats most things now!
I wish I had had this Pizza Pinwheel recipe way back when. It would have been a lot cheaper to make than buying Pizza pockets and probably a bit healthier as well! I could have snuck all kinds of vegetables into them, so long as they were finely chopped!
.JPG "Pizza Pinwheels")
I adapted the recipe from one I found on Carlsbad Cravings. I think my colors are a bit more realistic however. I don't know why people highly colorize their food photos.
There is another blogger out there who does the same thing, even with her travel photos and they always look far too bright and colorful. Totally unnatural.
With me you get things that look like they do in real life. For good or for bad. No surprises here!
.JPG "Pizza Pinwheels")
WHAT YOU NEED TO MAKE EASY PIZZA PINWHEELS
It may look like a long list, but most of it is seasonings. Basically, you need crust, sauce, cheese and fillings.
For the pizza sauce:
- 2 cups (480ml) marinara sauce
- 1/2 tsp onion powder
- 1/2 tsp dried basil
- 1/2 tsp dried parsley
- 1/4 tsp dried oregano
- 1/4 tsp garlic powder
- 1/4 tsp each salt and black pepper
- 1/4 tsp crushed red pepper/chilies
- 1/4 tsp crushed anise seed (Or fennel seed)
- 1/4 tsp sugar
For the toppings:
- 1 cup (140g) grated Mozzarella cheese
- 1/3 cup (60g) grated Parmesan cheese
- 36 thin slices of dry cured pepperoni
- 1/3 of a medium green pepper, trimmed and finely chopped (see notes)
You will also need:
- 1 package, single pizza size, refrigerated pizza dough, or the equivalent in homemade pizza dough
.JPG "Pizza Pinwheels")
If you don't want to make up your own sauce for spreading, you can use any good ready-made pizza sauce. You could also use my recipe for pizza sauce.
I have been making this pizza sauce for years and years. It makes enough for two pizzas but freezes well. It would also make enough for these pizza pinwheels and dipping.
I can promise you it is delicious! Years of trial and error and testing went into it.
.JPG "Pizza Pinwheels")
Today I used a can of the Pillsbury Pizza dough which worked out really well. You can also make your own dough from scratch.
I have a great recipe here for dough. It makes enough for two thin crust pizzas and is very simple.
In the UK I used to find refrigerated pizza dough in the chiller cabinet near the fresh pastas, but it was not a common thing to find. You could also use plain scone dough.
.JPG "Pizza Pinwheels")
For toppings here I kept it simple with dry cured pepperoni and some finely chopped green peppers. You can use any combination of toppings as you wish. The cheese helps to hold them in the pinwheels once they are baked.
Just make sure that you don't go overboard and add too much. It will all end up on the floor.
Aso make sure that what you do use vegetable wise is finely chopped.
I used only two kinds of cheeses, mozzarella and Parmesan. You can use whatever kind of cheese your family enjoys.
.JPG "Pizza Pinwheels")
I like to use a good dry cure pepperoni, such as the one that Pizza Delight makes. You could also use cooked and drained Italian sausage, bacon, etc.
I used only green peppers, but chopped black olives, red onions, etc. also work very well. Use what you know your family enjoys and in small quantities. In this case, less is always more.
.JPG "Pizza Pinwheels")
HOW TO MAKE EASY PIZZA PINWHEELS
These are really very easy to make. Kind of like making a savory jelly roll but with pizza dough and a savory filling!
Preheat the oven to 375*F/190*C/ gas mark 5. Line a baking sheet with some baking paper. Set aside
Place the pepperoni onto a paper towel lined plate and microwave on high for about 20 seconds. Remove, dab off any excess fat with a piece of paper towel.
Lightly flour a piece of parchment paper, or your countertop. Open the dough and roll or pat it out to a 12 by 15-inch rectangle.
.JPG "Pizza Pinwheels")
Whisk together all of the ingredients for the sauce, combining them well. Spread 3/4 cup of the sauce (180ml) over the surface of the crust, evenly, leaving a 1-inch border along one long edge.
Sprinkle the mozzarella cheese evenly over top. Place the pepperoni slices on top of the mozzarella, evenly spacing them. Sprinkle the chopped green pepper on top of the pepperoni and finish off with the Parmesan cheese.
Starting with the sauce filled long side facing you, tightly roll up the dough towards the 1-inch bare border. Pinch shut along the edge.
.JPG "Pizza Pinwheels")
Cut into 12 slices (Crosswise) using a sharp serrated knife.
Place the pinwheels, cut side up, evenly spaced out on the lined baking sheet.
Bake in the preheated oven for 25 to 30 minutes until the dough is golden brown and the filling is heated through. Leave to sit on the baking sheet for 5 minutes before transferring to a wire rack.
Serve warm with the remainder of the pizza sauce for dipping. Warm the sauce first.
You can keep these stored in an airtight container in the freezer. To use, thaw, then bake at 350*F/180*C/ gas mark 4 for 10 minutes, or until warmed through.
.JPG "Pizza Pinwheels")
You can see where you really need to roll them up tightly so that the filling doesn't leak out. This would also be a problem if you overfilled them. Less really is more here.
They are incredibly delicious and make a wonderful and fun snack.
These are fabulous served alongside of your favorite soup for a light supper that everyone will love!!
.JPG "Pizza Pinwheels")
MINI CHICAGO DEEP DISH PIZZAS - Using only 5 simple ingredients and taking not a lot of your time, you can have these delicious mini bakes on the table in less than half an hour. The idea behind these is that they are quick and convenient, and also incredibly tasty! As an appetizer, or a quick lunch, on the buffet table, for game nights, a light supper with a salad . . . whatever fits your need, your family is sure to enjoy these quick and delicious mini pizzas!
ULTIMATE PIZZA BAGELS - Prepare to fall in love! Grab the napkins and get ready to drool! Get ready to open wide and enjoy a spectacularly delicious hot sandwich!These delicious hot delights are the ultimate in Pizza Bagels. Not just a half a bagel like most Pizza Bagels you will see, these are the whole shebang! With double the sauce, double the toppings and double the cheese. A true delight you can wrap your mouth around.

This content (written and photography) is the sole property of The English Kitchen. Any reposting or misuse is not permitted. If you are reading this elsewhere, please know that it is stolen content and you may report it to me at: mariealicejoan at aol dot com
Yield: 12
Pizza Pinwheels
Prep time: 10 MinCook time: 30 MinTotal time: 40 Min
Super fun, easy to make and delicious! These pizza pinwheels are totally customizable to your own tastes and freeze beautifully, which means you can have a quick and tasty snack ready to go! If you use store bought dough, these go together in a flash.
Ingredients
For the pizza sauce:
- 2 cups (480ml) marinara sauce
- 1/2 tsp onion powder
- 1/2 tsp dried basil
- 1/2 tsp dried parsley
- 1/4 tsp dried oregano
- 1/4 tsp garlic powder
- 1/4 tsp each salt and black pepper
- 1/4 tsp crushed red pepper/chilies
- 1/4 tsp crushed anise seed (Or fennel seed)
- 1/4 tsp sugar
For the toppings:
- 1 cup (140g) grated Mozzarella cheese
- 1/3 cup (60g) grated Parmesan cheese
- 36 thin slices of dry cured pepperoni
- 1/3 of a medium green pepper, trimmed and finely chopped (see notes)
You will also need:
- 1 package, single pizza size, refrigerated pizza dough, or the equivalent in homemade pizza dough
Instructions
- Preheat the oven to 375*F/190*C/ gas mark 5. Line a baking sheet with some baking paper. Set aside.
- Place the pepperoni onto a paper towel lined plate and microwave on high for about 20 seconds. Remove, dab off any excess fat with a piece of paper towel.
- Lightly flour a piece of parchment paper, or your countertop. Open the dough and roll or pat it out to a 12 by 15-inch rectangle.
- Whisk together all of the ingredients for the sauce, combining them well. Spread 3/4 cup of the sauce (180ml) over the surface of the crust, evenly, leaving a 1-inch border along one long edge.
- Sprinkle the mozzarella cheese evenly over top. Place the pepperoni slices on top of the mozzarella, evenly spacing them. Sprinkle the chopped green pepper on top of the pepperoni and finish off with the Parmesan cheese.
- Starting with the sauce filled long side facing you, tightly roll up the dough towards the 1-inch bare border. Pinch shut along the edge.
- Cut into 12 slices using a sharp serrated knife.
- Place the pinwheels, cut side up, evenly spaced out on the lined baking sheet.
- Bake in the preheated oven for 25 to 30 minutes until the dough is golden brown and the filling is heated through. Leave to sit on the baking sheet for 5 minutes before transferring to a wire rack.
- Serve warm with the remainder of the pizza sauce for dipping. Warm the sauce first.
- You can keep these stored in an airtight container in the freezer. To use, thaw, then bake at 350*F/180*C/ gas mark 4 for 10 minutes, or until warmed through.
Notes
You can use any variety of toppings as you wish for these pinwheels, always remembering that less is more. Do chop each topping finely and bear in mind that if you overdo the fillings, they are more likely to leak out. Browned Italian sausage makes a nice change from pepperoni.

Thanks so much for visiting. Do come again!
Subscribe to:
Posts (Atom)





Social Icons