The recipes I am sharing with you for my menu this week come from a much beloved book that I have had for over 40 years now, The Best of Shaker Cooking, by Miller and Fuller and published by McMillan and Co in 1970. The dust cover has long been worn off of my copy, but you can still get a 1985 copy on Thrift Books with the dust cover intact.
I cannot express to you just how much I love this book. Although many of the recipes echo a past in America's history that is almost forgotten today, they are fascinating and delicious. Somewhat high in fat in some cases, as they came about in an era where people really worked very hard on a daily basis and required a large amount of calories.
This is an era where there was no such thing as fast or convenience foods. Everything was quite simply from scratch, and created using simple, wholesome, organic ingredients. Everything on the table arrived there without freezing, travel or packaging. Interestingly enough, for their time, they did use herbs and spices very liberally in their cooking. The Shakers were some of the first people in America to grow herbs on a large scale for the pharmaceutical market. It is not surprising that many of these herbs made their way into their food.
The Shakers very much believed in building up strong body in order to work the better for "the glory of God."
There are no photographs in the book, but scattered amongst the many delicious recipes are interesting little tidbits such as this Advice to Children for Behavior at the Table. I think there are probably many children who could use some of this advice! lol
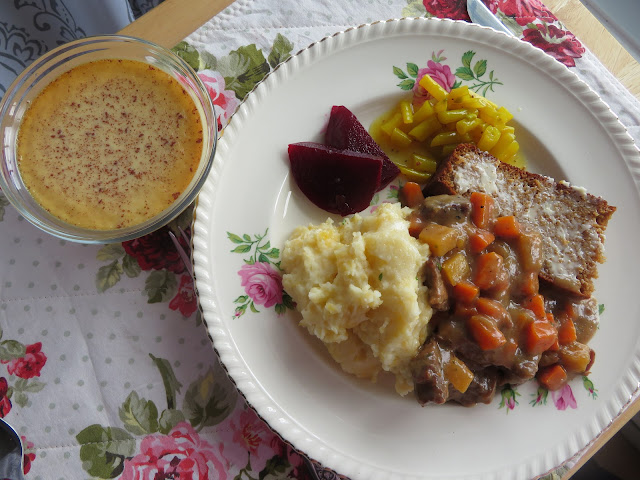
My Menu for this week was a simple one, and yet at the same time a very delicious and hearty one. All of the recipes included are from the pages of this book.
Do note that the beef stew requires several hours to cook so you will need to begin it at least two hours or so before you want to be ready to eat. You can also prepare it the night before if you wish. Stews like this always taste better the day after they have been cooked.
One thing which I really loved about this stew was that it was sized for just two people. After having cooked it I would say it is probably sized more for four people.
I found it to be quite generous. It was filled with plenty of meat, which came out very tender in the cook time. There was also plenty of vegetables by way of carrots and turnips/swede/rutabaga. There were no potatoes in this stew, but the gravy is rich and delicious.
The meat is coated in seasoned flour and browned. Onions are added along with some herbs. A mix of cider and water is added and the meat it stewed for several hours until it melts in the mouth, with the vegetables and herbs being added during the last half hour of cook time.

Shaker Beef Stew with Herbs
Ingredients
- Lump of suet, approximately 4 ounces (I used a knob of butter, about 1 TBS)
- 1 pound (454g) boneless chuck beef/stewing beef, cut into cubes
- 1 TBS plain all purpose flour
- 1 tsp salt
- 1/4 teaspoon of black pepper
- 1 large onion, peeled and sliced
- 1/2 cup (120ml) cider (I used fresh local apple cider, sweet not alchoholic)\
- 1/2 cup (120ml) water
- 1/4 tsp minced marjoram (can use dried)
- 1/2 tsp minced thyme (can use dried)
- 2 carrots, peeled and diced
- 2 turnips, peeled and diced (I used one very small rutabaga)
Instructions
- Melt the fat in a medium sized, heavy bottomed saucepan with a lid. (I used a smallish cast iron Dutch oven.)
- Roll the meat in the flour, salt and pepper. Add to the hot fat and brown well over moderate heat. Add the onion and simmer with the meat for 10 minutes.
- Add the cider and water, cover tightly, and then cook very slowly over low heat for 2 hours. Check from time to time to see if any liquid needs adding.
- 1/2 hour prior to it being done add your cubed carrots and turnips, along with the minced herbs. Taste to see if seasoned satisfactorily.
- Simmer until the vegetables are tender. If you think the gravy is too thin, you can thicken it with some flour and butter. (Just rub together and then drop into the stew as you wish it.)
Notes
I did not have fresh herbs and so I used dry herbs, which I added along with the onions.

Because there are two vegetables in the stew I did not cook any vegetables on the side. There are also no potatoes in the stew. I decided to go with a recipe from the book called "Alabaster" which is a type of potato side dish with also incorporates turnips.

Alabaster (mashed potatoes and turnips)
Ingredients
- 1 pound (454g) white turnips, peeled and cubed
- 1 pound (454g) white potatoes for mashing, peeled and cubed
- 1/2 tsp salt
- 1/4 tsp white pepper
- 1/2 cup heavy cream
Instructions
- Cook the turnips in boiling water to cover until fork tender. Drain and mash.
- Cook the potatoes in water to cover until fork tender. Drain and mash.
- Combine the potatoes and turnips in a pan. Beat together, adding the seasonings and cream. Beat to make nice and smooth.
- Serve hot.
Notes
The recipe says not to add butter or black pepper. The idea of the recipe is that it all be white. Since I was using rutabaga which is yellow, I did add a knob of butter for serving. Otherwise I kept everything white.

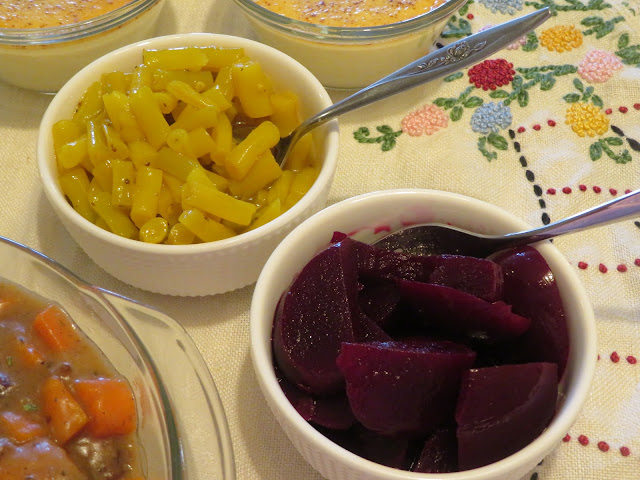
I believed, in the absence of other vegetables, an assortment of pickled vegetables might be offered on the side a salad of some sort. Since the season for growing lettuces is now past, I decided upon pickled offerings and so added a dish each of Mustard Beans and Pickled Beetroot.

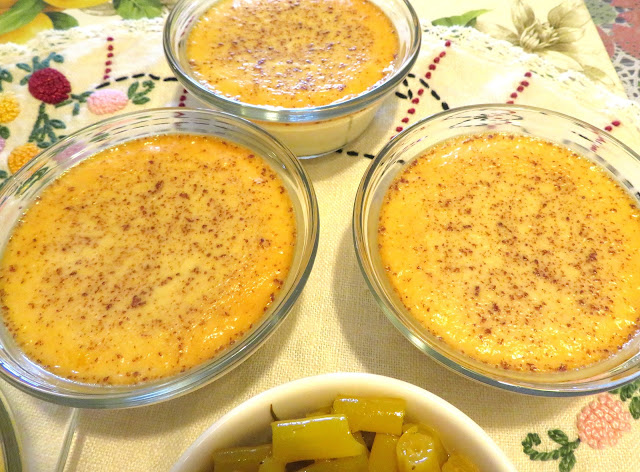
Honey Custard
Ingredients
- 5 large free range eggs, lightly beaten
- 1/2 cup (170g) liquid honey (use a good quality one with a nice flavor)
- 4 cups (960ml) whole milk, scalded and cooled to lukewarm (see notes)
- 1/4 tsp ground cinnamon
- 1/4 tsp salt
Instructions
- Preheat the oven to 325*F/160*C/ gas mark 3. Place four buttered custard cups in a roasting tin large enough to hold them in a single layer.
- Beat the eggs in a large measuring cup until light. Whisk in the honey, cinnamon and salt. Slowly whisk in the scalded milk.
- Pour into the buttered custard dishes. (This is why whisking everything together in a large measuring cup makes sense. No spillage.)
- Fill the roasting tin with hot water to come halfway up side of the cups. Bake in the preheated oven for 40 minutes. When done they will be set, but still have a slight wobble in the middle.
- Serve warm.
Notes
To scald the milk, put into a microwave proof beaker and heat on high in the microwave for 1 to 2 minutes. You will know it is scalded as a slight skin will form on the top.


As a fellow vintage cookbook collector I am loving these posts. You are really inspiring me. I really enjoy your blog and your recipes. Thank you Marie!
ReplyDeleteLove reading these posts, they're always so interesting and I learn something new every time!
ReplyDelete