
Showing posts with label Warm Salads. Show all posts
Showing posts with label Warm Salads. Show all posts
.jpg)
.jpg "Potato Salad Vinaigrette")
I think one of my favorite things to eat in the warmer weather is potato salad. I love potatoes any time of the year but come summer, I adore Potato Salad, and I have a multitude of ways to prepare it. I do like a mayonnaise-based dressing, but truth be told I love a vinaigrette dressing best of all!
Most prepared potato salads that you buy are overwhelmingly loaded with mayonnaise, so much so that that is pretty much all you can taste. In this delicious Warm Potato Salad recipe there is no mayonnaise, just a basic oil and vinegar dressing, loaded with fresh light flavors and textures that go really well with waxy new potatoes, letting their fresh and earthy flavor shine!
.jpg "Potato Salad Vinaigrette")
It is meant to be enjoyed warm. So, no pressure. You make the easy and simple dressing while the potatoes are boiling and then, as soon as they are done and you can handle them, they are thickly sliced and tossed into that flavor-filled vinaigrette. No fuss, no muss, no peeling.
Dressed simply while they are still warm so that they actually absorb some of the dressing's tangy and rich flavors . . . sharp pickled capers, sliced spring onions, the gentle heat of a good Dijon, fresh lemon juice and julienned fresh mint. All in perfect quantities so that that earthy flavor of the potatoes still shines through.
Easy peasy, lemon squeezy. Nothing else is needed. This is potato salad perfection. I promise.
1.jpg "Potato Salad Vinaigrette")
WHAT YOU NEED TO MAKE A WARM POTATO SALAD WITH AN HERBY VINAIGRETTE
Other than the mint and capers, pretty simple ingredients, and not a lot of any of them. This is a small batch recipe.
- 1/2 pound (8 ounces/227g) small new waxy salad type of potatoes, washed and unpeeled
- 2 TBS of extra virgin olive oil
- 1 TBS freshly squeezed lemon juice
- 1/2 TBS good quality Dijon Mustard
- 3 small spring onions, washed, trimmed and thinly sliced (the white parts only)
- 1/2 TBS small capers, rinsed
- fine sea salt and freshly ground black pepper to taste
- 2 TBS mint leaves, cut in chiffonade style (Roll tightly and then cut crosswise with a sharp knife to make thin strips)
.jpg "Potato Salad Vinaigrette")
Make sure you use waxy potatoes so that they hold up their shape. A floury potato tends to break down and will not give you as pretty a result.
In a salad like this Extra Virgin Olive oil matters. The flavor whilst not pronounced is vital.
Do use the freshly squeezed lemon juice rather than the lemon juice made from concentrate. The real thing will give your dressing an infinitely better flavor.
I used Maille French Dijon dressing. It's the best and most authentic in my opinion.
Spring onions are what is also knowns as Scallions or Green Onions. The smaller, younger, more tender ones are ideal.
Use the smaller capers packed in vinegar if you can. If you do need to use the salted ones, then rinse them really well and pat dry. Also, if you can only get the larger capers, then chop them up a bit into smaller pieces.
Some people may not like mint. You can use parsley or basil and still have a lovely salad.
1.jpg "Potato Salad Vinaigrette")
HOW TO MAKE WARM POTATO SALAD WITH AN HERBY VINAIGRETTE
Tis not hard at all. Do take note of my hints and tips below here so that you can make the best potato salad ever!
Place the potatoes into a steamer basket over simmering water. Cover tightly and steam for 20 to 25 minutes, until pierce easily when prodded with the tines of a fork.
Make the dressing while you are steaming the potatoes by whisking together the olive oil, lemon juice and mustard. Fold in the capers and spring onions.
Season to taste with some salt and pepper. Set aside.
.jpg "Potato Salad Vinaigrette")
When the potatoes are tender remove the from the steamer basket. As soon as you can handle them comfortably, cut into thick slices crosswise and place into a bowl.
Give the dressing another whisk and then pour it over top of the still warm potatoes.
Gently toss together, without breaking the potatoes, while they are still warm, so that they can absorb the dressing. Taste and adjust seasoning as needed.
To cut the mint into a chiffonade, roll the leaves tightly into a roll and slice across the roll into thin slices. gently break apart and then toss together with the salad. Serve immediately.
Notes
If you are not a huge fan of mint, you can substitute it with an herb that you do enjoy. Flat leaf parsley works well as does basil.
.jpg "Potato Salad Vinaigrette")
HINTS AND TIPS FOR PERFECT POTATO SALADS
Here are a few helps to make your potato salads better, be they mayonnaise based or vinaigrette based. They apply in either case!
1. Make sure you choose the right type of potato. Typically, you would not use a potato which is good for mashing, or a floury potato as they are called. You do not want a potato that is going to break down too much in the dressing. New potatoes are perfect for potato salads. Any potato with a waxy texture will work well. They have thinner skins, are usually much smaller in size, and will hold their shape and not turn gummy in the dressing.
2. Don't overcook your potatoes. You want your potato to still have a bit of a bite and not be disintegrating into mush. Start them off in cold water and cook at a medium to low simmer for 15 to 30 minutes depending on their size and the type of potato. Poke them with a toothpick to see how done they are. If there is a huge resistance, they are not ready, if they are starting to break apart you have gone too far!
3. Cover your potatoes with a clean tea towel after draining. I usually drain mine into a colander and then place the colander back over the saucepan with a clean towel draped over top. This allows them to dry out a bit and improves their texture.
4. If you are making a potato salad with an oil-based vinaigrette type of dressing, you will want to dress the potatoes while they are still warm. This helps the flavors of the dressing to penetrate the potatoes. If you are using a mayonnaise or cream-based dressing, let your potatoes cool to room temperature before dressing. One exception is my recipe here, which included a pre-dressing of a vinaigrette and then the mayo dressing afterwards. This helps the salad from absorbing too much of the mayonnaise.
5. When it comes to a potato salad, less is more. Don't over dress the salad or be tempted to add in too many "add-ins." You can always add a bit more dressing just prior to serving it if you feel it is a bit too dry. Also, when you have too many ingredients in it like pickles, etc. it can be overwhelming to the tastebuds as they all compete for space on your palate!
1.jpg "Potato Salad Vinaigrette")
This was a really delicious potato salad. I am fond of mint, and it is coming up in the garden at the moment, so the timing was perfect for using some of it. You could use any other herb that you wish.
Capers can be a bit of a strong flavor, but there are not enough of them in this salad to overpower any of the other flavors.
Simple and quick to make this is the perfect side dish to serve with any kind of grilled meats, poultry or fish.
.jpg "Potato Salad Vinaigrette")
The potato is one of my favorite vegetables. I have never met a potato I did not enjoy. In the summer potato salads are high on my list of enjoyed side dishes. Here are a few others for you to take a gander at!

HONEY MUSTARD POTATO SALAD - Not only is this an incredibly simple potato salad, but it uses two kinds of potatoes. With its delicious honey mustard vinaigrette dressing, it is a salad that you can totally make ahead. It is also somewhat healthier than most mayonnaise-based potato salads! Simple ingredients done incredibly well, and in the simplest of ways. That's always been my promise to you!

BISTRO POTATO SALAD - This salad uses lovely baby salad greens, fresh herbs, (I used mint, dill, tarragon, parsley and chives, and a few spring onions), boiled potatoes, some boiled egg wedges, a few thinly sliced crisp garden radishes and a lovely tangy vinaigrette dressing. This is the type of salad which would typically be served in a French Bistro. A feast for the eyes and tastebuds.
Yield: 2 Servings
Warm Potato Salad with an Herb Vinaigrette
Prep time: 25 MinCook time: 5 MinTotal time: 30 Min
Simple but never boring. This is a small batch recipe which can be doubled or tripled to serve more people. This salad has extraordinary flavors.
Ingredients
- 1/2 pound (8 ounces/227g) small new waxy salad type of potatoes, washed and unpeeled
- 2 TBS of extra virgin olive oil
- 1 TBS freshly squeezed lemon juice
- 1/2 TBS good quality Dijon Mustard
- 3 small spring onions, washed, trimmed and thinly sliced (the white parts only)
- 1/2 TBS small capers, rinsed
- fine sea salt and freshly ground black pepper to taste
- 2 TBS mint leaves, cut in chiffonade style (Roll tightly and then cut crosswise with a sharp knife to make thin strips) (See notes)
Instructions
- Place the potatoes into a steamer basket over simmering water. Cover tightly and steam for 20 to 25 minutes, until pierce easily when prodded with the tines of a fork.
- Make the dressing while you are steaming the potatoes by whisking together the olive oil, lemon juice and mustard. Fold in the capers and spring onions.
- Season to taste with some salt and pepper. Set aside.
- When the potatoes are tender remove the from the steamer basket. As soon as you can handle them comfortably, cut into thick slices crosswise and place into a bowl.
- Give the dressing another whisk and then pour it over top of the still warm potatoes.
- Gently toss together, without breaking the potatoes, while they are still warm, so that they can absorb the dressing. Taste and adjust seasoning as needed.
- To cut the mint into a chiffonade, roll the leaves tightly into a roll and slice across the roll into thin slices. gently break apart and then toss together with the salad.
- Serve immediately.
Notes
If you are not a huge fan of mint, you can substitute it with an herb that you do enjoy. Flat leaf parsley works well as does basil.
.jpg "Potato Salad Vinaigrette")
This content, written and photography, is the sole property of The English Kitchen. Any reposting or misuse is not permitted. If you are reading this elsewhere, please know that it is stolen content and you may report it to me at mariealicejoan at aol dot com.
Thanks for visiting! Do come again!!
If you like what you see here, why not consider signing up for my newsletter and/or subscribing/following me on Grow. You can also bookmark my recipes via the Grow platform. Check out the heart on the right-hand side of the screen.


When I was cheffing at the Manor, once or twice a month my boss would entertain all of her friends from her internation women's club to lunch. They were actually supposed to take turns, but she ended up doing it most of the time.

First of all I think she was probably the wealthiest of them all and secondly I think she liked to show off to the others and get her money's worth out of me. I didn't mind as they were wonderful opportunities to stretch and exercise my skills.

All of the ladies would enter at the back entry way where I would greet them with a cold drink, usually an option of a glass of wine or an ice cold elderflower drink, which I would have gotten ready prior to their arriving. It was my job to greet them because the Mrs, despite having had all morning to get ready would probably only just be getting in the shower, having spent several hours faffing about with flowers in the laundry room. She spent an inordinate amount of money on her flower arrangements. I can't even begin to tell you . Let me just say that the flowers for one of her luncheons would have cost more than an entire month's wages for myself.

While she was faffing about with the flowers I would be setting the table for the luncheon which would have been either in the Conservatory, the dining room, on the stone patio deck at the side of the house or under the arbour out in the back garden. A lot depended on the time of year, and what the weather was doing.

As well as that I would be trying to organise and prepare all of the courses for the luncheon. First there would be three bite sized nibbles for them to enjoy with their elderflower/wine prior to the luncheon. They would need to keep themselves occupied with something while they were waiting for her to make her grand appearance, so nibbles it was. I usually tried to keep these simple because the ladies didn't really want to fill up too much.

Usually there would be a first course. She liked to serve soup for the first course. Depending on the time of year it would be either a hot soup or a cold soup. She had beautiful dishes to serve them in. One of my favourites was the soup dishes that looked like vegetables, each with their own leaf plate. they were really quite pretty.

After the first course they would enjoy the main course which would be either some poached salmon or chicken with vegetables or a salad of some sort. Of course this is simplifying things somewhat as it was never quite as simple as poached salmon, but always something fun and delicious and colourful! This would be followed by a choice of two desserts. And yes, I did all of it by myself. The preparation of everything, the serving, the clearing and the clean up afterwards. Let me tell you at the end of the day I would be zonked. Thank goodness if I was working a luncheon I didn't have to cook supper that evening!

Things like this Turkey Taco Salad would have been popular luncheon options, although she would have preferred a salad that was a bit fiddlier than this one. This one is dead simple . . . from start to finish and oh-so-delicious!!

I am sure the ladies would have enjoyed it immensely.

A crisp homemade tortilla bowl . . . created by draping small tortillas over muffin cups spritzed with canola cooking spray, so easy . . .

Filled with a spectacularly flavour filled turkey mixture, perfectly seasoned and beautifully spiced.

Garnished with some grated cheese, shredded lettuce and sliced spring onions . . . then drizzled with ranch dressing and sprinkled with cherry tomatoes. This would have gone down really well with the ladies I am sure. I think you will enjoy it as well. Quick, easy and delicious!
Turkey Taco Salad
Yield: 6
This is so delicious you would never think that it is basically also quite healthy!
Ingredients:
For the turkey filling:
- 1 medium carrot, peeled and grated
- 1 pound lean ground turkey
- 1 TBS paprika
- 2 tsp ground cumin
- 1 tsp garlic powder
- 1/2 tsp each fine sea salt and ground black pepper
- 1 tsp green tabasco sauce
- 240ml boiling water (1 cup)
You will also need:
- canola cooking spray
- 6 street taco sized flour tortillas
- 4 leaves of romaine lettuce washed, dried and shredded
- 6 TBS grated strong cheddar cheese
- 6 cherry tomatoes, washed and quartered
- 1 large spring onion, washed and finely chopped
- ranch dressing to drizzle
Instructions:
- Preheat the oven to 190*C/375*F/ gas mark 5. Lightly spray a medium, six cup muffin tin with some canola oil spray.
- Gently fit the tortillas into each cup to fit and then lightly spray with more canola oil. Alternately spray the bottoms of the muffin tin with the oil spray and press the tortillas over them allowing them to drape down the sides and spray again. Bake in the preheated oven for 8 to 10 minutes until crisp. Remove from the oven and allow to cool.
- To make the filling, heat the oil in a large skillet. Add the carrot and cook for a minute or so, then crumble in the turkey. Scramble fry. breaking it up as you go, for 5 to 7 minutes until it is beginning to brown and is no longer pink. Add all of the spices and seasonings. Stir to combine and cook for a minute longer. Add the tabasco sauce and boiling water and cook for about 3 minutes, until most of the water has evaporated. Taste and adjust seasoning as desired.
- Place one of the crisp tortilla cups on each of six salad plates. Fill with the turkey mixture dividing it equally amongst the cups. Top each with 1 TBS of the cheese, some of the lettuce, the spring onion and cherry tomatoes. Drizzle with some ranch dressing and serve immediately.

Turkey is a superfood, filled with plenty of vitamins and nutrients and is also thought to help lower your risk for cancer. I don't know how they know these things, but I am sure they have done their studies of it. Odd how I can't really stand the texture of ground beef, but I love ground turkey!


We are having another week of gorgeous weather here in the UK, which is great as the children are all off on half term, well in England and Wales at any rate. I have been taking advantage of the warmer temps and preparing lots of lovely salad type of meals for us. This is a salad I had not made in a number of years, and all of a sudden I got a craving for it. Fried Halloumi Cheese, with a Lime and Caper Dressing. Fried cheese??? Yes!! Why not!


I can take no credit for this recipe. It has been adapted from one by one of my favourite cookery writers here in the UK, Delia Smith. You might not be familiar with her in North America, but over here she is at least as popular, if not more than is Mary Berry, who I know you will be familiar with due to the GBBO. In fact, Delia is so popular here that she has what might be called the "Oprah" effect on products, both in the way of food ingredients, and in cooking utensils! She was one of the first cooks over here on the Television that I watched. She is very, very good and so are her recipes. In fact, they are pretty fail proof.

What she does is take simple quality ingredients and shows you how to make the best and most of them, with foolproof methods. She has been a great example to me in that way. If Delia can cook them, then just about anyone can! I like that.

I think it can be a pretty pricey cheese in North America, however, but as a treat, well worth the price. Over here it is quite affordable, at least pre-Brexit, we will see about afterwards. It has a texture which is quite similar to a good Mozzarella or a string cheese. Its salty and tangy and quite similar in flavour to Feta I would say, but it really comes into its own when you fry it.

You end up with a cheese which has a crisp and golden crust and a semi firm centre with just a touch of goo. In short, it is unbelievably gorgeous! I just love it. This beautiful Lime and Caper Vinagrette Dressing is the perfect way to show it off.

Once again, simple ingredients done well . . . lime (both the zest and the juice), white wine vinegar, capers, good fruity extra virgin olive oil, chopped fresh coriander (cilantro), grainy Dijon, some seasoning and, ta da! Bob's your Uncle!! I like to add a touch of sugar myself, but that is just me. It takes off some of the edge from the tartness of the lime and the capers. I have also used Chinese Rice Wine Vinegar in the past with most delicious results. Make sure you have plenty of crusty bread to serve with it as well, so you can sop up all of that lovely dressing!

What you have here is a very enjoyable salad that works beautifully as a light lunch for two, or as a starter course for more people when you are entertaining. I really hope you will try it. It's fabulous!

*Lime & Caper Dressed Halloumi Cheese*
Serves 2 as a light lunch
I have done a bit of research and found that in America at least you could consider some of the Mexican cheeses which don't melt when heated, such as Queso Blanco or Asadero if you find it impossible to get Halloumi Cheese. Bon Appetit!
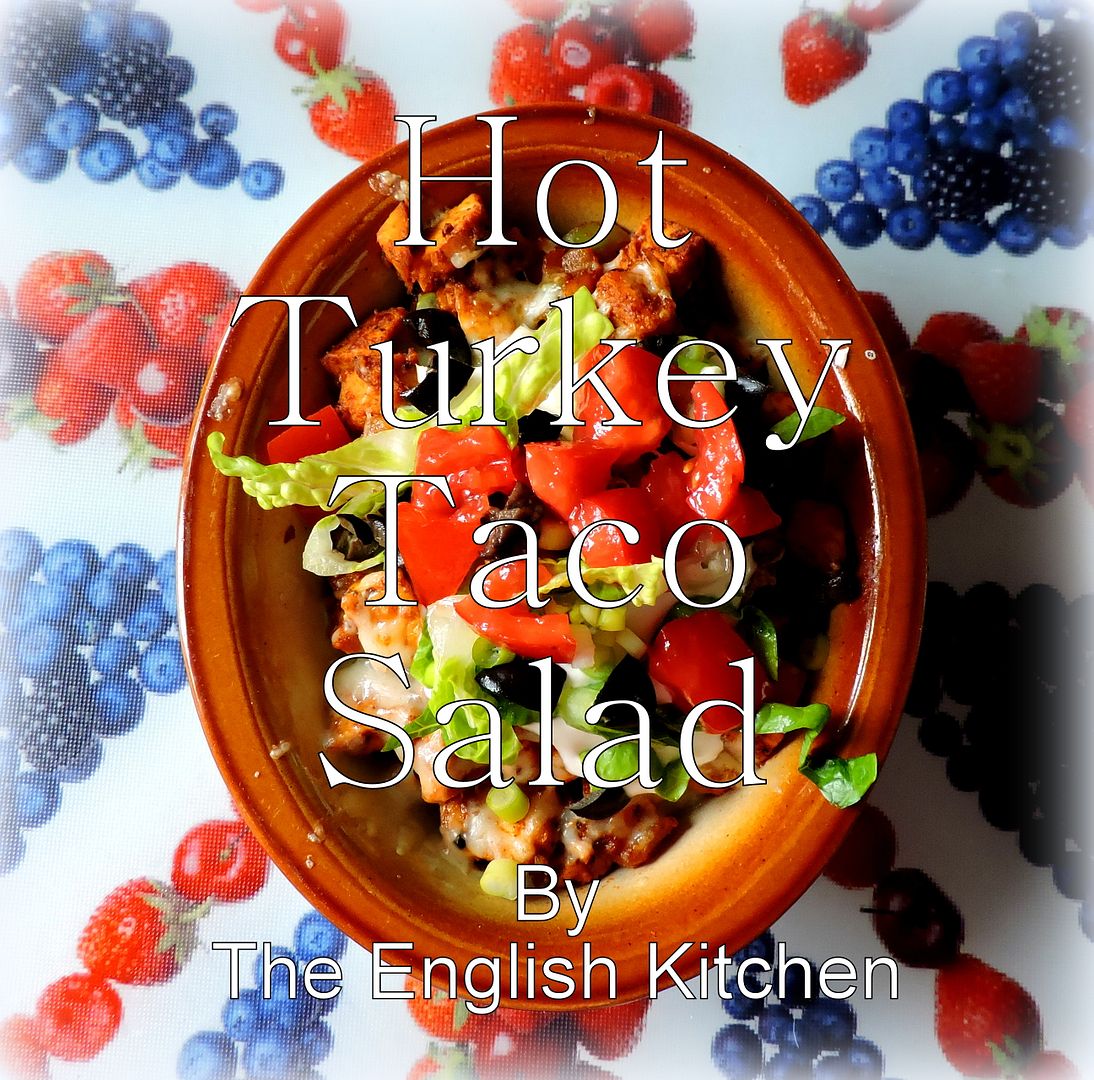
Yesterday I promised to show you something today that you can use up some of the leftover roast turkey in and here it is, a delicious Hot Turkey Taco Salad. It should be noted that you can also use freshly ground turkey as well, so you don't have to have leftover cooked turkey for this, but if you do, this is a really tasty way to use some of it up!

I recently received a lovely carton of Shallots from UK Shallot Growers. These are seriously the nicest looking shallots I have ever seen.
With their sweet piquant flavour, shallots are a real favourite of chef's the world over, however statistics have shown that a large number of UK households just don't buy them. (A staggering 56%!) I want to prove to you just how delicious these little babies are and how very versatile! I am never without these in my larder, and I have been so enjoying these fine ones I have been sent!
Related to the onion (as opposed to being a younger version of it), shallots grow in clusters at the leaf base. Most varieties are smaller than onions, have finer layers and contain less water. The flavour of a shallot is much milder and sweeter than that of an onion, so if a recipe specifies shallots, substituting onions won't give the same results. Their lower water content means they need to be cooked more gently than onions.

HOW TO CHOOSE - Look for firm shallots, with no soft spots, damp or mouldy patches. Brown shallots are the most commonly available. Small, with a light brown skin, they have a mild flavour, and, on occasion, have more than one bulb inside. Banana shallots are the largest variety and are named for their shape and size. They have a smooth elongated shape, with a tan-coloured skin and are slightly milder than the other types. As they're larger, they're swifter to prepare than the same volume of smaller shallots. Pink shallots have a pink skin and a crisp texture and their flavour is pungent, but not harsh.

HOW TO PREPARE -Trim off the top and peel. This is a lot easier if you stand them for a minute or two in boiling water after trimming. Then slice finely or chop as you would an onion. Cut in half from top to bottom. Put the cut side down and make a number of horizontal cuts towards, but not quite reaching, the root. Then make as many vertical cuts through the shallot, again not quite reaching the root. Holding the shallot very firmly and with the knife blade at right angles to the first set of cuts that you made, slice down vertically - the shallot will fall away in small pieces as you go. Continue cutting until you reach the root, which you can then discard.

HOW TO STORE - store shallots in a cool dry and dark space, with plenty of room for the air to circulate around them. I keep mine in a basket underneath the stairs. Stored properly they will keep well for several weeks.

One of the first things I did with them, was to take advantage of the new potatoes that are in the markets at the moment along with the fresh tarragon that is growing in my herb garden. I love fresh tarragon and it goes so very well with the sweetness of shallots.

This is a very simple salad . . . you simply need some fresh new potatoes, preferably smaller in size, a bit of fresh tarragon, some seasoning, a pinch of sugar, some white wine vinegar and a bit of mayo, along with the shallots. ;With fresh clean flavours, and simply prepared ingredients, it's a fabulous potato salad! Perfect for those Al Fresco meals we are all enjoying at the moment!

*New Potato Salad with Tarragon and Shallots*
Serves 6 to 8
This is a delicious version of potato salad nicely flavoured with tarragon and shallot. Magnificent combination.
2 pounds of new potatoes, washed well and halved
3 TBS white wine vinegar
1/2 tsp sugar
1 shallot, peeled and finely minced
3 TBS chopped fresh tarragon
freshly ground pink himalayan sea salt and freshly ground black pepper
3 to 4 TBS of good quality mayonnaise
Place the potatoes into a large pot of lightly salted water and bring to the boil. Cook until tender. Drain well.
While the potatoes are cooking whisk together the vinegar, sugar, shallots and some seasoning. Drop the warm potatoes into this and gently fold in the tarragon. Allow to cool.
Fold in the mayonnaise. Season to taste with salt and pepper and serve. Delicious!

Shallots really shine in sauces and gravies. I decided to incorporate some of them into a delicious sauce to have with some really fabulous spare rib chops I found at the shops.

It's a very simple sauce with very few ingredients. This way the flavour of the shallots really shines through!

Other than the shallots and mushrooms, there are only a few other ingredients such as some mustard and chicken stock, a bit of parsley and some seasoning. I served them with some potato and celeriac mash and some thyme and honey braised carrots. It was a meal fit for company.

Sometimes it's just nice to treat yourselves don't you think?

*Pork Chops with a Sauce of Mushrooms and Shallots*
Serves 4
Dinner party fare, but so easy to make. Tender, juicy chops with a lovely sauce. I like to serve this with a potato and celeriac mash, and honey thyme glazed carrots. The Toddster ain't complainin!
1 tsp butter
4 bone pork chops (I like the spare rib chops), 1 inch thick
fine sea salt and freshly ground black pepper to taste
garlic powder to taste
3 shallots, peeled and chopped (about 1/4 cup)
225ml of chicken stock (1 cup)
10 ounces of sliced closed cap white mushrooms (about 2 cups)
1 TBS Dijon mustard
2 TBS chopped fresh parsley
Heat the butter in a large skillet over medium heat. Season the pork all over with with salt, pepper and garlic powder. Add the chops to the pan and cook them for 7 minutes on one side. Flip them over and cook for an additional 7 to 8 minutes on the other side. Place them in a warm oven to keep them warm.
Add the shallots to the pan. Cook, stirring, until softened. Add the mushrooms. Cook for several minutes longer until they begin to soften as well. Add the chicken stock, mustard, 1 TBS of the parsley and season with some freshly ground pepper to taste.. Cook for about 3 minutes. Put the chops onto a platter and pour the mushroom sauce over all. Sprinkle with the remaining parsley and serve.

Here is another really tasty way I used some of them! They go wonderfully when mixed with other vegetables such as sprouts, broccoli, cabbage, etc. Here I simply pan fried them with a bit of fresh thyme from my garden, some shredded brussels sprouts and pancetta! Delicious!

*Sauteed Brussels Sprouts with Pancetta and Shallots*
makes about 10 servings
Printable Recipe
You don't have to wait for the holidays to enjoy this delicious side dish. Crispy tender brussels sprouts sauteed with crispy bits of pancetta and shallots. Oh so tasty!
2 1/2 pounds of Brussels Sprouts, trimmed and then shredded
into thin slices with a sharp knife
1/4 pound of thick pancetta, cut into bits
a knob of butter
2 shallots, peeled and chopped finely
2 tsp fresh thyme leaves, divided
salt and freshly ground black pepper to taste
2 tsp lemon juice (optional)
It may seem a bit fiddly to prepare the sprouts for cooking but it really isn't. I trim off the bases and any bad looking leaves and discard. Then I take a sharp knife and just quickly cut them into 1/4 inch slices.
Heat a large skillet over medium high heat. Throw in the pancetta. Cook, stirring until it begins to brown. Add the butter and the shallots. Cook and stir until the shallots are softened. Add the brussels sprouts, stirring to coat, along with half of the thyme leaves. Cook, stirring occasionally over medium heat, until the sprouts are crispy tender and beginning to brown a bit on the edges. Season to taste with some salt and pepper and the lemon juice if using. Add the remainder of the thyme leaves and serve.

I was also able to use some of the shallots I had been sent in this delicious hot salad of French Beans and Chorizo sausage. There are some fabulous flavours going on there. The green beans, the chorizo, toasted almonds and a delicious warm dressing.

*French Bean and Chorizo Salad*
Serves 4
Printable Recipe
This is lovely and light and I could eat just a plate of this and nothing else. I love the buttery crunch of the almonds against the mellow crunch of the crispy tender beans, all bathed in a warm chorizo dressing. Delicious!
2 large shallots, peeled and minced
2 TBS white balsamic vinegar
300g french haricot beans, trimmed
100g of blanched almonds
butter
100g of chorizo sausage (the dry kind) peeled and sliced thinly
a hand ful of flat leaf parsley, coarsely chopped
freshly ground black pepper to taste

Put the shallots and vinegar into a small bowl and leave to soak while you cook the beans and sausage.
Steam or simmer the beans in some lightly salted water until crispy tender, about 4 minutes. Drain well and rinse under cold water. Leave to drain in the colander.
Heat a frying pan over medium heat. Add a knob of butter. When the butter begins to sizzle, tip in the almonds. Cook and stir until the almonds are nicely browned. Season with a bit of salt. Place the green beans on a platter and tip the browned almonds over top.
Return the pan to the heat and add the chorizo. Cook, stirring, until it begins to brown and gives off some of it's juices. Scoop out the cooked chorizo with a slotted spoon and tip the chorizo onto the beans as well. Add the shallots and vinegar, and the parsley and toss everything together.
Serve.
And as they say over here in the UK . . . "That's Sha . . . llot!!! (That's your lot. Don't you like how clever that was! I know! I even impressed me!)
Subscribe to:
Posts (Atom)





Social Icons