

One of my friends on Facebook the other day sent me a photograph of a dessert they had found and wanted to know if I had ever seen it, or made anything like it. I managed to track the recipe down to this place. It appears to be in German.
I tried to translate it, but had no luck, and so instead I set about recreating my very own version of something similar, and with (I have to admit) most delicious results! Oh how I love the challenge of creating my own recipes from scratch!

It is composed of a white cake base, a raspberry filling, a whipped cream cheese filling and a final topping of crisp biscuits/cookies.
It is composed of a white cake base, a raspberry filling, a whipped cream cheese filling and a final topping of crisp biscuits/cookies.
Make sure you don't put the cookies on until just before serving because if you do it too soon, they will soften, which isn't bad, but isn't actually what you want. You want a crisp topping.

The cake is an old handwritten recipe from my mom, simply entitled Alice's Plain Cake. It was a cake she used to make me when I was a child that was considered suitable for a young child's digestion. (My family all calls me Alice.)
This was the perfect base. Moist and delicious, with a simple vanilla flavour.

For the raspberry filling I used both fresh and frozen raspberries. I used the frozen berries, along with sugar and a cornflour/cornstarch paste to create a type of raspberry glaze/filling/pudding.
I used cornflour because it creates a transparent pudding. Once cooked and cooled, I folded the fresh raspberries into this and then spread it over the baked and cooled cake layer.

For the creamy layer, I whipped some cream cheese, sugar, vanilla and a small amount of thick/double/whipping cream together until thickened.
Enough so that I knew it would stand up to the rest of the dessert when chilled and which would cut easily. I spread this over the raspberry layer.

The dessert was then covered tighty and refrigerated overnight. (Six hours would do it as well, so if you made it in the morning, you could serve it that night.)

The final touch was crisp biscuit/cookies which were simply laid out on top of the chilled dessert. I had wanted to use Social Teas but couldn't find any square or rectangular ones when I went to the shops, only round ones and they wouldn't work at all.
SO I chose to use Nice Biscuits, which are a coconut type of plain biscuit, topped with a sugar coating. They worked perfectly, and like I said, don't add them until just prior to serving, or they will soften. I suppose it all depends on what you want.

The end result was a dessert which was so incredibly delicious that I didn't dare keep it in the house for very long. My husband and I each had a square (Topped with some whipped cream and fresh berries.)
The rest was divided between my next door neighbor for her to share with her son, and sent down to our friend Peter Lee who was celebrating his 75th Birthday! Both were very much appreciated!

This was a real show stopper, and yet so simple to make. Especially when you break it down into its three element, and just create one at a time.
It isn't a fiddly dessert to make, and it sure was delicious! A simple and yet elegant dessert that will have everyone scrambling for seconds!

*Raspberry Dessert Cake*
Makes one 8 inch cake
A
friend showed me a picture of something similar from a German website.
I studied the recipe and then created my own loosely based on what I
saw. It turned out delicious. I hope you like it!

Beat in the flour mixture 1/2 at a time, alternating with the milk, to
give you a smooth batter. Scrape into the prepared baking tin.
Bake in
the preheated oven until golden brown and top springs back when lightly
touched. (25 to 30 minutes) Remove from the oven and cool, while you
are making the raspberry filling.
Combine the frozen
berries and sugar in a saucepan. Cook, stirring over medium heat, until
the raspberries are broken down and the sugar has completely
dissolved. Stir in the raspberry liqeuer. Whisk the cornflour and
water together. Whisk into the raspberries and bring to the boil
stirring constantly, until thickened and clear.
Remove from the heat and
allow to cool completely. Fold in the fresh raspberries. Spread this
over the cooled cake layer. Place in the refrigerator to chill while
you make the cream layer.

Cover and place in the refrigerator to chill for
several hours or overnight. When ready to serve, top with the biscuits
to cover. Cut into squares to serve. Top each serving with a splodge
of cream and a few fresh raspberries.

I have to say I was immensely pleased and proud of the results of my experimentation and challenge. I love it when it ends up being something which I know people are really going to enjoy! I really hope you will give it a go!
I would feed this quite happily to company! Bon Appetit!!
I have to say I was immensely pleased and proud of the results of my experimentation and challenge. I love it when it ends up being something which I know people are really going to enjoy! I really hope you will give it a go!
I would feed this quite happily to company! Bon Appetit!!

Harry Hill launches campaign for empowerment of children
Newman’s Own Foundation has committed £150,000 for UK charities and Harry Hill announced the program today. Newman’s Own Foundation, started by the late actor and philanthropist Paul Newman, will grant approximately £150,000 (US$200,000) to registered UK charities for the empowerment of children. To date over £4 million has been awarded to a wide range of UK charities.
Long-time advocate of Newman’s Own, Harry Hill has worked with Newman’s Own Foundation since 2014. Citing Paul Newman as an inspiration, Harry is encouraging UK charities to apply for grants from this year’s campaign after this year visiting one of the recipients of the 2015 grants, Hackney Village. Applications are now open and charities meeting the requirements are encouraged to submit their grant requests by Monday 5th September, 2016. Final grants will be announced on 21st November 2016.
Newman’s Own Foundation was established in 2005 by Paul Newman to sustain the legacy of his philanthropic work. Since 1982, Paul Newman and Newman’s Own Foundation have donated more than US$ 470 million (approx. £355 million) around the world.

Comedian Harry Hill, says; “I am thrilled to be involved with Newman’s Own Foundation again. Last year I got the chance to meet some of the grant recipients and saw the incredible impact the funds had. Paul Newman has always been a huge inspiration to me personally and I wanted to get involved to help spread the word about this year’s grants and encourage UK charities to apply”.
Bob Forrester is President and CEO of Newman’s Own Foundation, and was a close friend of the late Paul Newman. He comments, “We would like to encourage all charities which focus on empowerment programmes to submit a request for a grant during this campaign. We hope our funding can make a difference not only to empower but inspire, encourage and support children throughout the UK to overcome exceptional situations in order to build a better future”.
UK charities that meet the criteria may submit their contact information from 4th August 2016 via the expression of interest form available on www.newmansown.co.uk on or before the 5th September, 2016. Selected organisations will be contacted to receive a full application for funding from Newman’s Own Foundation. Additional charity requirements may be found at newmansownfoundation.org/what-we-support/funding-guidelines/. Grantees will be announced on 21st November 2016.
To find out more visit www.newmansown.co.uk
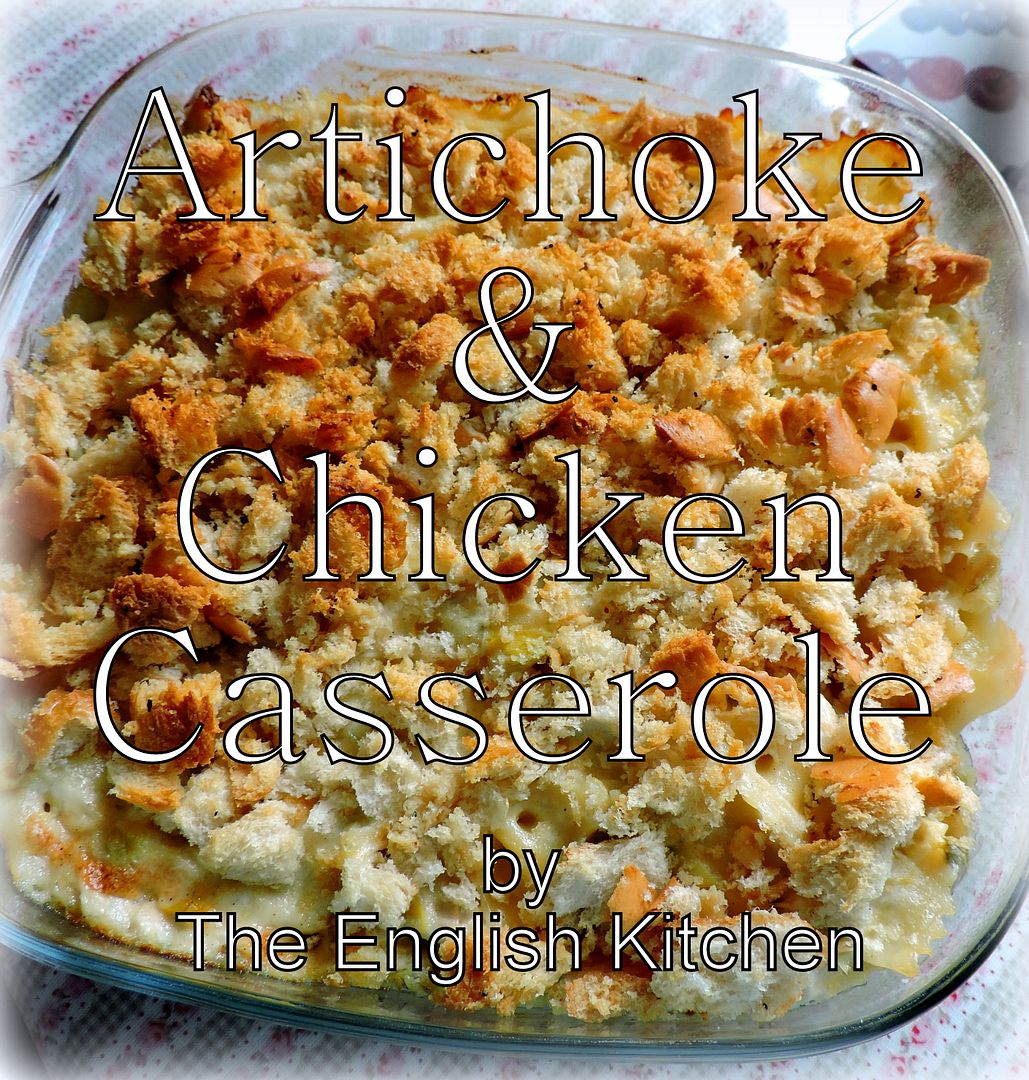
When I worked at the Manor one of the appetizers that was quite popular for the Dinner Parties was a Hot Artichoke Dip. It was cheesy and garlicky and went down a real treat.
I also used to do a baked chicken dish slathered in artichokes that the Mr was gaga over. This week, I created a casserole which incorporates the best of those two things into one delicious dish!

It's creamy and rich . . . just like the dip . . . cheesy, without being overly so . . .

Makes good use of cooked chicken, leftover or otherwise . . . . and store cupboard ingredients.

Pasta, cream cheese, cheddar, tinned artichokes, mayonnaise, sour cream and yes tinned cream of chicken soup. I am not a tinned soup snob like some people.
It has its uses, and I am not ashamed to admit it.

I grew up on it and it didn't kill me. In fact, we thought it was delicious, and there are certain recipes and dishes that just wouldn't be the same without it, so there!
You could call me a lot of things, but I don't think you could ever call me pretentious, that's for sure!

You could just crush garlic croutons on top, but I like to make fresh bread crumbs. I leave them a bit chunky and then toss them with some melted butter and garlic.
These get scattered on top prior to baking and get all nice and crispy, like garlic bread. Altogether this is quite, quite delicious! I like to serve a salad on the side.

*Chicken and Artichoke Casserole*
Serves 6

Mix well to
combine. Pour into the prepared baking dish. Sprinkle with the
seasoned bread crumbs.

DEEEEE-licious!

I cooked the chicken that I used in this dish in a Lékué Deep Steam Case! This is one of the nicest kitchen tools I have recently gotten.
- Steam cook your way to a healthier lifestyle
- For use in the microwave
- Faster and more convenient way to cook
- Retains more nutrients and flavour
- 100% Platinum Silicone
- BPA Free
- 10 year guarantee
- Dishwasher safe
I was a little bit dubious at first about cooking a whole chicken in it, I have to admit. Complete instructions are included in a little booklet that comes with it, for steaming meats, fish, vegetables etc.

I had a small chicken, about 2 pounds. I followed the instructions in the booklet, crossed my fingers and went with it!

You cook it first one one side for 10 minutes (with some herbs and a bit of white wine, I used apple juice). Then you flip it over and do the other side for 10 minutes.

With a standing time of about 5 minutes, you are rewarded 25 minutes later with a perfectly cooked chicken.

I checked the temperature with my met thermometer to be sure. (Like I said I was a bit dubious.) It was spot on, and not only that, but the chicken meat was deliciously moist and I had some lovely juices in the cooker to use for gravy if I wanted to.
Perfectly cooked whole chicken, moist and delicious, in less than half an hour. Way to go Lekue! I love this! And they come in a variety of sizes.
Why not make more of your microwave and use one of these silicone containers from Lékué to steam cook your way to a healthier lifestyle. Offering a faster, more convenient way to cook your food than traditional pots and pans, microwave steam cooking retains nutrients and flavour, so not only will your food be ready quicker but it cooks in its own juices and will taste much better too. Ideal for cooking rice, pasta, stews, soups, meat, fish and vegetables, they’re easy to use
Note - Although I was sent a steam case for free to try out, I was not required to write a positive review. Any opinions are entirely my own. I really am impressed with this piece of kitchen kit!
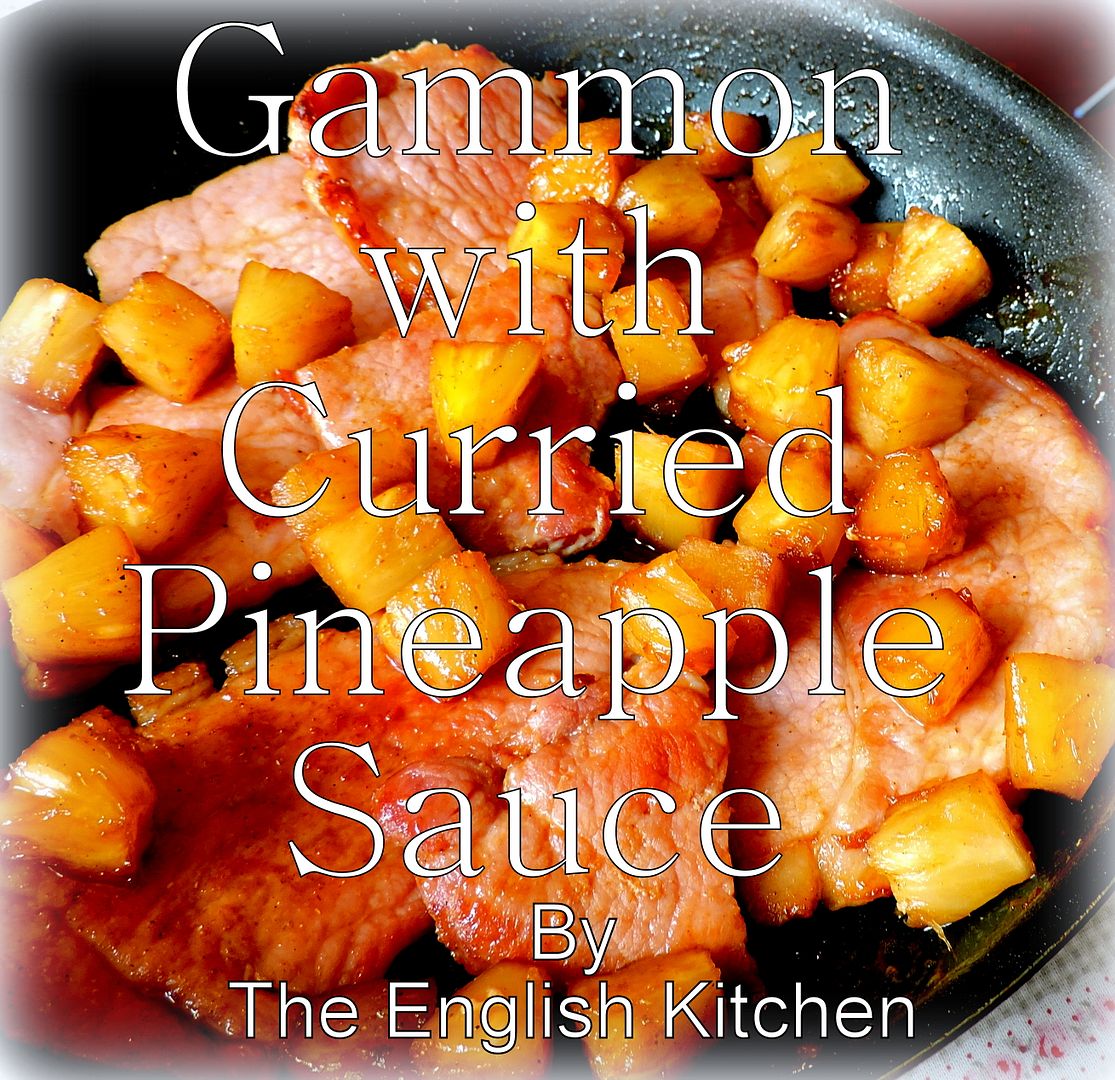
I like to treat us to gammon steaks every now and again, and I usually like to shake things up a bit when I do. You can get a gammon steak grill at most pubs over here in the UK, served with chips and either a fried egg or a ring of pineapple on top. Neither one has ever really appealed to me. Today I created a curried pineapple sauce to serve with them instead and it went down a real treat!

Making Mexican (Tex Mex) food here in the UK has always presented me with somewhat of a challenge.
Although there are certainly many more ingredients available these days in the grocery shops than there were when I first moved over here, they are quite Briticized and not everything that I am used to using is available. But that's okay. I adapt.

I adapted this recipe from one I found on the Old El Paso Web Site.
I adapted this recipe from one I found on the Old El Paso Web Site.
We've only just gotten the stand and stuff taco shells over here, but there is a great tutorial for making your own here.

Old El Paso Spicy Taco seasoning isn't available here. Instead they have Garlic Paprika Taco Seasoning mix.
Old El Paso Spicy Taco seasoning isn't available here. Instead they have Garlic Paprika Taco Seasoning mix.
It's probably the same thing, but uses spanish smoked paprika, which is quite hot and spicy so it worked well.

No such thing as tinned green chillies either, but that is also okay. I just use fresh green chillies which I deseed, trim and chop and then soften along with the onions.
No such thing as tinned green chillies either, but that is also okay. I just use fresh green chillies which I deseed, trim and chop and then soften along with the onions.
I have always done this over here in the UK when it calles for tinned green chillies and it works well.

I keep telling myself that I am going to buy a mitt full of green chillies one day and roast my own, but I never do . . . and so I just use them fresh.
I keep telling myself that I am going to buy a mitt full of green chillies one day and roast my own, but I never do . . . and so I just use them fresh.
I don't really like my food super hot anyways.

These were really, really nice. I made my husband's with soft stand and stuff tacos because he doesn't like really hard food and those worked well also.
I served them with our favourite garnishes of chopped peppers, onions, olives, shredded lettuce and sour cream. Very scrumptious indeed! And so simple and quick to make! Now if we could only get the Mexican cheese. I used a mix of Strong Cheddar and Jack.

Simple and delicious. A real family pleaser.
1 TBS oil
1/2 pound cooked, shredded chicken
1 packet hot and spicy taco seasoning
1 medium onion, peeled and diced
2 green chilies, trimmed and chopped (discard seeds and ribs)
10 taco shells
10 TBS refried beans
240g of grated cheese (I use a mix of strong cheddar and jack) (2 cups)
To serve:
your favourite taco toppings such as sliced jalapenos, sour cream, salsa, chopped coriander, shredded lettuce, etc.)

Preheat the oven to 200*C/400*F/ gas mark 6. Spray a 9 by 13 inch baking dish with non-stick cooking spray. Set aside.
Heat
the oil in a large skillet. Add the onion and chilies. Cook, stirring
frequently until softened. Add the garlic. Cook until fragrant and
then add the chicken, taco seasoning and drained tomatoes. Reduce to
low and then cook for five to eight minutes so that the flavours meld.
Place
the taco shells in the baking dish, open side up, next to each other.
Place a TBS of beans in the bottom of each. Top with a portion of the
chicken mixture. Sprinkle generously with the grated cheese.
Bake
for 12 to 15 minutes, until the cheese is bubbling and the edges of the
shells are golden. Serve hot with your favourite toppings.

Of course it goes without saying I used Cirio Tomatoes for this. They really are the best! But then you already knew that I am sure. ☺

Cirio Chopped Tomatoes . . . authentically Italian. They are so good I could just eat them out of the tin with a spoon, and do from time to time. (Don't judge me!) In a recipe where the tomatoes are going to be one of the stars, you want really good ones, and these are the best!
Super Fab, quick and delicious! Bon Appetit! Or should I say Comiendo Feliz!
These were really, really nice. I made my husband's with soft stand and stuff tacos because he doesn't like really hard food and those worked well also.
I served them with our favourite garnishes of chopped peppers, onions, olives, shredded lettuce and sour cream. Very scrumptious indeed! And so simple and quick to make! Now if we could only get the Mexican cheese. I used a mix of Strong Cheddar and Jack.
*Oven Baked Spicy Chicken Tacos*
Makes 10
1 clove garlic, peeled and minced
1 400g diced tomatoes, drained well (14.5 ounces)Of course it goes without saying I used Cirio Tomatoes for this. They really are the best! But then you already knew that I am sure. ☺
Cirio Chopped Tomatoes . . . authentically Italian. They are so good I could just eat them out of the tin with a spoon, and do from time to time. (Don't judge me!) In a recipe where the tomatoes are going to be one of the stars, you want really good ones, and these are the best!
Super Fab, quick and delicious! Bon Appetit! Or should I say Comiendo Feliz!
All of the content you see here on this page, both photography and written, are the sole property of The English Kitchen, Marie Rayner. Any reposting or misuse is not permitted. If you are reading this elsewhere, please know that it is stolen content and you may report it to me at mariealicejoan at aol dot com.
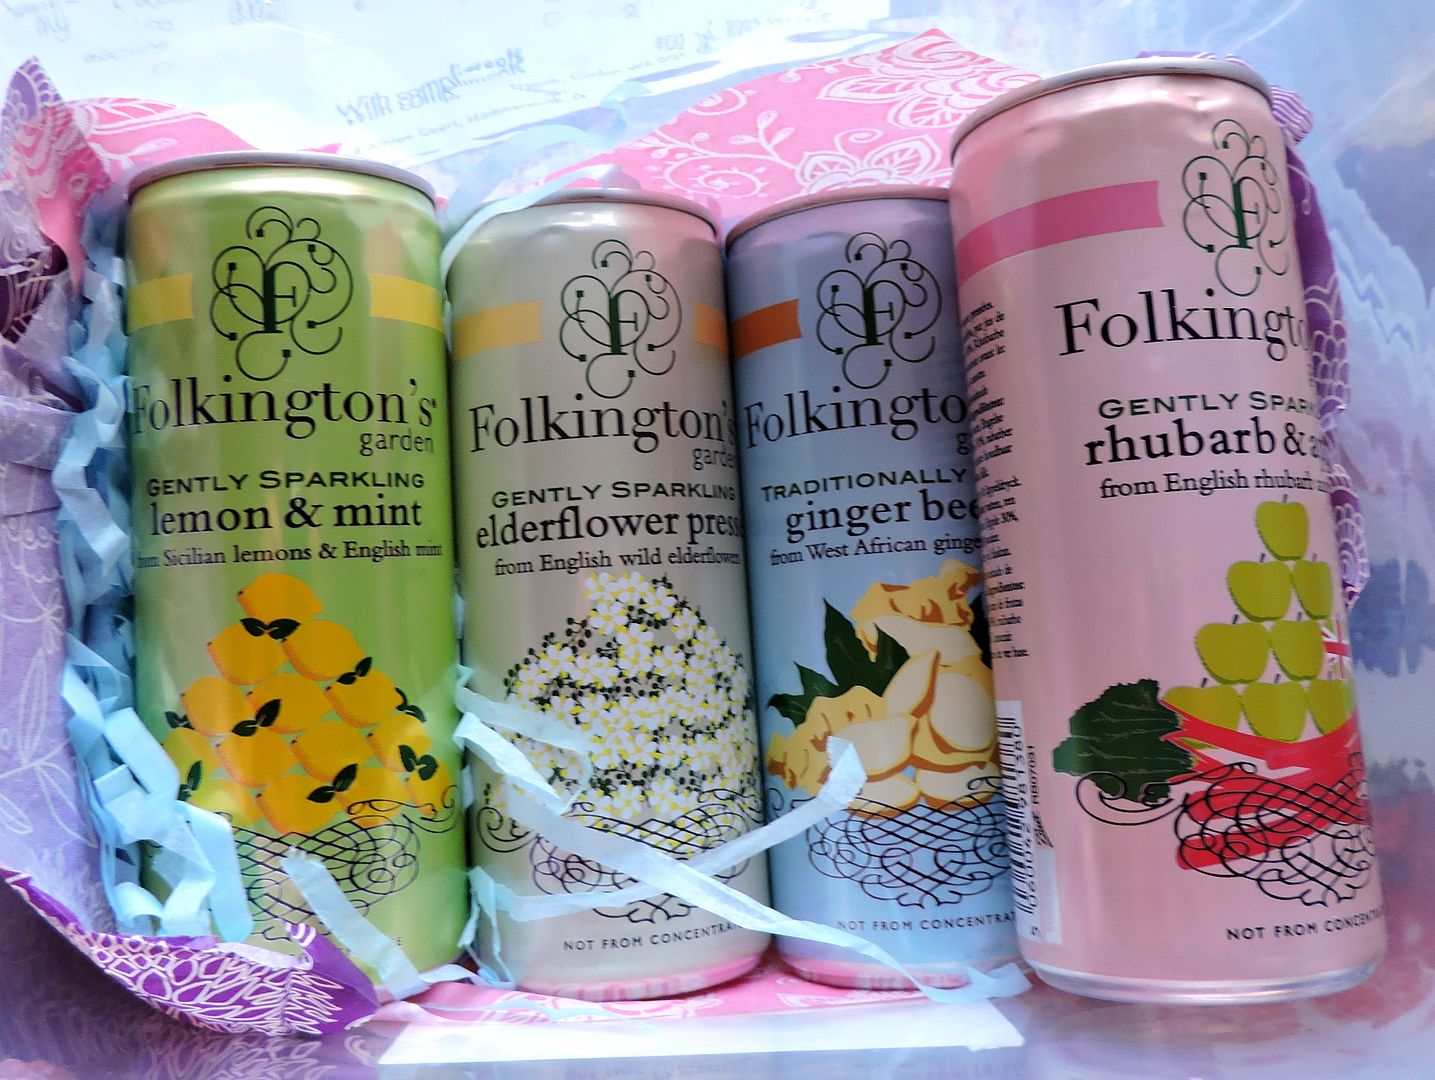
Folkington's, a small, independent Sussex drink company, has launched a delightful dose of sparkle in a can with its new range of four fruit pressés called Folkington’s Garden. Each is made from a different harmonious blend of English fruits and flowers complemented with ingredients from sunnier countries only where necessary. Guilt-free, and coming in at under 100 calories each, free from all nasties and never from concentrate, they offer a sip of the English countryside anywhere.
Inspired by the Sussex Downs village Folkington, which was first mentioned in the Doomsday Book, the four flavours available are:
-traditional ‘Elderflower’
Made with wild elderflowers picked from English hedgerows and a dash of sunny Sicilian lemon juice.
- zesty ‘Lemon and English Mint’
A tried and tested favourite.
- a quintessentially English ‘Rhubarb and Apple’
Beautifully English.
- a fiery ‘Ginger beer’
Using hot West African ginger root balanced with English rhubarb juice and Sicilian lemons.
Folkington’s sparkling pressés are perfect as mocktails for parties, refreshing at barbeques and as an everyday indulgence at work. You can find Folkington’s Garden range in independent shops, cafés and delis.
These drinks are refreshingly delicious served chilled and over ice on a hot summer's day! Yum!

This is a really delicious chilli that you can make either in the slow cooker or on top of the stove. It works well either way, so in the summer when it's hot out, I do it in the slow cooker, and in the cooler months when I don't mind a bit of heat in the kitchen, I do it on the stove! It's hearty and delicious and actually very healthy!
I so wanted to show you this easy dessert at the weekend, but my photo-bucket account where I store my photos wasn't letting me in so I have had to wait until now. You are just going to love this simple and delicious dessert!
The timing for this is just perfect as our blackberries are just going into overdrive at the moment with the very beginnings of the seasoning starting and so much more to come! Apples and Blackberries are a marriage made in heaven!

Early apples are starting to show up now as well. I have always found it interesting that naturally delicious tasting fruit pairings happen to ripen together. Anyone would think it had been planned that way!

Think Strawberries and Rhubarb . . . apples and blackberries . . . lemons and limes, figs and pears, raspberries and peaches, and so on and so on . . .

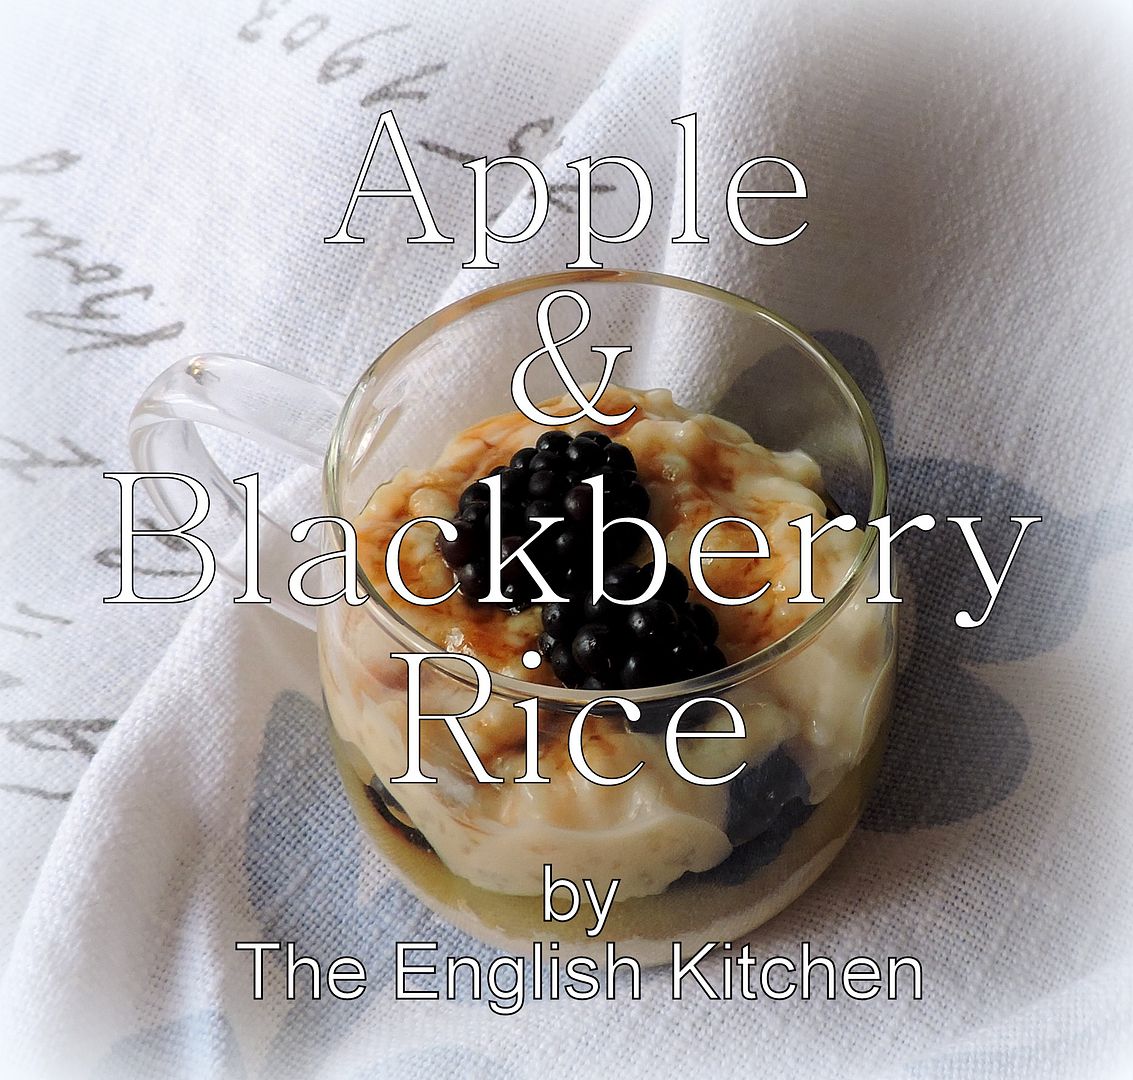
This dessert is a real doddle actually. It goes together lickety split! I always keep a tin or two of good quality ready made rice pudding in the cupboard. My husband loves rice pudding.

You can use ready made apple sauce also if you wish . . . I make my own, but using ready made also makes this really easy. Just make sure it is a good quality.

The two are just layered in a glass along with some fresh blackberries and a sprinkle of brown sugar on top.

Nothing could be simpler, quicker or more tasty! This is very, very satisfying and not altogether unhealthy. You can also make these several hours ahead!

*Apple & Blackberry Rice*
Serves 4
I know you will enjoy this! Bon Appetit!
Subscribe to:
Posts (Atom)


Social Icons